New to lightburn and lasers in general. Just purchased an OMTech Polar+, and while the laser component works just fine, I cannot get the camera lens calibration to work at all. I’ve tried the latest stable lightburn as well as the most recent 2.0 release candidate, but no dice.
I’ve tried basically everything I’ve seen on this fair forum on both versions:
Fallback/Default camera capture system
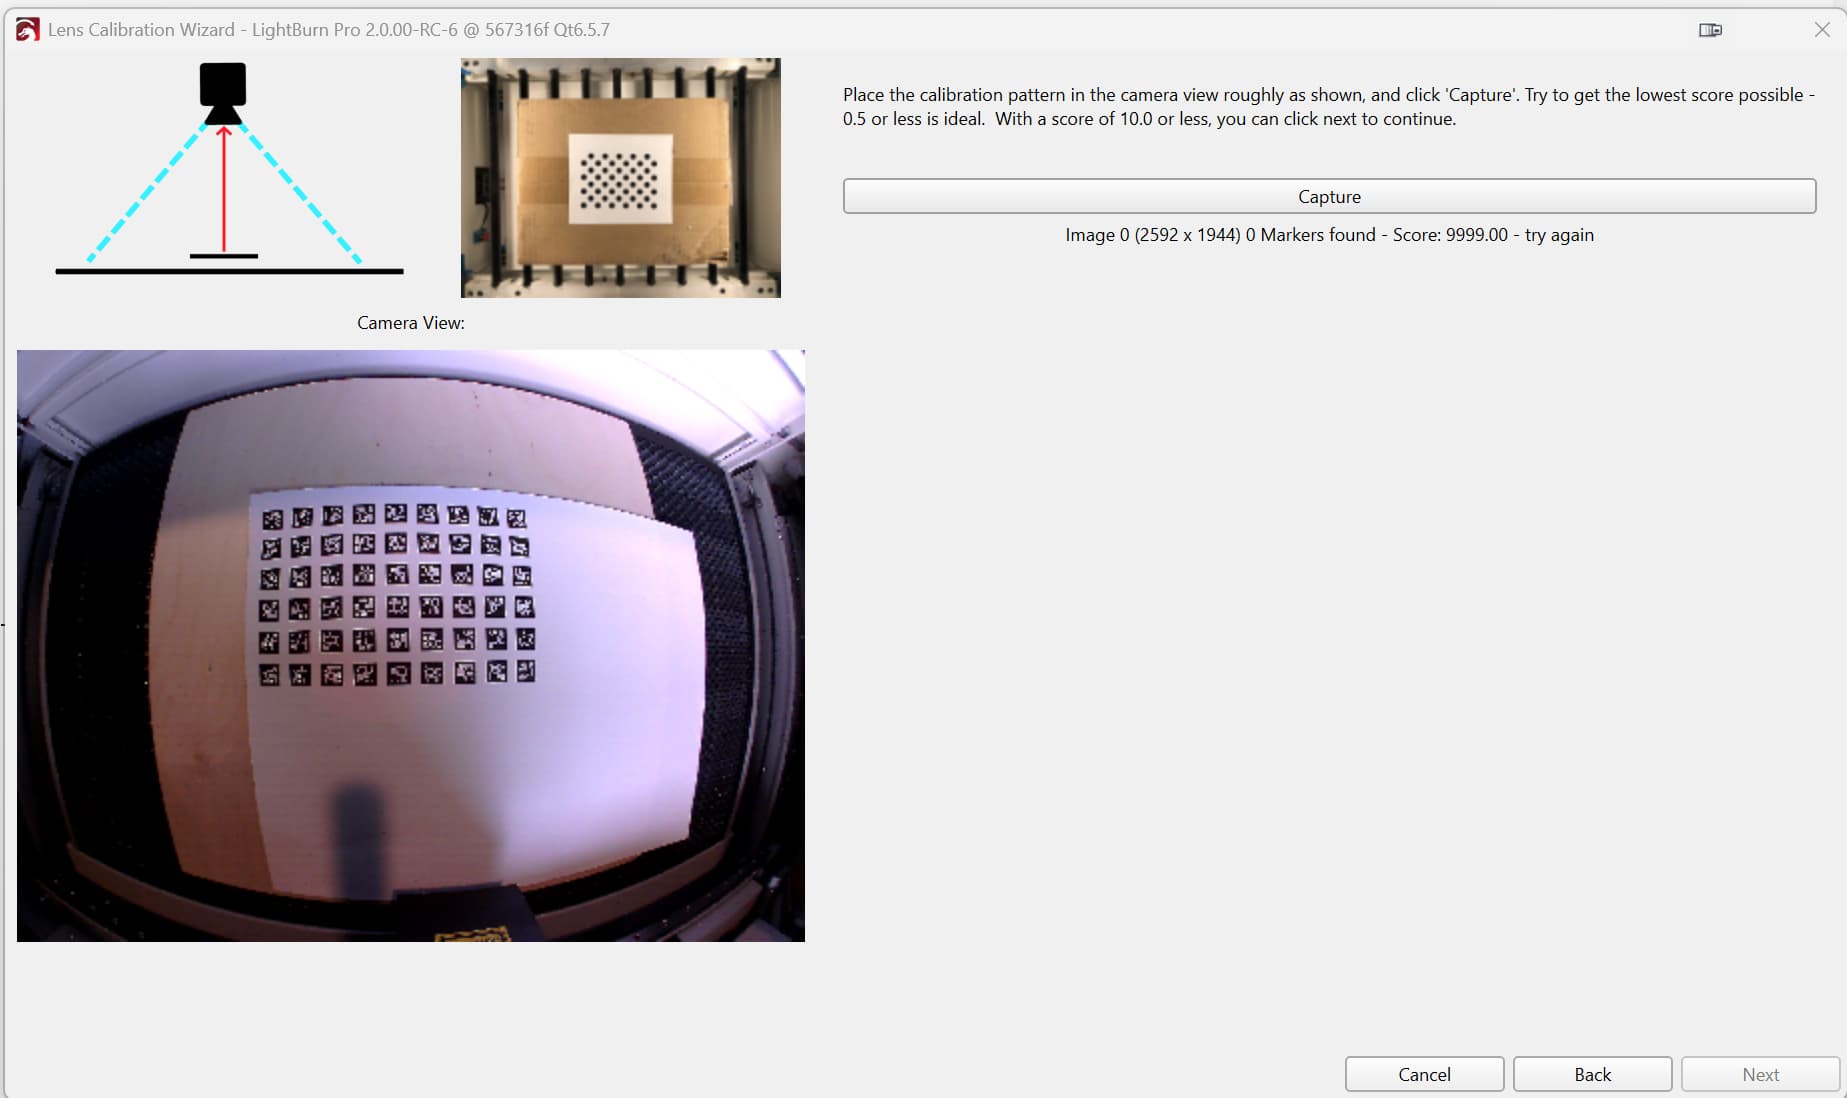
Current lens calibration system - with both circles (with and without honeycomb check) and 4 different sizes of AprilTags.
Experimental lens calibration system
Changing camera lighting
Lifting camera lid and holding AprilTags various distances from the camera
using OBS to create a virtual camera. Just got black screens in lightburn, even though OBS itself shows the camera just fine.
Camera calibration especially with the camera on Polar machines can be very tricky. My first reaction at looking at your screenshots is that your calibration pattern is too large. I’d suggest printing smaller.
I’ve also found the circle pattern a bit more forgiving than the apriltags though I’m not certain about this.
I printed many different sizes of circles, and found one that did work. Smaller was better. I think I printed it at like 20% to get the following results (which don’t look super great to me, but better than nothing):
I got less than 1 in most of the scores, except I had to keep the dot printout to be relatively close to the center of the bed. If I went beyond around half the way out from center in any direction, the image simply couldn’t be found.
Honestly, I wonder if this wouldn’t be better handled by humans in each stage. That is to say, the program captures one image and we humans do similar to alignment step and select the edges of an image. I can very easily see the pattern in the capture, but the software itself failed pretty hard to determine where it was.
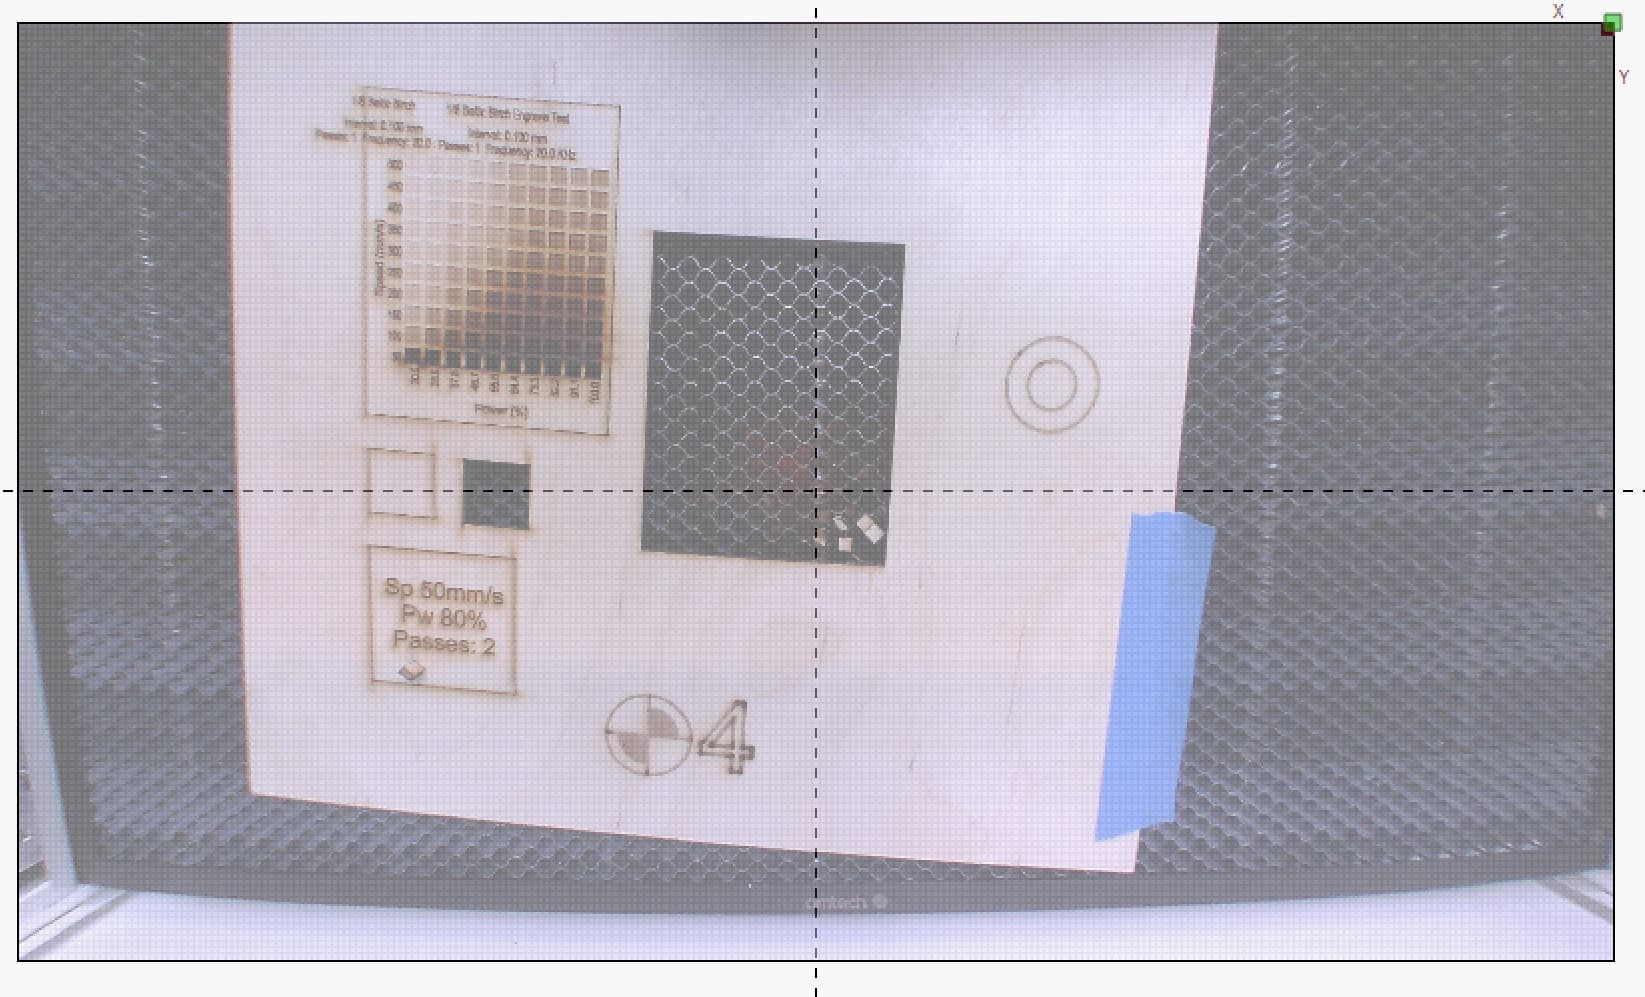
This definitely doesn’t have enough distortion correction applied. Your image should at least be roughly square. This may be because you weren’t able to capture a wide enough area but not sure.
Can you confirm that you selected fisheye lens during the camera calibration process?
While I haven’t seen a semi-auto process like this, LightBurn uses OpenCV. If you wanted to attempt this outside of LightBurn you could modify a camera settings file with values you determine and have LightBurn use those values.
There are a few different ways to do this but the most straightforward is right-clicking on the Camera Window and selecting “Import Camera Settings”. You can similarly export settings to see what the format looks like in the same context menu.
I contacted omtech yesterday and they got back to me with someinstructions, which seem to match what the lightburn docs say to do. But. They also provided me a pre-configured camera configuration file. It ain’t perfect, but it’s better than what I got from the wizard.
Attaching it for anyone else having the same issue.
That’s certainly better. The fact that there’s still distortion visible with the official file is comforting that my attempts were no better on a Polar.