Loving Lightburn, learning a lot, thought my experiences may help others down the line…
I am more of an electronics hardware guy than a creative guy… so more than 50% of this is just learning the technology… along the way I learned a LOT about my hardware and figured posting a summary may help others struggling along like I have done…
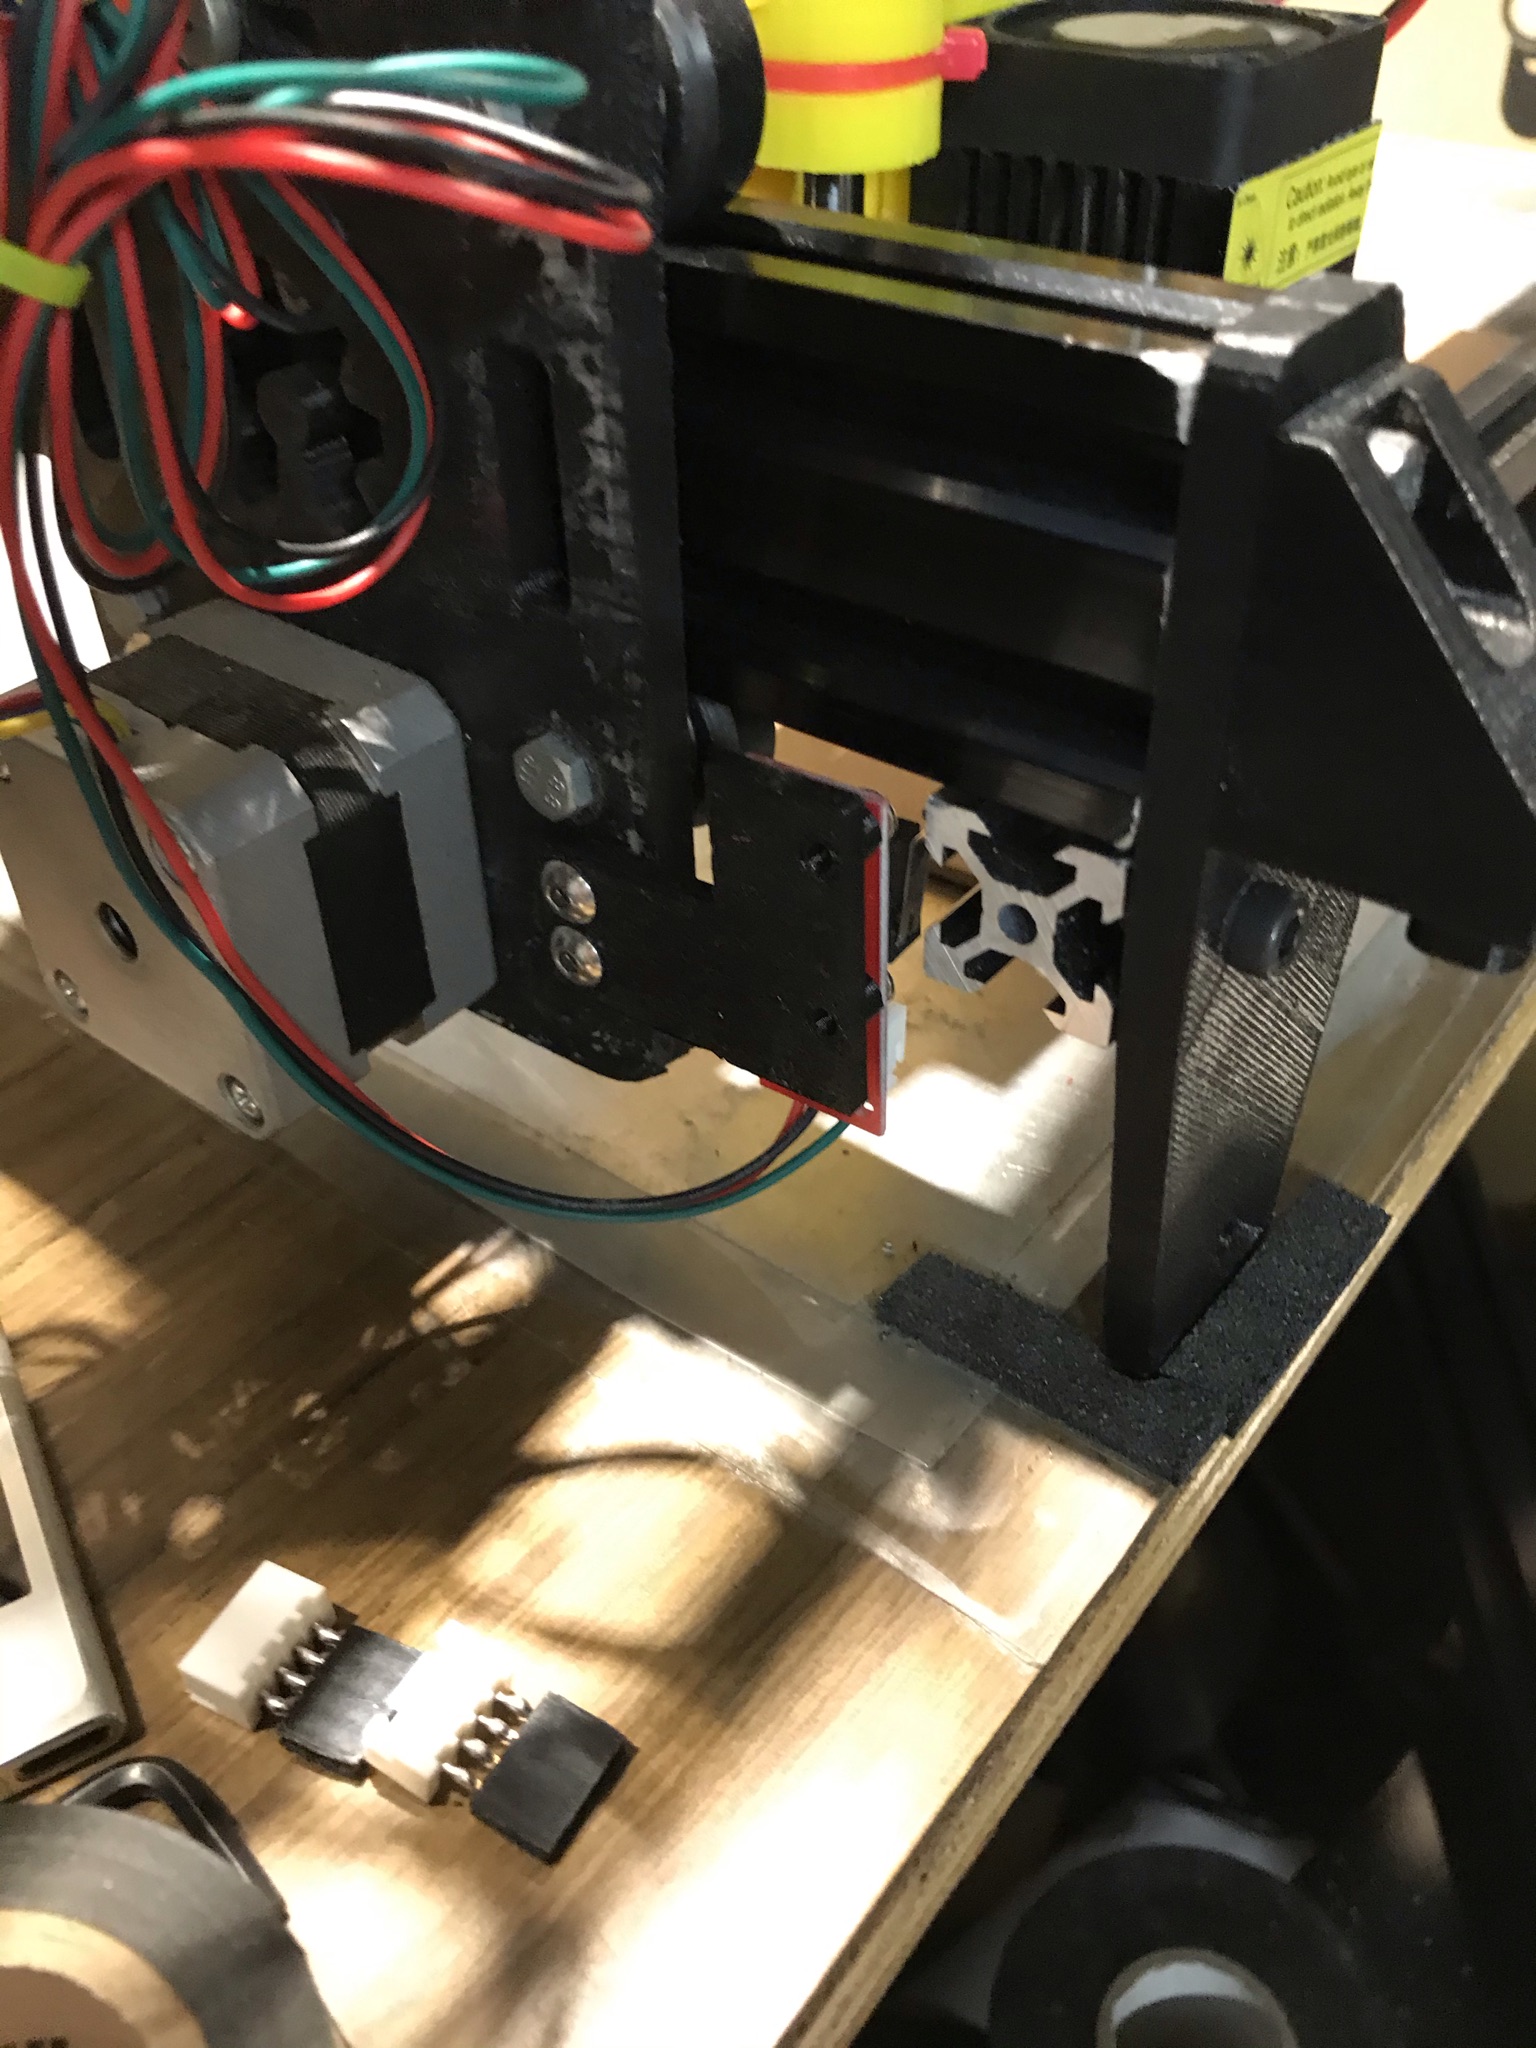
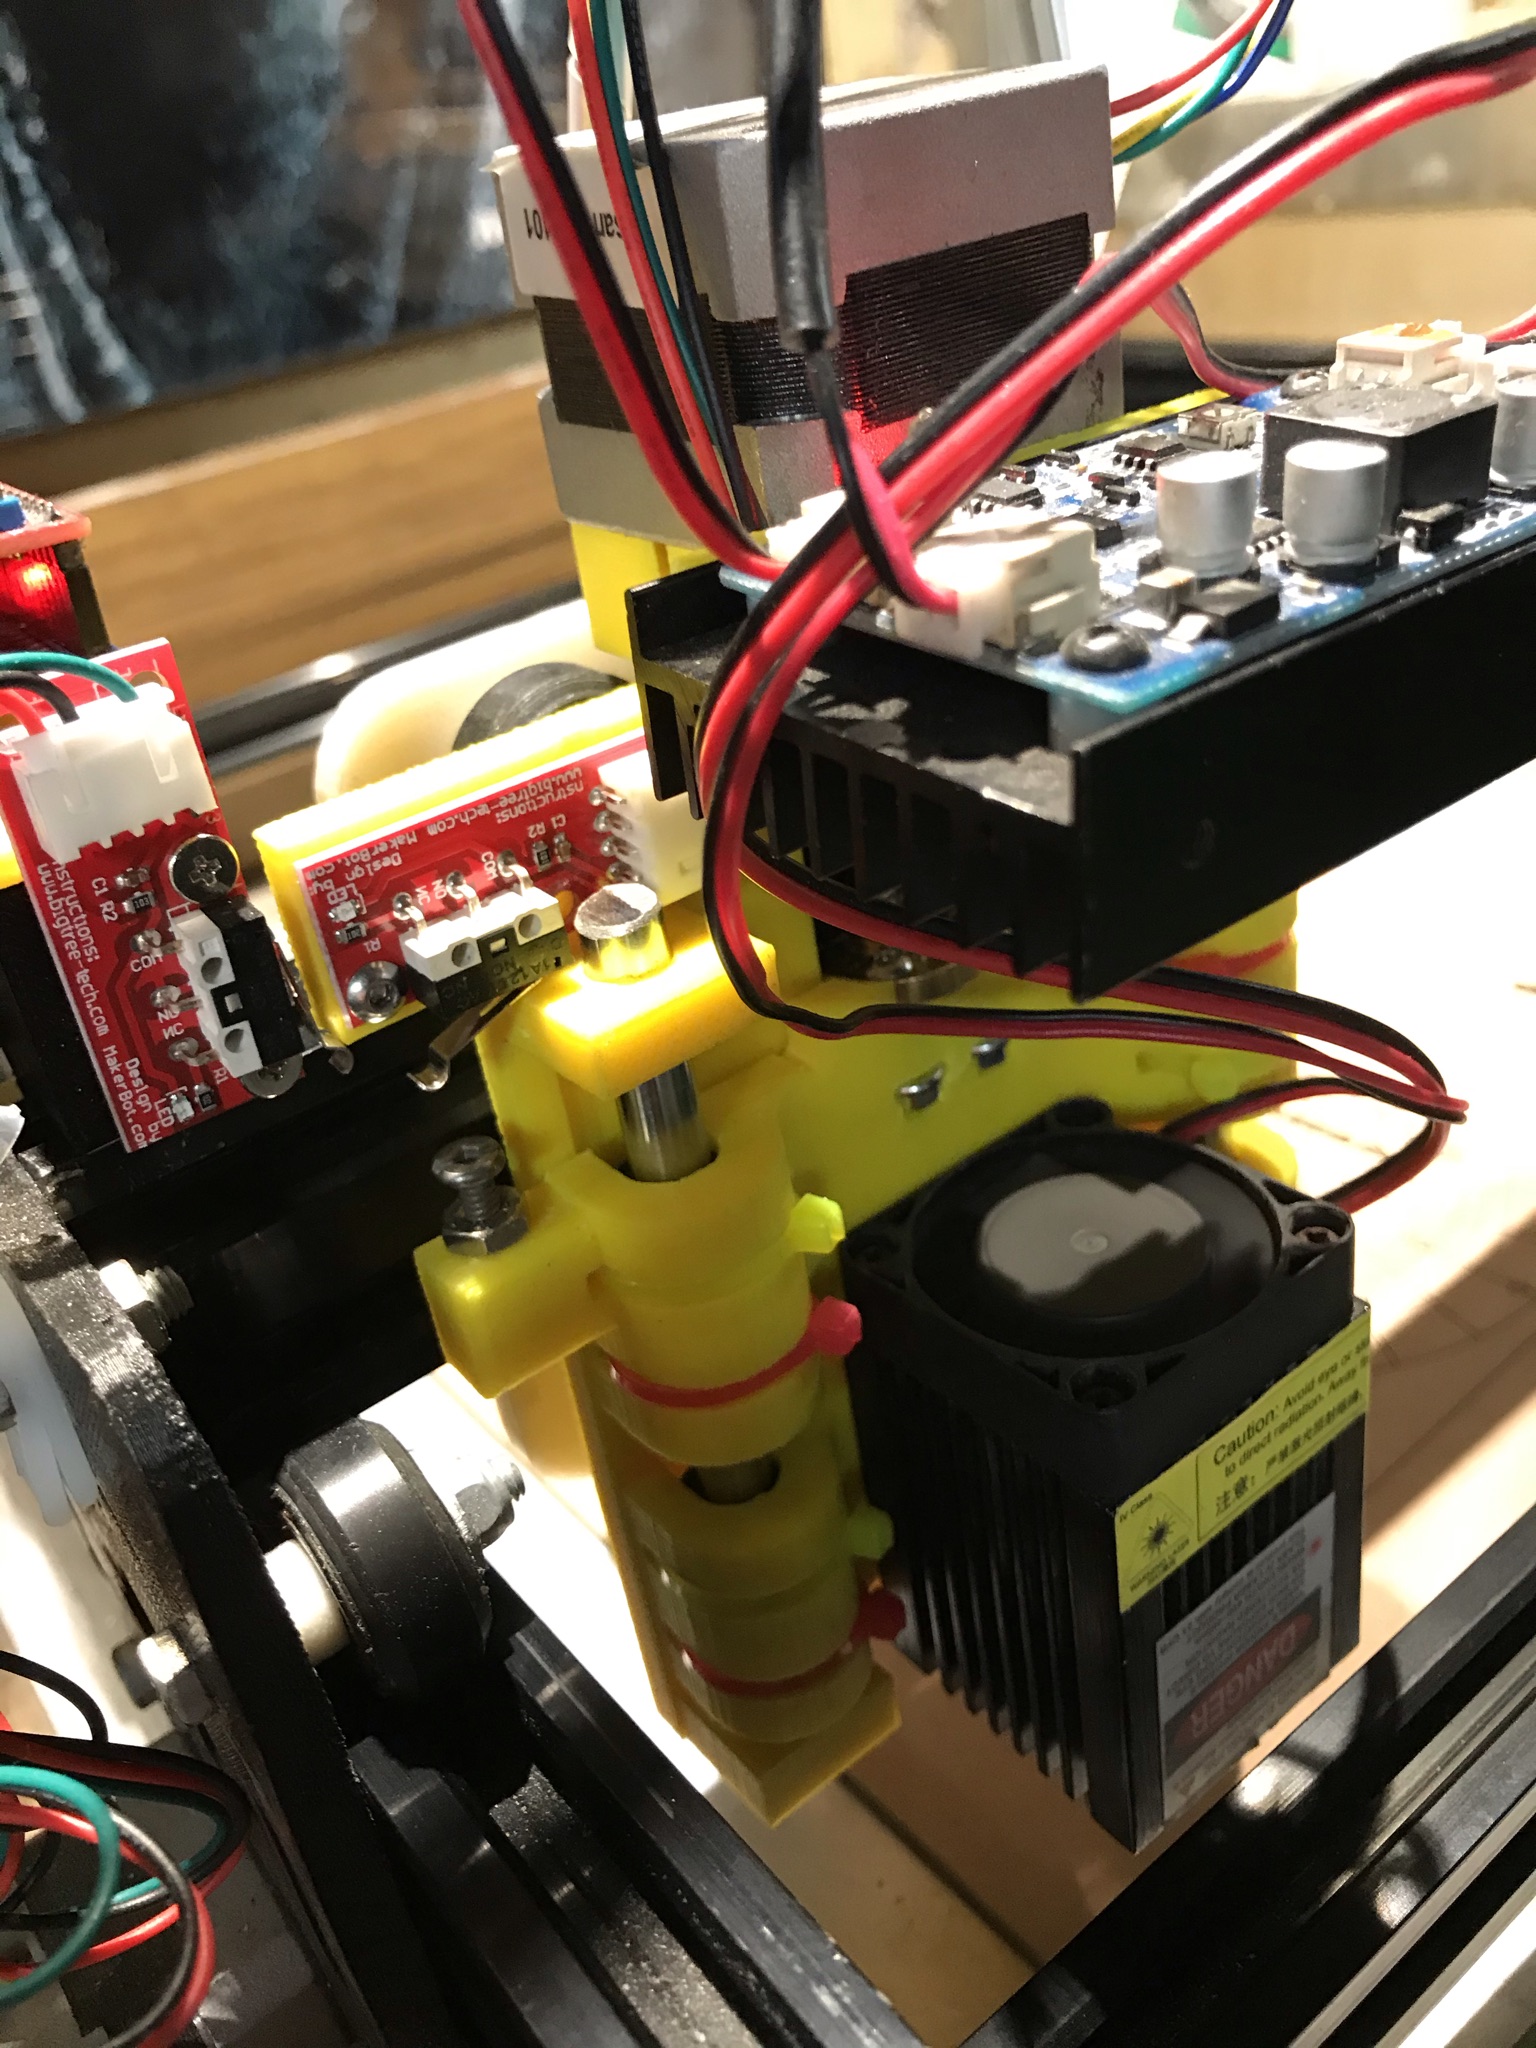
Current hardware is an Openbuilds Acro Laser frame that I built from scratch with my 3D printer and some 2020 extrusions and stepper motors off a VERY old PrinterBot (laser cut plywood), some cheap 3.5W laser I picked up from Bangood I believe, a CNC Shield V3.0 on an Arduino UNO running GRBL 1.1f. I have limit switches at X=0 Y=0 Z=0 (i.e. on one end not both)
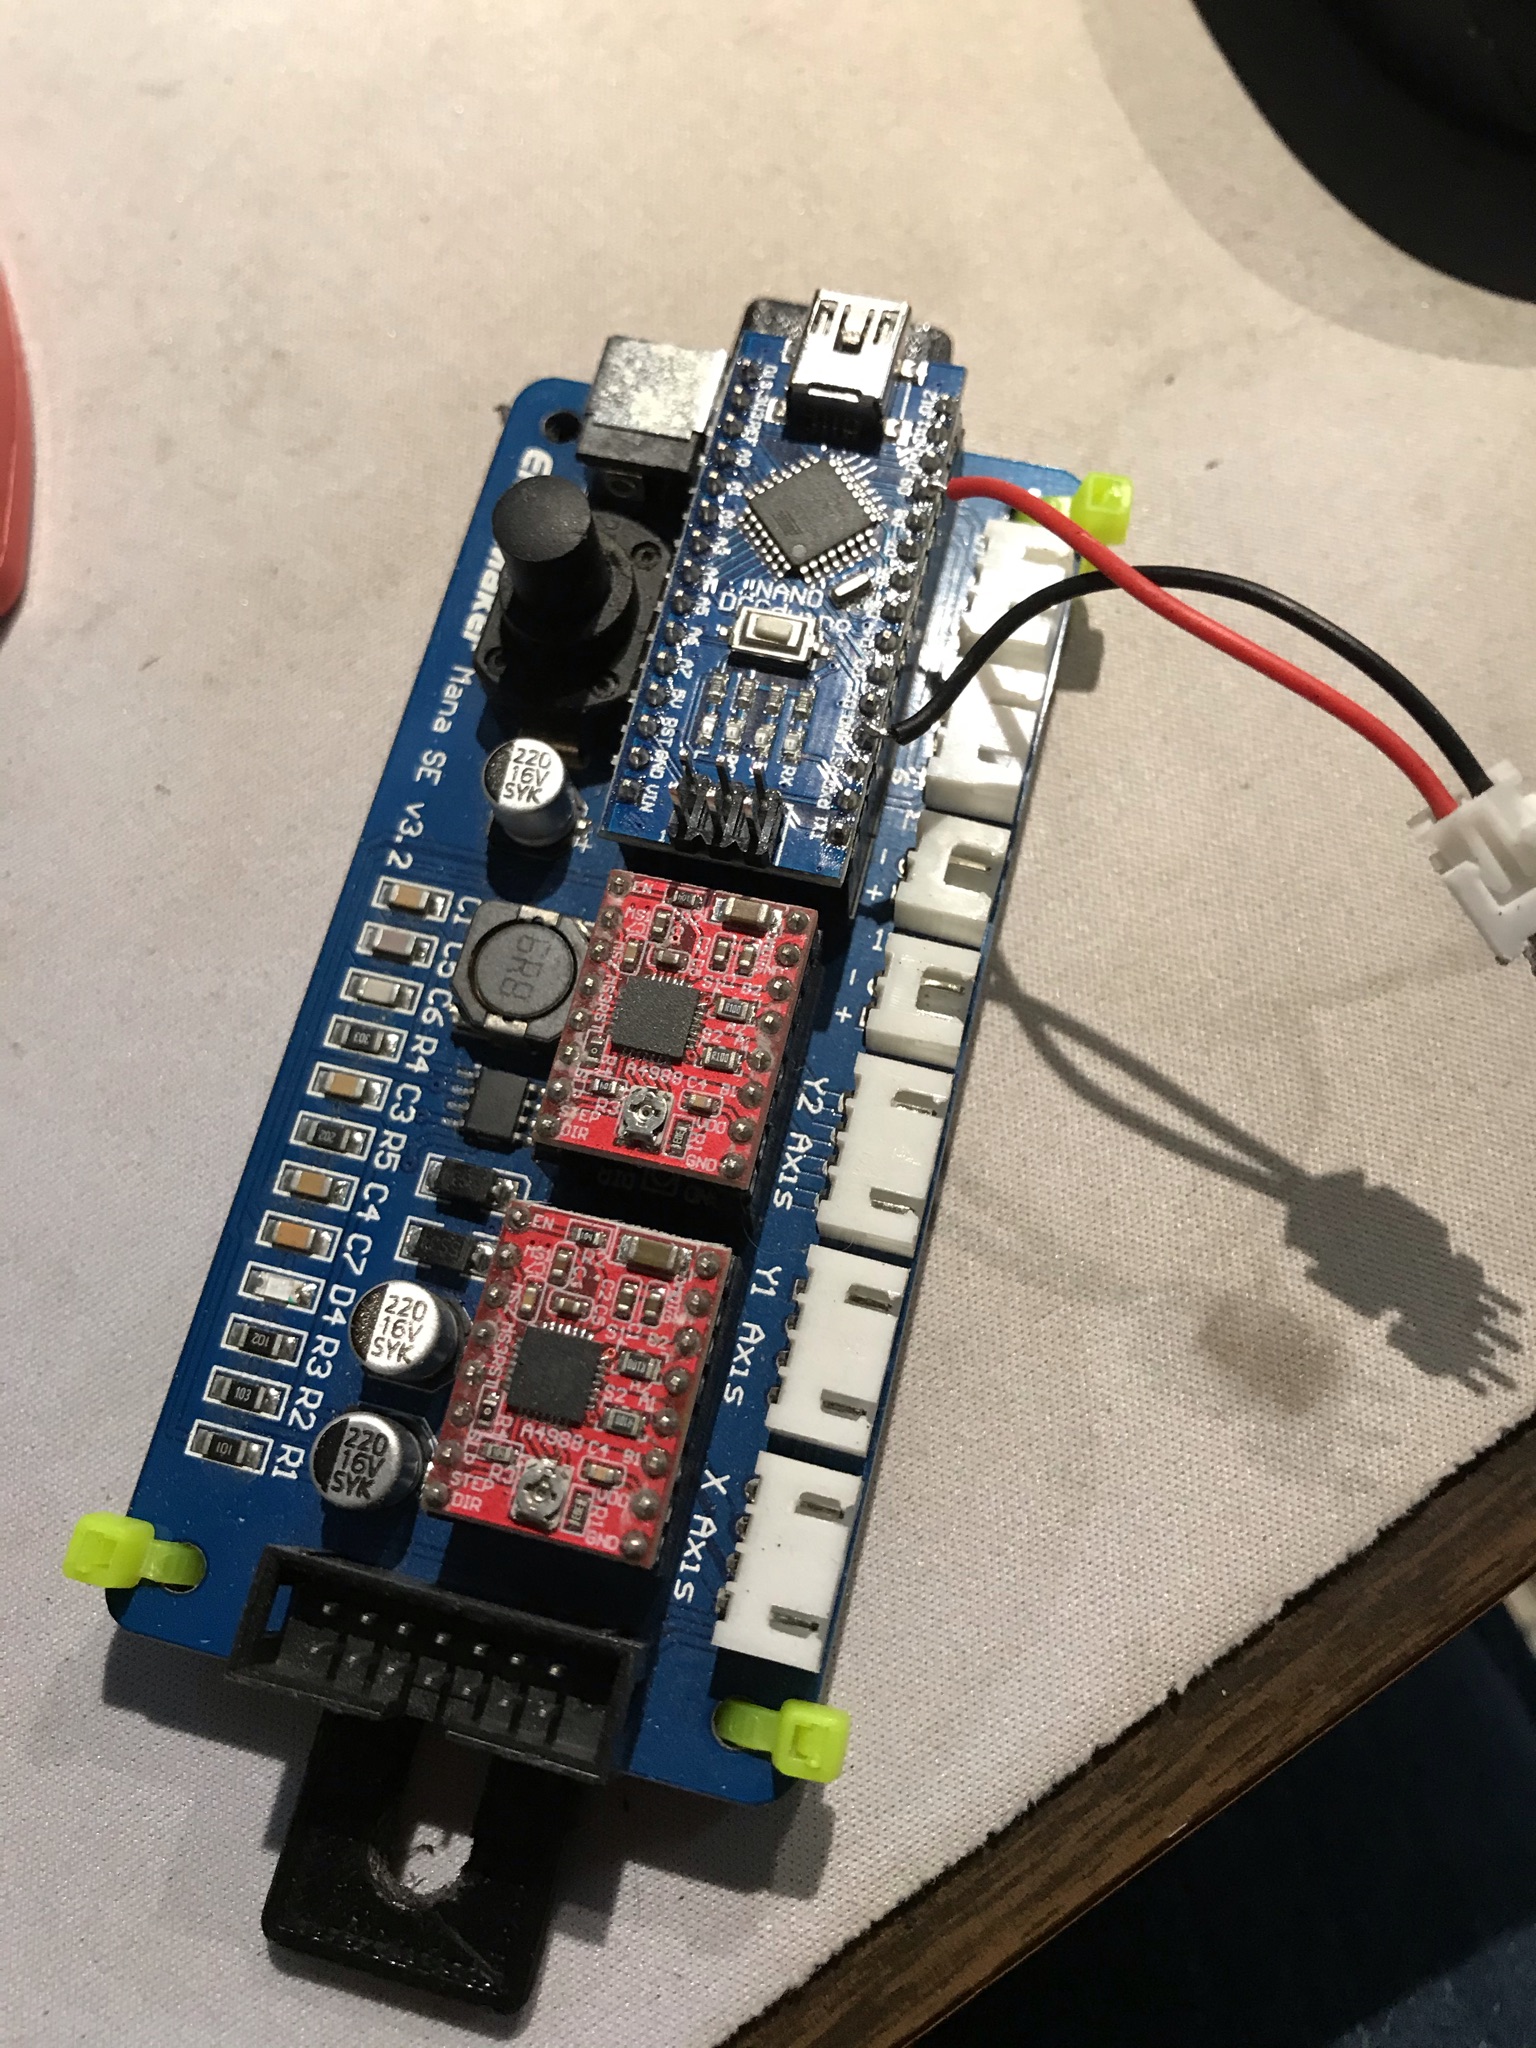
I started with an Eleksmaker Mana SE V3.2 with an Arduino NANO running GRBL 0.9. I used EleksCAM initially and found it lacked… crashes, bugs, less than ideal. I tried a lot of “free” things before finding LightBurn. LightBurn is worth every penny.
My original Acro laser had no limit switches. The issue there is repeatability… I was never starting from the same reference point which made repeatable tasks a challenge. No provision for limit switches on the EleksMaker Mana SE V3.2 board. I’m a hardware guy… so I added limit switches… Picture below shows how I added two wires onto my Arduino NANO (one signal pin connected to D9 on the NANO and one ground pin) to connect the limit switches… Even as a hardware guy this kind of blew me away how you can do X Y Z limit switches on one signal pin… Its brilliantly simple. Start homing an axis and wait for a switch to be pressed. Back away and come at it again slowly to get an accurate reading then back away 1mm to open that switch then home the next axis… All the limit switches are “normally open” in parallel… so when ANY of the switches hits home and closes you get a signal… The only time this simple setup fails is if your unit happens to be sitting in a position where a switch is closed when homing happens. But getting homing to work also involved a bunch of setup, and thats more than just turning it on in LightBurn! You have to have GRBL settings enabled before it will even try to home…
This is where I learned GRBL commands and the LightBurn console is AWESOME!!!
$$ shows you all the GRBL settings… there are GRBL reference commands out there so I am not explaining all of them but a good starting guide is http://www.diymachining.com/downloads/GRBL_Settings_Pocket_Guide_Rev_B.pdf
Note that this covers GRBL .9 stuff… and there are some important GRBL commands for laser in 1.1 that are not listed that I will try to mention.
$22=1 enables the homing cycle in GRBL and it is important to note that when you enter this in the console you are PERMANENTLY changing the setting on your controller… power cycle doesn’t erase this… its done… so a wise person would issue a $$ command and copy and paste ALL your original settings into a file you keep forever and then make changes and shoot yourself in the foot and have the original settings to fall back on. My foot has bullet holes in it.
Once $22=1 is set then you can have LightBurn hom and know where 0,0 is!!! Or can you… I clicked home and my X axis went the wrong way and drove itself into the far side. Doh… Homing direction…
$23=??
Teh value for $23 is what they call a bitmask value which can be confusing but the GRBL Pocket Guid I mention above has this Axis Config Table that makes it understandable.
0 reverses no axis. 1 reverses X axis, 2 reverses Y axis, 3 reverses X and Y axis, 4 reverses Z axis, 5 reverses Z and X axis, 6 reverses Z and Y axis, 7 reverses Z and X and Y axis…
My setup used $23=3
I had my beast homing!!!
I then decided to upgrade my EleksMana SE V3.2 to a newer GRBL version and I recall using T2Laser demo mode to do that as it made it easy. Really you are upgrading the NANO to a new GRBL since the EleksMana SE V3.2 is really the driver board and the NANO holds the smarts… A warning here, it is possible to really mess things up and have a non functional board when upgrading firmware. In the business we call it bricked or bricking… when a firmware fails and you no longer have a device that does what it is supposed to do nor will it talk to you to accept even the old firmware… I did that… bricked the NANO. But I am a hardware guy, familiar with Arduino, I have a USBasp programmer, I could unbrick the nano! Or, at $4 online, buy a new one. In fact, I highly recommend that approach BEFORE bricking… a NANO is like $4 so buy one and pop the original out of the EleksMana SE V3.2 board and use the new one… that way you can fall back to your old NANO when things go pear shaped.
I flashed mine with GRBL 1.1e and THAT was when I learned a LOT about GRBL… All the parameters that had come “preset” in my ElegsMaker Mana Mana SE v3.2 likes steps per mm for each axis had to be adjusted to get things to scale properly. Spent a lot of time burning 100mmx100mm squares and making sure I had the right size output and adjusting $100 and $101 ($102 also but thats Z axis and I hadn’t added that yet)
I also learned about $130 $131 and $132 which sets the size of your unit which had NEVER been right for mine… and there are things like $20 and $21 to set soft and hard limits to prevent it driving forcefully into the frame.
But I wasn’t done learning… I needed to add more challenge to the process…
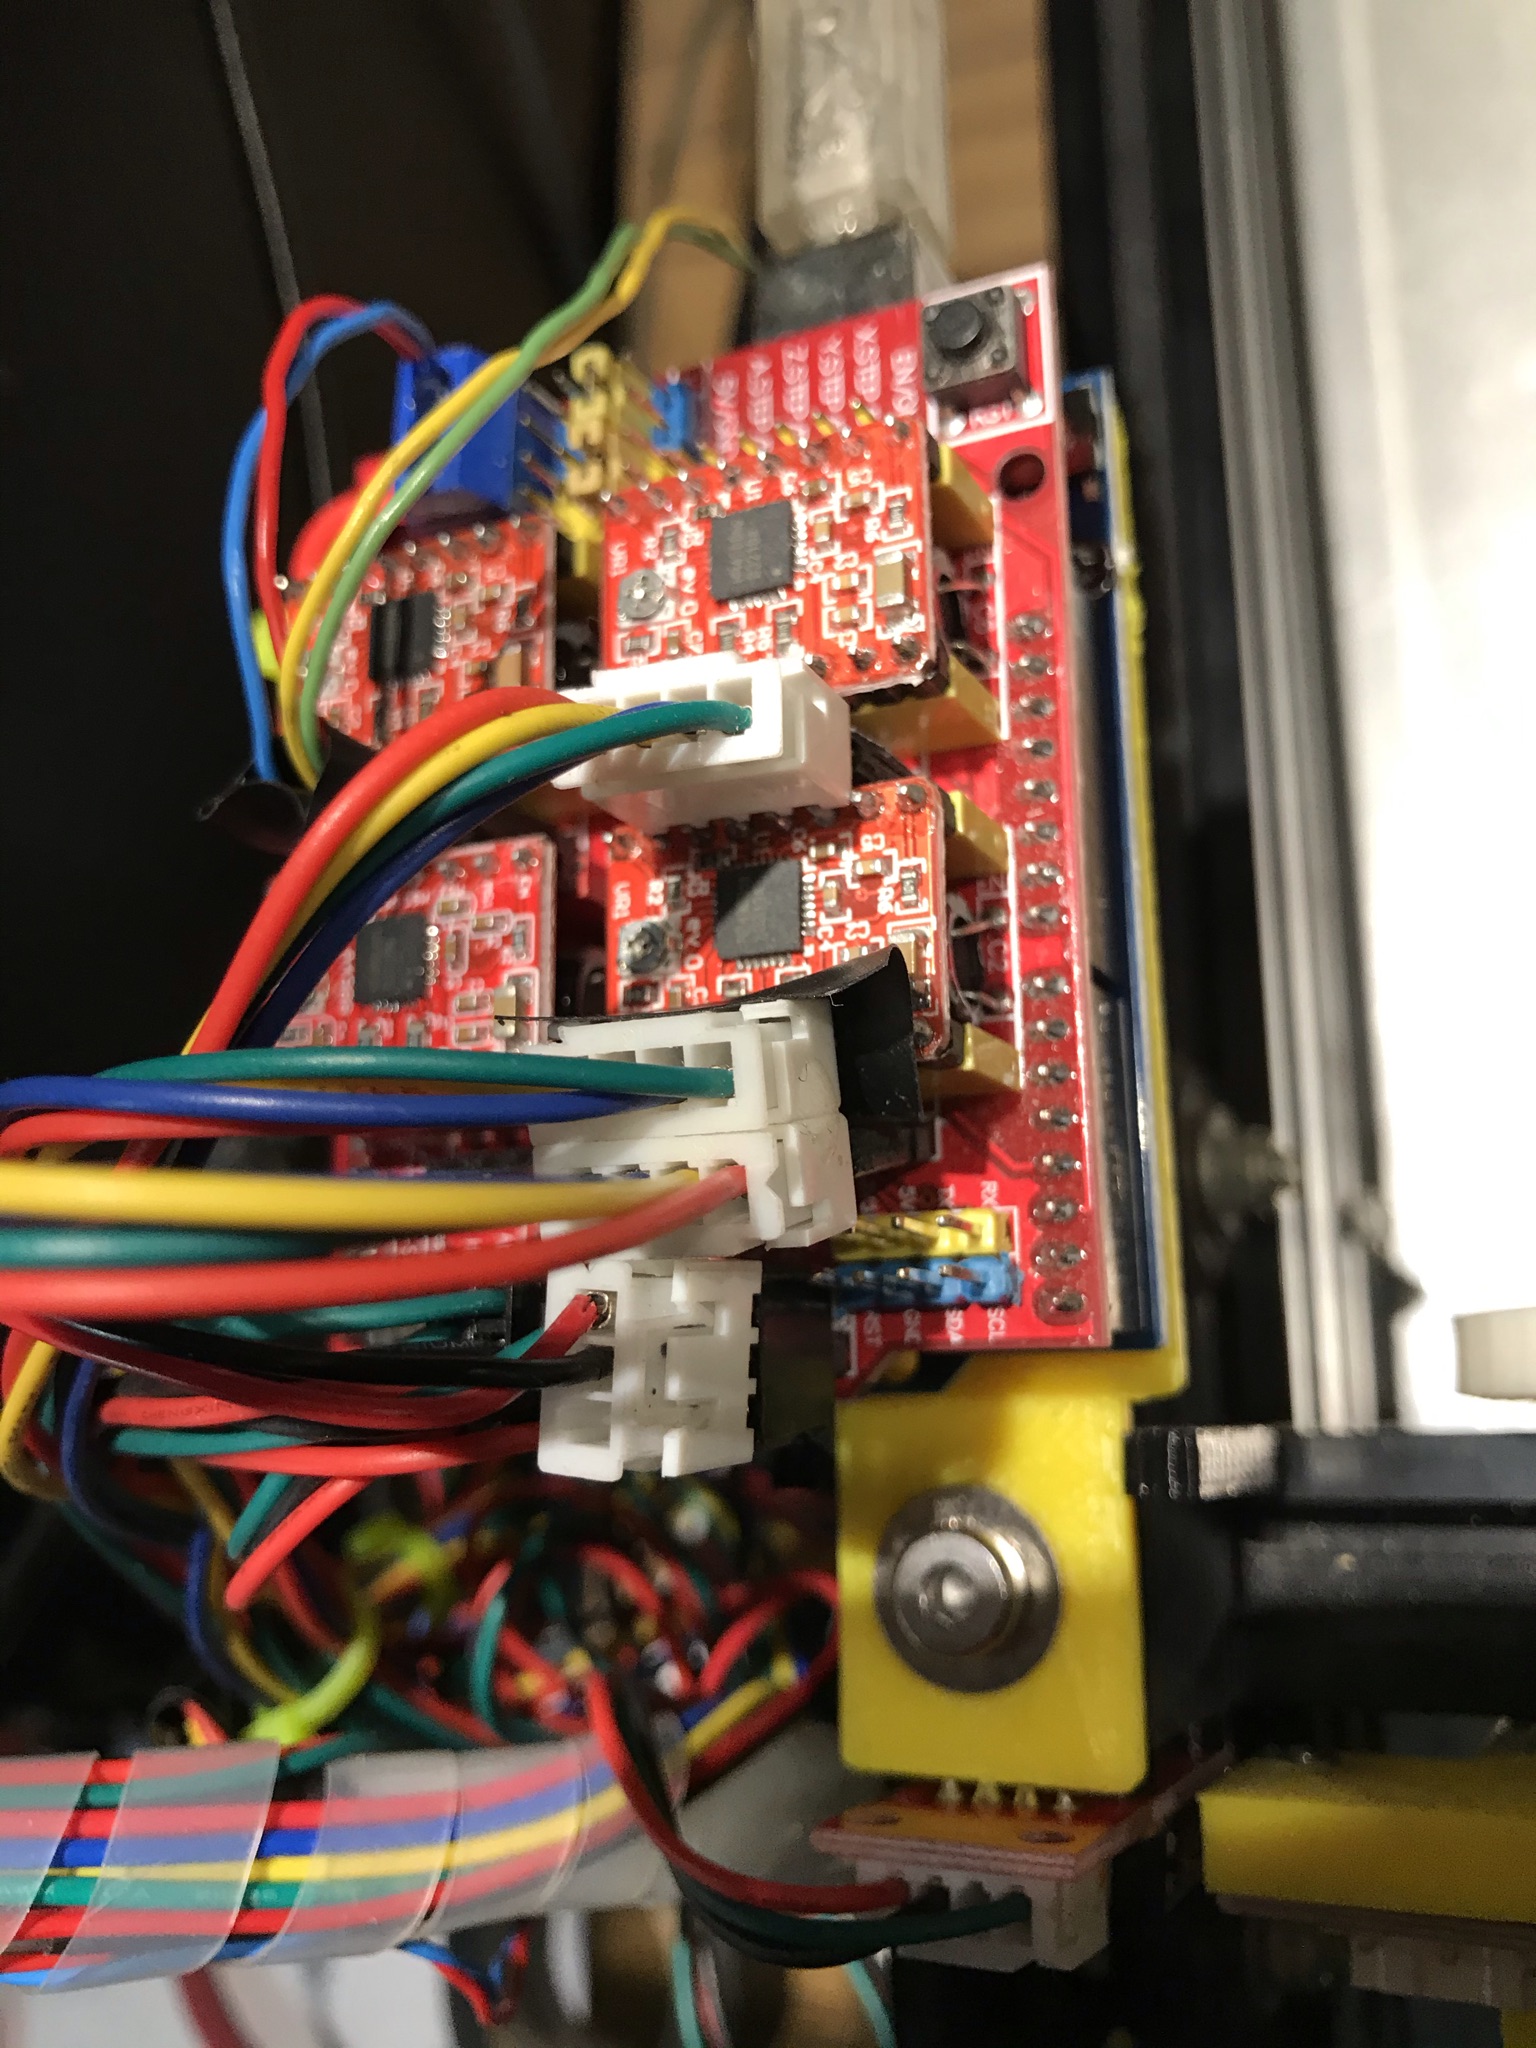
My EleksMaker Mana SE V3.2 board has two drivers… X and Y… well I figured it was only a matter of time before I added a spindle instead of a laser and had a CNC milling machine… I needed X Y Z axis… so I picked up a CNC shield V3.0 board that has not 3 but 4 drivers on it… even better I thought… If you are reading this, don’t… V3.0 has limitations. There are newer that make life easier… But I had it so I went with it… Like the EleksMaker setup the CNC shield uses an Arduino board caled an UNO to hold the smarts. I bought a CNC Shield UNO bundle that came with GRBL installed… That was GRBL .8 I think… That didn’t support limit switches I believe… so I needed newer GRBL on it and after reading a bunch of stuff about limit switches and PWN laser control and how the V3.0 board wasn’t compatible with GRBL 1.1f I decided to go ahead anyway… Sucker for punishment. (spoiler, its working).
There were a bunch of things that I thought I liked about the V3.0 board when I bought it. XYZ axis drivers was the key but that 4th driver set could be cloned to any of the other axis which meant my Y axis that uses two steppers could each have its own driver which a hardware guy assumes is the best way to go. What I found was that it was noisy and vibrated a lot compared to my old board that just had two connectors for the two Y axis steppers both driven from the same driver. My theory is that things were not perfectly in sync with two separate drivers causing vibration. I run both Y steppers off Y driver on the CNC shield V3.0 and it is smooth.
The big issue running GRBL 1.1f on the CNC shield V3.0 is that in GRBL they changed which pins on the UNO the software uses for certain functions like Z limit and Spindle control (laser control). So after flashing 1.1f on the UNO with the CNC Shield V3.0 I have my Z limit switch plugged into the pins labelled SpnEn and I have the laser PWM signal wire plugged into Z+ End Stop pins! Other than that wiring issue the only other thing is the zillion GRBL settings that were mentioned above and a few new ones… GRBL 1.1f has a new setting $32=1 that says laser mode… $32=0 is spindle mode and $32=1 is laser mode… spindles are mechanical and take time to speed up and slow down so on a change in the speed (intensity for a laser) if using a spindle you have to delay… laser is instant and the delay just slows down you burning…
The Z axis… In my heart I wanted a CNC milling machine… but I was realizing that the Acro Laser frame was not rigit enough for this task… nevertheless I decided to go for an adjustable Z axis for the Acro Laser for a couple of reasons. When lasering materials of different thickness I either had to manually raise my Acro Laser or manually adjust the laser focus for the sharpest finest burn. Adding Z axis meant just setting the height based on the material thickness.
I looked at two on Thingiverse
OpenBuilds ACRO Z Axis by petethepig - Thingiverse
Acro Laser cutter/ingraver - Mods and upgrades by Webberen - Thingiverse
I actually was building the first when I decided to go simple and build the second… pics below…
The reality of adding a third axis was really just additional settings to deal with in GRBL like the $23 homing direction and steps per mm $102 and $132 Z size etc… By this time I was actually getting better at all this so it wasn’t that bad but still a few hints… $20 and $21 soft and hard limits can be frustrating until you have a full understanding… disable them and be prepared to hit reset on the CNC shield when you hit an end. I also learned a few hard and frustrating lessons about making sure that LightBurn and your CNC shield are in sync… it is REALLY a good ide to exit LightBurn and reset the CNC shield when making changes to most GRBL settings like home directions and workspace sizes and especially when re-adding a device in LightBurn…
Which reminds me… when you flash a new GRBL version you should delete and re-add the device in LuightBurn so it is sending the right GRBL commands… when it finds a device it does a query and determines the version so it can use the capabilities… if you flash new and use old device setup you can and will get unpredictable results. And every time you add, remember all the device settings you tweaked in LightBurn… Z axis enabled, home on start, directions, size etc… (if you set $130 $131 $132 correctly then size will be right!!!)
A couple of final things I learned… do not necessarily fully understand, but got working…
Idle hold… My EleksMaker mana SE V3.2 board would power the steppers all the time so nothing moved… my CNC shield did not… turns out there is a $1=255 that will keep the motors powered to hold (they then get warm, but they get warm when operating so should not be an issue). I set that in my CNC shield but I still do not understand because my EleksMaker Mana SE V3.2 has $1=25 which should only hold for 25ms then power off. (open to explanations)
Workspaces and origin… when I first started using the CNC shield I would tell it to go to a specific X Y position after homing and it would go WAY FAR from home… Huh? In LightBurn there is a Get Position. and my Acro laser reported X at -339 and Y at -334 (My Acro is 340x335 X Y respectively as set in $130 $131 in GRBL to match the physical size). Again, I do not completely understand but the Eleksmaker mana SE V3.2 was starting at bottom left and the CNC shield was starting at top right. I read up in the LightBurn Docs>>Common GRBL Setups and found
G10 L2 P1 X-340 Y-335 which apparently sets a workspace offset to put things where they belong with respect to my Home position. Again, this command is entered in the LightBurn console to the GRBL controller but this does not show up in the $$ display. it shows up in the $# display so there is another thing you should archive before issuing the command in case you need to go back. Again you should reset the CNC shield and exit and restart LightBurn to make sure they are both on the same page as far as workspace…
Well that was easy…