Hi all, newbie here.
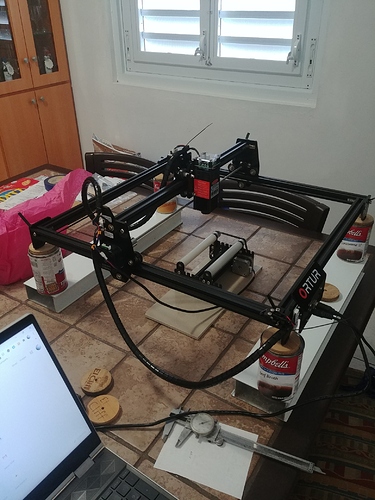
I have an Ortur LM2 that I bought recently to enter this hobby. I am very happy to say that it works very well with lightburn. Me being a noob, I find that Lightburn is a program that I can understand pretty good. I am on my trial period and would love to buy the license but just before I was going to get this license I went ahead and tried my Ortur Rotary attachment. I must say, I thought I was getting the hang of this but it turns out I just cannot get this thing to work. I have done various searches on the subject and have tried all sorts of settings and CANNOT get it to work. I was hoping someone here has one working and maybe point me in the right direction or is willing to share his or her settings. The only thing that I have been able to do is the following:
Start Lightburn
Turn on Ortur LM2
Enable rotary y axis
Test rotary (no rotary attached)
After test, connect rotary and hit Test again
It will rotate only if I do steps in that order.
After all this I cannot get the laser to do any work. I will get some errors and it says it is busy.
Once it is “busy” I have to restart and do the whole process again just to get to the same point.It has been very frutrating and I amsure I am missing something.
Any help would be extremely appreciated.
Greetings
Did you follow the manual and disabled soft limits when using the rotary tool?
I have no idea of the manual you are referring to. The rotary only came with an assembly instruction, sort of. Can you tell me where I can get this ‘manual’ ? Thanks
I am in the same boat you are, Experimenting with my OLM2 and rotary attachment.
In machine settings you can turn off the soft limits. Though I have no idea what this will actually do II’m willing to give it a shot.
This is the manual if you notice:
Page 10 and 11 please
Good to know that I’m not the only one with the same problem. Once I get my hands on the ‘manual’ I’ll work on it some more. Please let me know if you have any success with the ‘soft limits’. Up until now, I didn’t even know they existed or what/where they are.
Thanks Ortur Tech. I already had this file, it just wasn’t showing the dialog boxes in English. I could try this with the GRBL program but I thought this forum was about using the Lightburn software, no offense. Are you suggesting that those settings could be ‘passed on’ or done on Lightburn?
Actually, has anyone here ever used the Ortur YRR with Lightburn?
Very frustrated as it was so easy for me, being a noob on this, to get the LM2 working perfectly with the Lightburn software.
You can achieve the same result using Edit menu -> machine settings
Not everyone has access to Lightburn so Lasergrbl is the “go to” option that serves everyone 
You need to deactivate the soft limits, because as you swap the Y gantry by a roller - which by definition has no End stop/Limit - machine will endless keep rotating untill it finds its stop.
AS it doesnt, it ends giving an error. And gets in lock state
Rotaries are not so straight forward though as the diameter of your piece has to come into play
But if you change those settings - which you should set back when not using the YRR - you should be able to control the Rotary in lightburn correctly.
Then i would youtube rotary attachement videos, many go through the math required to calculate the surface area, is quite a dense topic to put into text and also would help you understand why math is involved with round objects
But let me know first, if the changes above helped you to control the rotary in lightburn. Then we go from there
Ok, I will try this. I already have the math to make it work as I am able to test the rotary with my input (diameters,ratios and stuff). I’ll see if I can change those settings in Lightburn and chime back, thanks.
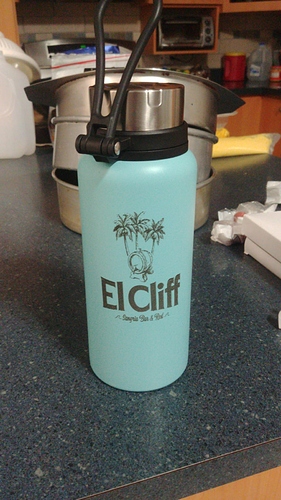
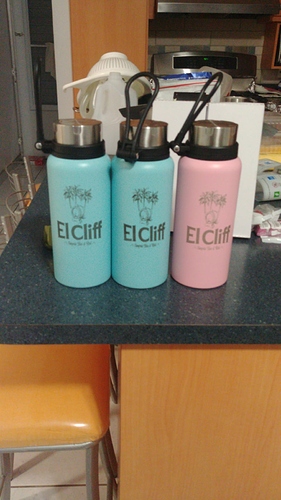
Finally! Thanks Ortur Tech for the insight on the soft limits. I went into machine settings, disabled the soft limits and auto home. Went to rotary setup, put my numbers in and that was it. I had a little trial and error with the mm per rotation numbers but was able to get it right. Just finishing up on my 5th cooler as I type. I hope this is helpful for anyone else trying to set up the Ortur YRR and LM2.
Thanks again.
Without pictures it didnt happen 
The math is a bit hard for sure but i am glad you got a hang on it.
in fact if you come to our facebook group, i am sure a good ammount of guys would want to pick your brains on the math you using.
And, no, I am not being sponsored by any soup.
In Lightburn, I just punched in my roller diameter and my cooler diameter. I then , with a little trial and error, ended up with 205mm per rotation for the circumference given. That number is only good if you are going to engrave around the whole circumference (11.75 inches for a 3.74 diameter object in my case). The 205 came out by putting the cooler on the roller and testing it till it gave a complete revolution.
I divided 205 by 11.75 and came out to about 17mm per inch.
My logo was about 3 inches wide, hence, 3 x 17= 51 or 51mm per rotation.
I tested the logo on painters tape first and it came out fine. Hope this helps anyone.
This topic was automatically closed 30 days after the last reply. New replies are no longer allowed.


