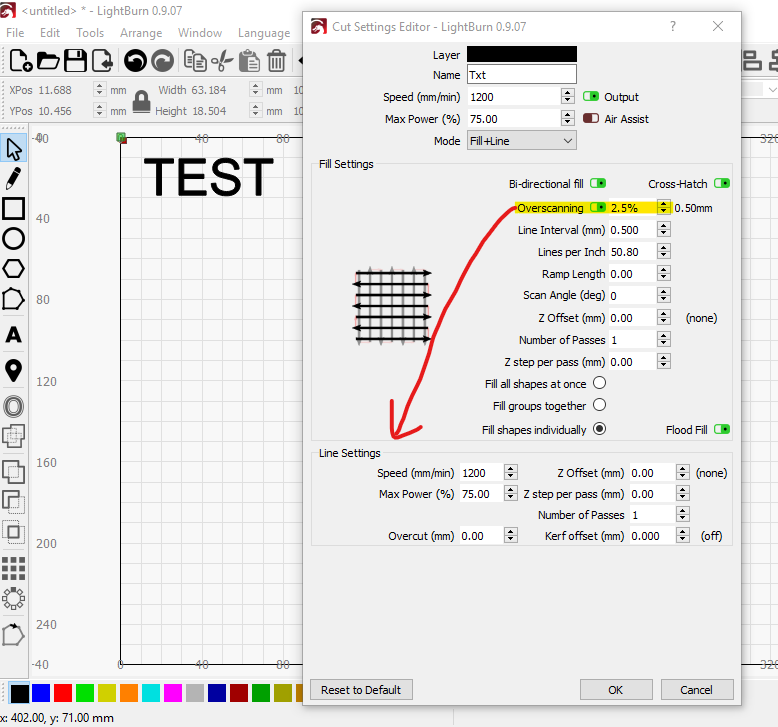
I am engraving vector images (or text) and using “fill + line” engraving. The purpose is not to cut the shapes, but just to engrave them on wood with a nice contour. Although I can use the “overscanning” option for the fill part, there is no such options for the line part. Each contour line has a dark spot where the laser starts and finishes a shape (where the laser is still accelerating and decelerating). Is there a way to have the same “overscanning” option for the outline?
Addressed directly in email, but to provide help for others, here is that response.
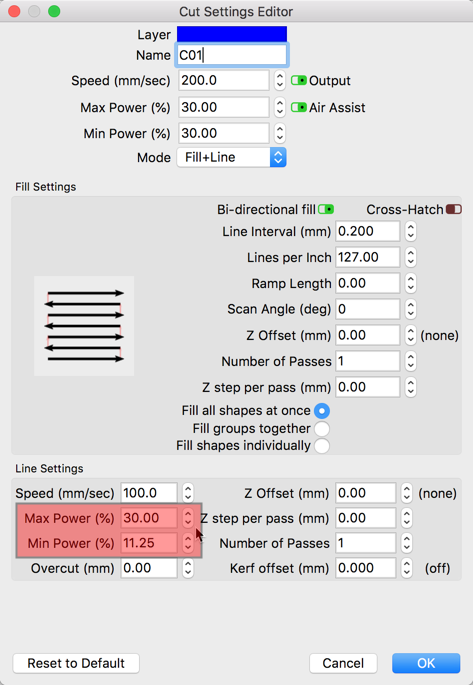
I can not see what hardware profile you are using but when cutting/marking with the ‘Line’ style cut, this is controlled differently than the overscan. You control the power of the cut using the Min and Max Power settings. If you want to only mark the outline, setting the Min Power to something lower than the Max Power setting will allow the laser to “ramp” the power down as the head slows for a direction change, then back up again as it gets to speed. This will help significantly with over burning the corners of your letters.
1 Like
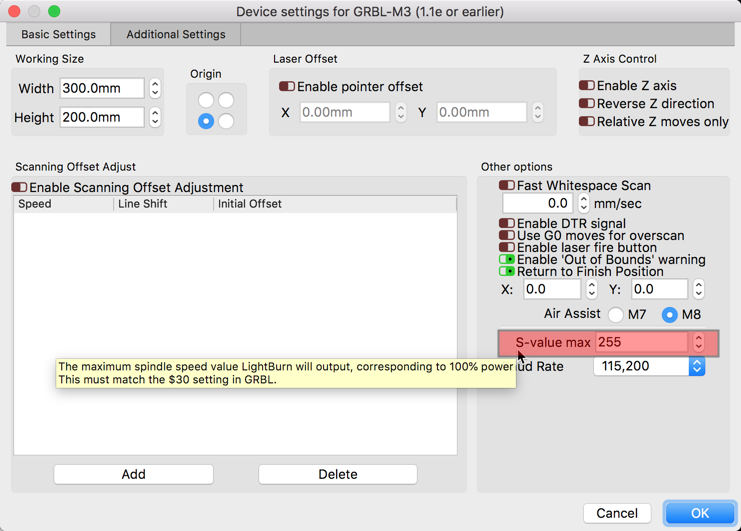
I looked into my machine setting (I have eleksmaker A3 Pro), and saw the min spindle speed, RPM ($31) is set to 0 and max spindle speed, RPM ($30) is set to 255. Not sure if I am looking at the right place, but I didn’t see any power variable in the machine setting. Is there anywhere else I need to go to set these up properly? Thank you so much!
Thank you for sharing your hardware setup. I was recommending LightBurn Min. and Max Power settings.
As for the firmware settings you shared, they are fine. You will want to make sure that your $30 setting matches the ‘S-value max’ set in LightBurn. You can change either, but they need to match.
That is interesting… I do not have the min value showing up in mine? See the first picture I posted. I see the max, but not the min. As for the S-value, I double checked and it was indeed set 255.
Sorry, my bad…Tired and here is Sunday evening so I missed this.
Type $$ followed by Enter/Return into the console of LightBurn and paste the results here.
$32 should be 1 (enable laser mode)
Here is another great resource for your setup.
As another member previously posted, “Scroll down to the bottom “operating instructions” and follow that. Once you have it working in elekscam, it should work in lightburn. Follow the instructions to the letter and that will get you up and running…”
Haha, this is not time critical, please don’t waste your Sunday evening on this! You did an amazing job so far, I can wait a few days  I will also make my homework, and read on the eleskmaker website. I will need to reinstall elekscam, I dropped it a long time ago, it is NOTHING compared to lightburn!!
Here is my hardware status.
$$
$0=10
$1=100
$2=0
$3=1
$4=0
$5=0
$6=0
$10=0
$11=0.010
$12=0.002
$13=0
$20=0
$21=0
$22=0
$23=0
$24=100.000
$25=1000.000
$26=250
$27=1.000
$30=255
$31=0
$32=1
$100=80.000
$101=80.000
$102=80.000
$110=4000.000
$111=4000.000
$112=2000.000
$120=400.000
$121=400.000
$122=400.000
$130=390.000
$131=297.000
$132=200.000
1 Like
If you are using a version of GRBL firmware older than 1.1f, it doesn’t support variable power mode.
Read here: https://github.com/gnea/grbl/wiki/Grbl-v1.1-Laser-Mode#laser-mode-operation
LightBurn’s “GRBL” profile uses the M4 (dynamic power) mode, so that the power is varied with the speed of the laser head. The “GRBL-M3” profile uses M3 (constant power) mode, so the power output is constant as the speed of the laser varies, resulting in darker burns at start & stop points, as well as any corners.
It would be possible to extend the start and stop points, but it would be hard to add them to all corners in any reasonable manner.
Thanks, that makes sense… I might try to update my eleksmaker to 1.1f (currently on 1.1e), but I read a lot of people having issues with 1.1f for this machine. Oh well…
As for your solution of extending the start and finish (similar to what you did for overscanning), that would be amazing!!! I don’t think we need to mess around with the change in direction, as it seems to have minimal impact. See my picture below, the issue is clearly the start and finish points. It would be such a nice feature… if not too difficult to implement. 
Thanks again, and amazing customer support! Highly impressed.

This topic was automatically closed 30 days after the last reply. New replies are no longer allowed.