hello,
how to pause the job between engraving and cutting (to activate air-assist)?
Is it possible?
You could send only the engrave layers, turn on air then send the cut layers. You could insert a dummy layer between the engrave and cut allowing you the time you need.
Thanks for your quick reply.
What do I put in the dummy layer?
Could you give an example?
It depends on how much time you need. You could make a small shape and run it at a slow speed & 0.5% power. You could duplicate and run your cut layer at 0.5% power. The low power prevents it from marking anything, but time will elapse while the gantry is moving.
As far as I know, there is no way to add an indefinite pause, other than to send the engraving and cutting as two separate jobs.
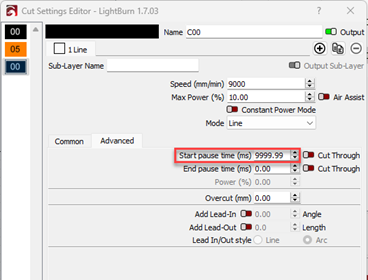
In the ‘Advanced’ tab for a Line Mode layer in Cut Settings, you can add up to 10 seconds pause (9999.99ms) before the cut starts, like this;
Or, as @thelmuth mentioned, you could just add a dummy shape, for example if you want 1 minute then create a line on a new layer 50mm long with a speed of 50mm/min, and you can use 0% power.
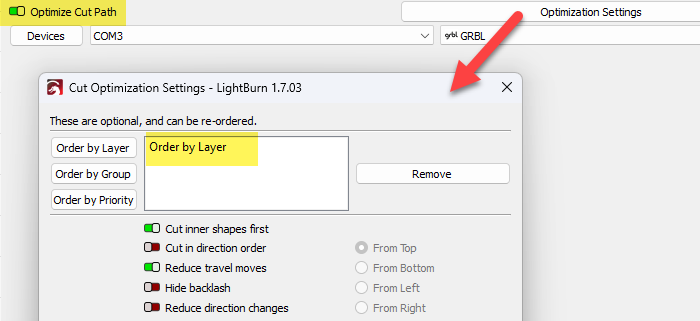
For example, here I just added a “one minute” line near where the cutting starts;

If the delay is in the wrong place, ensure that ‘Order by Layer’ is prioritised;
Thanks, I will test this as soon as possible
I understand the principle, but is it possible to shorten the break if I arrive before the end?
That is to say, to “skip” a layer manually
While I don’t know your setup, it does give an idea for the Lightburn team. The M0 command can work as you want. It’s a general pause gcode that works with at least most CNC systems, GRBL based, and Marlin based.
I saved the gcode, did a quick search for my second cut pass, added M0 after the last movement of the previous cut, and loaded it into Octoprint (I have setup for GRBL). It paused and then I could hit the resume button in Octoprint.
I tried directly from Lightburn by sending a ~ command, but apparently doesn’t send console commands while running a loaded gcode file.
@LightBurn Maybe along with the delay section, allow custom gcode before/after layers? And maybe recognize an M0 being sent to activate the resume button?
For this, I would recommend just running the layers one at a time. Right-click on the ‘Output’ header in the Cuts/Layers window and ‘Disable all Layers’. Then just enable one at a time and run them.
Adding the ability to output arbitrary GCode per layer would also mean we’d have to track the state of the machine and put back anything the user changed that we required - Users would be free to change between imperial / metric, absolute / relative, or enable any number of other things that would mess up our own internal state tracking, so we really don’t want to add this.
That was my thought as well, but I usually overengineer a specific solution and usually dive too deep. ![]() That’s why I took it upon myself to try the setup I described above. I can be fully ignored in this instance.
That’s why I took it upon myself to try the setup I described above. I can be fully ignored in this instance.
Thanks to all for your suggestions, but ultimately, I think I’ll go for “air-assist” piloting (with LignhtBurn) so I don’t have to interrupt work: It’s a way around the problem.
I used the “air-assist” control, which works well, avoiding having to pause .
Thanks for the update.
Sorry, we misunderstood your original question and thought that you could not use the air assist control with your machine automatically.
No worries - have a great Christmas!
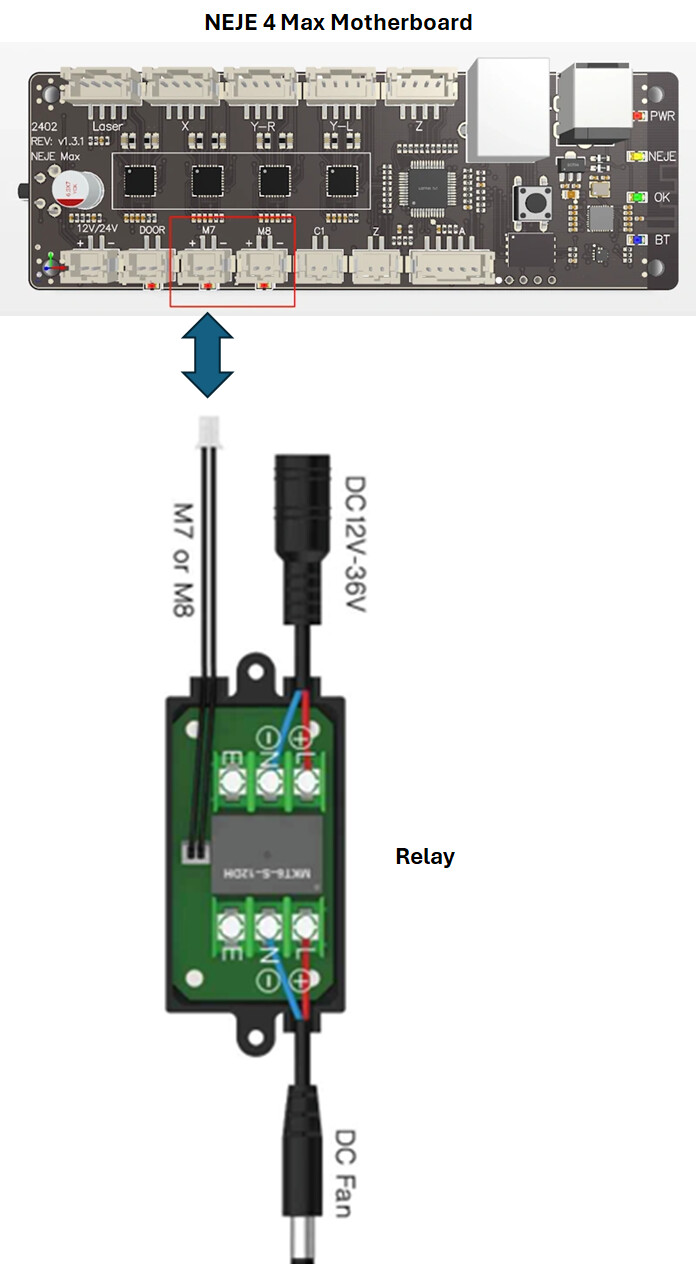
You understood correctly, I did not have automatic “air-assist”, so I wanted a break to activate it manually. Since it is complicated, I bought Lightburn, and tinkered with a system to have automatic “air-assist” (Lightburn controls a 12V relay, which powers my air pump). In short, I arrived at a simple and effective solution. Thanks again for your answer.
That’s awesome!
Could you please elaborate on how LightBurn control the relay?
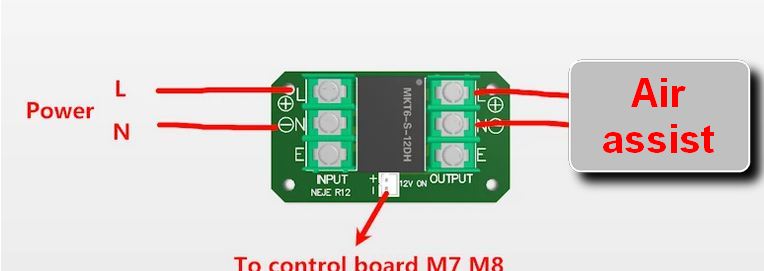


On my Atomstack there was a jack output provided to control the AirAssist, so I didn’t need to connect to the motherboard.