I have an OMTeck 60W new version laser. I just got in a PI Burn 3.0 rotary. I am not understanding the instructions on how to set it up in LightBurn. How do I Figure the Steps Per Rotation? How do I go with setting this rotary up?
The PiBurn document is pretty clear, what part of it are you having a problem with?
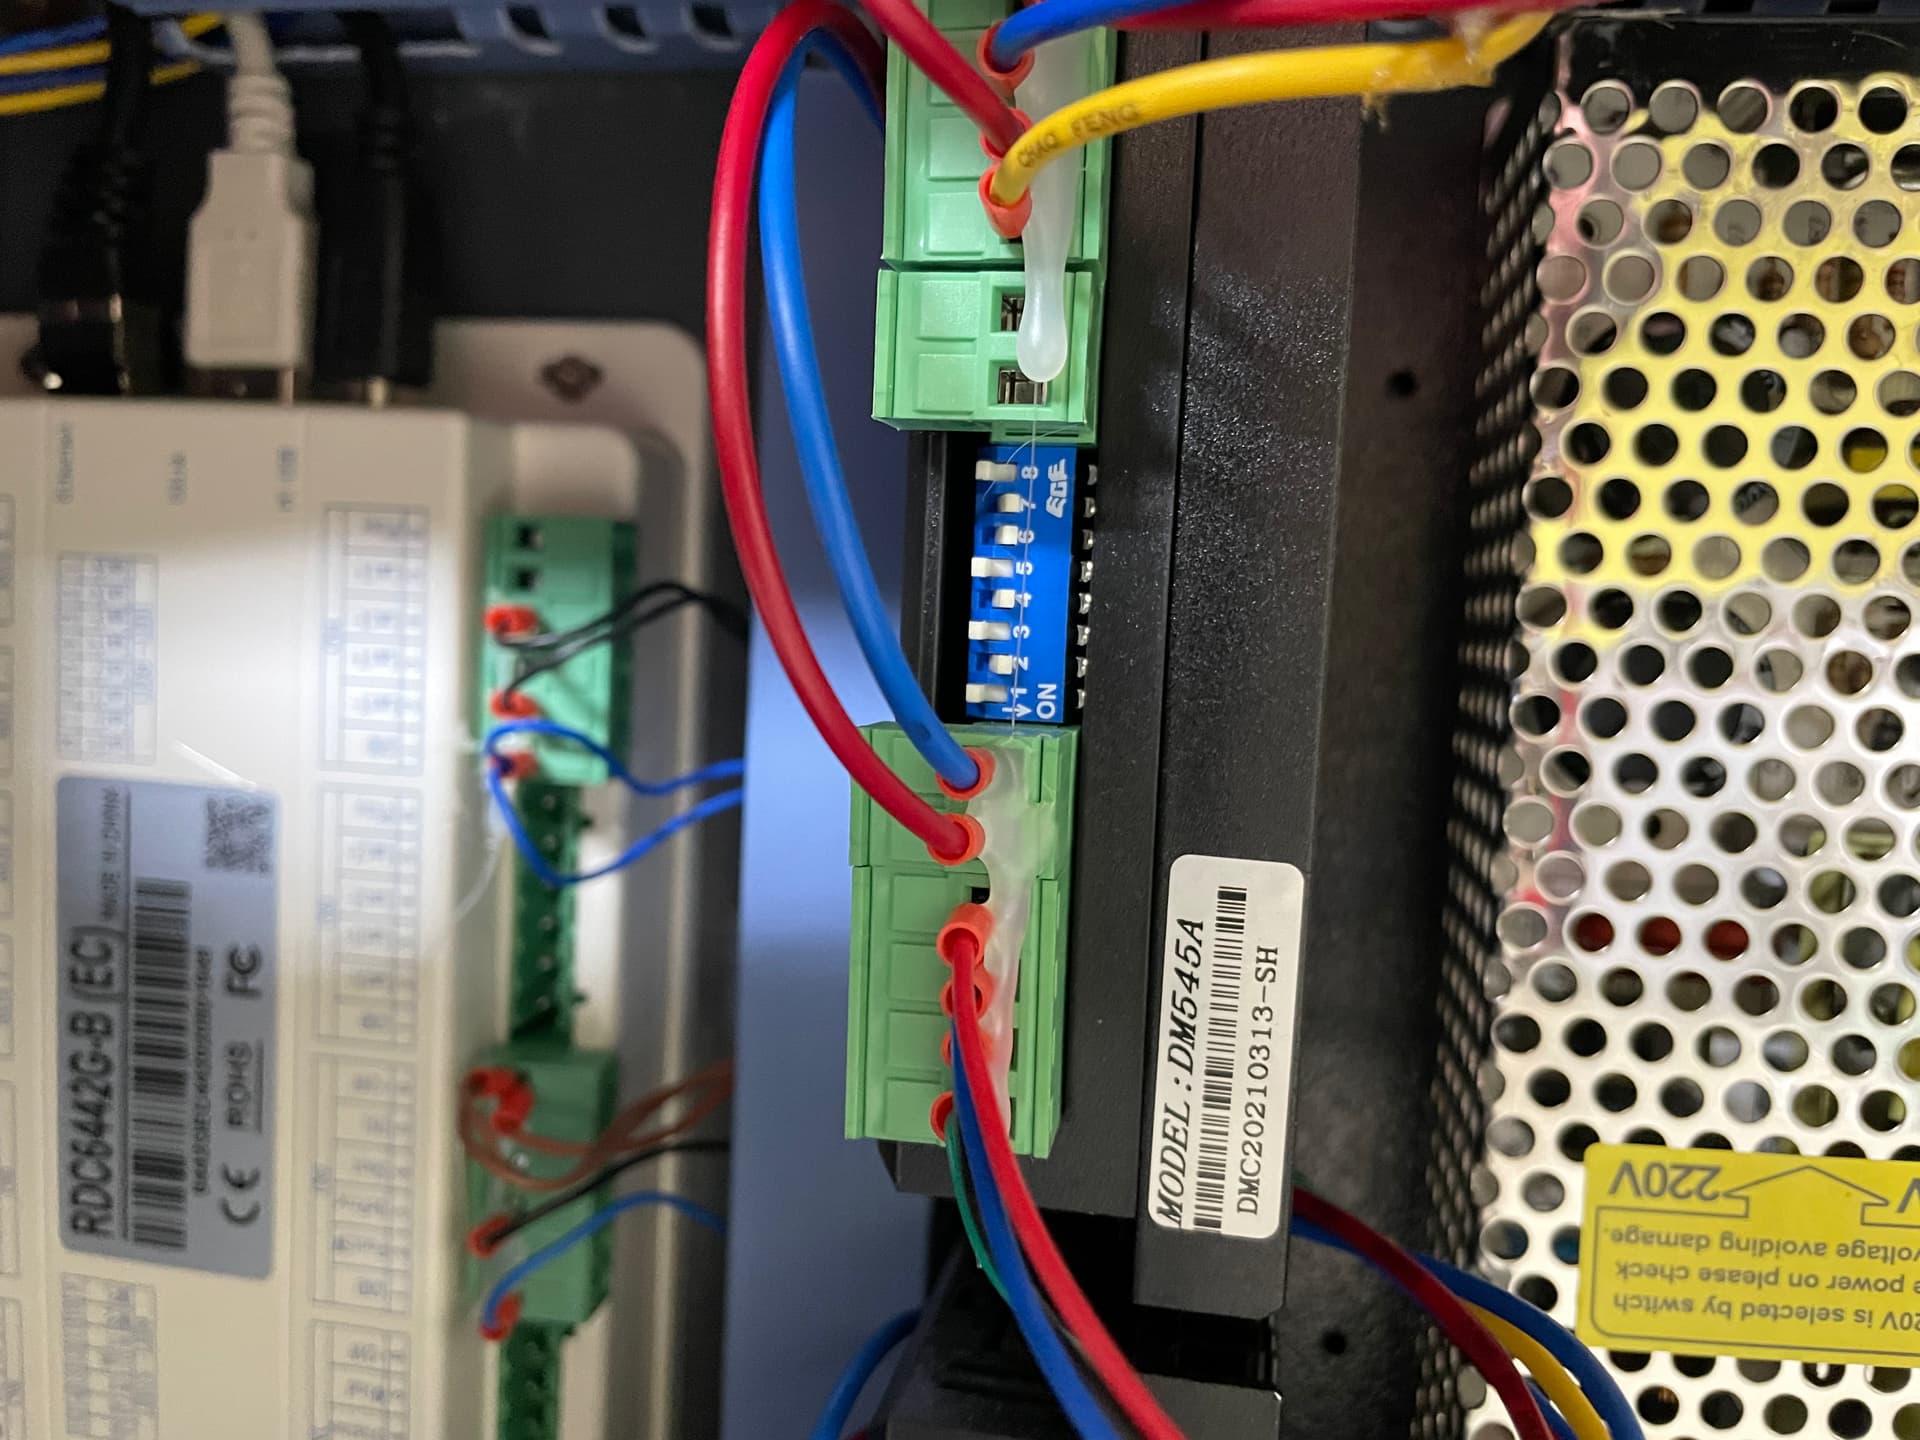
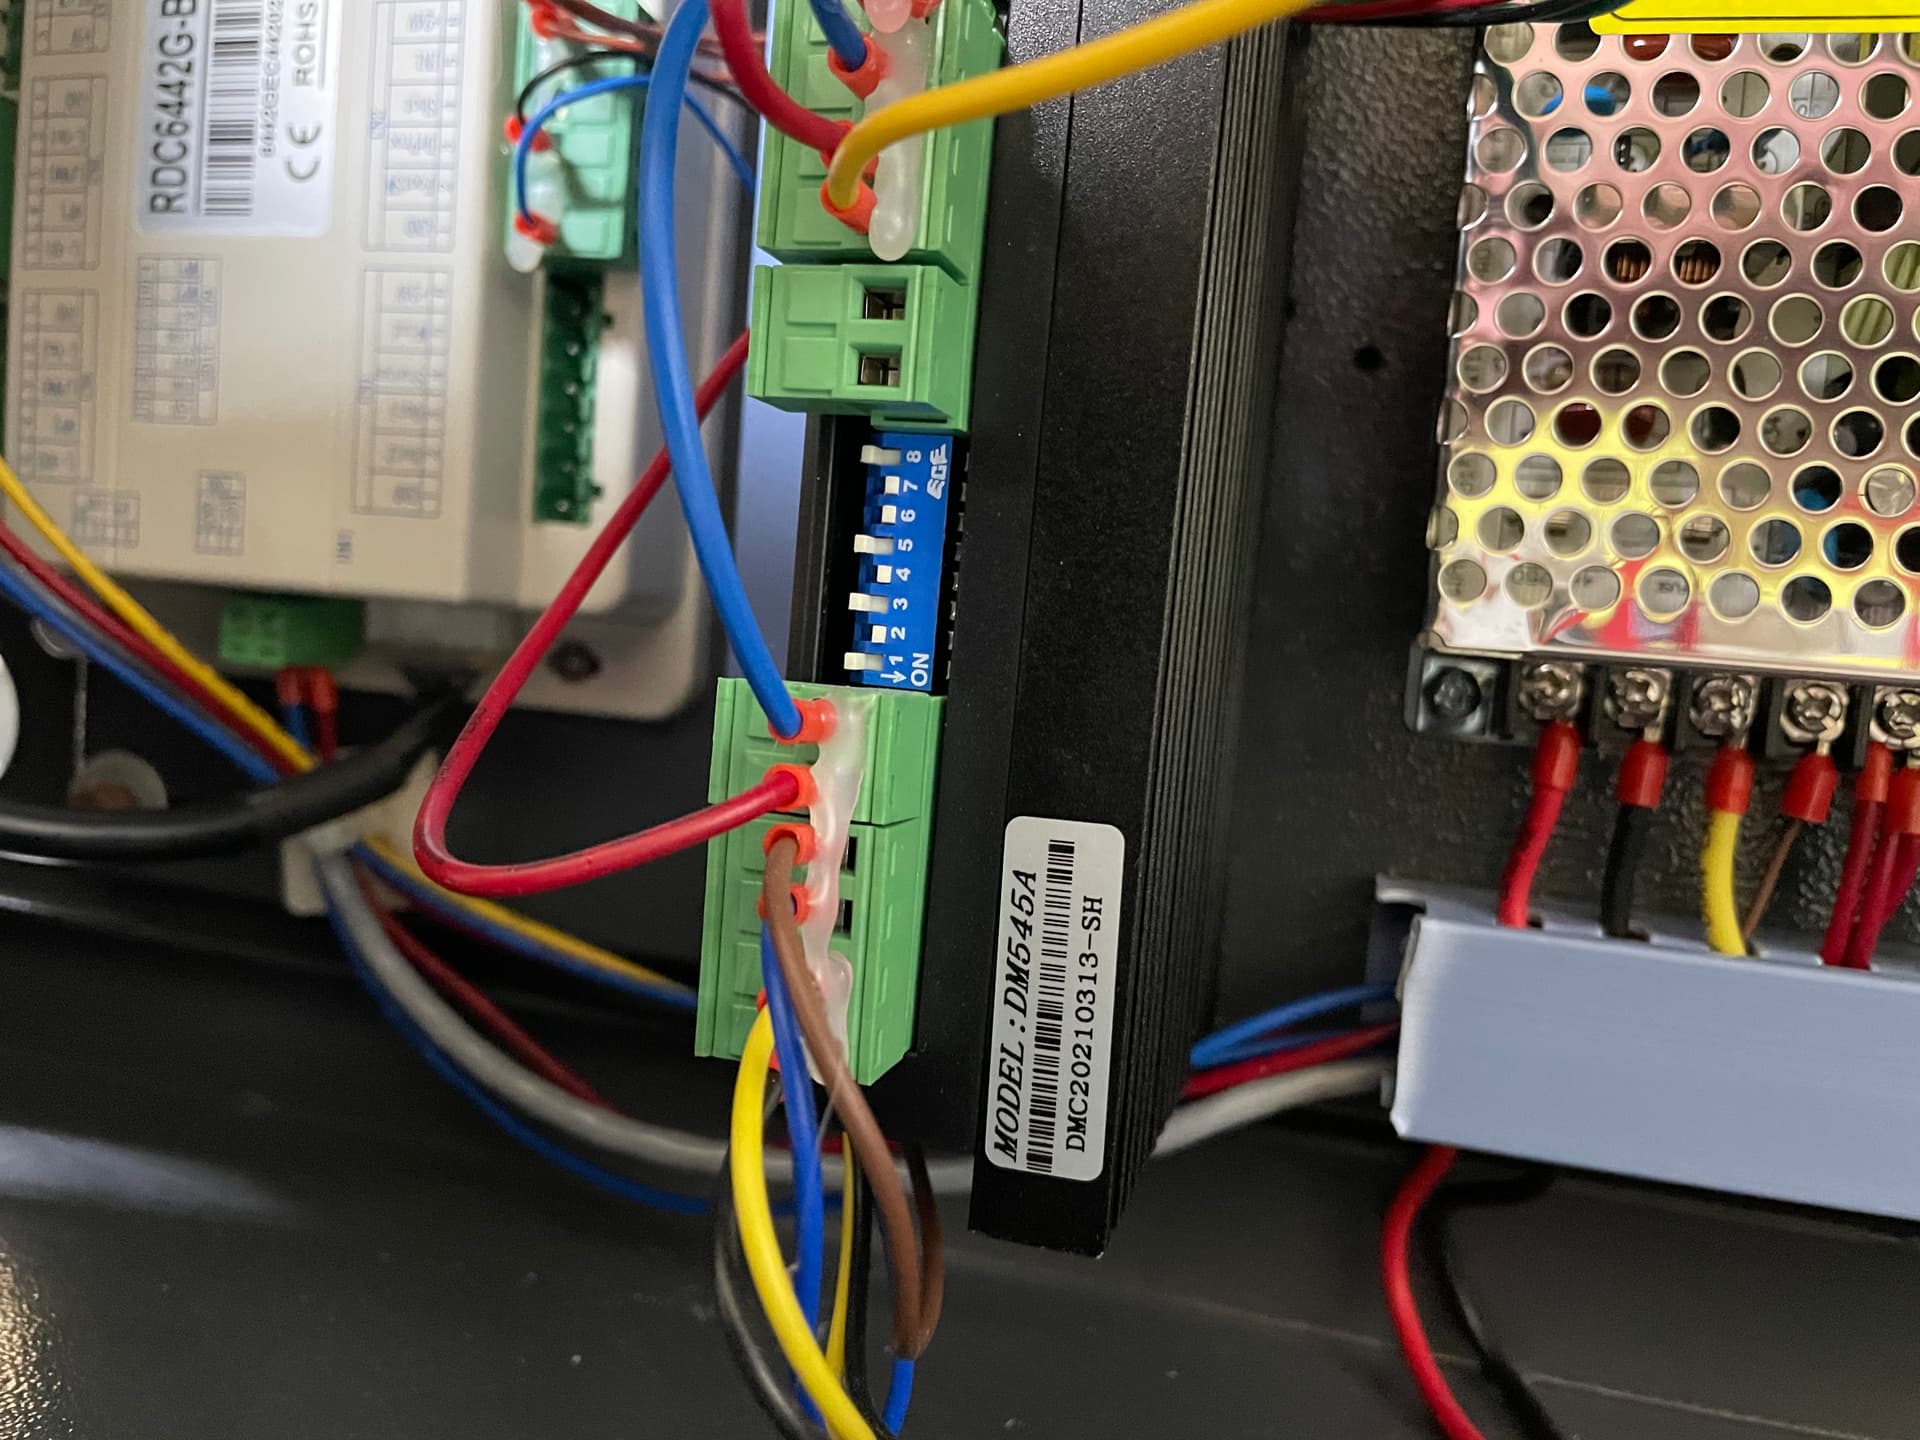
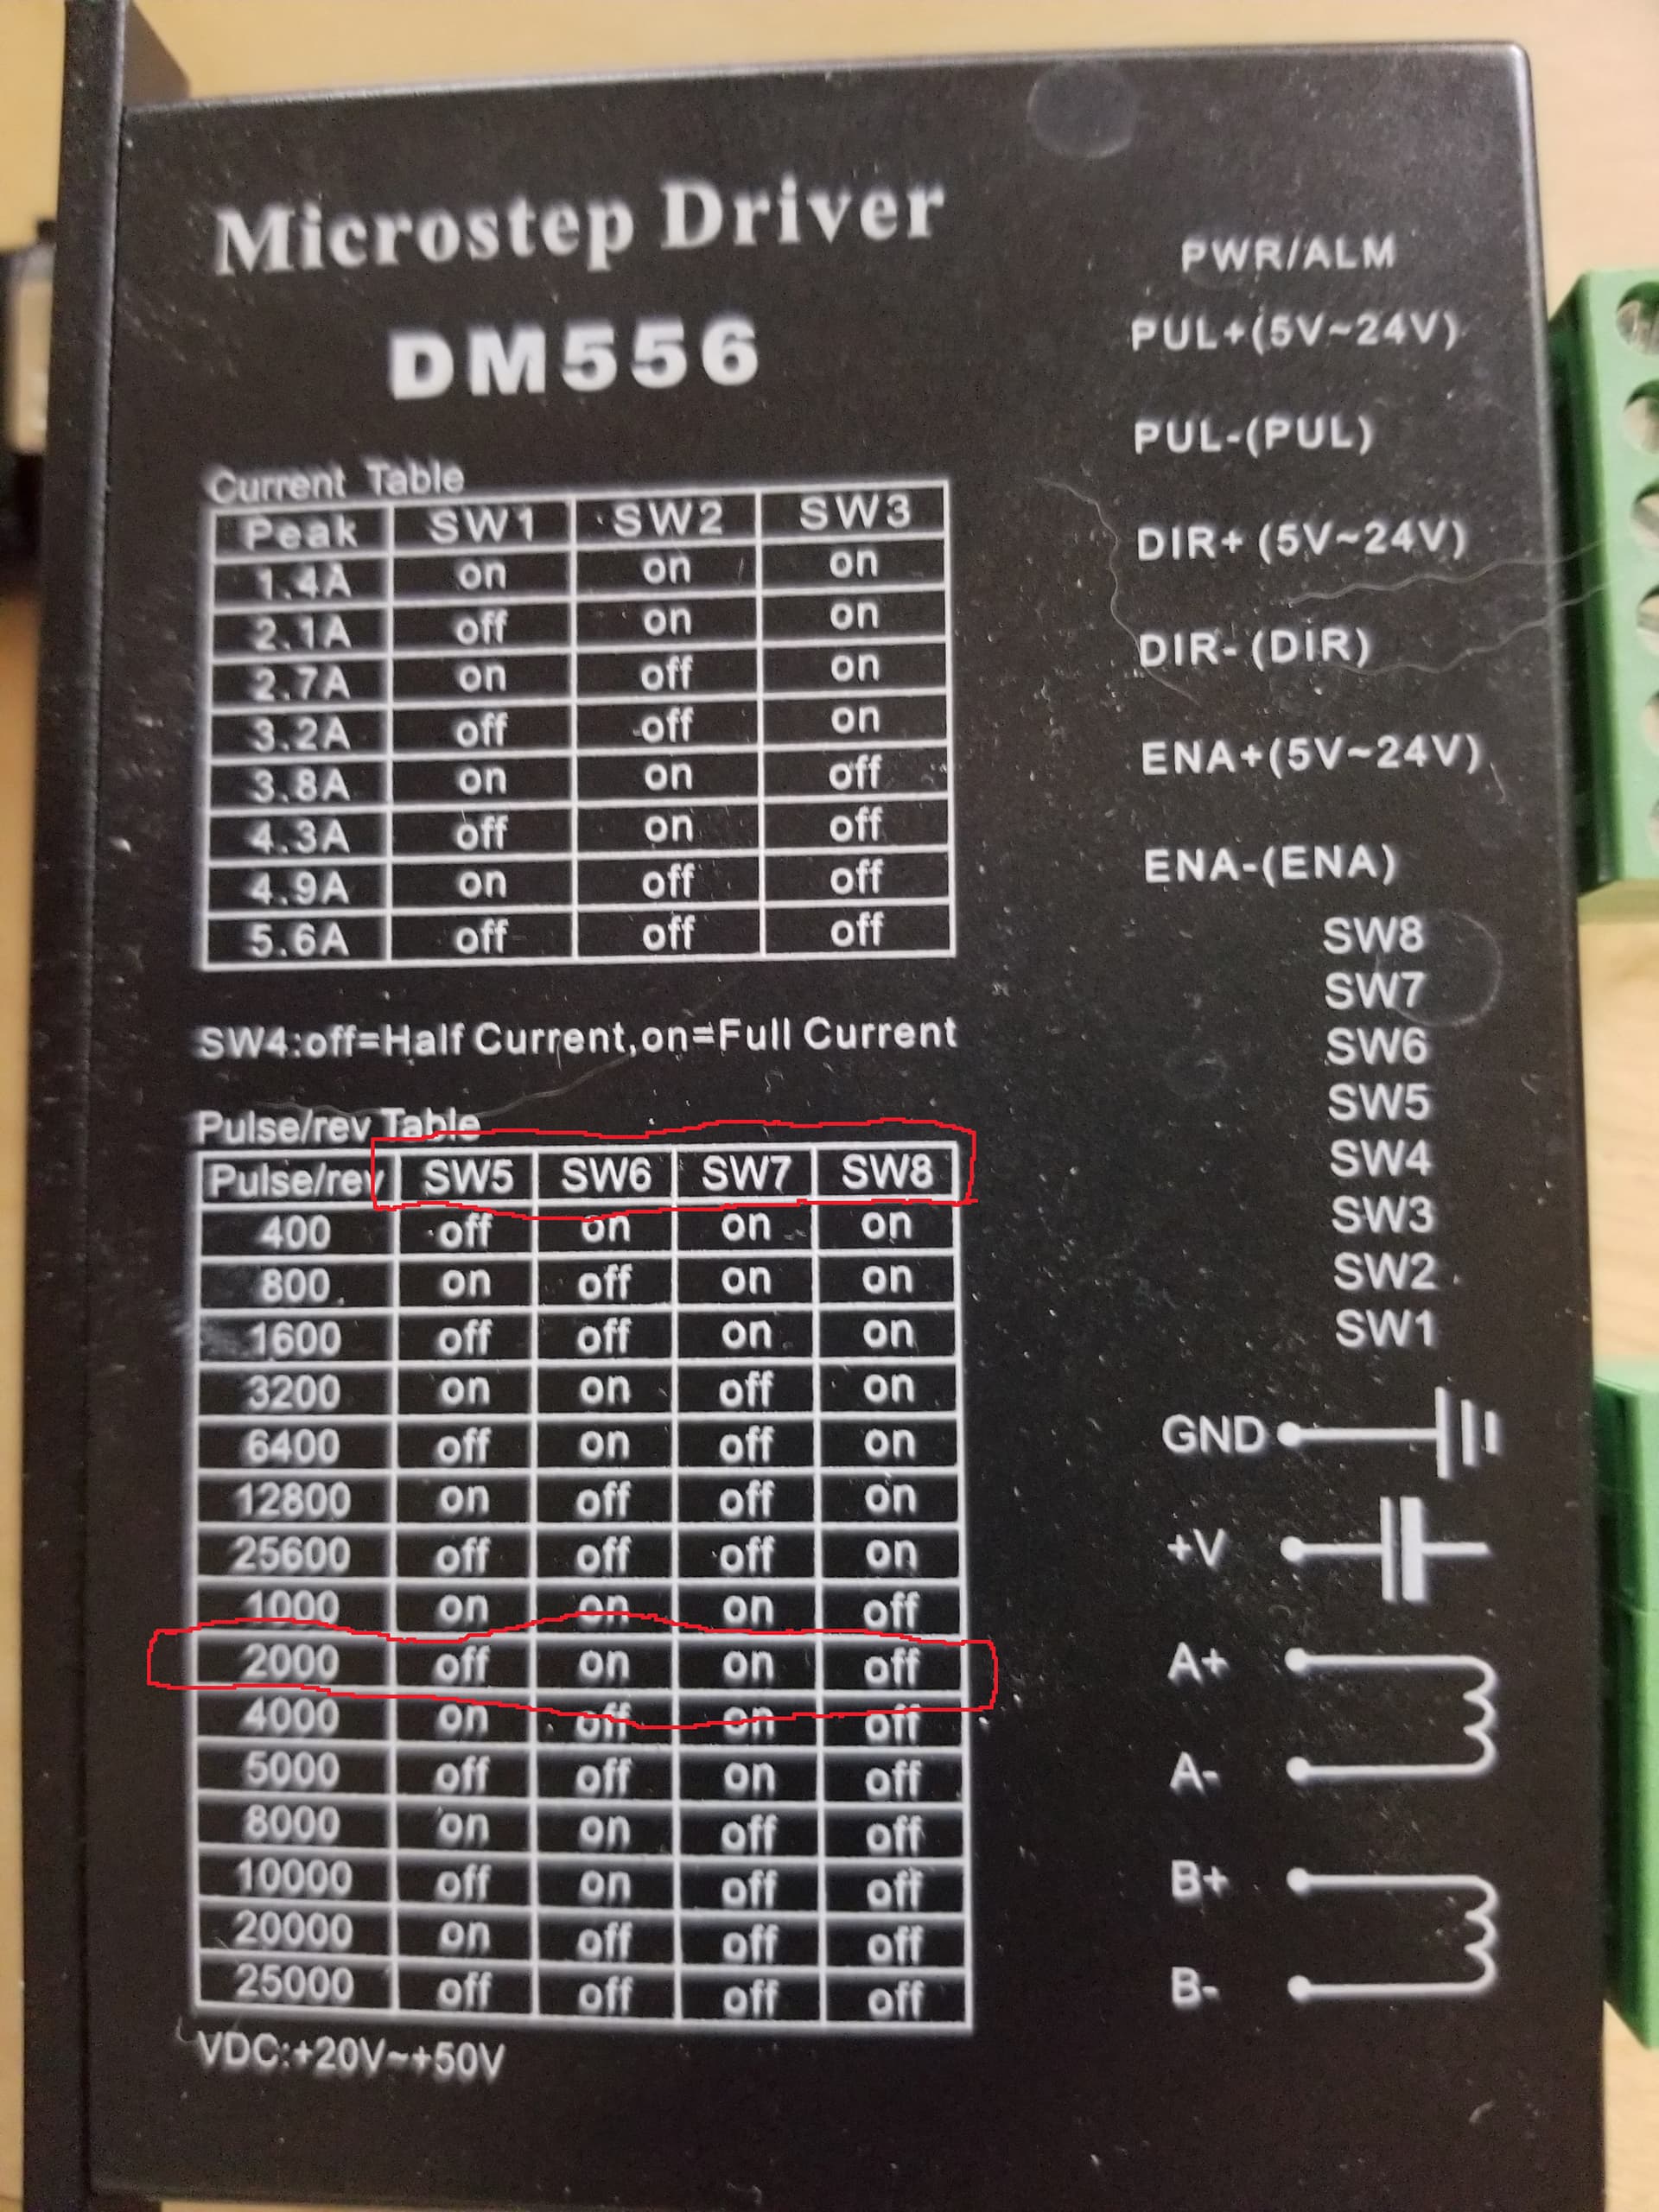
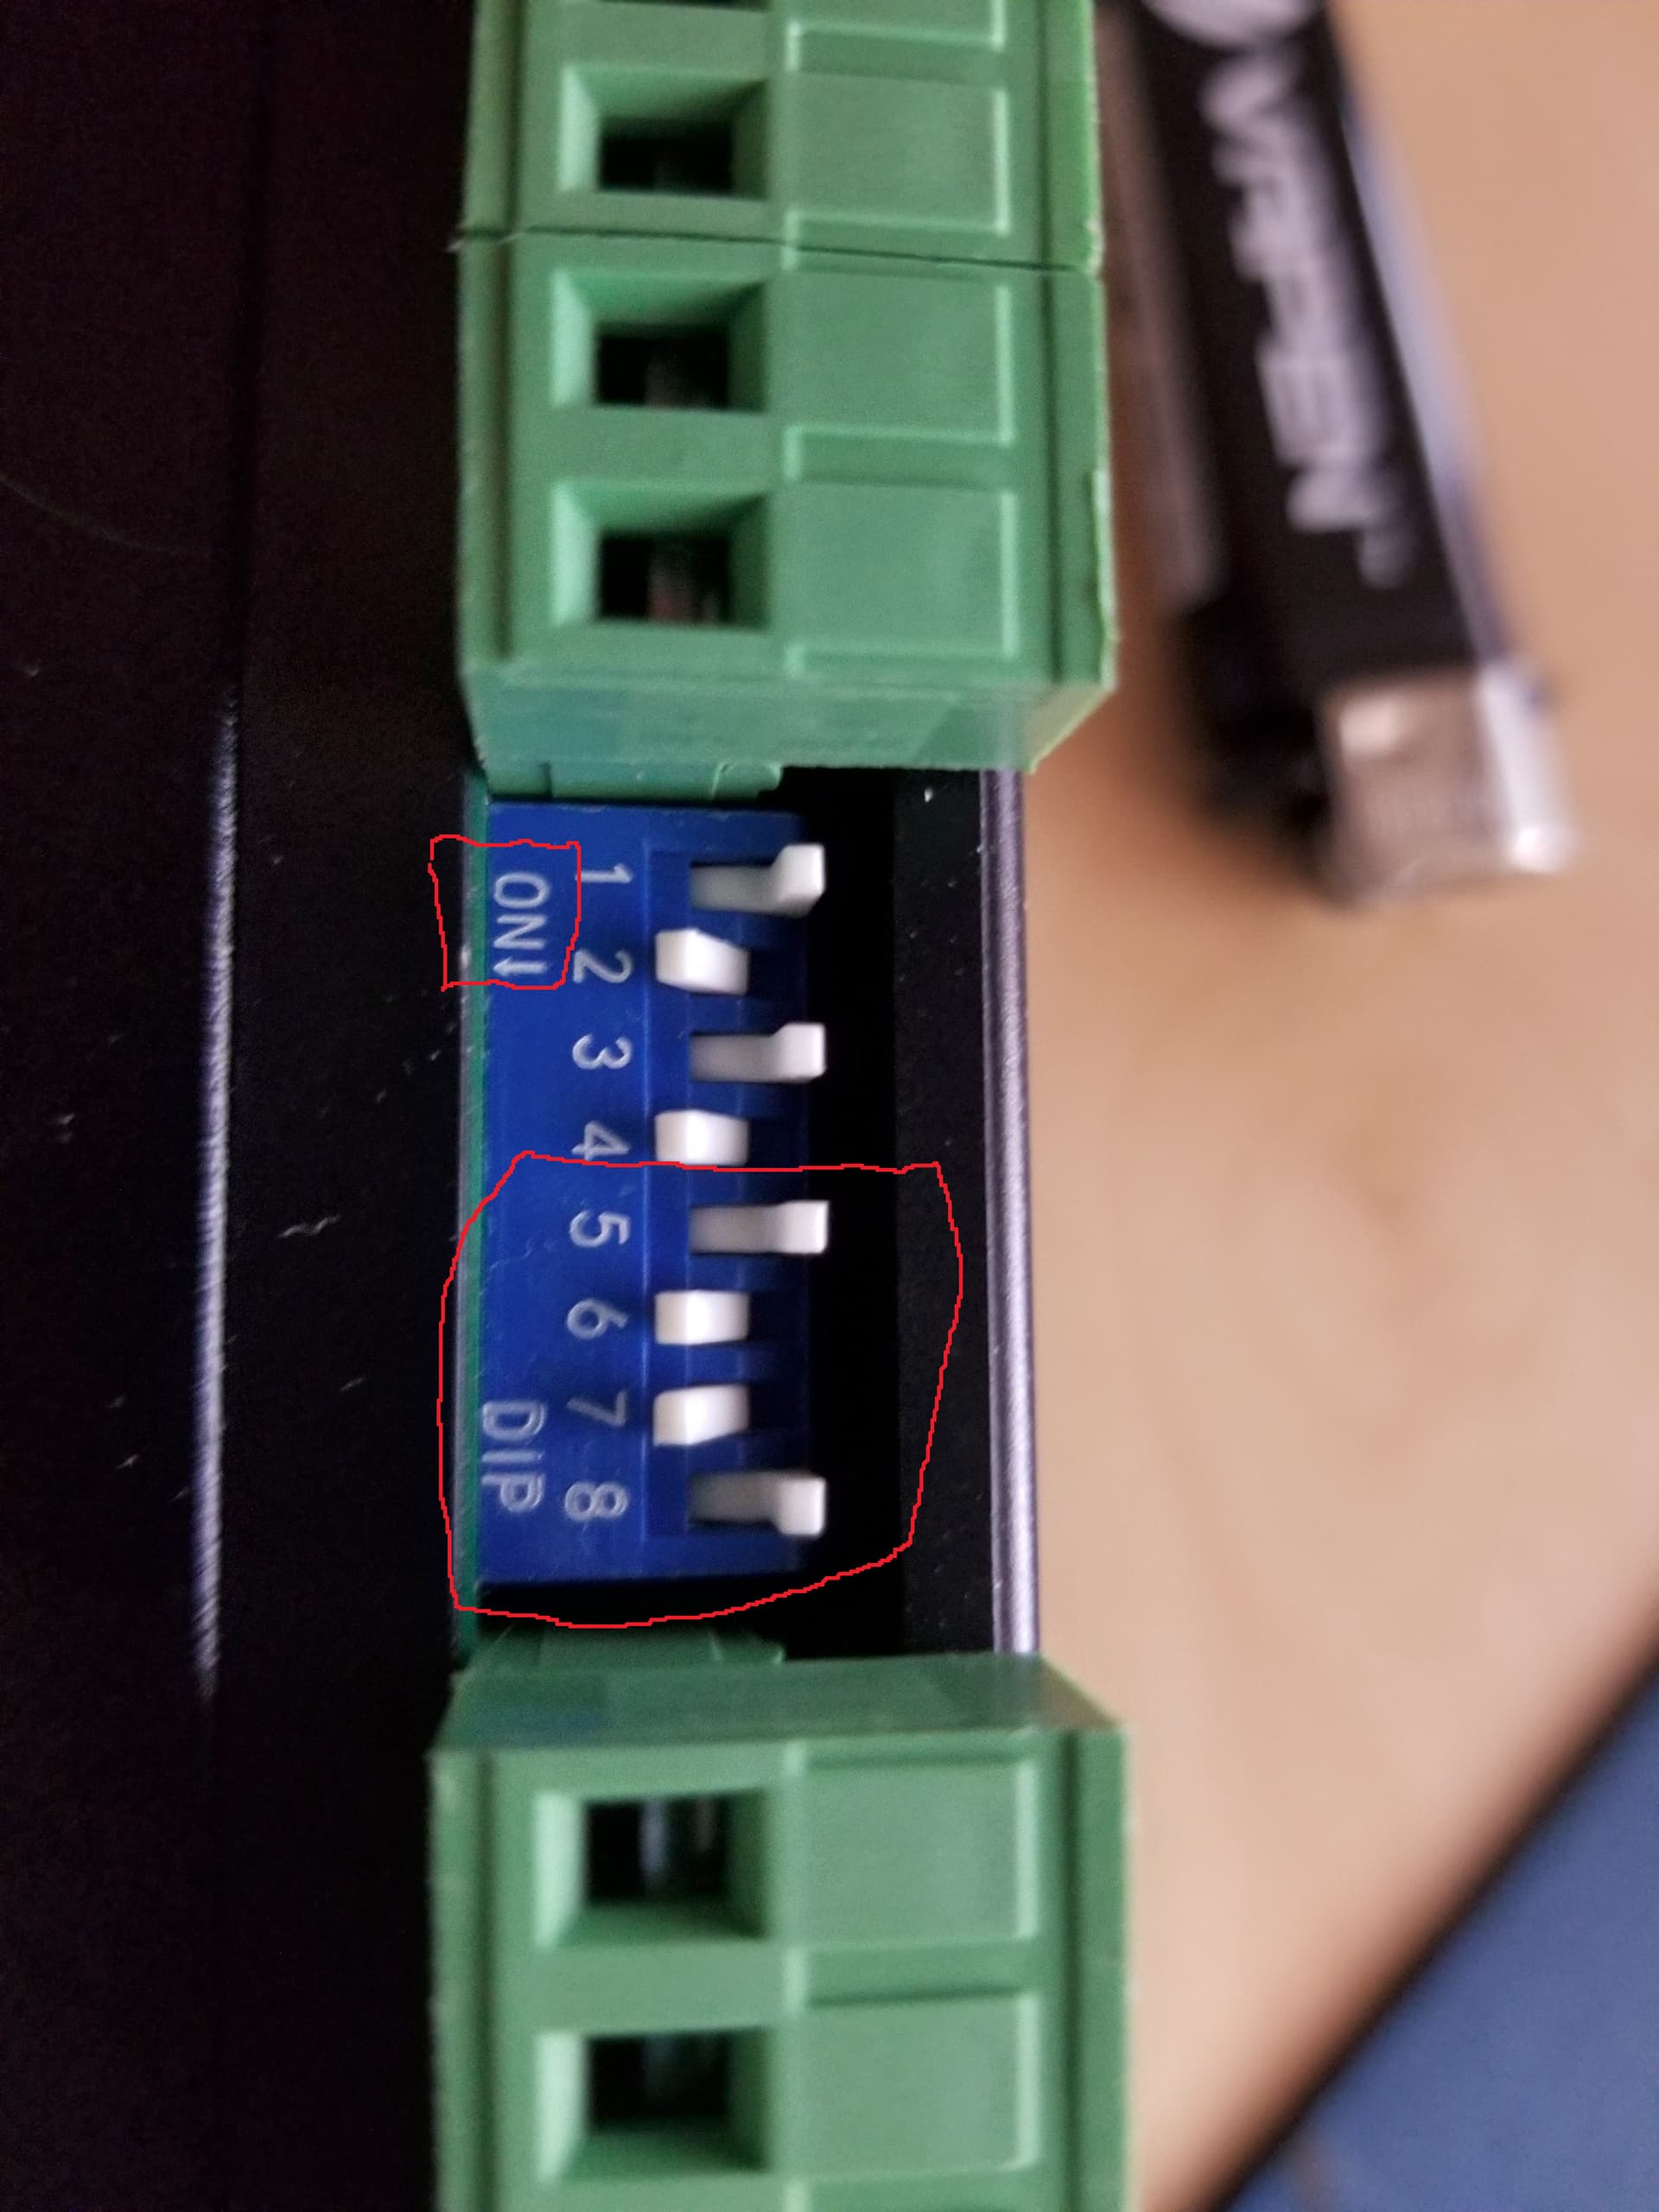
For step/rotation you have to look at how the stepper motor drivers are configured.
On my document it’s on page 12 and show both a 2 phase/3 phase motor drivers. You have to see how the switches are configured to get steps/rotation.
Mine is 2000 steps/rotation, piburn gear ratio is 2.5 * 2000 = 5000 steps/rotation.
The only other thing you need is the size of the driving wheel, mine is 62mm.
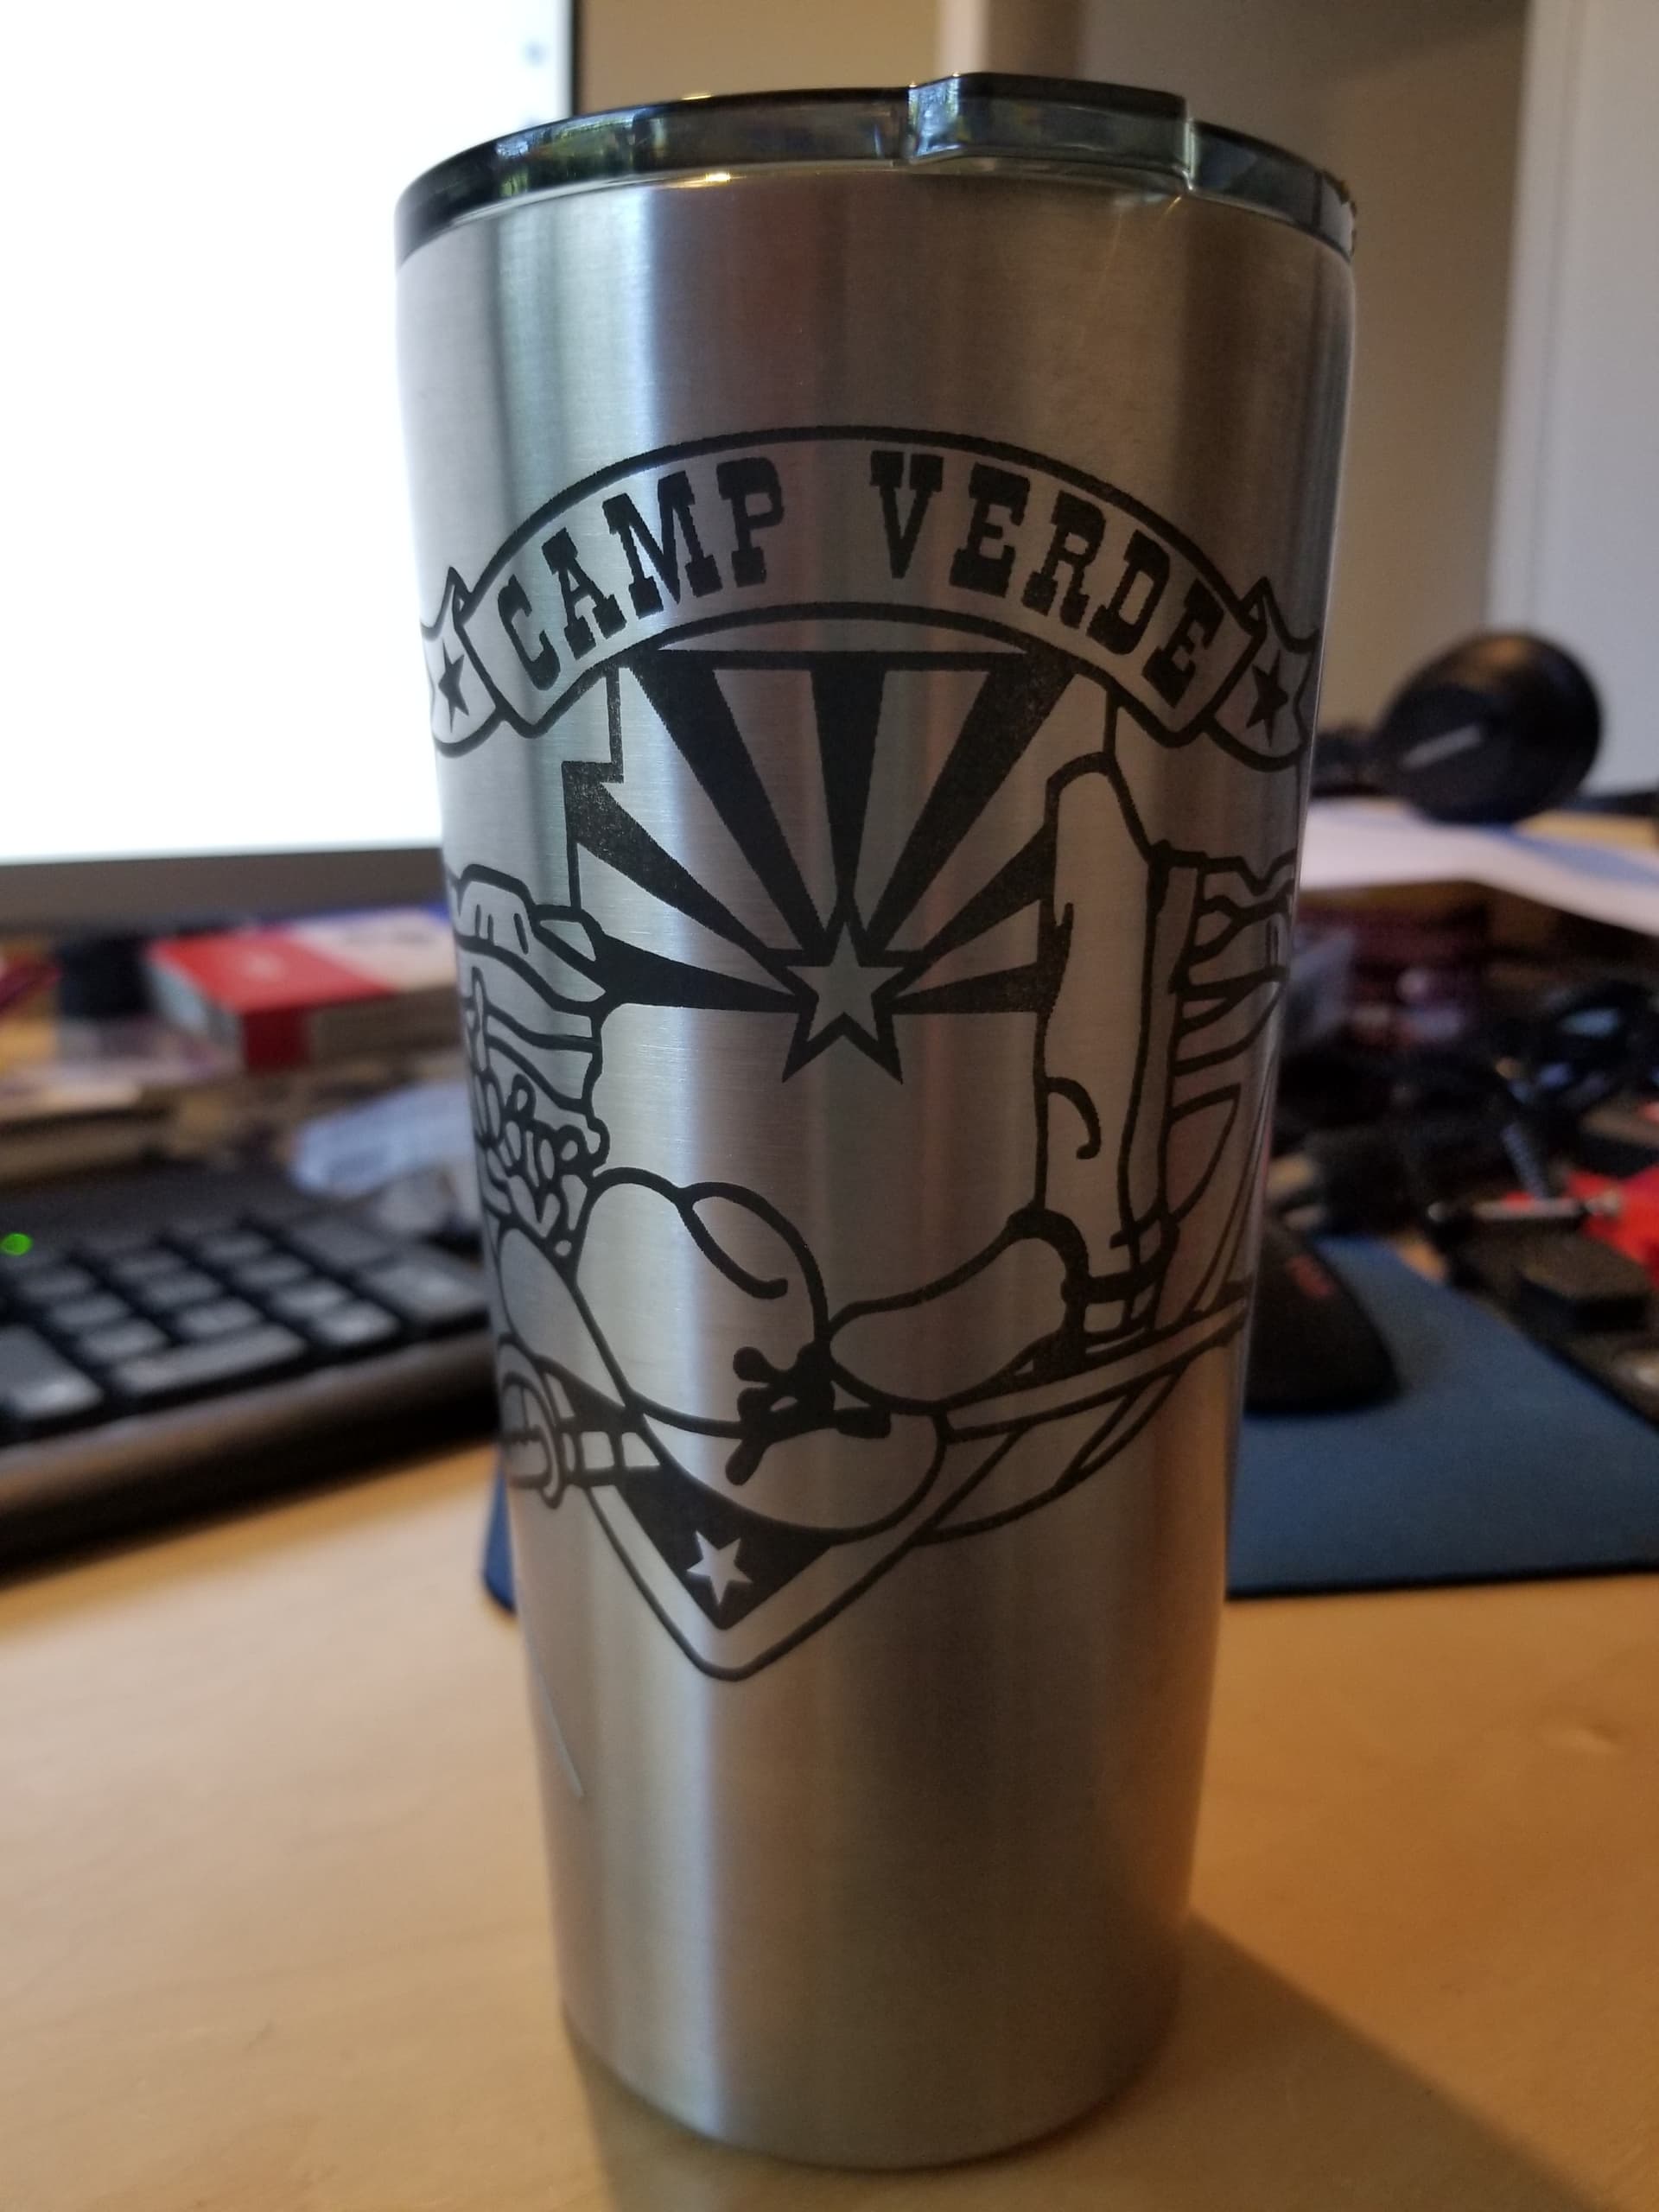
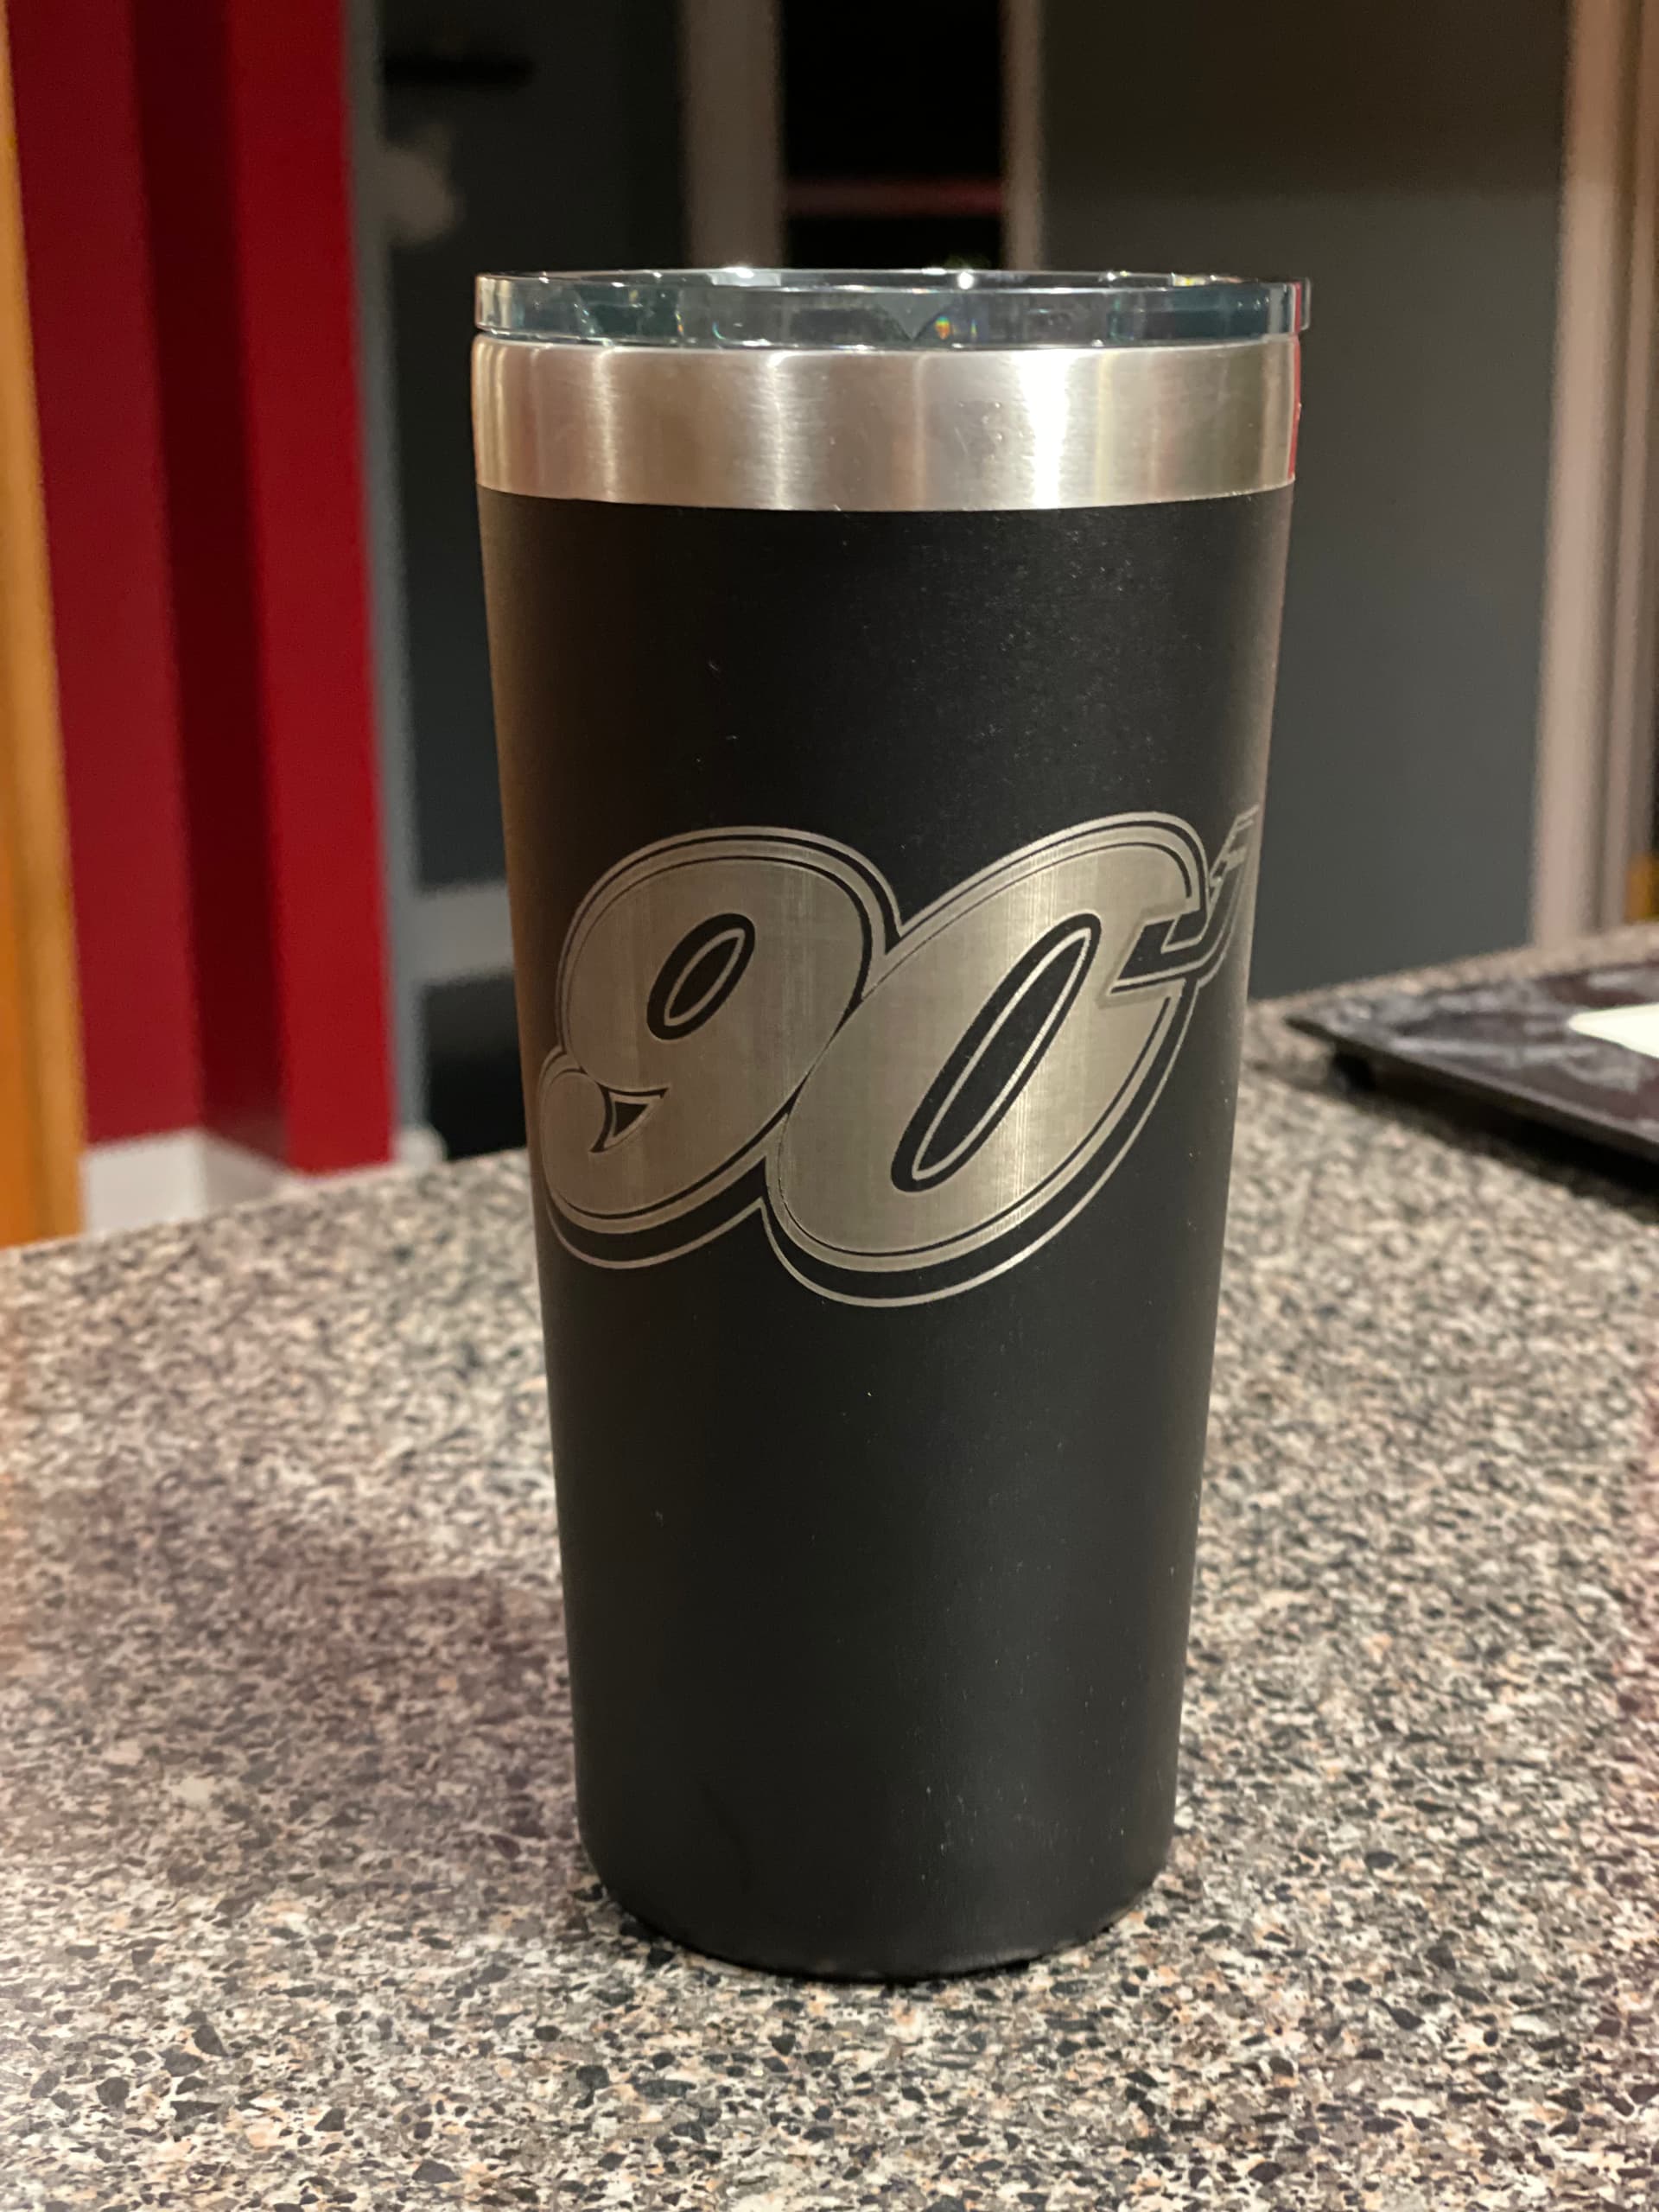
That was an early mug.

1 Like
Could you explain what the “new version” is about, please
I have the blue/grey. Im not sure really! I just got it a week ago.
Doing this from memory…
This is my driver
These are how my switches are set (same as yours, in this case). Notice ‘on’ is towards the circuit board.
This is from a picture on the internet of your 545A driver
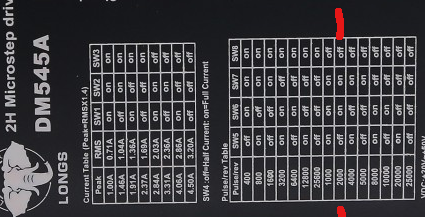
Looks like you use the same numbers that I do…
2000 steps/rotation X 2.5 (gear ratio) = 5000 steps / rotation of wheel. Set the wheel diameter to 62mm.
Might have to give the wheel diameter a little wiggle room, it was originally set for 63.
Hope that helps.
1 Like
Fine and clear answer, I will “archive” this post for the day I have to expand my accessories myself. Thanks
Thanks so much. You explained it well. I wasn’t for sure if numbers 1,2,and 3 had anything to do with it. I was confused.
Assume you are talking about PiBurn models. They are all set up similar, but I think the newer versions are ‘fixes’ for things that came up…
![]()
Ok I input 5000 steps per rotation. I lowered my speed to the recommended settings in LightBurn. I am not sure why my image is off a bit. I set the diameter.
Difficult to tell since I don’t know what it’s supposed to look like… Although I actually like the effect…
Once configured, you should not have to change anything. The diameter of the object makes no difference.
If it’s ‘shifted’ then it’s losing traction when it’s moving the object. I’ve slowed my machine down to 1/3 or less of the recommended speeds and acceleration values and I get better results.
However there are associated challenges. The biggest difficulty I’ve found is vector images for multiple reasons.
They have no acceleration area, so it limits speeds and a quick change in direction results in a loss of traction.
Some people advise putting marbles or other ‘debris’ for a lack of a different term, in the cup to increase of mass to help make contact. It may help, but it exacerbates the issue by increasing the mass, which is the problem in the first place.
Looks like you’ve figured out how to get it to operate, just need to fine tune things.
I have a bunch of configuration changes in different files. You will probably want to save your rotary configuration so you can just reload it when you take the rotary off and return to normal operation.
Good luck… Keep us updated
![]()
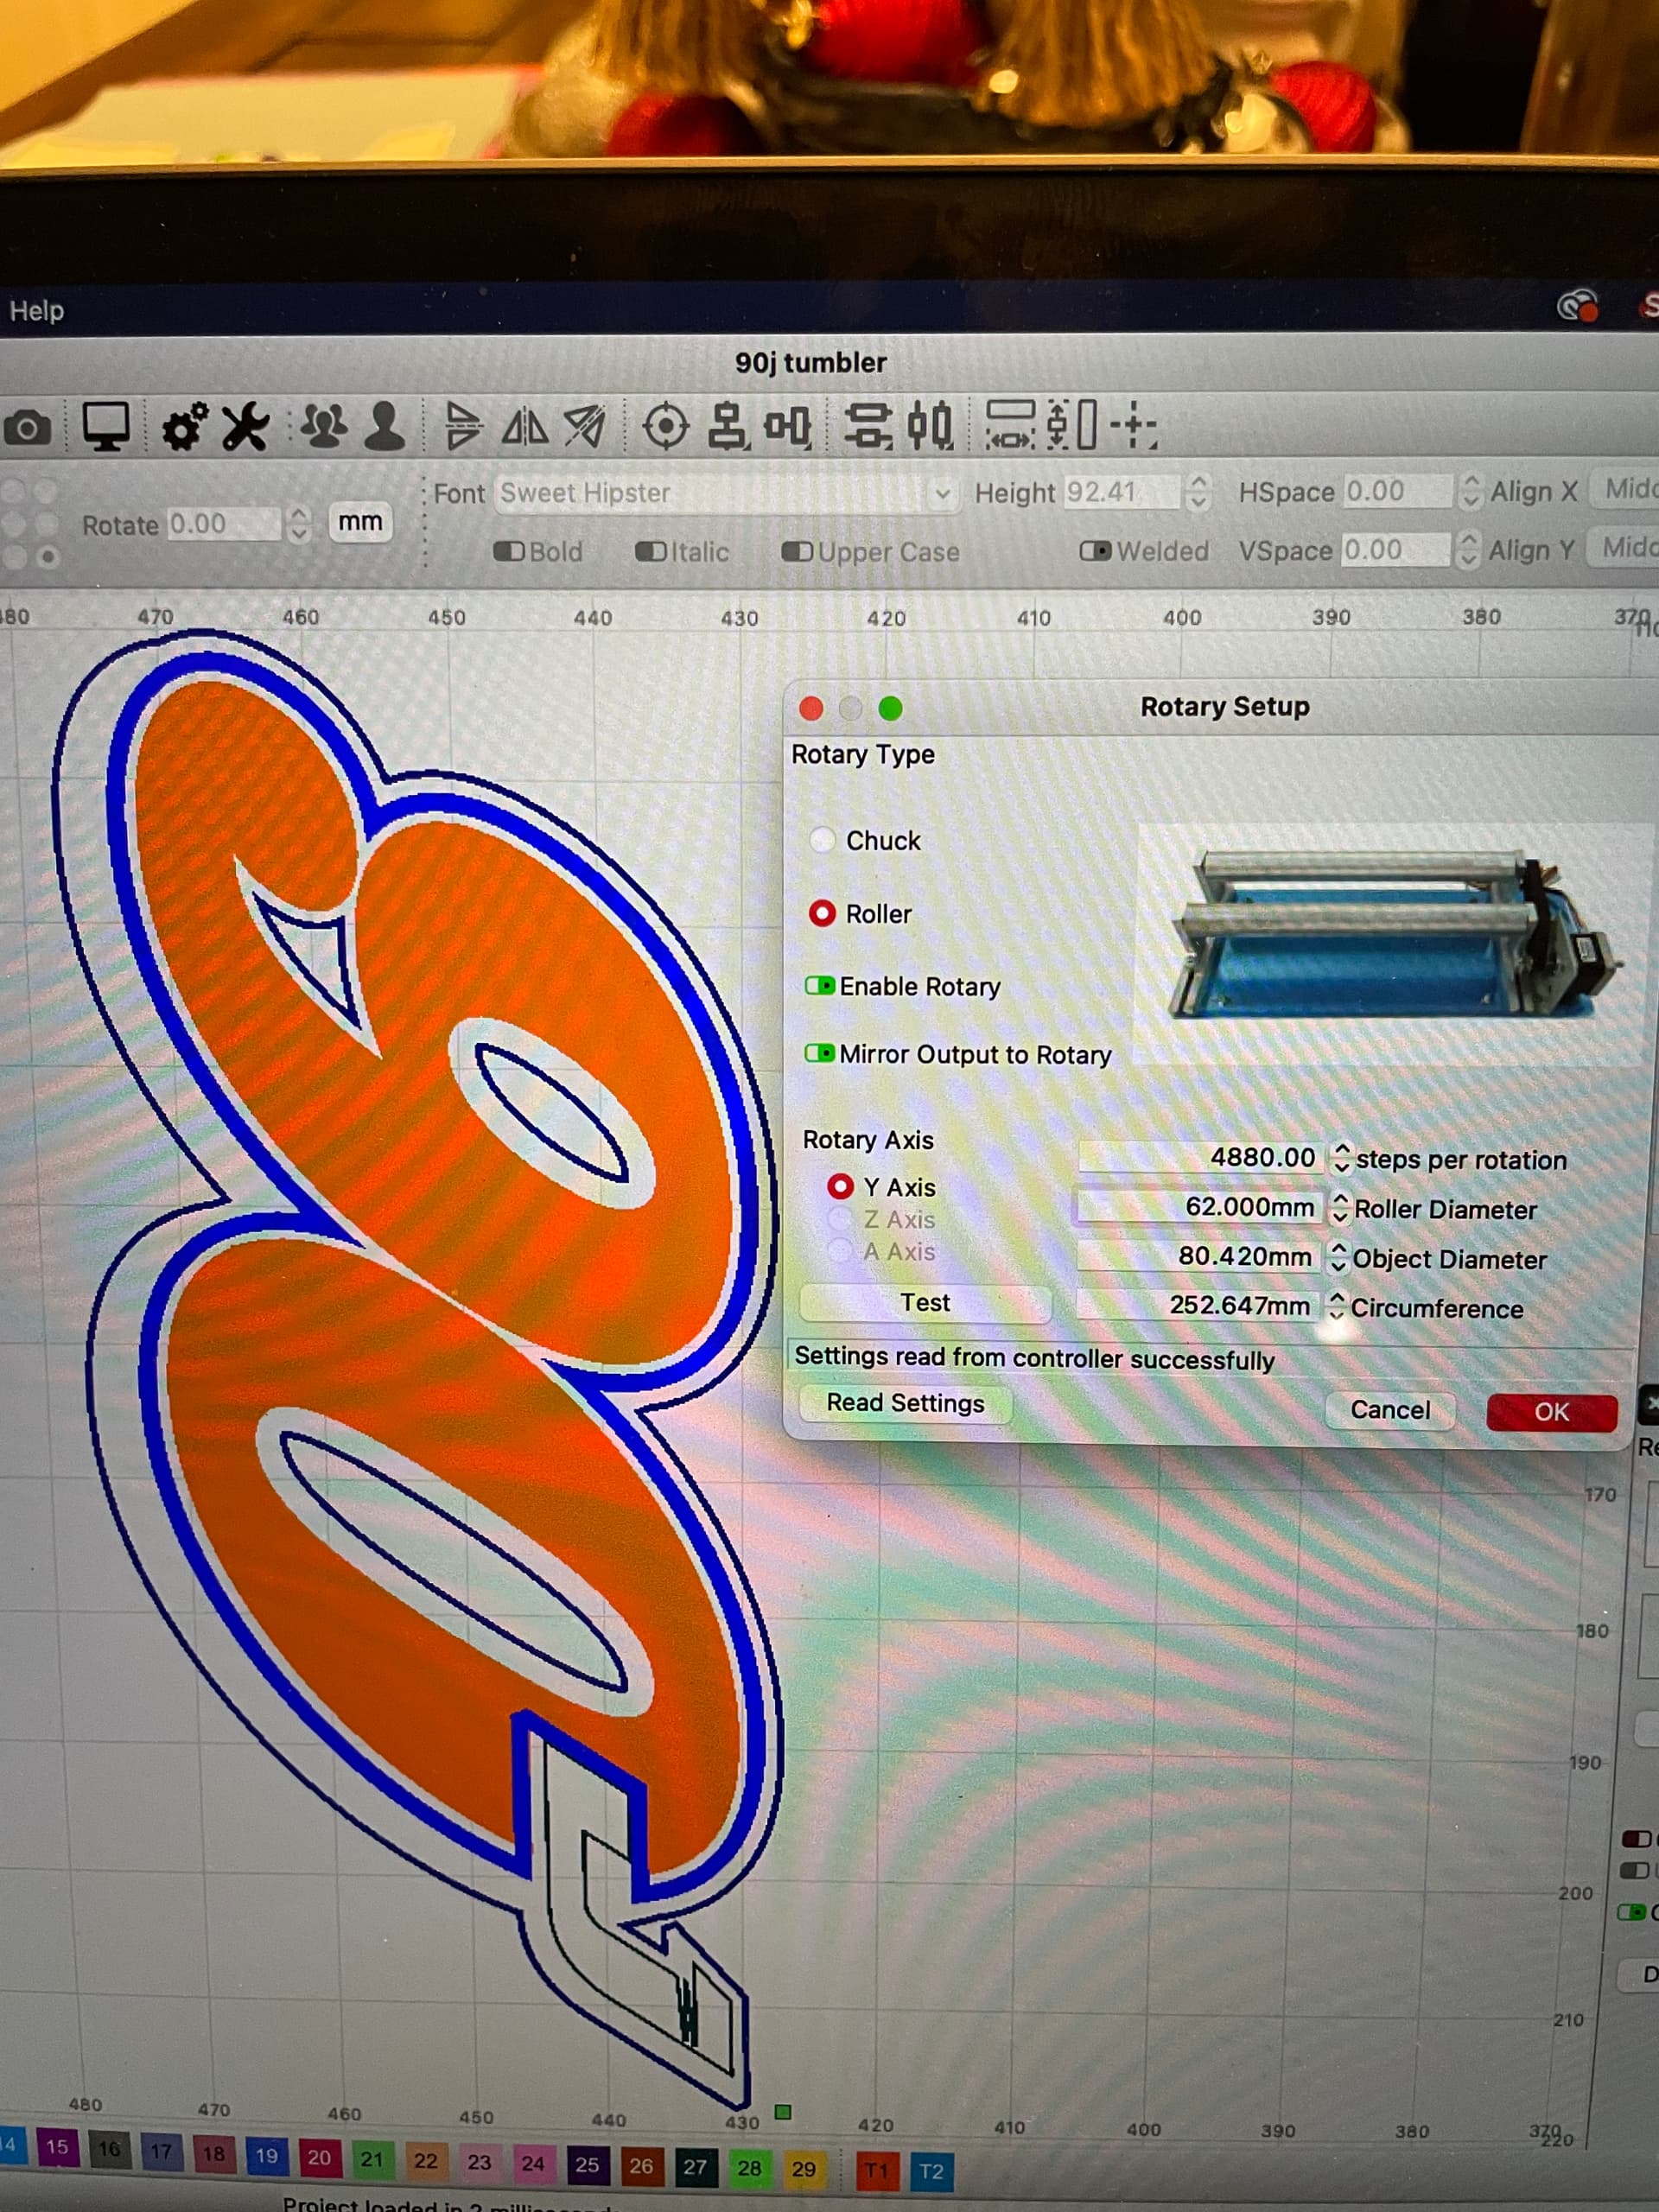
I started out with my steps per rotation at 5000. I dropped it down to 4880 from doing the 100mm test. It was dead on. I am still having trouble. What else do I need to check on?
This is from the manual, did you set these?
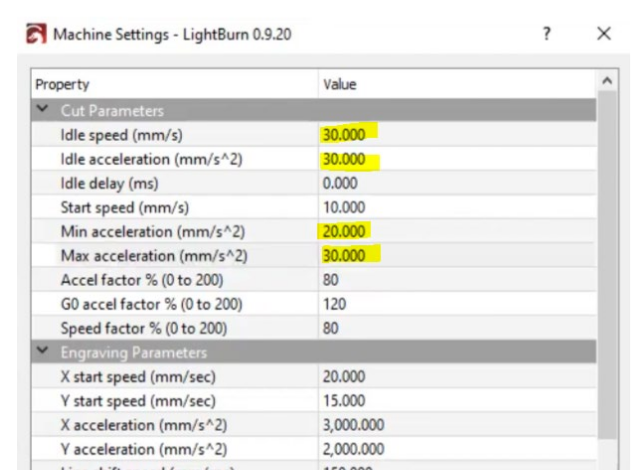
I also changed the Y acceleration in the ‘engrave’ section to 10 or 100 or something much lower than the 2,000, if I remember right. You can fiddle with this, the lower the value the more overscan you will see. I’m suspicious that one of your values are trying to accelerate the cup to quickly.
I’d look but the lps is being worked on, just taking a break at the moment. Don’t want any power to it…
Can you post the .lbr2 file? There might be some answers in how you have it set up…
Just an update on the issue I was having. The reason my image was not in register was because I had to many layers. I changed to one layer and it came out great. I think when the laser went to start another layer the cup must have shifted.
I think, an excellent deduction ![]()
The less you ‘move’ the object the better. That’s why vector engraving is very difficult and the speeds are very limited…
Glad you have found the issue.
Good luck, take care and have fun.
![]()
This topic was automatically closed 30 days after the last reply. New replies are no longer allowed.