Hi all.
How can i pick a specific origin point in lightburn? I have some fairly complicated parts that I engrave, and I need to use a hole that is in the inside of the part as my origin. I cant seem to find a place in Lightburn to select that hole.
Hi all.
How can i pick a specific origin point in lightburn? I have some fairly complicated parts that I engrave, and I need to use a hole that is in the inside of the part as my origin. I cant seem to find a place in Lightburn to select that hole.
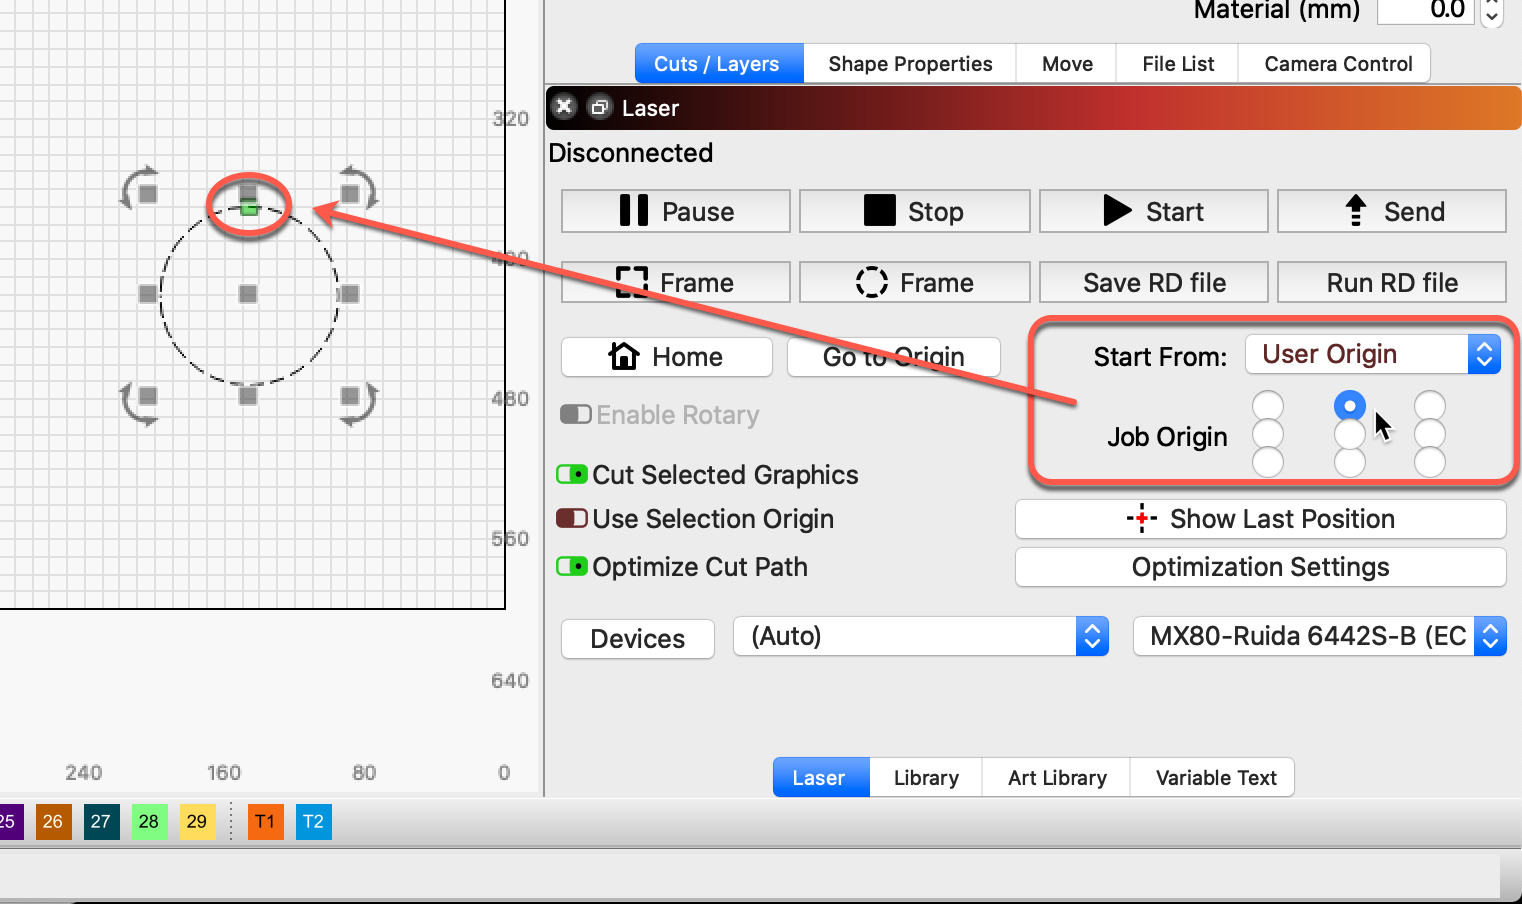
This is worth review, Coordinates & Origin - LightBurn Software Documentation. With further details, we might be able to assist with workflow suggestions. ![]()
yea i have gone though that. I just want to be able to pick a point and use that. I guess the way to think about it for me, since we run a bunch of CNC’s, is i should be able to set my location of origin in the computer then match that up on our laser. Now the location of origin in this case, absolute wont do that, current wont do that, and user wont. It seams that there is no way in lightburn to select a specific location, like say the top of a circle to use as the origin point. unless im missing something?
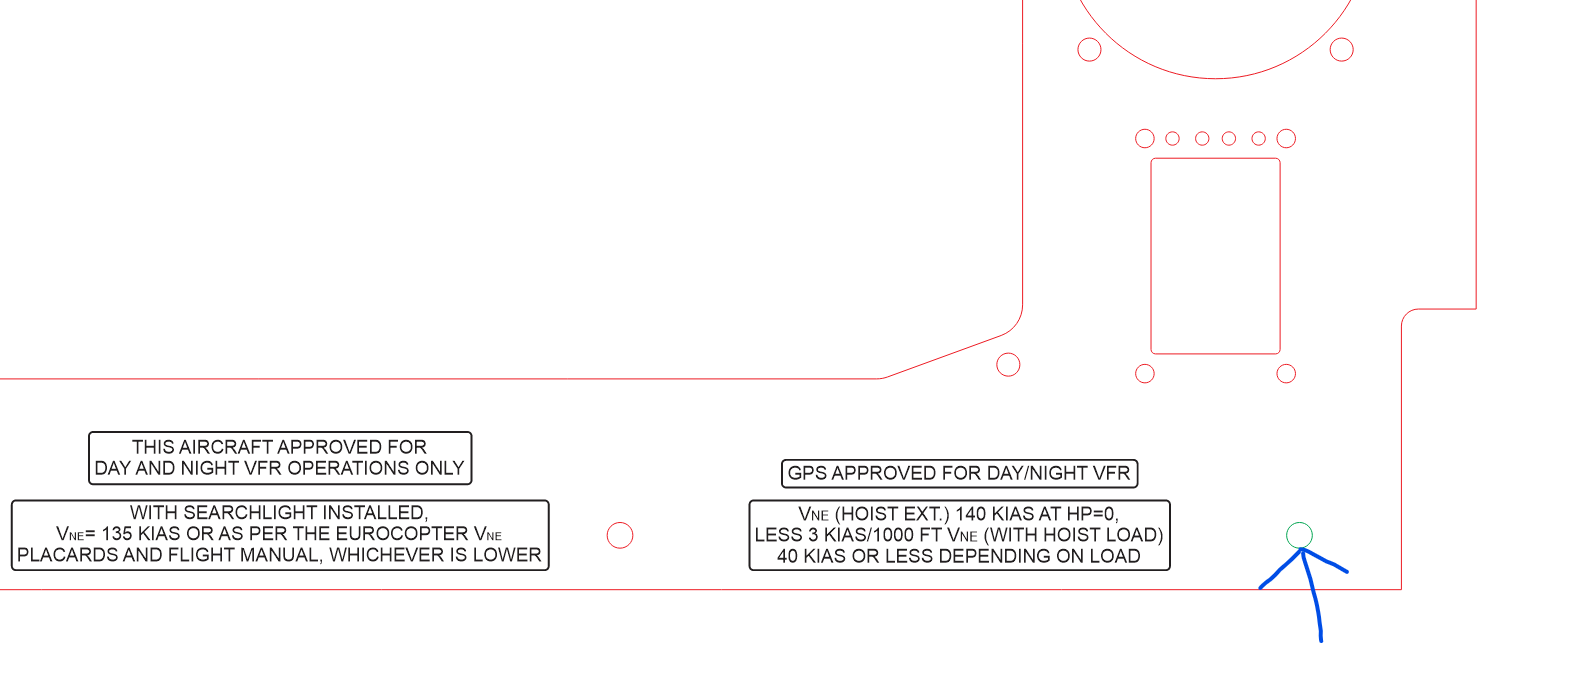
in the image, the red is already cut on our CNC. We powder coat then engrave the black. the hole i am pointing to is an example of where i would want to pick a point, say the top of it. the hole is only a small part of what is in the machine and lightburn.
Ok. Is that a bitmap image or vector work? Why are you wanting to start there? Why does that matter? I am not understanding the issue.
this is a dxf. its matters because we have a lot of parts that are odd shapes, and they are covered with a mask and tape during the engraving, which makes locating a bit hard to locate. So in the case above, i could select the top of the circle, or i would select the bottom corer of the red. if i was to use user origin, and set it to the bottom right, that would not be able to be located since that does not exist in our dxf.
I am not understanding what this means. You can register material sitting on the bed of the laser to make it ‘known’ to LightBurn. Have a look at the ‘Print and Cut’ feature as a way to set a location and process the work based on this knowledge. Could that work for what you are wanting to do? You can choose existing art to align with or add registration marks that are visible or not covered with tape.
Here is our documentation explaining how it works: Print and Cut - LightBurn Software Documentation
This video is addressing a different set of issues using the same tool. You can see how you can register the material with the things you want cut within LightBurn.

Print and cut is a good way, it also takes care of rotational alignment. If you don’t need that, set LB to use absolute positioning, have it move the laser to a specific point (either with the “move here” tool or after selecting a shape with the menu in the “arrange” menu), then move your physical part until it is at the right place. That’s how I re-position the alignment markers on my work area after bumping them out of position when cleaning the machine.
This topic was automatically closed 30 days after the last reply. New replies are no longer allowed.