HELP!
Hey Guys, I am seeking pictures of your Ruida controller if you swapped from a Leetro MPC 6515. I would just like to compare wiring. I tried to follow MyRamond, but he had a different Leetro controller. Then I saw two other controllers and there wiring was a little different.
Pretty sure mine was 6515. Not sure what to show you a picture of, I just did one axis at a time. I think I had to swap wire order in the terminal blocks. But, honestly, just trace the wires from the stepper drivers. They are marked on the driver, and the wiring diagram shows you where they belong on the new controller. after that, its just limit switches and power. My machine is a 2012ish Gweike 1290, FWIW. I’m sure wire colors are going to vary widely…
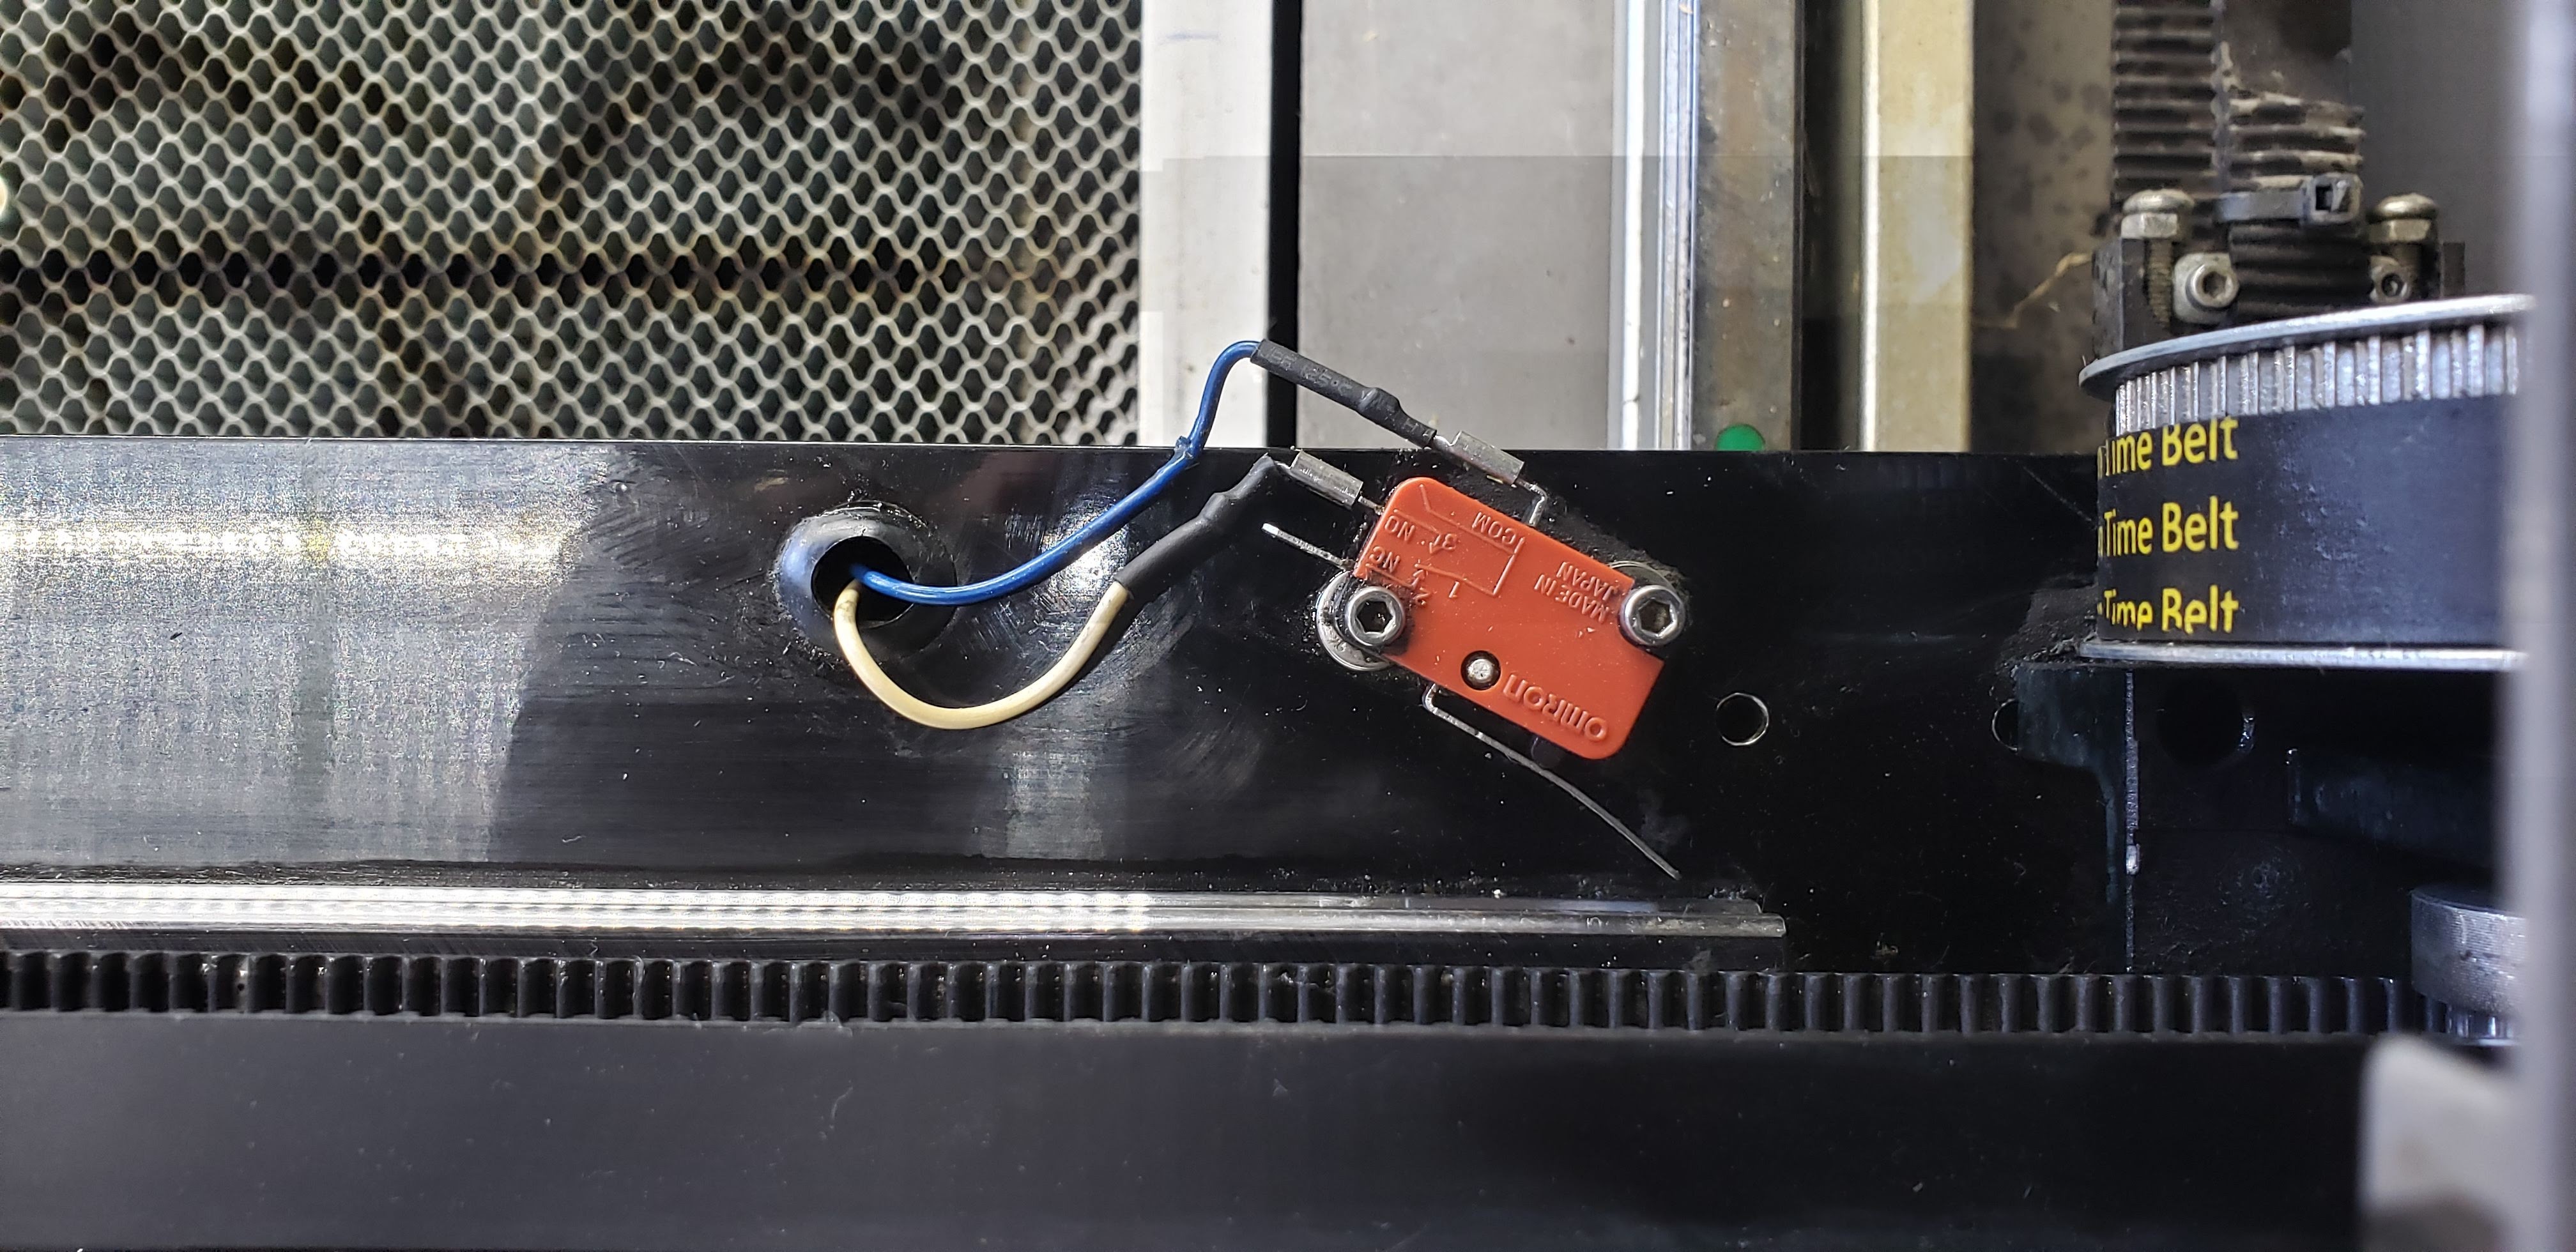
I have all my stepper wires hooked up along with power. I was curios to see what people have hooked up for limit switches. Would like to see picture of your Ruida limit switches.
Fortunately, mine was equipped with limits on x and y from the factory, and the wiring was in palce. I just probed the pins for continuity, and compared the ports on the Leetro. They are simple lever action micro switches.
@DMcLeod Thanks for the info. Mine has the same two limit switches. On the Ruida controller there is a place for limit switches Ground, Limit X- and Limit X+ same thing for the Y axis. That is the part I would like to see a picture of. To me that is three different wires, I only have two.
I currently have two blue wires hooked to the ground. I then have an orange wire going to the X or Y limit -. I then hace a white going to the other X or Y -.
Make sense or am I confusing you more. When I manually trigger either limit switch it lights an led on the Ruida controller, but if the laser head hit one of the edges it just continously keeps banging. With the Leetro controller if it hit an outer limit it would hit a couple times and then quit.
Thanks,
Bruce
Oh. The X+ and X- are for two different limit switches for that axis. Same for the Y. You can have a switch at each end of the gantry, so the controller know when it hits the end. I don’t have 2 per axis, the controller just keeps track of the distance traveled, and stops when it reaches the value programmed in for that axis. It would be useful if you somehow moved the head after the machine homed, without the controller knowing (Crashed into something and jumped a tooth or two. A reset will rehome the machine, though, so I would guess most machines don’t have 2 switches per axis. I think mine are wired to the - side, but I’ll check and post a picture. It might be in your settings too, are the axis’ set to use the limit switches, and are they travelling the right way? If you’ve wired to X-, then as you move the X axis towards the limit switch, the controller should be displaying a decreasing number for the X axis’ position.
Like said before in your other topic you need at least two limit switches in the corner where your machine homes. You need one on the x-axis and one on the y-axis. When hitting these switches, the machine knows where zero (home) is. From there on it can work within software limits and possibly with a second limit switch on the x-axis and y-axis. These are optional.
In terms of wiring: you need to get a GND to the switch and as far as I know a -. Do this for each switch.
So, place the limit switches where your machine homes, or switch the homing position in the controller parameters such that it matches your limit switches position.
Also, if you lack the information you can just loosen the belt and/or pulley and see what the machine does. Manually actuate the switches and see what happens. Be creative
Please show us some pictures of your laser cutter regarding the position of the limit switches and mark the corner where the machine performs its homing. (preferably in the other topic).
@jpjacobs, Thanks JP, I am pretty sure that is exactly how I have it hook up now. I moved my home position to the top left corner and haven’t tested it yet. When I moved it from top right to the top left my files now cut upside and backward. I had that before and corrected it, but I can’t remember what I did. I’m getting there and LightBurn makes it all worthwhile.
Thanks for all your help,
Bruce