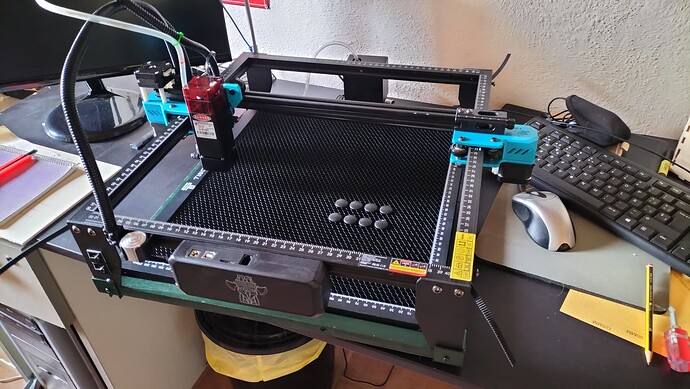
I just got the atomstack laser for Christmas so I’m totally overwhelmed here. Where EXACTLY do I place my honeycom and then the material on the honeycomb. So far I’ve not found anything abouth this. HELP please!!!
For a new user, I would suggest you place the honeycomb under them middle of the cut area until you get the hang of how the program and the laser work together.
On the program - make a small square or circle, select it by dragging a box around the item and press “P” to move it to the middle of the workspace.
On the laser window (mine is on the right hand side, in the stack of small windows) select the FRAME button. The laser head will move around the shape. Try that out for now - see if you can make the laser do some simple tricks before we get too far into the awesome abilities.
Remember, we crawl before we walkm then we walk before we run. Take the learning in small steps.
How about this. Measure the useable area of the honeycomb. Open Lightburn and connect it to your machine. Make a square the same size as your measurement and place it in the center of the screen. Hit Frame and move the honeycomb until it matches up with the outline created with the frame.
Then take a magic marker or pencil and draw around the honeycomb so if you move it or your laser for cleaning or whatever you can just put it back. If its not 100% perfect its not a big deal. I also marked the feet where my laser goes for the same reason
Make a frame. The laser sits on the frame held in place and the honeycombe sits inside. No movement between the two so once the laser is set up it’s permanent. Because I’ve up graded the size, I have a Mk2 version.
Thank you. We will do this!!!
@Mito Has the correct answer, but on my first laser I simplified. Used a piece of plywood and a cutting table - align everything the way you want, screw / CA glue stops for the laser feet and the honeycomb - I used small corner brackets that I had on hand, but could also be scraps of plywood, 3d printed dohickies, etc. This results in a very precise, repeatable, and movable setup.
