someone who knows why this quality is so poor
on the bigger picture.
I have used the same settings on both pictures
speed 70 power 20% grayscale 257 dpi
btw it´s same type of wood popple


This is the original
someone who knows why this quality is so poor
on the bigger picture.
I have used the same settings on both pictures
speed 70 power 20% grayscale 257 dpi
btw it´s same type of wood popple
The original image is not very good resolution, and power of 20% is probably too low. You haven’t said what units your speed is in - it could be 70 mm/sec, 70mm/minute, or 70 ipm… ? If it’s mm/sec that’s probably ok, if it’s mm/min it’s probably too slow.
Sorry Sir
the speed is 70 mm/min
What´s the best resolution for this project
70 mm per minute? You should be running at 3000mm/min or higher, 90% to 100% power. I would start with those settings and see how it looks.
Thank´s Oz for the help with this
I have been looking thru several youtube tutorials
and this one he say that the best results is 70mm/min, power at 11%
I´m confused…
The wood I use is poplar
That was likely a 100w CO2 Laser - very different settings than a 2.5w diode. You will need to experiment to find the settings that work well for your system, or find users with the same hardware as you and ask what their settings are.
Sounds to me like he says 70mm/sec in that video, not 70mm/min.
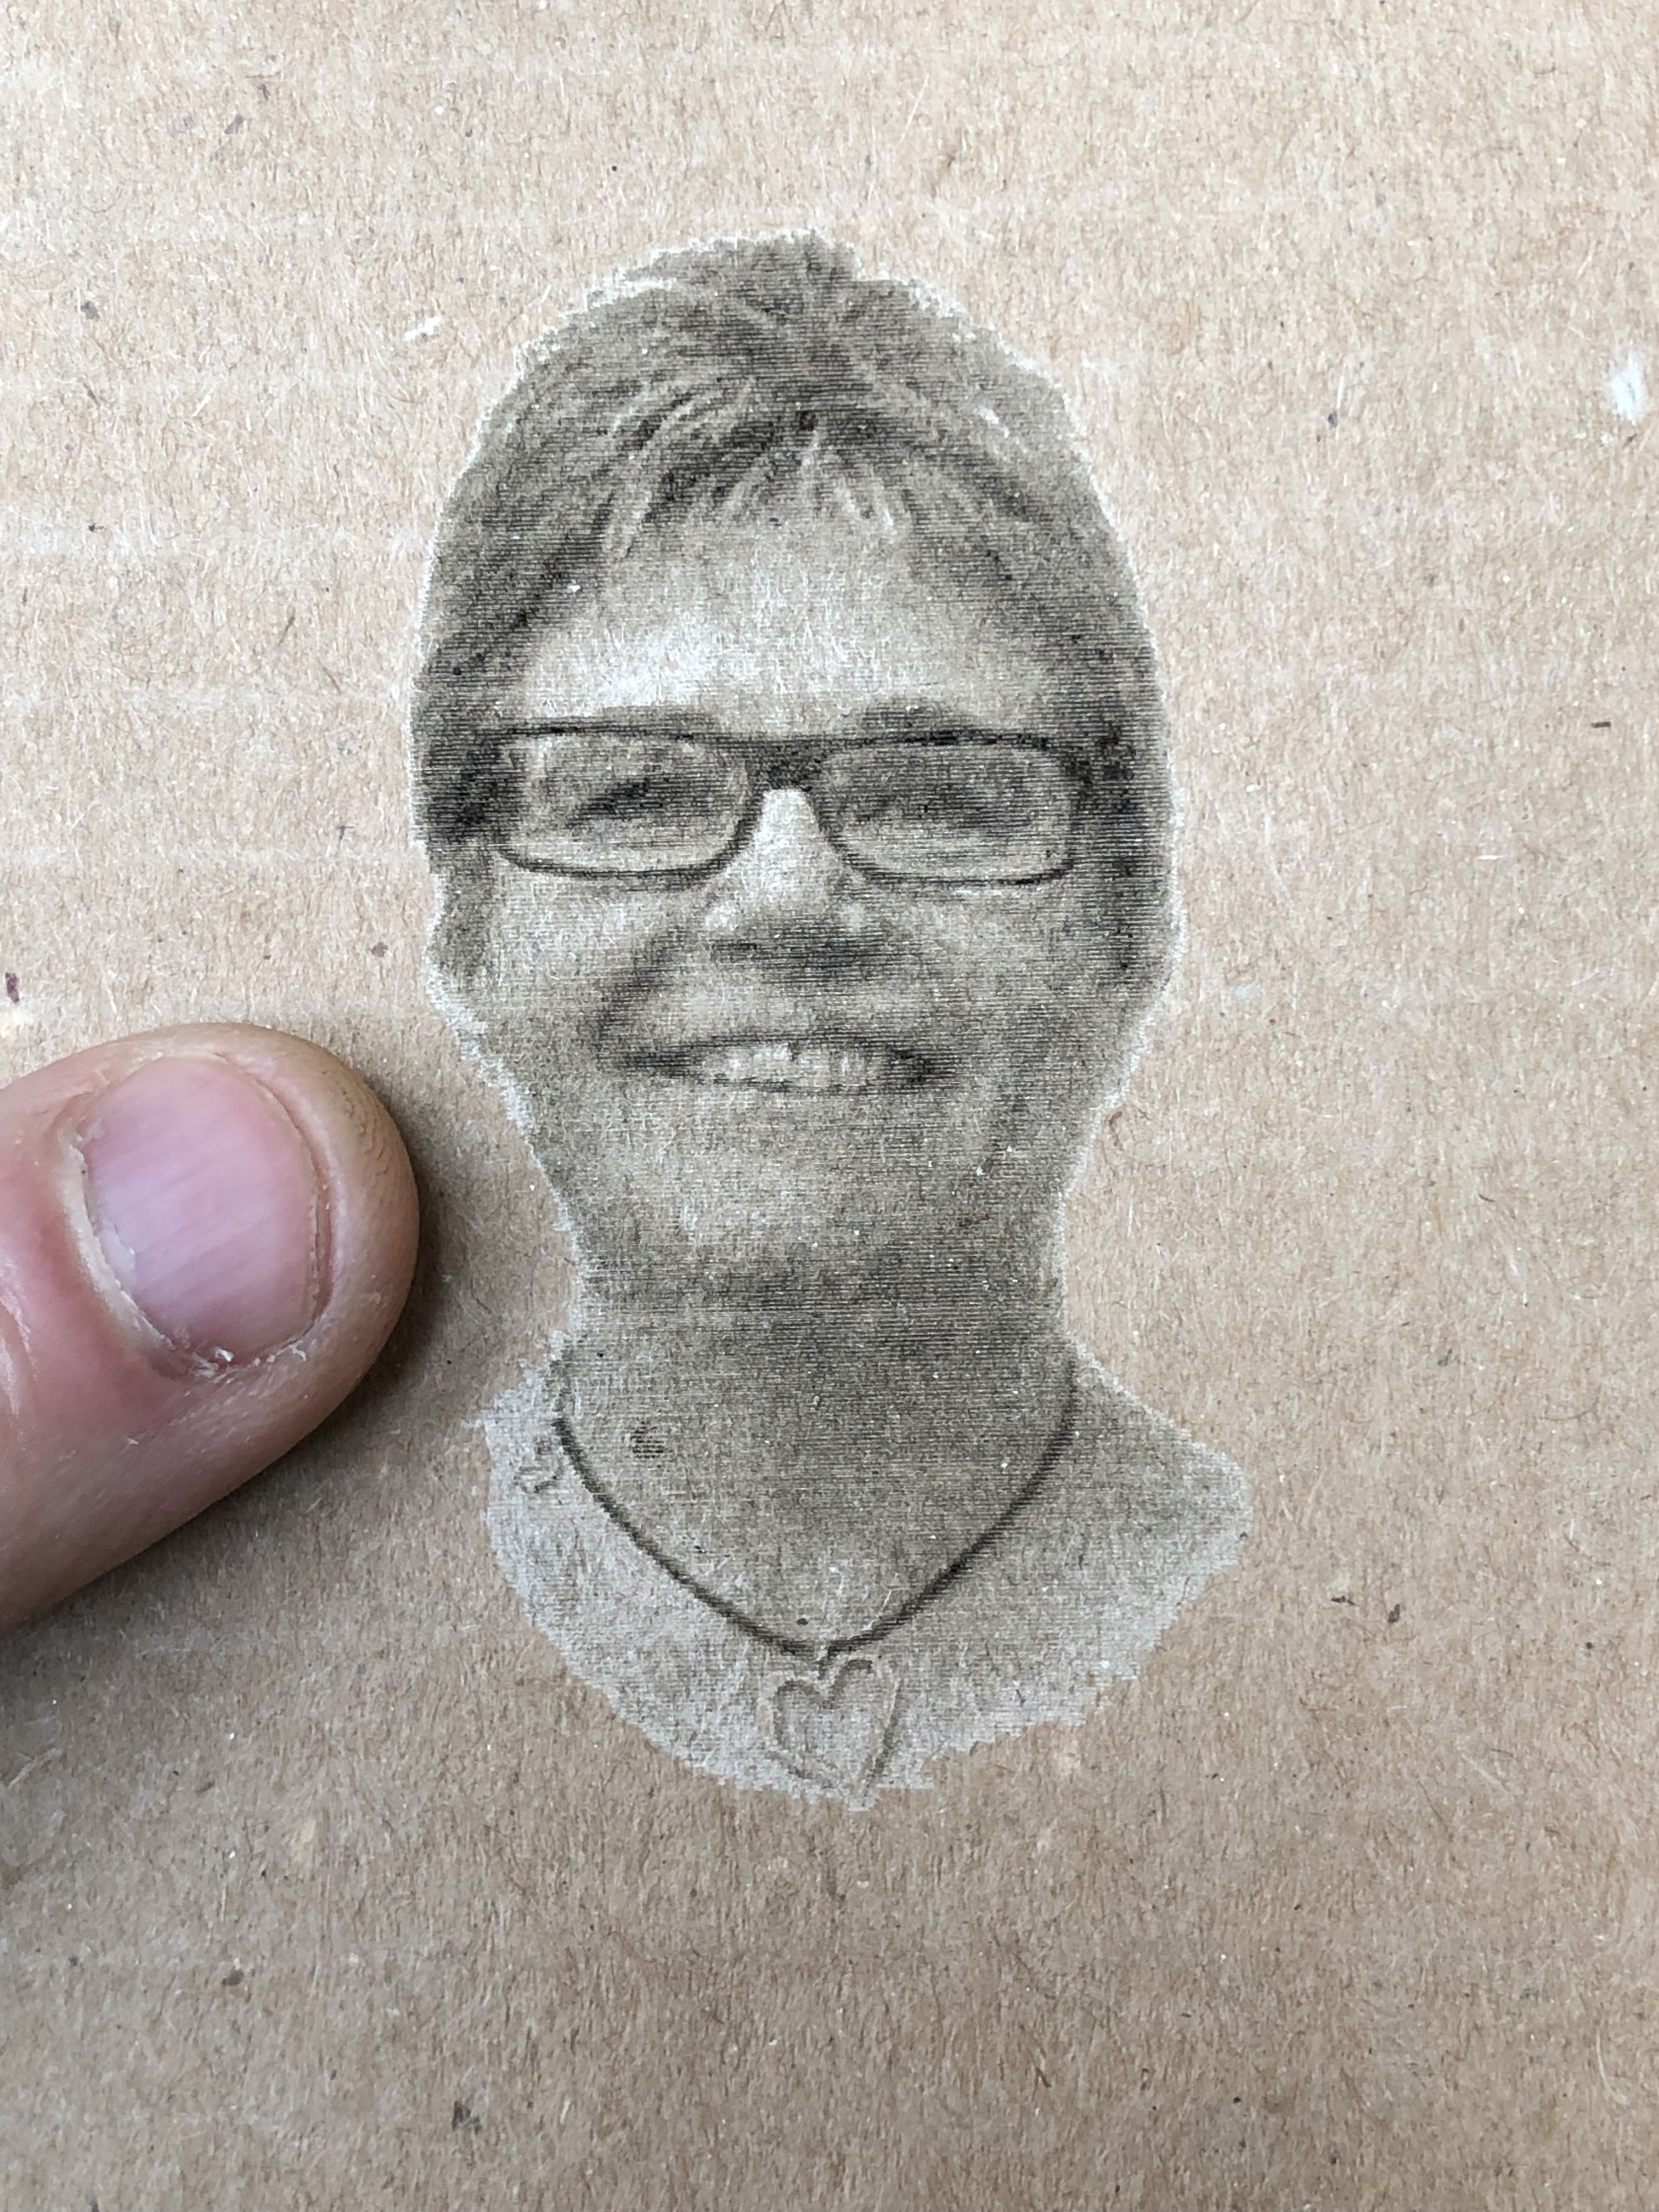
Here is a new resulution of the picture it´s in 300 dpi
But it still burning to dark
can anyone help me thru this please
You’ve just taken the same picture and adjusted the DPI setting. This is not the same as finding a picture that is higher resolution and contains more detail.
Your image is also very dark to begin with - for example, if you look at the teeth, they are quite gray instead of white.
By making simple adjustments to the Contrast and Brightness controls in the Shape Properties window you can bring the details out more, which will help.
You have also said in another post that you’re running your diode very slowly and at 11% power. Don’t do that - Run it at 100% power and adjust the speed to get the best burn. If you are using an older GRBL controller, it has 8-bit PWM, meaning only 256 power levels. By using 11% power, you will only get 11% of 256 output power values, or about 28 levels of gray, which isn’t enough for good shading, and if the diode doesn’t turn on at lower levels you’ll lose even more.
This is your image, 30% Contrast, -16% Brightness, 0.9 Gamma, 70mm/second, 70% power, 254 DPI, Grayscale, using a 4w diode on very poor quality packing cardboard.
Thank´s Oz
I have the 1.1f wich I was recomended to upload.
And have the Jtech 3.8W laser
You mention
“By making simple adjustments to the Contrast and Brightness controls in the Shape Properties window you can bring the details out more, which will help.”
I have photoshop
Are you referred to the Lightburn or other program.
I really appreciate your help.
Would you like to take a look on the original picture ?
All the adjustments I mentioned were done in LightBurn - I just copied / pasted the picture posted in the forum directly into LightBurn, selected the image, adjusted the properties in the Shape Properties window until the image looked better, set my settings and pressed start. You are looking at the result of the first attempt. With more tweaking it could get even better, but nothing I do on my side will find the correct settings for your laser - you have to experiment to find what works.
Super great thank´s Oz
I look into that tomorrow
and give you feedback
Should I use the settings you mentioned above ?
Sorry I am such a beginner and stupid
Not stupid - It just takes time and practice, that’s all. The laser isn’t as simple to use as a printer, and different materials will take different settings to get an image to look right. There’s a learning curve, and everyone goes through it - do small test images with different settings until you find something that looks like it’s getting you the detail you want, then scale it up, and change only one setting at a time until you get a feel for what is changing, and how it’s affecting the final result. You’ll get there!
For your system, the settings I used above are probably a good starting point (the power, speed, and DPI values). For things like brightness & contrast, every image will be different.
Thank´s for supporting me.
I have tried a several settings, and gone thru
a loooots of tutorials, but not get the results that is good enough.
I need to get this done
before I order the program
Oz
I have tried a numbers of settings but non of them is acceptables.
Where can I find examples that I can try, to see what´s best for this one
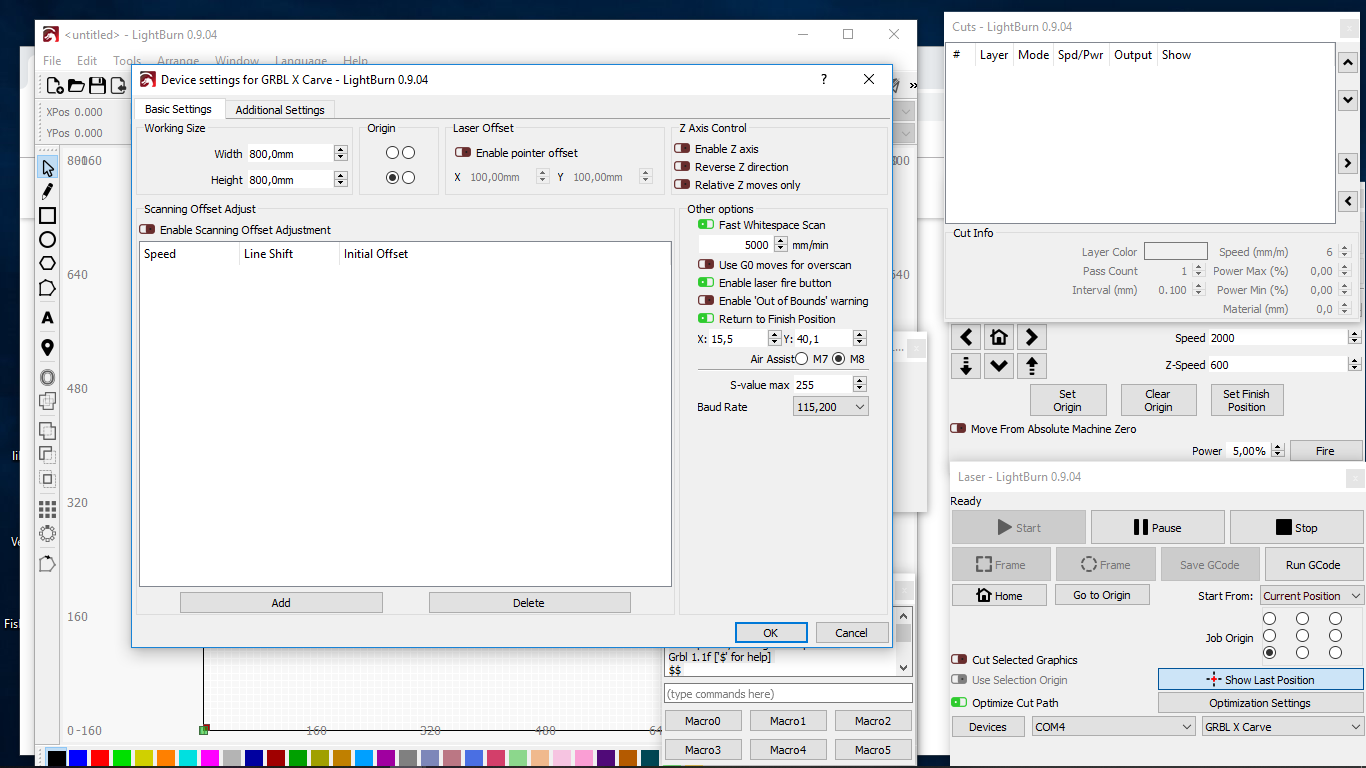
Let’s look at something else first: what are the settings for your GRBL controller? Type $$ in the console and press enter, and copy the output here. Then go to Edit > Device Settings in LightBurn, and post a screen shot of those. It’s possible your laser is not set up properly.
Waiting for connection…
Port opened, waiting for response.
Grbl 1.1f [’$’ for help]
$$
$0=10
$1=255
$2=0
$3=4
$4=0
$5=0
$6=0
$10=115
$11=0.020
$12=0.002
$13=0
$20=0
$21=0
$22=0
$23=3
$24=25.000
$25=750.000
$26=250
$27=1.000
$30=255
$31=0
$32=1
$100=40.000
$101=40.000
$102=188.976
$110=8000.000
$111=8000.000
$112=500.000
$120=500.000
$121=500.000
$122=50.000
$130=790.000
$131=790.000
$132=100.000
ok
Thank´s Oz for taking the time with me.
You’re welcome. The specific things I was looking for are set correctly - $32 and $30 are often the cause of trouble, but yours are OK.