I received a new Gweike Cloud Pro laser due to a electronic issue. I was previously functional no issue using Lightburn. Calibration was not perfect (not .3 or less), but worked without issue.
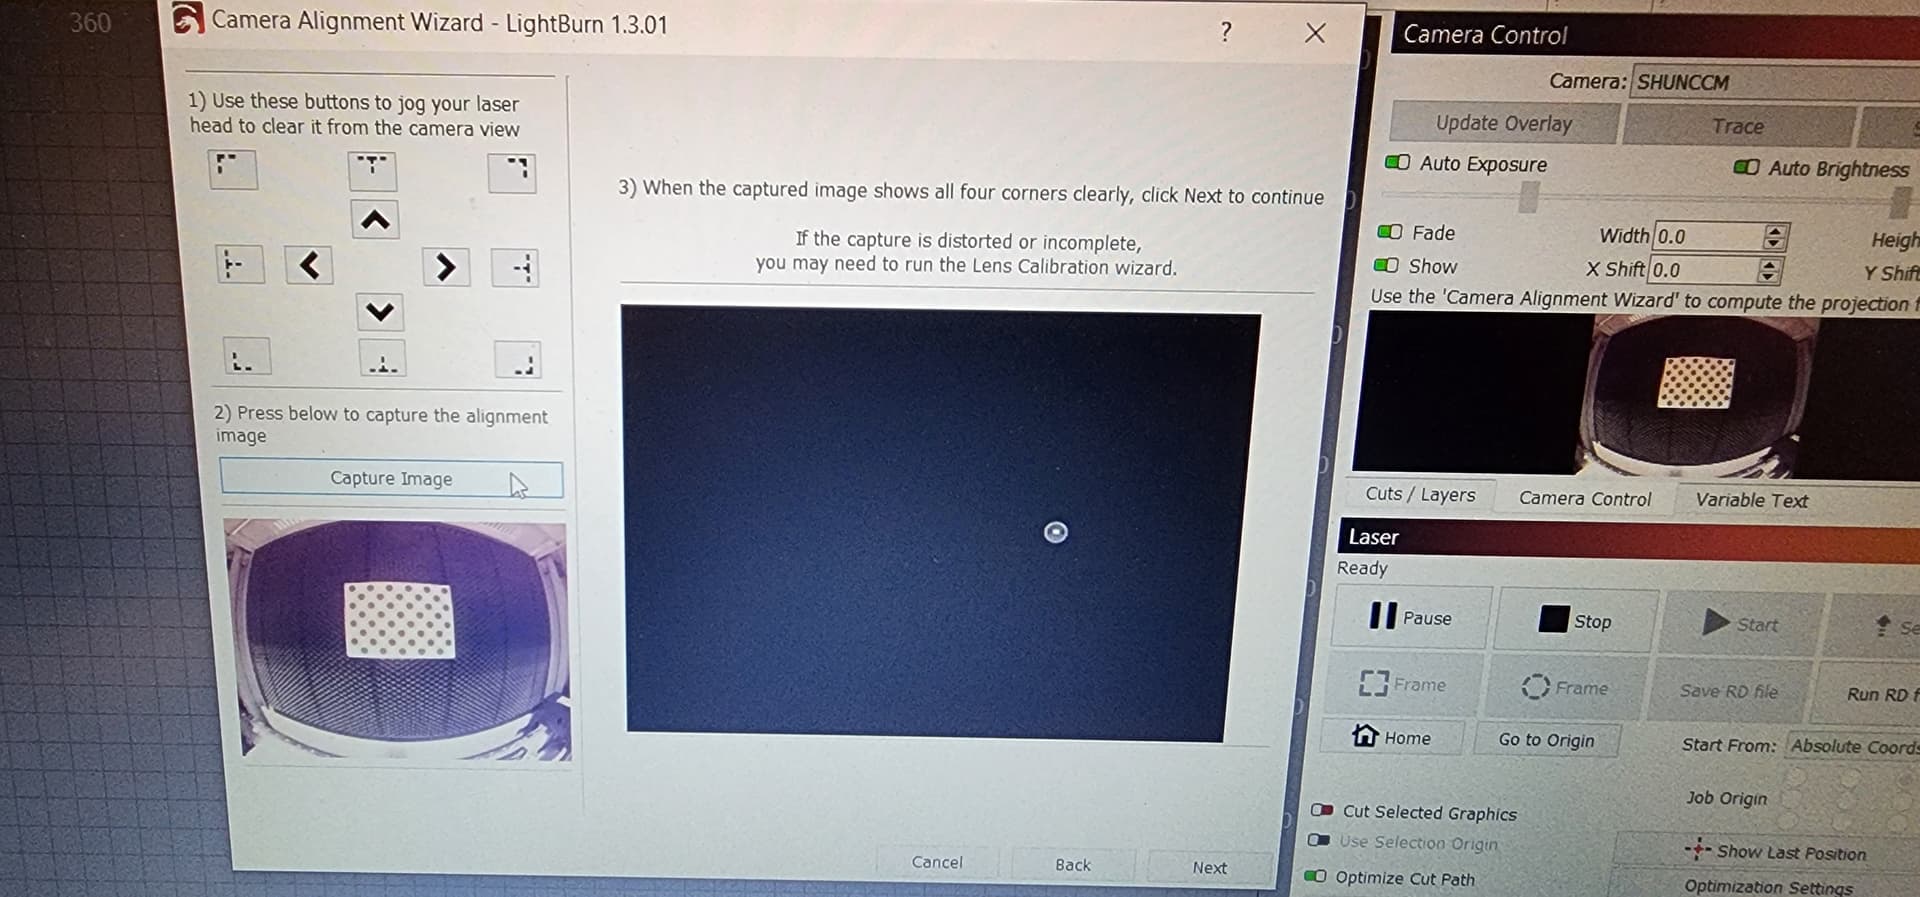
New machine, reset calibration. Completed lens alignment with dots, again, not perfect (~.5-.8). However, this time when I move onto Camera Alignment Wizard, the burn is perfect, but the image is absolutely incomplete/distorted. Re-completed lens alignment three times and still unable to click into targets to calibrate. Unsure what to do here. Cleaned lens…no other lose cable etc. Using Gweike Cloud built in lens.
Attached example of most recent issue when calibrating. Previous were closer, but not even close.
Your use of terminology is throwing me off a bit. To be clear, there are 2 separate and discrete steps to Cameral Calibration: Lens Calibration and Camera Alignment.
To me it looks like your Lens Calibration hasn’t gone well. Suggest you redo that. Make sure you’re picking “Fisheye Lens” as your lens type. Repeat until you get exclusively Great scores.
Apologies for the terminology and appreciate your reply. Yes, concur the two steps. My issue is step 1 completes (dots image), but step 2 appears to think step 1 failed miserably.
Looks like I need exclusively “great” scores, but it appears impossible for me. I move millimeters only to never accomplish great scores. Only ever <1.0 scores after HOURS.
What size do you recommend for the dot image? I have full page and a few smaller. Unsure what one to use. I am using a “letter” size one in this image.
There’s something likely in the setup or environment that’s making this a struggle.
It’s not so much the absolute size that’s important. It’s the relative size within the camera viewport. A few things to watch for:
Try to size the calibration pattern so that it’s slightly less than 1/9 the size of the viewport. Imagine 1 cell of a 3x3 grid. Smaller than 1/9 is probably better than larger in this case. You want the ability to be able to move the pattern if required and too large a pattern will not work if you need to bring the pattern closer to the camera
Make sure the pattern is being printed at the correct aspect ratio, not stretched in any way.
Adhere the pattern to a known flat surface
Focus the camera so that it’s as sharp as possible at focal distance to material as it will be used in production. Try to keep the pattern at roughly this distance and sized accordingly but you can move around if necessary.
When you run through the calibration process, concern yourself only with the score and not the resulting image. Again, you really want great scores, preferably under .2.
As far as environmental conditions:
Try to have as even and bright an environment as possible.
Avoid harsh shadows or overly bright spots. Ideally you’d use diffused scattered light
I assume the lens is immovable and mounted to the machine but if you’re able, remove the camera from the body if that allows you to have more ideal calibration conditions
Remove anything from view that could be mistaken for part of the pattern. Honeycombs are bad but any other dark areas can throw off the process. Try to eliminate anything that gets in the way
The right conditions can be the difference between a relatively easy process and an extremely frustrating one resulting in low scores
Thanks for the great reply. I have been shutting off the room light so the light from the GWEIKE machine is clean - seems to be a very solid light. I will be trying glue and a wood image next try.
I used the same dot image as when it worked fine previously, just this time doesn’t seem to take. Will update as soon as I can.
Still no success, so odd. Calibrated it like the GWEIKE YouTube video suggest with the lid open, very easy to get >.3, but of course it is not accurate. So bizarre that it is so easy when done with the lid open but impossible when closed. Ill read your post @BillieRuben and keep trying
Idea, if we have the same machine, should’nt I be able to use your exported settings? Is it a “thing” for people to pass around default laser camera settings?
Actually, you want lower scores, not higher scores. The lower the better.
The orientation of the lid at lens calibration time is actually unimportant. If you can get the right scores with the lid open that’s fine.
This should work without issue. However, production variation likely means that things won’t line up quite the same between machines. Also, depending on the supply chain and specification there may be multiple camera vendors that are used. I don’t have any specific knowledge in this case but just raising it as a possibility.
@berainlb Thanks for the reply, yes mean <.03. So if I did it with the lid open, and all .3 or less, Then what is my issue now!?! When I send it to burn, it burns an inch or so off from where I drew a line
Remember, lens calibration is independent from the camera alignment process. If you’re getting good scores in lens calibration that should address the issue of distortion correction.
However, the alignment of the camera to the laser head is accomplished with camera alignment.
If you are that far off in alignment then I’d suggest going through camera alignment again.
Can you describe in excruciating detail the process you followed during alignment?
As always, thanks so much for the quality replies. I have been reusing a previously burned camera alignment template but I see now it has a slight bend in it. I think (maybe) this might be the issue. I need to find flat material to re-burn and redo.
This is almost certainly the cause of your issues.
These cannot be reused as it depends on the exact placement of the burns relative to the machine, not relative to the material or camera. By reusing these you’re basically aligning to a floating arbitrary set of locations. You will need to burn fresh markers every time you align unless the markers have not moved.
Thanks all, looks like it was the bend in the MDF. Feel dumb.
Next issue - Focusing. I have Z-axis enabled in lightburn, but do not see where to give it the material thickness. Before my reset, I swear I had a tab once I had enabled the Z in machine settings.
Disable Relative Moves Only under the Z-axis settings in Device Settings. But I suggest you follow @BillieRuben’s guide on this as she’s put some work into sorting out some common issues.