Can someone make me understand where the disconnect in my brain is? I have messed around with a few settings and here is what i am noticing. When i go into a new project of lightburn and I pull in a picture, i then go into my settings and tinker with speed and power. Like right now, im trying to burn an image onto a piece of wood. Its thin wood and each time i set the power low to (in this example) 8%, i watch my ammeter and it never climbs above 0. The laser portion says that it is turning on and off as needed, but there is no mark on the board whatsoever. Then, i i set the power to 100%, and then go into shape property and set that to 8%, an image appears (though completely washed out, 0 definition to it). The ammeter bounces from 0 up to almost 5 mA. What is the difference here and what gives? Why is tue image so washed out. Any hoter and i might burn through the wooden piece, any lightwr and it goes from washed out to faded
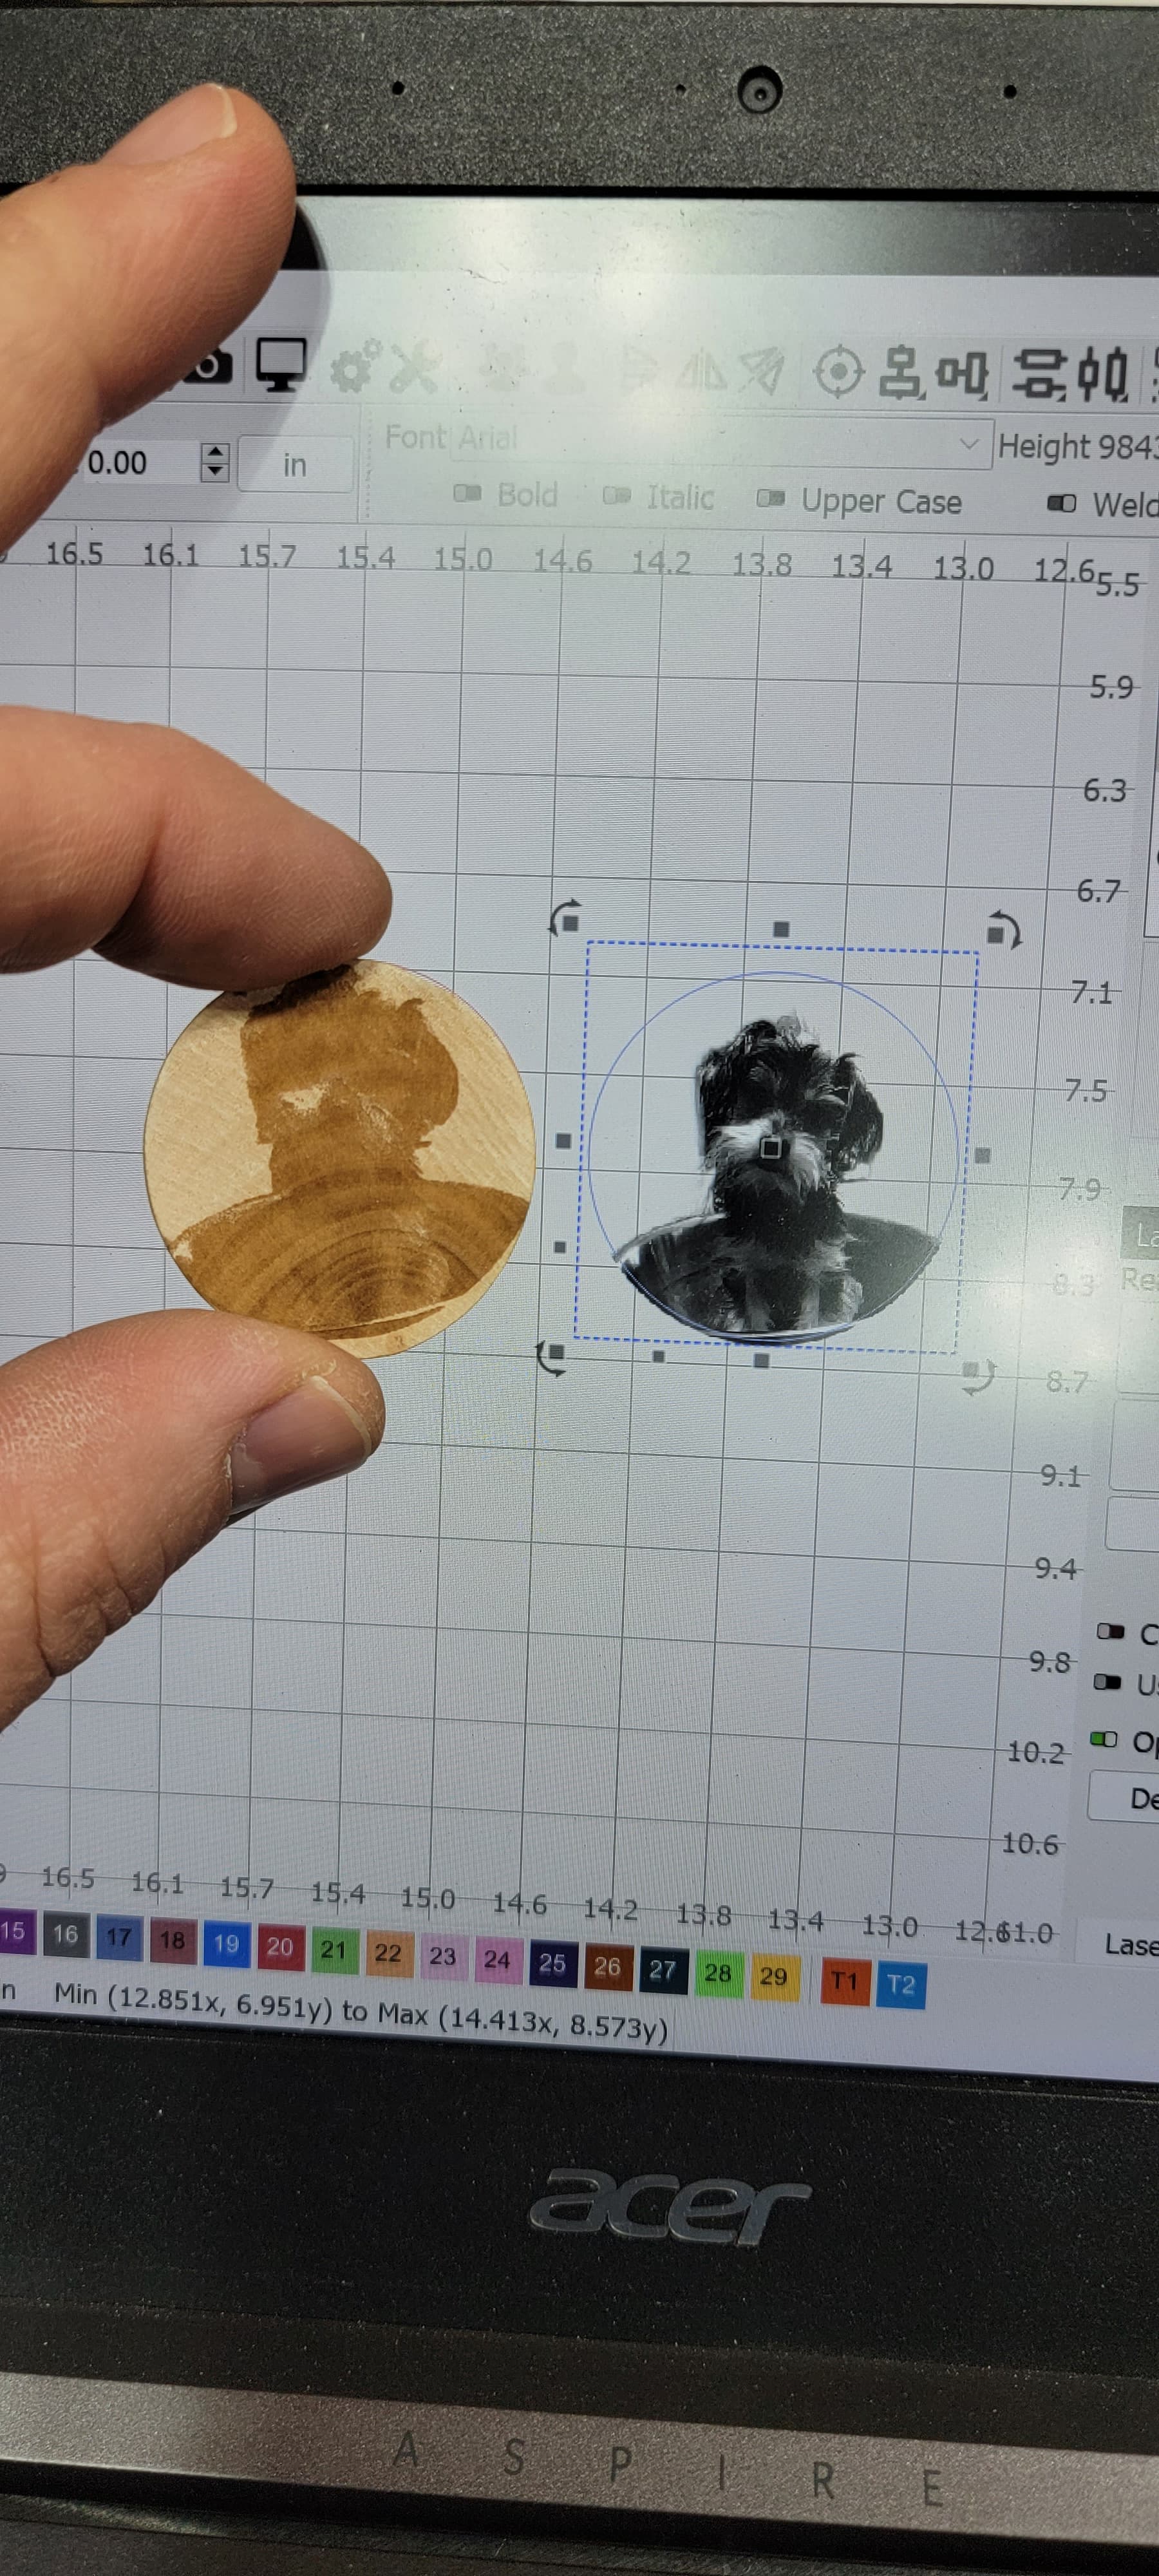
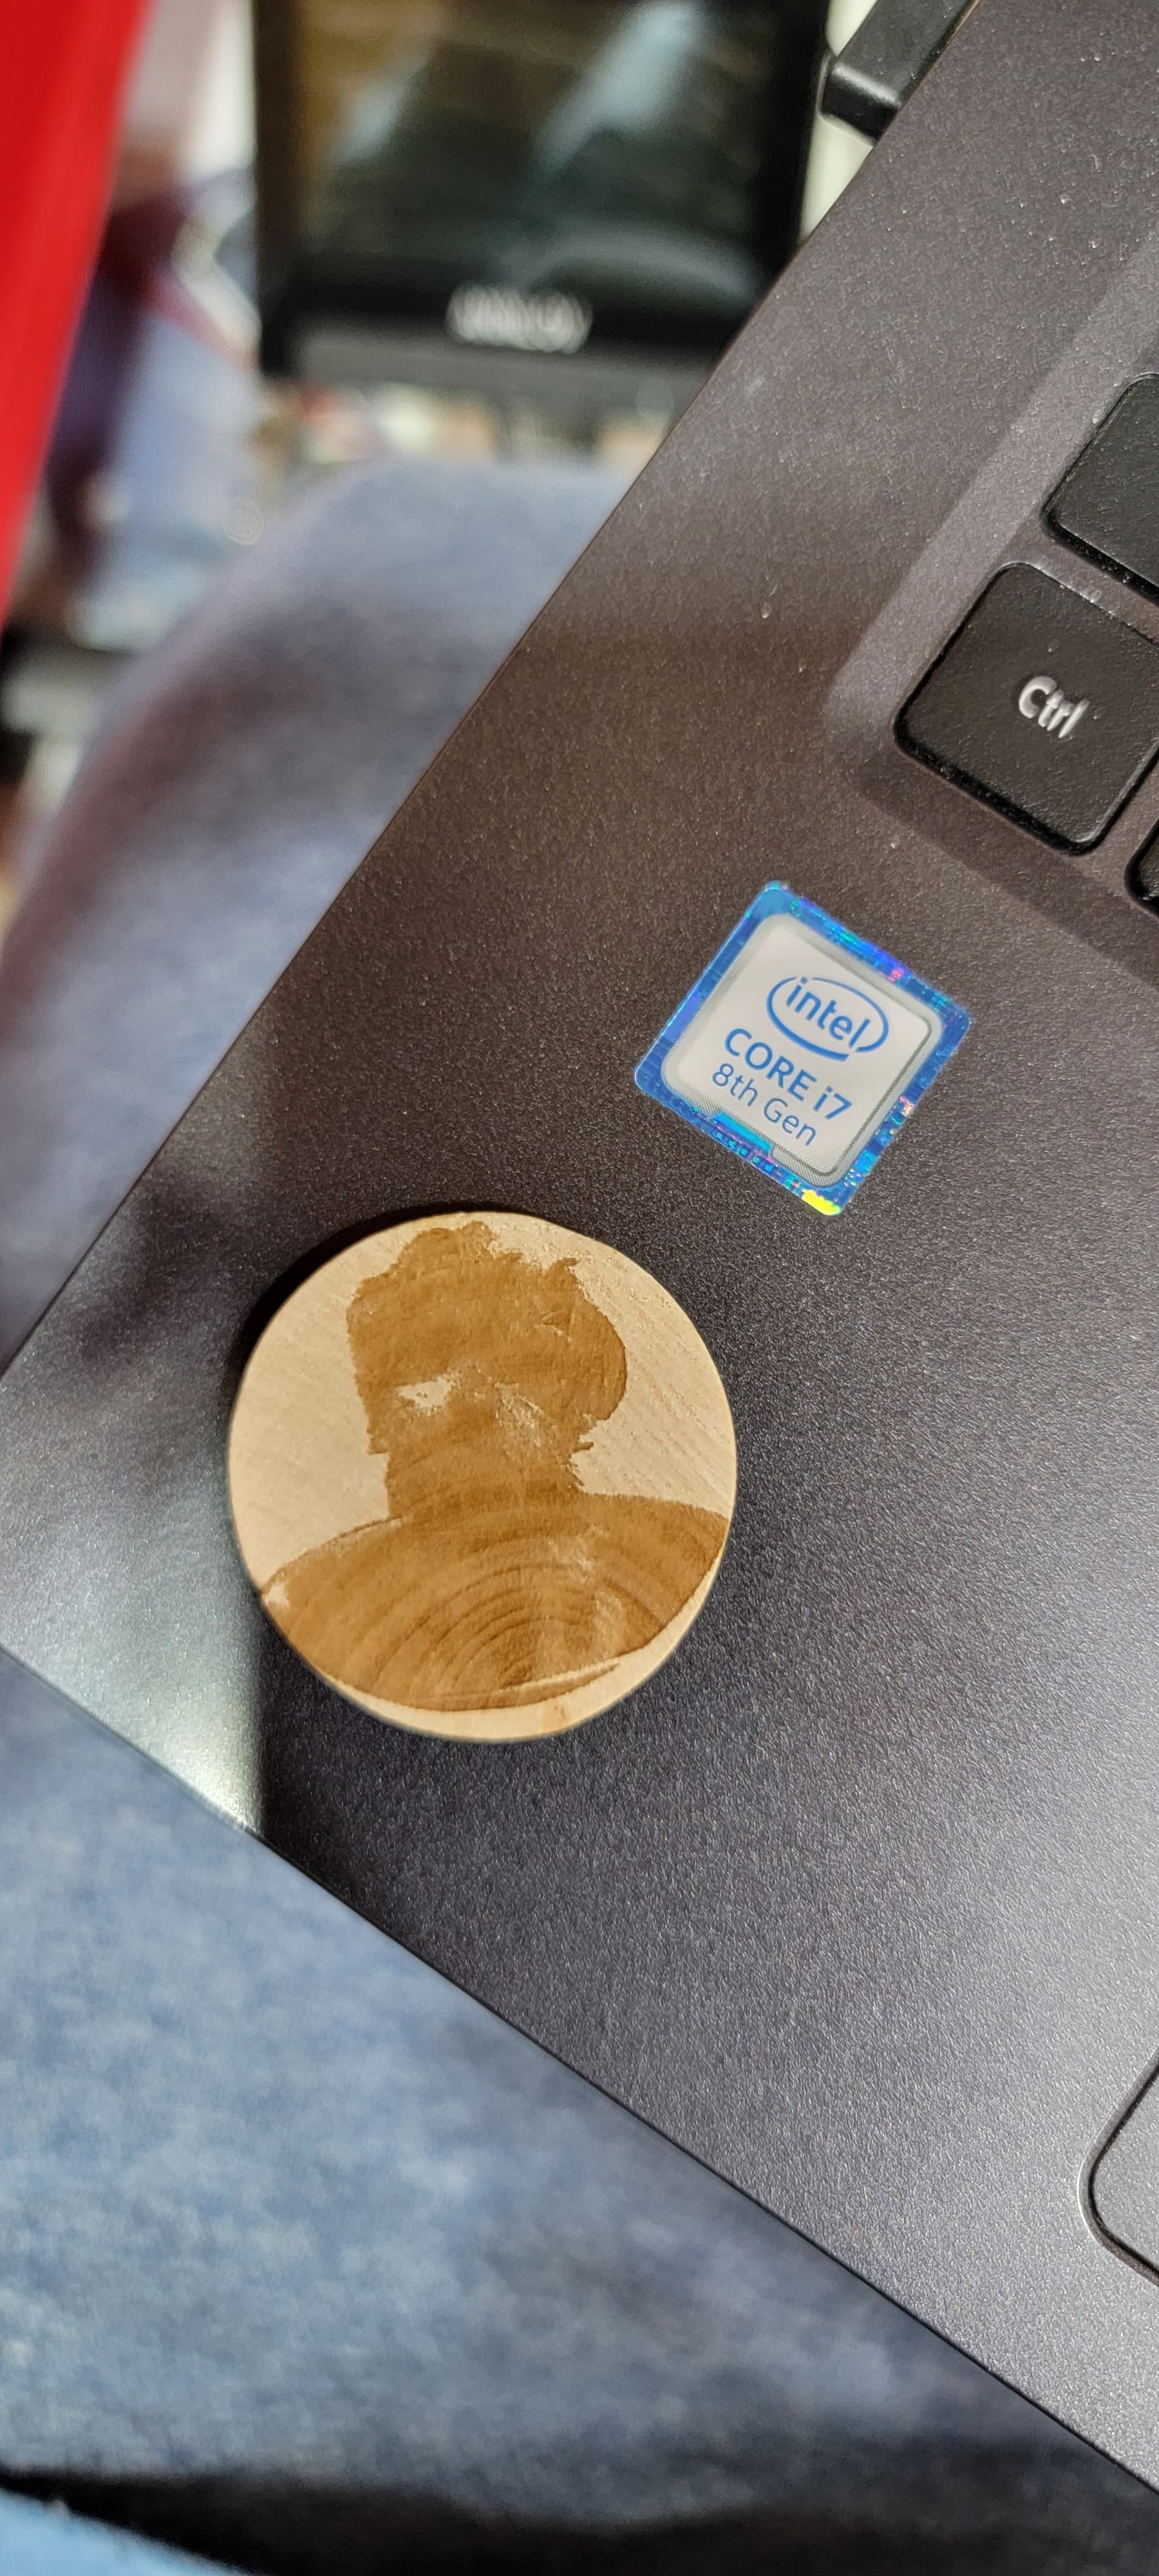
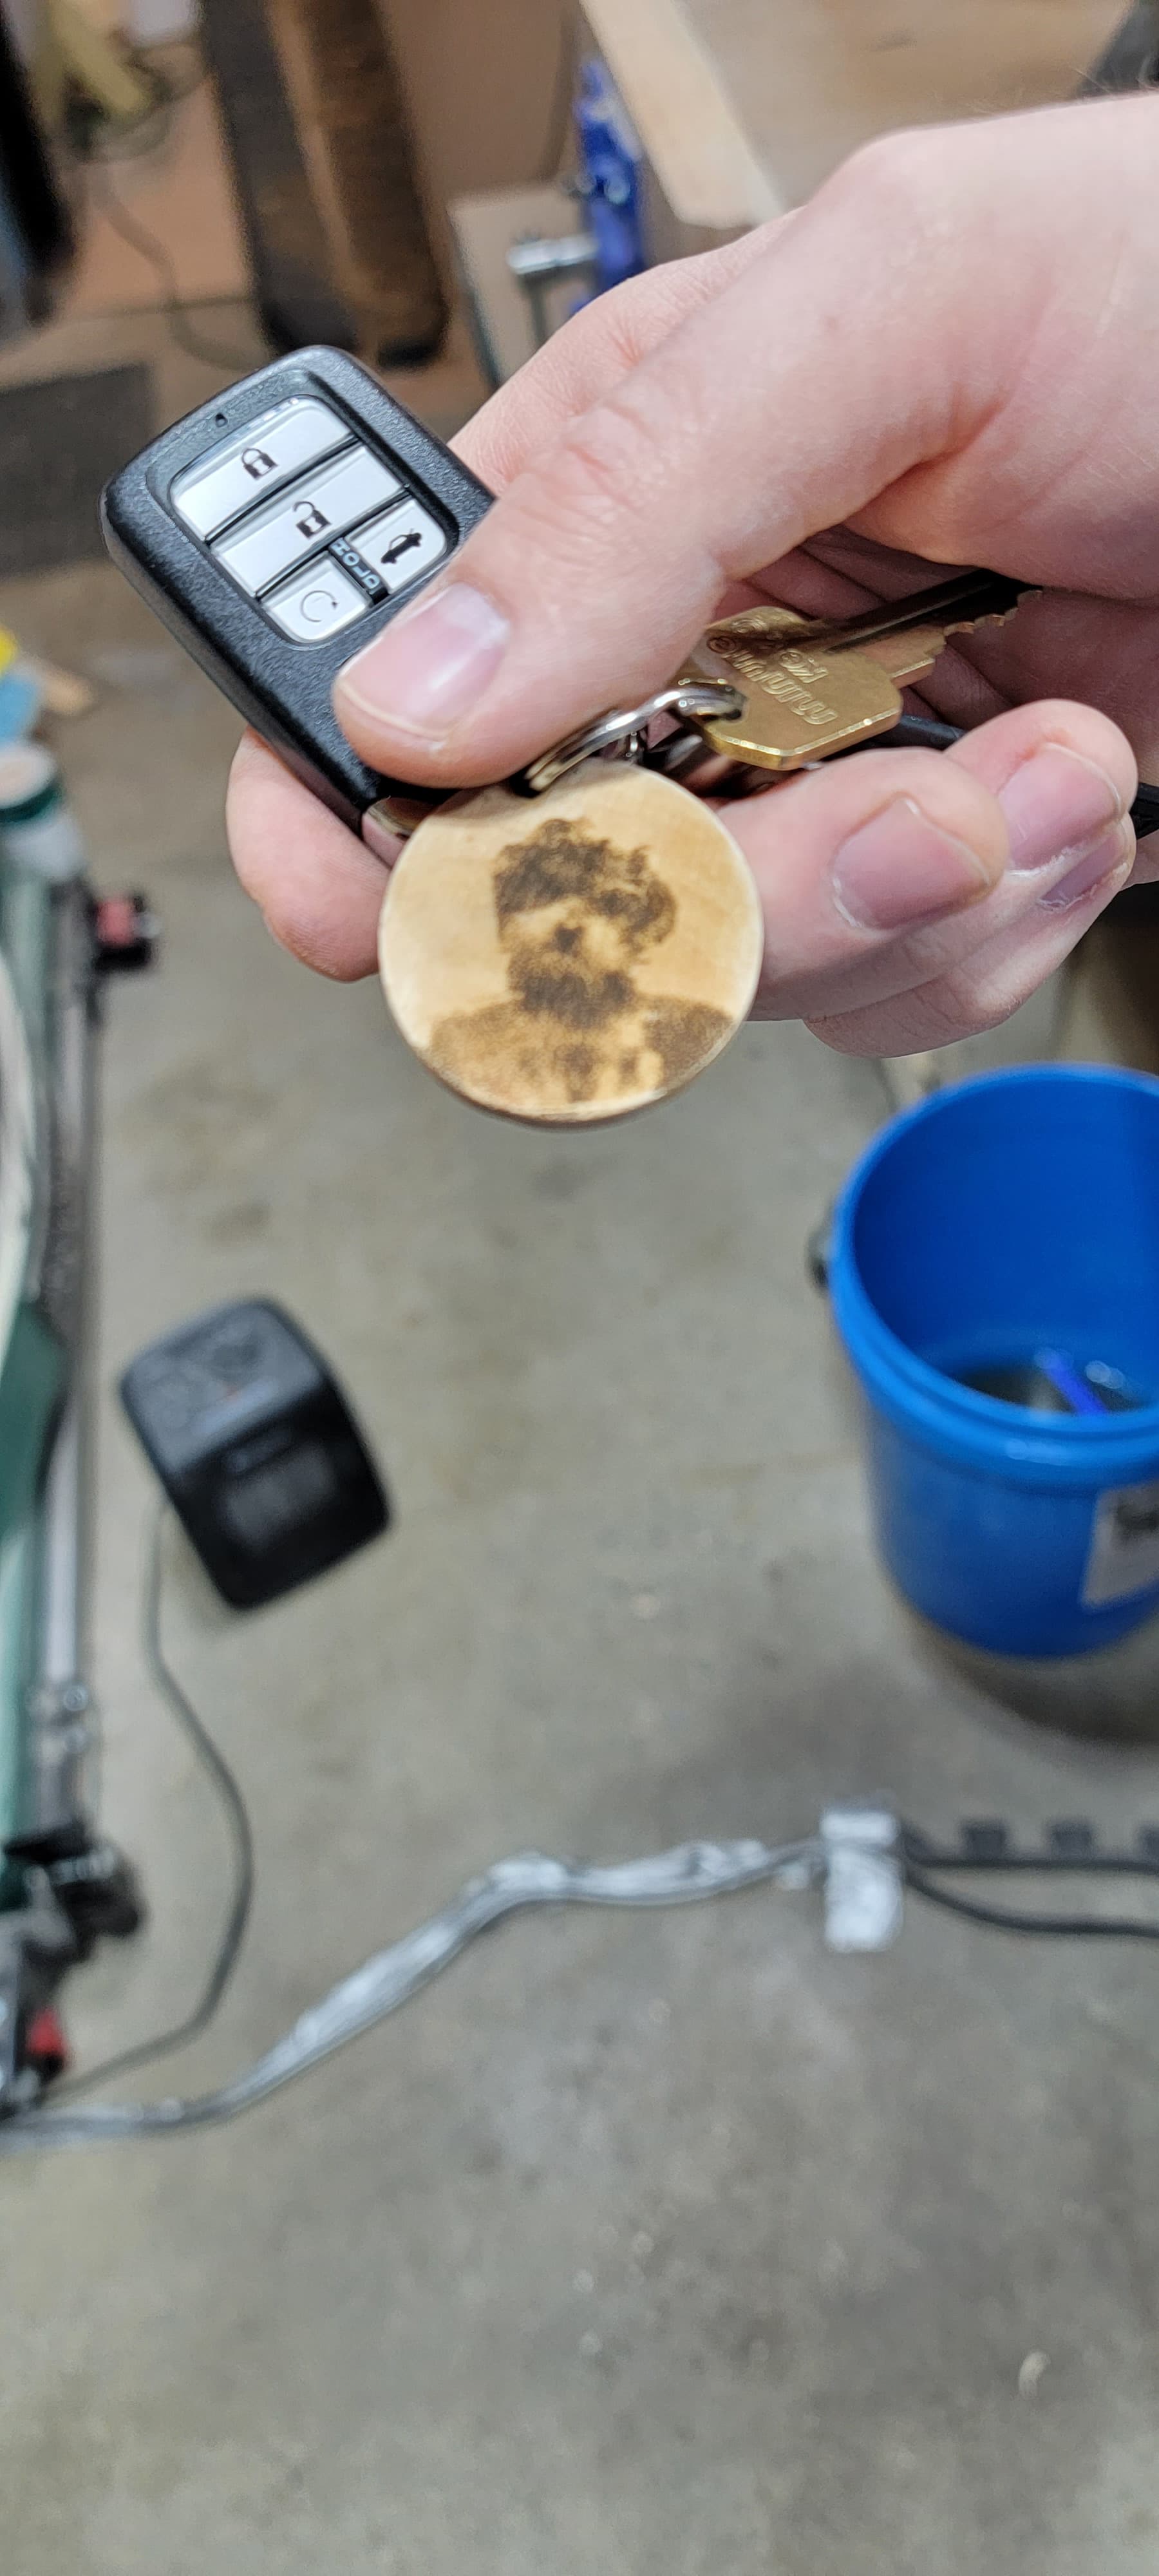
The included pictures are the same piece. I was holding it up fir reference. The image is almost topographical, in that it has hills amd valleys created by the laser. I am trying to eek down on the output while still getting a dark burn. Is that not possible? It almost seems the minimum temperature that the laser runs at is almost too hot for this material. I wonder if i could do several light faster paths to achieve this
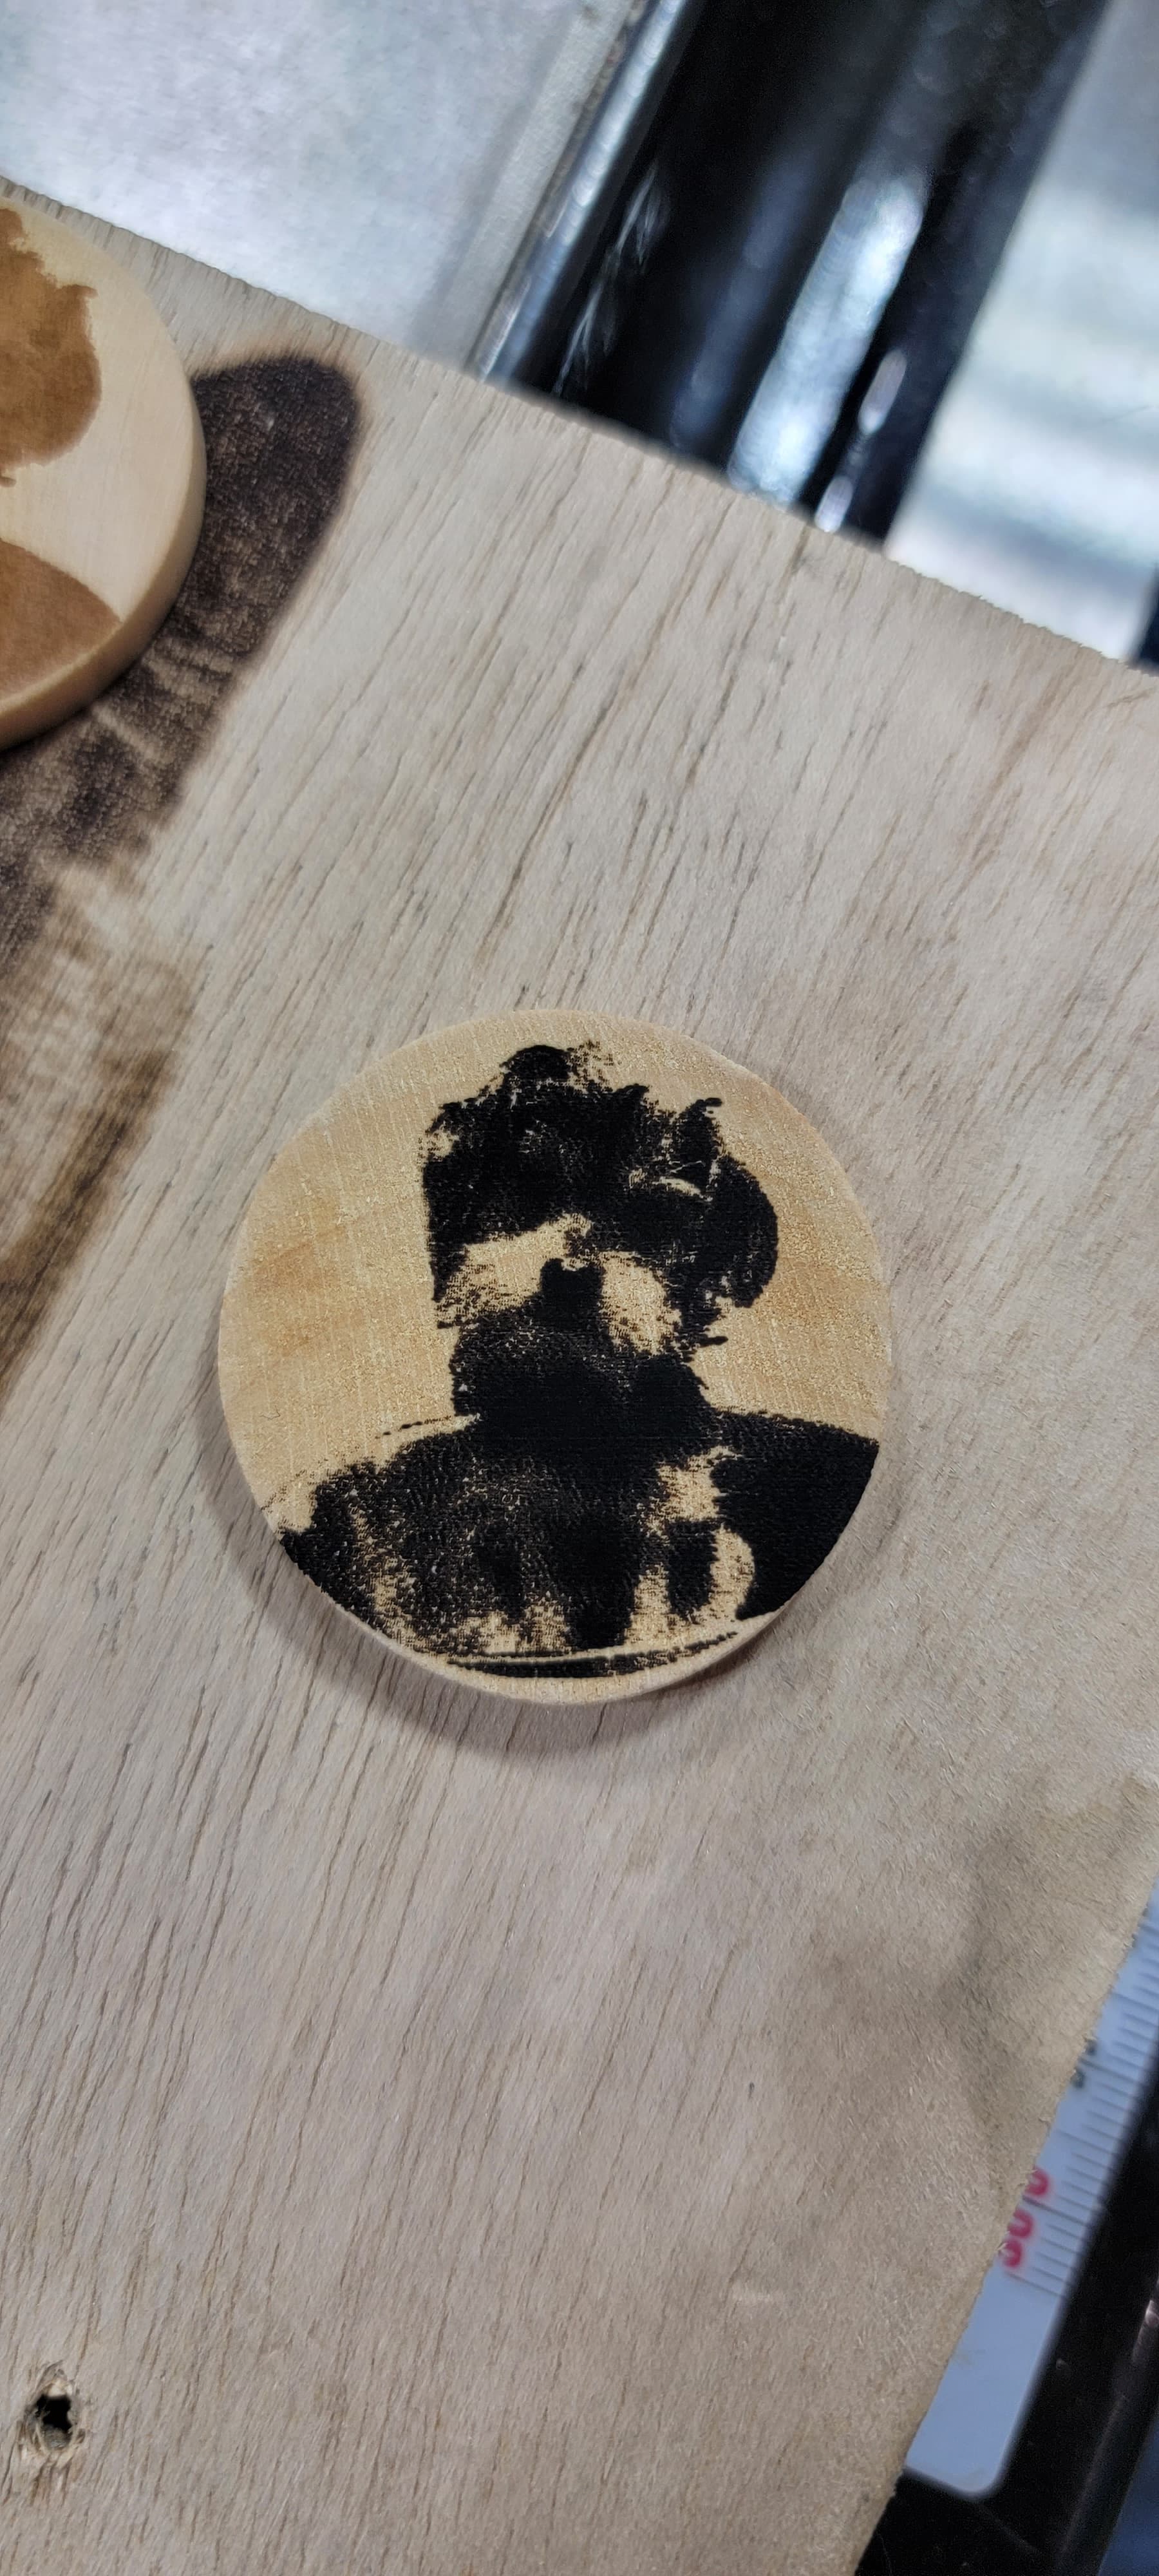
This is with a 1/10 solution of borax. Tried the burn while it was still drying. Gets really dark but again loses definition.
This second picture was done on my diode
What is min power set to in the two approaches? The difference there could account for the variance.
How fast and what is min/max/dpi settings ?
Generally, scanning on the Ruida, it will not use min power.
That power setting, 8%, is pretty low. My machine won’t lase below about 9.5%, which is pretty common.
Is this a new machine?
Assume you have checked the optical path.?
![]()
Yes, new machine-ish. This is the same machine that you and i discussed prior. Omtech MF2028-100 100w co2. Im controlling via lightburn for both settings. Initially anyway. I will go into the layer and pick a setting. In this case i was doing 400mm/s and 100%, then in the shape properties for that layer, i have the power set to 3% and it comes on and bounces around 1-4 mA during the on cycle. With a borax solution, i am able to get a darker burn especially if the wood is still damp from spraying.
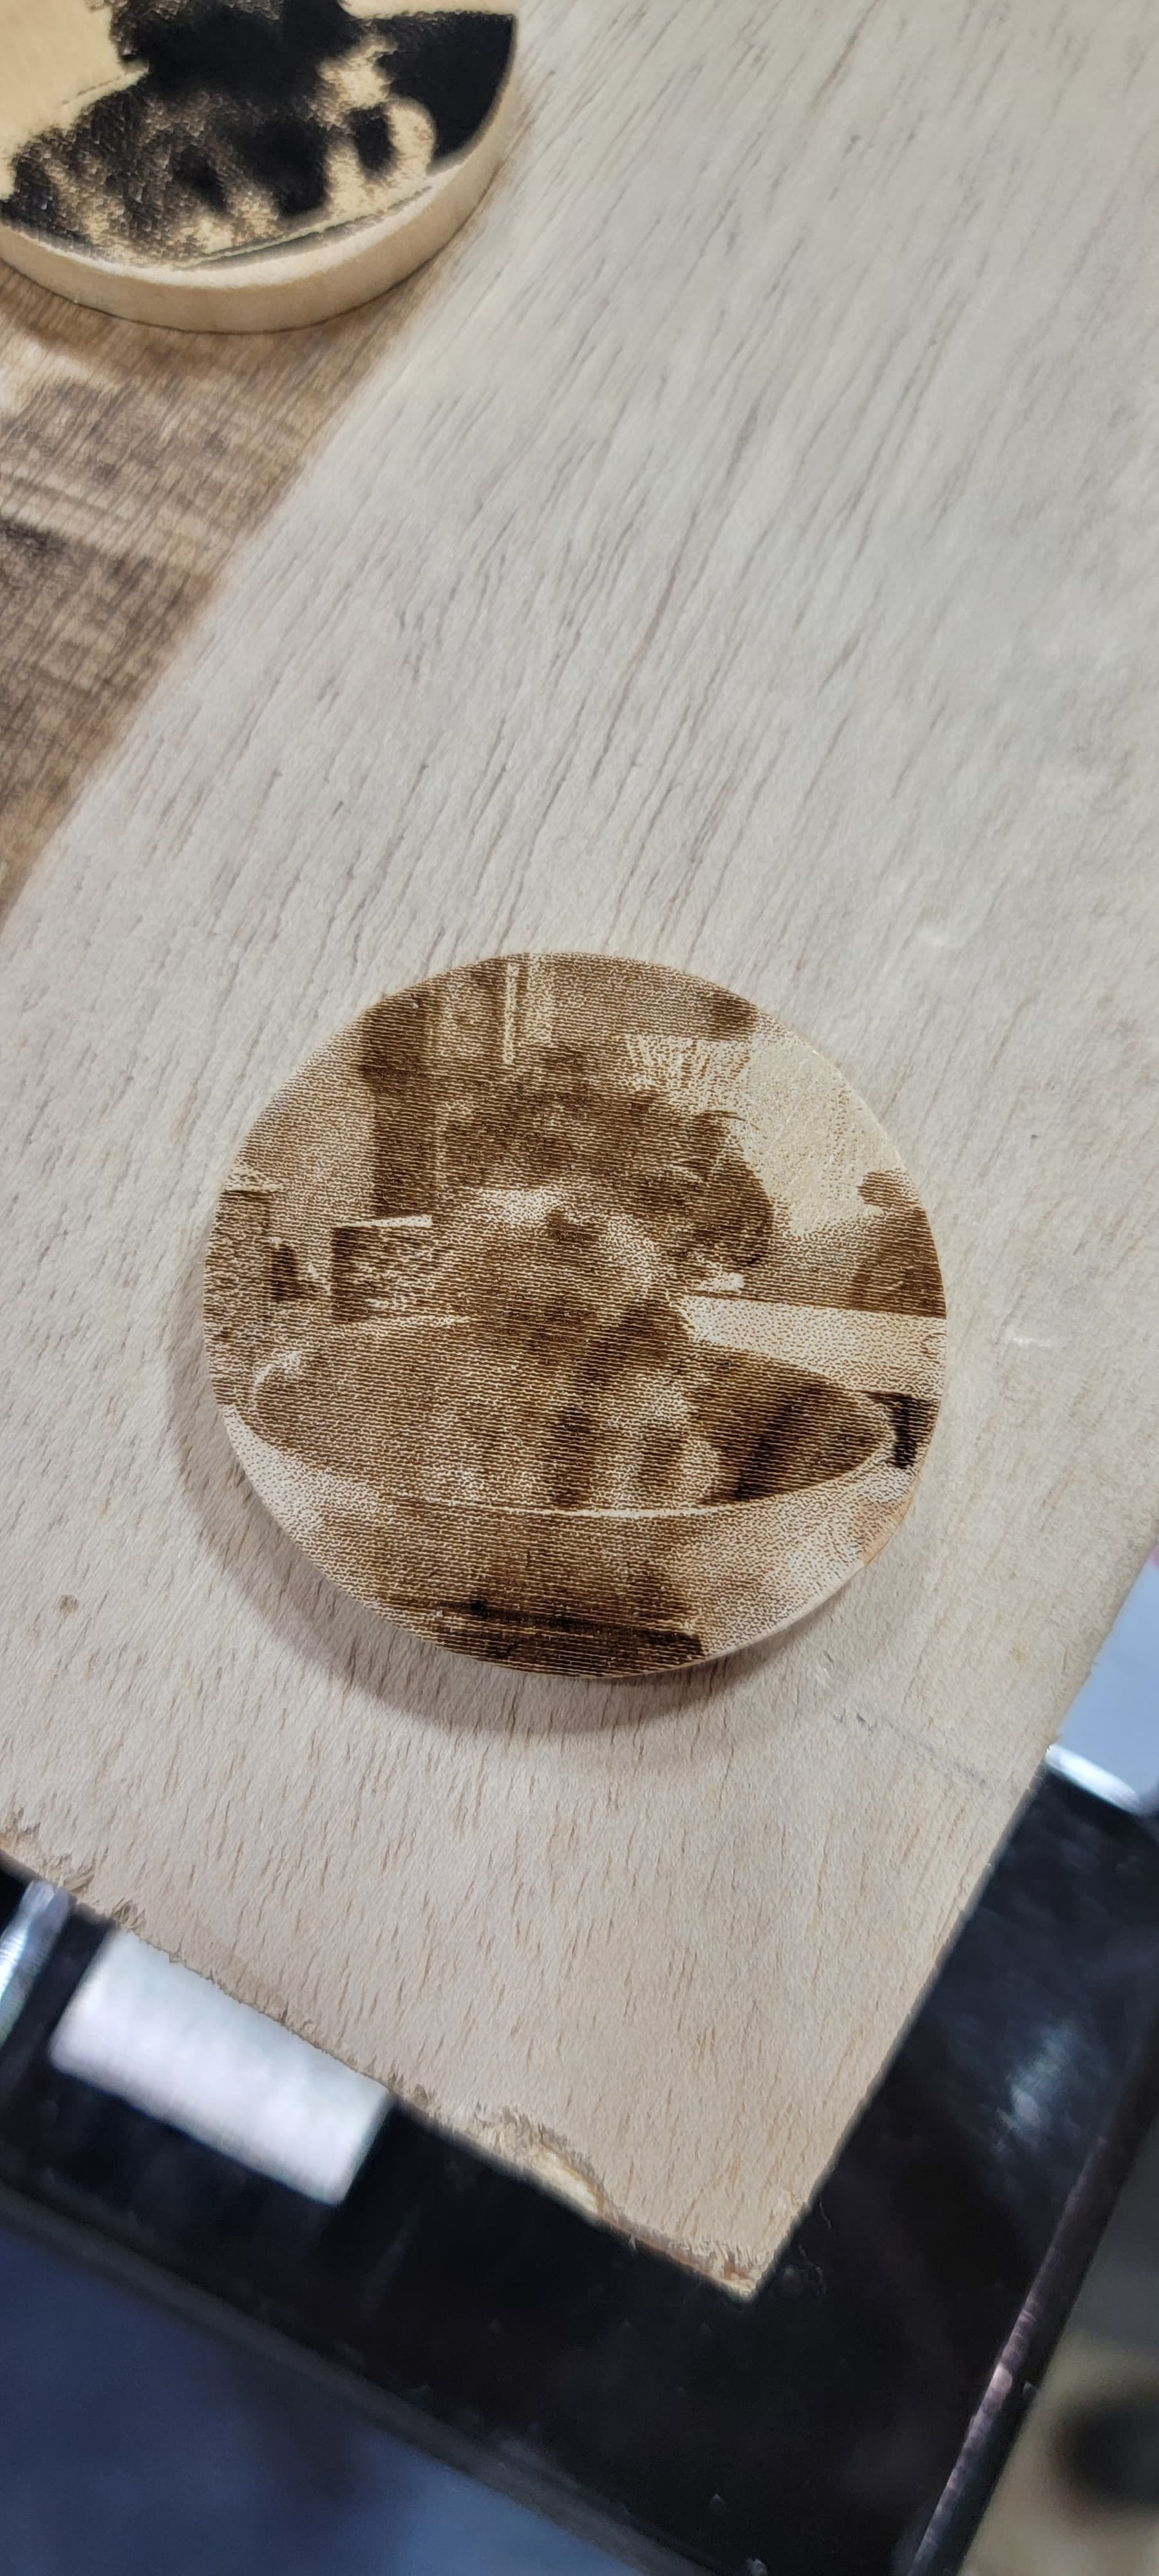
So i can get a… sort of good burn. The dpi is 318 here. I did a whole thing where i did dot pattern tests (russ sadler) and determined that my manufacturers template is almost spot on for my focal length.
My biggest confusion is that at less than 10% power in the layer settings, the laser wont fire. But at 100% layer power setting and 3% in the shape property, i get the 1-4 mA output. Its clearly not 100% at that point, because 100% at 200-400 mm/s would burn so deep, if not catch it on fire all together. Whats the significance of the shape property power, vs the layer power setting?!
My understanding of the shape and how I’ve been using them is that it’s the % of the layer power. I’ve ‘assumed’ that… maybe erroneously.
I think I looked at one of the material test programs that’s on-line.
Why don’t you just set the layer for the power you want instead of playing this game with shape properties…?
One of the issues that I tell people that want a powerful machine is that the ‘low’ range of power is not available. My 50watt (we’ll call it) will lase at just below 9.7% or so… If we use 10% then I can only get a minimum of 5 watts output. A 100 watt machine has a minimum of 10 watts, based on the same information.
The difference between 5 and 10 watts on some materials is way to ‘hot’ as you’ve seen.
Might try using it as a standard layer until you hear otherwise.
![]()
Min set to 8. Anything below that will not trigger the laser at all.
To make sure I understand the 2 scenarios… can you confirm this is the setup?
Scenario 1: Power scale 100%, max power 8%, min power 8%
Scenario 2: Power scale 8%, max power 100%, min power 8%
Can you also confirm the speed setting as well? Please include units.
400mm/s power 100% min 8%, shape property power 3-5%
I suspect if i tinker with the layer power as mentioned above and keep the min power at 8, like maybe max power 10, min power 8, and not mess with shape property, i might have similar success. My wondering was that maybe the shape property tailors the power even more. Like just ball parking here, as i have no real clue on laser powers etc, but 50% layer power, 50% shape power would equate to 25% total power. The reason i had thought that was that at 8% layer power with 0 min power, i got 0 ammeter readings. But running the same setup through shape properties at 8%, I got 1-5 mA.
As i understood raster testing and such, i remember working on min and max power settings and found that my machine turns on at around 10%. I have never ran my machine at 100%, but i would think that it would register more than 1-5 mA. So you might start to understand my initial question?!
I am an over thinker, so it might literally do the same things with no regard to the shape property settings all together, but I thought it would be cool if there was a way to neck down the power below the minimum fire level of 10%
I assume this is for scenario 2. What was scenario 1? I’m trying to get to understanding the discrepancy in output power you saw in the 2 scenarios.
Yes, these settings should be perfectly deterministic, meaning that the final values derived from the 2 scenarios should be consistent and predictable.
Yes. this is the intent. Power scale is a percentage of the original base figure. But there may be some nuance to this. It’s harder to work through on Ruida controllers vs gcode as the output is proprietary, binary, and obfuscated.
I think there’s value in sorting out how power scale affects overall power but I don’t think it’s the right tool for trying to artificially decrease the minimum power required to excite the laser. I do think there’s value in trying to maximize the range of usefully addressable power values as this would increase the resolution of control available to you.
I think the others here are on the right track about trying to limit total current. That should be tied to your 100% power setting.
If it won’t lase below 10%, sorry, that’s the physics.
We’d all love it if we could run our hv excited machines down to 1%. I think you should get on that… ![]()
As @berainlb points out it’s a nebulous area, but try this link.
https://edutechwiki.unige.ch/en/Ruida
I think there’s more going on here… I’ve seen too many things that strike me as anomalies.
![]()
Thank you, i will check this out
Have you tried running the laser at 20% 0r 30% instead of 100%
I have a 40 watt CO2 laser and the only time I run it at 100% is when cutting plywood.
Even cutting Plexiglass I dont run 100%.
I dont know anything about shape property and have never used it.
The Ruida offers 2 places to adjust power- the machine config, and layers.
If your tube has no output below 10% PWM, you should set it in machine config. Then specify min power of 0 (actually I think it requires you to enter 1%) and that means 10% PWM.
Please correct me if I’m wrong. Lots of stuff about the Ruida fields is guesswork.
I’m not following this…
1% of 90… that would be 0.9 pwm… is that even possible/theoretical for hardware? Even 1% of 100 is 1, way below the ability to lase. At least for dc lasers.
Then how does the control panel manipulate things…? another nebulous area of the ‘alien’ Ruida…
![]()
I never run it at 100% assuming that even with the layer percent at 100% using the shape property % at 8-10% im probably only doing 8-10% over all. With 5mm plywood i cut at 55% with great success. I cant recall what acrylic was 400mm/s 40 power?! Not sure
Layer Max/Min and every % in between is within the Machine Min/Max scale.
And, if doing a grayscale burn, all levels fit within the Layer scale.
e.g. Machine Max 90%, Min 15%. If your Layer settings are 100% and 0%, you actually get 90%/15% to LPS.
If the layer setting is 50%/10%, then… well, the whole scale is 90%-10%=80%. In Layer, 50% power is halfway between= 50% at LPS. Layer 10% is 10% of the way from 10% to 90%= 18% at the LPS.
If you’re doing a grayscale burn with that Layer, then 60% black (153 of 255) is 60% of the way from LPS 50% to 18%= 37.2% at the LPS.
So, up to 3 nested scales if you use grayscale. AND you can, and should, set the LPS current to the target, a fourth place power gets limited. If you do this you might just leave Machine Power Max at 100% because that won’t overcurrent the tube.
Well now I have a list of things to try out…
I follow most of that. I’ll have to put some of these to the test…
![]()
Also you get washed out engravings when you set the resolution too high. The dots will overlap when using dither. I suggest to use a test pattern and do a few series at 100, 200 and 300 dpi. Another option is to use different material maybe a bit harder surface. Soft wood tends to give washed out results when too much power is used.