I guess I’m new to this conversation, but I am set to go a different route. I have the 50-watt omtech model (https://www.amazon.com/gp/product/B08NB1K9ZB) and in order to add the motor, I will need to add the second idler pulley and use a longer belt. The issue I have is somehow I need to remove the existing belt and replace it with the longer belt that fits the new routing. I am looking for video or photo instructions (or drawings) on how to get the old z-axis belt out and replace it, keeping it intact. Any hints on those such instructions?
It would be better to create a new thread… that way others can find it…
I’m hoping that @JohnJohn can move it to it’s own thread…
I have a very similar machine, OMTech China Blue 50W (advertised). I haven’t had to replace the belt but have looked at it…
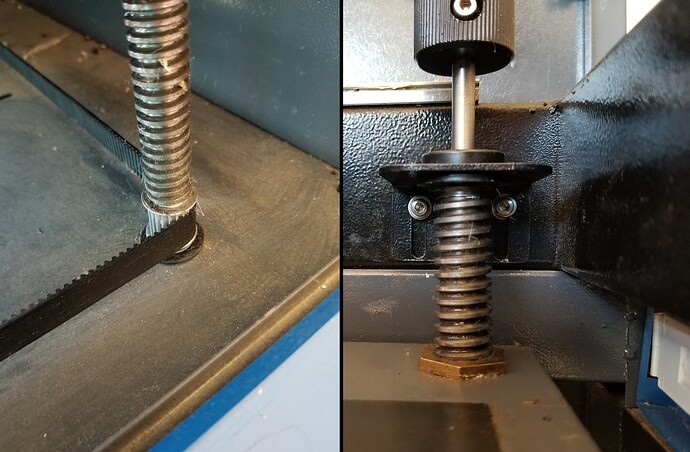
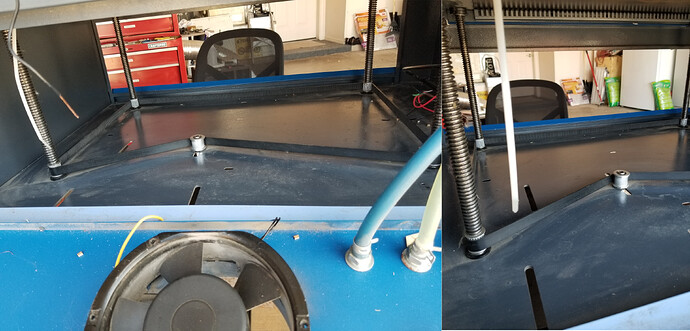
I’ve looked in there and it appears the vertical screw shafts sit in a hole in the bottom of the frame. The upper part also has a bushing in it and is held in place by two screws… these are the only screws
Looks like you have to undo both screws at the top of each lift screw, then lift it up out of the cabinet to pass the belt under it…
Left is where it sits in a hole and rotates on the cabinet… there is nothing on the underneath side… right is the top bracket that has two screws holding it in place…
![]()
@adamk
At Jack’s urging i’ve moved your post to its own thread.
I did see a powered Z-Axis retrofit completed by another community member. I don’t recall if your question about the old belt and second idler pulley was answered there.
My educated guess is that one of the constraints can be removed which would allow the belt to be released. The original idler or tensioner would likely be first. How does the bed-lift screw assembly come apart?
Mine is a continuous belt, so you have to remove all 4 of the screw shafts to get it out… or cut the belt… which doesn’t help you with installing a new belt.
@JohnJohn … thanks for the move… ![]()
![]()
@JohnJohn - please re-title the subject as “Powered Z-Axis …” . For the question at hand, the X-axis is not involved.
Regarding the answer to the question, I did submit the same question to OMTech, who makes my machine. Their answer was that we need to remove the two screws/nuts from each of the four-corners that hold the top of platform gear bearings, then after lifting the platform off the bearings, we can remove the old belt and install the new one. The brackets that hold the bearings, as installed, prevent us from swapping between different size continuous belts.
Adam
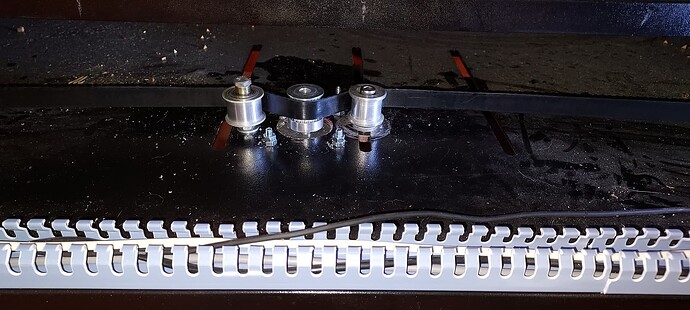
Mine has an idler pulley in it… doesn’t yours? It seems to have a wide adjustment range. It’s also drilled for a Z motor…
Doesn’t yours have these? We have the same machine… from the same people… OMTech…
![]()
Well, it’s nearly the same machine. Omtech makes two 50 watt chassis. Mine is the one that’s a little shorter than yours. It does have an idler pulley, also, but even if mine is fully removed, the belt is too short to wrap around the new motor gear, using the mounting positions on the bottom of the case.
Adam
That’s what I concluded after pondering the innards of my OMTech 60 W (which has an overcooked 50 W tube).
I’d be sorely tempted to do one leadscrew at a time:
- Release the belt tensioner to get the belt off the leadscrews
- Remove the setscrews to release one leadscrew
- Turn the leadscrew to raise it out of the bottom bearing
- Slide the old belt out
- Slide the new belt in
- Turn the leadscrew down into the bearing
- Repeat for the other three corners
- Snug the (new!) belt with the tensioner
- Done!
The advantage of that would be keeping the platform pretty much level during the whole affair. You’d still want to verify the overall alignment at each corner, but it’d be a darn sight closer than gutting the whole machine and starting from scratch.
no need to remove the belt
That works on your laser because you have all the space under the cabinet. For those of us with the 50 watt, they have a much smaller space under the chassis, and it will not fit the stepper motor.
Thanks.


