I have been labouring over getting the Print and Cut feature to work but each time it cuts it is off.
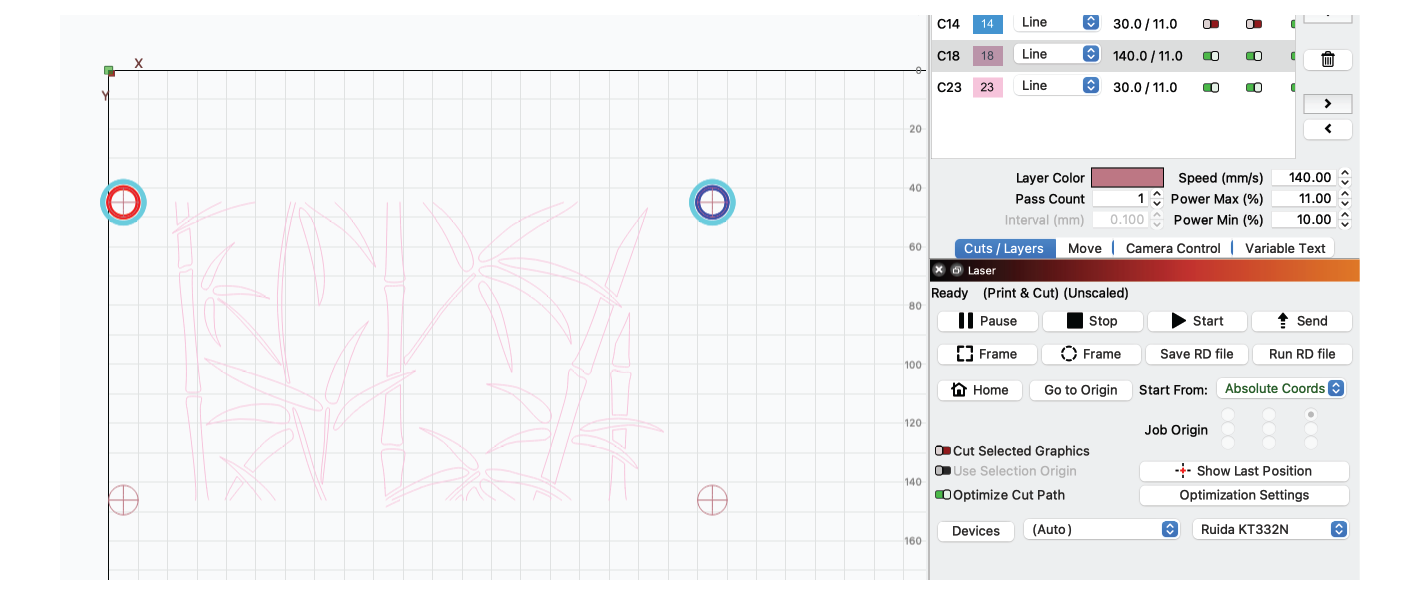
I have realligned my laser, checked the red dot pointer matches where it pulses, made sure it is Absolute Coords. What else can I try?
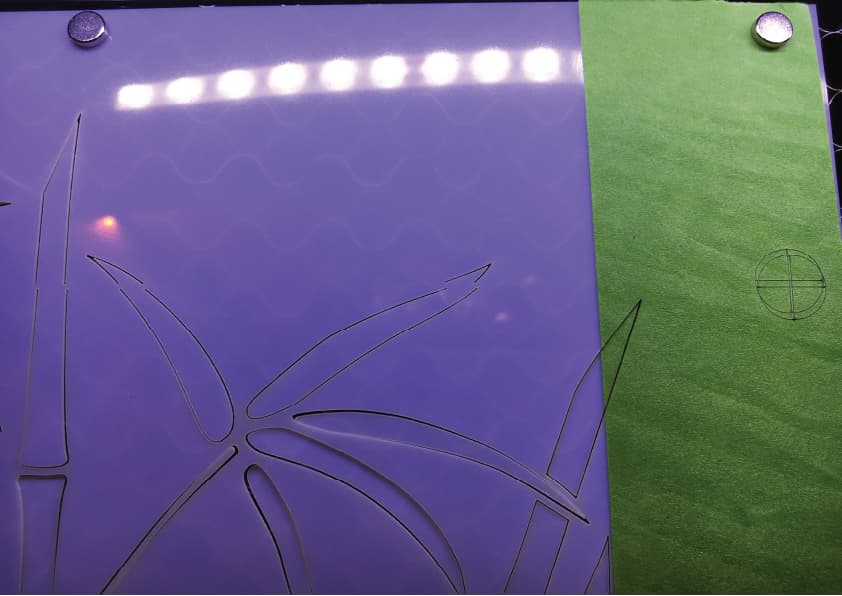
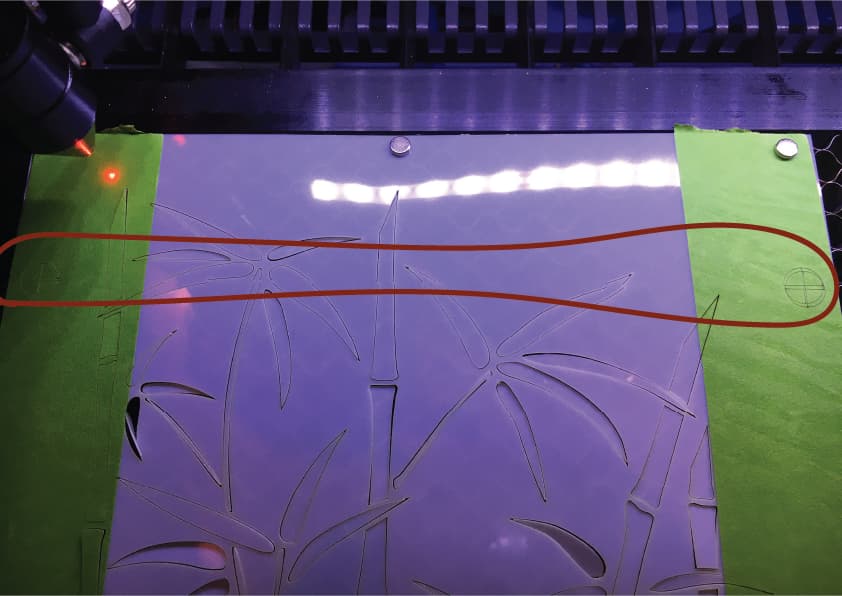
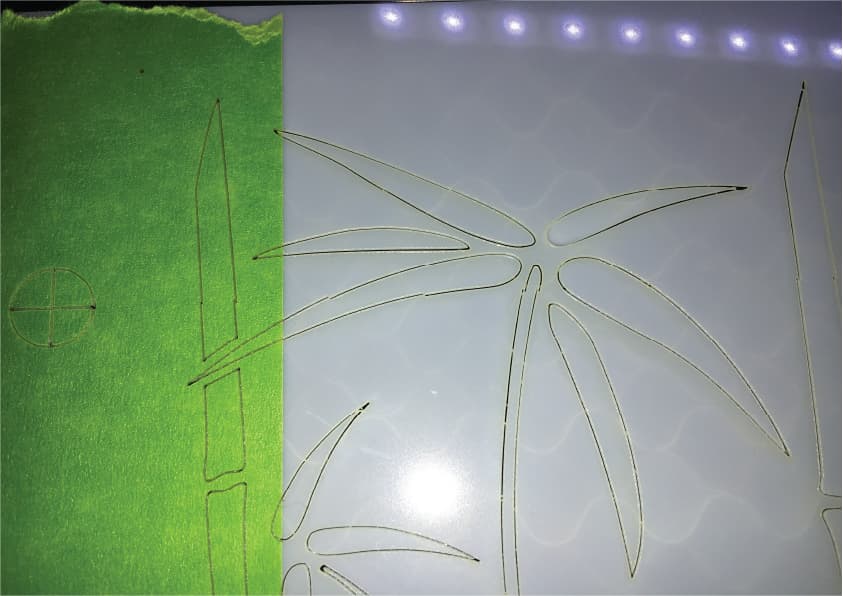
The green painters tape I have on the sides of the 190 micron Mylar I am cutting is there so I can hopefully eventually find the right settings to engrave on the tape and peal off afterwards. I thought perhaps its minuscule height from the Mylar may have caused the skewing by the repeat cuts onto the tape are also off.
I have an Omtech 50W laser that has been previously diagnosed on here as having a tiny complication with the stepper motor when attempting certain detailed moves, not this type of standard cutting that I do regularly.
A good rule of thumb is to fix whatever problems you find before looking for new ones. If you haven’t completely eliminated the previous motion problems, then there’s not much motivation for anybody to (try to) identify new motion problems.
The pictures of the targets look exactly like there’s a loose screw in the Y axis drive train, which is exactly where the previous problem occurred, so the same advice applies as before. You’re gonna have to get in there, try to loosen every screw, and retighten them with proper alignment.
It is also possible the entire laser head is loose (we’ve seen recent reports of that sort of thing!), that the lens inside the head is shaking around, or something else is wrong.
Basically, anything can be loose, even when you’re certain it can’t possibly happen. That’s what you’re looking for.
I think I now understand what is being asked of me and what was asked of me before, I am now deep in the horribly awkward back of the machine.
Is there any tool you would recommend for loosening/tightening the setscrews? With the allen key provided and a screwdriver with a hexagonal attachment I can’t get them loose so far.
Stick the short end in the screw, apply about half again more force as you think you should to the long end, and the screw will grudgingly loosen. I just tried that on my laser; you may want gloves to protect your palms.
I would like to live in the parallel universe where a really tight screw meant it was installed correctly, but …
What can happen is that the screw was turned tight on the flat, but the shaft wasn’t oriented with the flat directly under the screw and perpendicular to it. As a result, the shaft can turn the flat away from the screw, even though the screw is now firmly glued tight in the coupler or pulley.
Don’t make that mistake when you tighten it again!
The jackshaft across the back of my laser seems to not have flats, so the coupler simply grips the shaft with enough friction to keep it from turning. In that case, tighter is better and you should mark the shaft where it meets the coupler so you can tell whether it’s been slipping while you weren’t watching:
This is what mine looks like, which is good because it takes fiddling with the flats out of the equation. I’ve placed straight pieces of tape in line with the line in the coupler like you’ve done and compared before pictures with pictures taken after I repeated the print and cut movements 6 times in a row as well as a whole lot of jogging around. As far as I can tell there has been no movement from the tape.
I’ve tightened the setscrews as much as I can anyway and they feel as tight as they’re gonna get to the point of damaging the head.
In repeating the print and cut movements I did notice that I could cut the first section and then repeat it and it would line up clean on top of each other without the 1mm drop. Surely it should drop by the degree it is off by each time I repeat it? Or maybe not , due it returning to the origin each time as opposed to starting from a registration mark and then immediately jogging out upon starting (which may be happening starting from the origin i just cant see it because there is no mark to judge against).
I have also been fiddling with the red-dot pointer, making sure it is dead on marks I’ve pulsed and added a piece of mdf with a small hole in to narrow the beam. In alligning the red-dot I’ve noticed I can move the laser head a noticable amount by hand and even when I’ve tightened the 3 screws affixing it. Have I found the culprit or is this a thing that will happen regardless if you were to jostle the laserhead by hand as opposed to it moving because the whole unit is being moved?
What I’m proposing (having seen it in the wild) is that the shaft can rotate slightly inside a pulley / coupler, with the (slightly not snug) setscrew stopping the flat in either direction. The shaft position depends on the history of how it got there, so running the same job will produce pretty nearly the same errors at the same points.
Which makes it look like a software problem, because we all know hardware can’t behave like that.
Bingo! If it can move freely, it’s a source of positioning error, because the controller does not control where it is.
Consider this tale of woe:
I’m going to elevate that problem up in the debugging checklist, because it seems regrettably common.
Fixing it may require some derring-do with a box of metric screws, but you’ve found at least one problem!
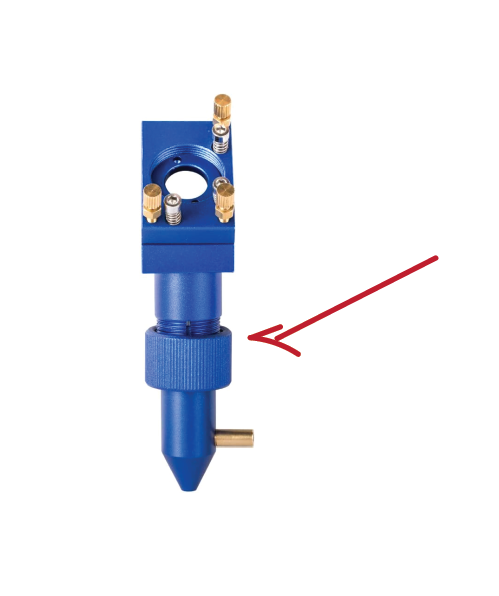
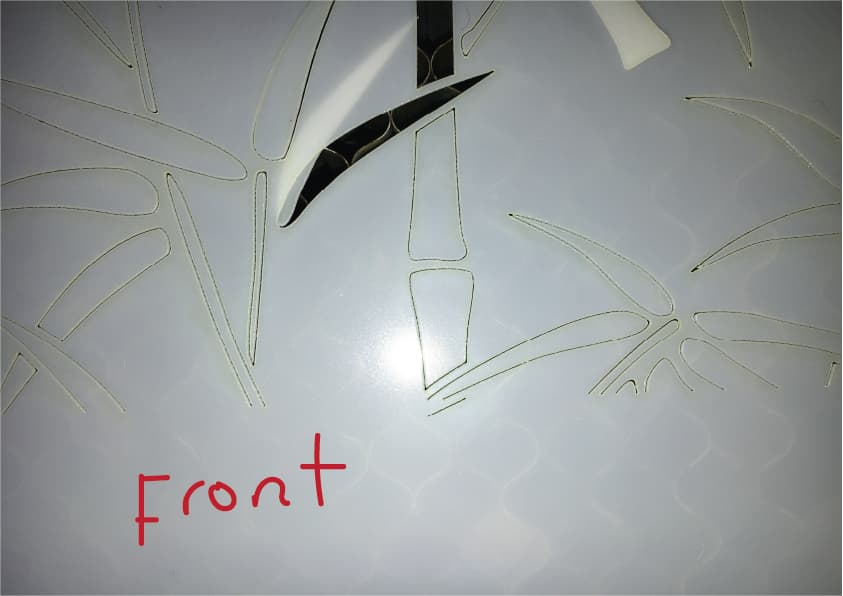
The movement came from the part of the laserhead I’ve annotated with the arrow above. I think it wasn’t loose but the way the threads had lined up when screwed together had allowed for a bit of movement, like when you screw on a bottletop slightly off.
It’s definitely improved the cut though it’s not perfect. I’m hoping the misalignment now is caused by a misalignment between the red-dot pointer and the laser beam as the Print and Cut is so reliant on the coordinates set based on the red-dot position. I have been aligning the red-dot before each attempt though My adding of the small piece of MDF in the red-point hole to narrow the beam may be throwing off how tight the light is held in place and so may ultimately be more harm than good.
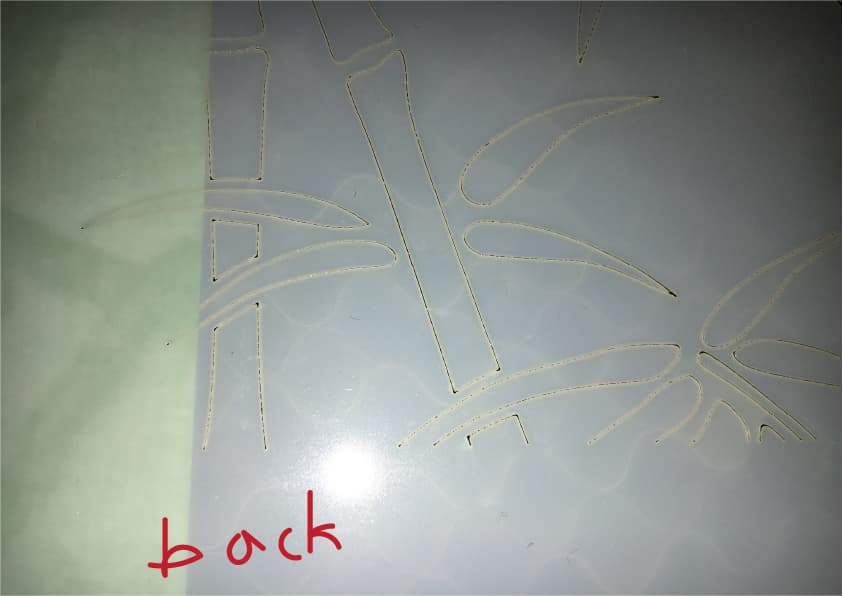
Lastly, the second Print and Cut section now doesn’t appear to cut all the way through and appears slightly jagged somehow. The first section cut cleanly.
I will try a whole a4 cut in one once I am back from work to see if this is now a permanent problem that will affect my cuts outside of attempting to Print and Cut.
That collet nut looks cocked even in that stock picture!
If it’s been brutally cross-threaded, then you may have a problem threading it on correctly and tightening the collet inside.
I’m assuming the lens tube has a family resemblance with the one on my laser, although it looks different:
In mine, the lens is at the bottom of the lower tube, sitting atop the nozzle. Your tube doesn’t have a separate nozzle, so I think the lens is behind the nut.
I’s possible the whole lens assembly is now misaligned. That’s not your fault: the initial alignment may have been done with the lens in the wrong position.
Unscrew that nut, remove the lens tube, and see what horrors lurk within. The lens should be firmly mounted inside with no wiggle room and should not have any rough edges.
You should verify the beam goes straight down the middle of the tube. Remove the lens, apply some tape to the tube, screw it together (without the lens), and fire a manual pulse. If it’s not dead center where the lens should be, that’s a gotta-fix-it problem.