I’m trying to figure out the ‘Print & Cut’ function and it’s giving me fits, so I’m hoping someone here has some advice.
My machine has limit switches, a 400x400 working area, and is set to move to x390 y390 at the end of a job so I can get whatever I’m working on out easier.
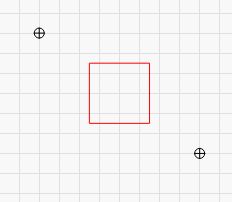
I made a simple file with a 30mm square centered at x200 y200 on a CUT layer as well as two targets on a different layer set to lower power for marking.
My cut didn’t go all the way through so I put the piece of wood back on the machine, went through the setting of the two Print & Cut target positions, but the square doesn’t get cut again. Nothing is cut and the machine moves to x390 y390. If I look at the Preview then I don’t see the square, just my two targets.
I’m running 1.0.06 of lightburn, using Absolute Coordinates and I get the same results if I use the Print & Cut Wizard, or if I set the targets manually.
I’ve watched everything I can find of youtube as well as looked through what I saw in the lightburn documentation and I think I’m doing everything just like the docs and videos show, but obviously I’m missing something.
Anyone have any ideas?
This is a screenshot of what I am cutting BTW, if it helps. Since I’m trying to figure this out I was trying to keep things as idiot resistant as possible. I can be a clever idiot at times, so any time I can stack the deck I will.
You have a bit of hardware listed, which is the problem?
It’s always nice to have the .lbrn2 file here to examine. If something is switched off, maybe someone will catch it. It also gives us a better of what you have in your hands.
Is it the square, the targets or both that are not being cut the 2nd time?
Are your targets ‘grouped’ each as it’s own target. Clueless if this matters or not…
I assume you have a camera or some way to align the object if you move it?
I’m not sure what you are asking with this: “You have a bit of hardware listed, which is the problem?”
I was just trying to describe the machine I was working with.
I can upload the actual .lbrn2 file this evening, I’m not at the machine right now.
Sorry about the lack of clarity, nothing at all is burned the 2nd time.
I do not have a camera, I jog the laser to align with one target, set that one and then jog to the 2nd target and set that one. If I’m understanding Print & Cut correctly, I shouldn’t need a camera to get things lined up?
I do not recall grouping the targets, but that is possible.
I did not have “Print Selected Graphics” enabled at first, but I did attempt the job an additional time and did select 'Print Selected Graphics", at that point I clicked on the square to select it, but no change in output.
Yes, ‘Absolute Coords’. I double-checked that as I saw several mentions that it was needed.
The preview without Print & Cut looks appropriate and I get the expected laser output, the preview with Print & Cut only shows my two targets but not the square and I don’t get any laser output at all.
Try this: In the Move window, click ‘Get Positions’ - what does it say?
If the numbers are negative, the system thinks your output will be out of bounds, so it’s ignoring it. You can disable that in Edit > Preferences, on the 2nd page:
They shouldn’t be negative if you have homing enabled and working, but there are GRBL configurations that work in negative workspace instead of positive. If you don’t have your $10 firmware setting set to 0, it’ll mess up anything in LightBurn that’s trying to query the controller position.
Ok, remember way up at the top of this thread when I said “I’m an idiot”? This looks to be an example of that.
I must have thought that I looked at “Get Positions” before I changed $10 to 0, however I now believe that I did not.
With $10=1 I get two negative numbers after homing. Moving up and right gives me numbers that are less negative, but still negative.
With $10=0, I get 0,0 after homing and both numbers get more positive as I move up and right.
I’m sorry for the confusion… I’ll try and do better
I’m not sure that’s true, I have 2 cnc machines. One homes bottom left so all code is positive to home, and the other homes top right so all code is negative to home (absolute)
You usually set a work zero (G54) and then all code is referenced to that, then there are other work offsets (G55-G59?) so you can reset your code to another vice, fixture etc.
So I suspect as long as the Gcode is written to a work offset then there shouldn’t be a problem (work offset can be the same as machine home)
The point wasn’t that he necessarily needed to be in $10=1 but that he would need to address the coordinates. The easiest way for how he’s been doing it to simply go back. Yes, he could do this with offsets but either way he’s making a change.
Also, note that homing location does not necessarily equate to machine origin.
When you have different ‘home’ positions, you are operating in different quadrants. The image will ‘flip’ or mirror depending on the quadrant of your origin or ‘home’.
I haven’t read the code lately for the Arduino, but if I recall all of these coordinates are unsigned integers, they cannot go ‘negative’.
If you think about a work space in absolute coordinates, negative number are ‘outside’ the ‘defined’ work area.
I thought I’d read in the Common Grbl Setup that the $10 register was supposed to be set to 0…