This may have been asked before and if so apologies I’m not able to find the answer. I want to use the print & Cut feature of Lightburn and have followed the instructions on the video and others on line. I’ve created a simple shape a box with a diamond in the middle. I’ve created the two registration marks outside of my shape and run the first pass (engraving the diamond and cutting the registration cross. I’ve then flipped my work piece and use the Print and Cut Wizzard to line up both the registration marks and engraved the diamond then cut the box. Everytime I attempt it, the engraving is off to the left by about 5 - 6mm and above centre by about the same. Doesn’t matter what I do (move the registration marks to align with each other, put them in random places, etc) the same thing happens. Anyone got any ideas?
Appreciate any help and advice, great software btw!
Sorry for the delay. I am not following this workflow you describe. Please show us, illustrate this process for us, to help us “see” what you are doing and what result you are getting and we can go from there.
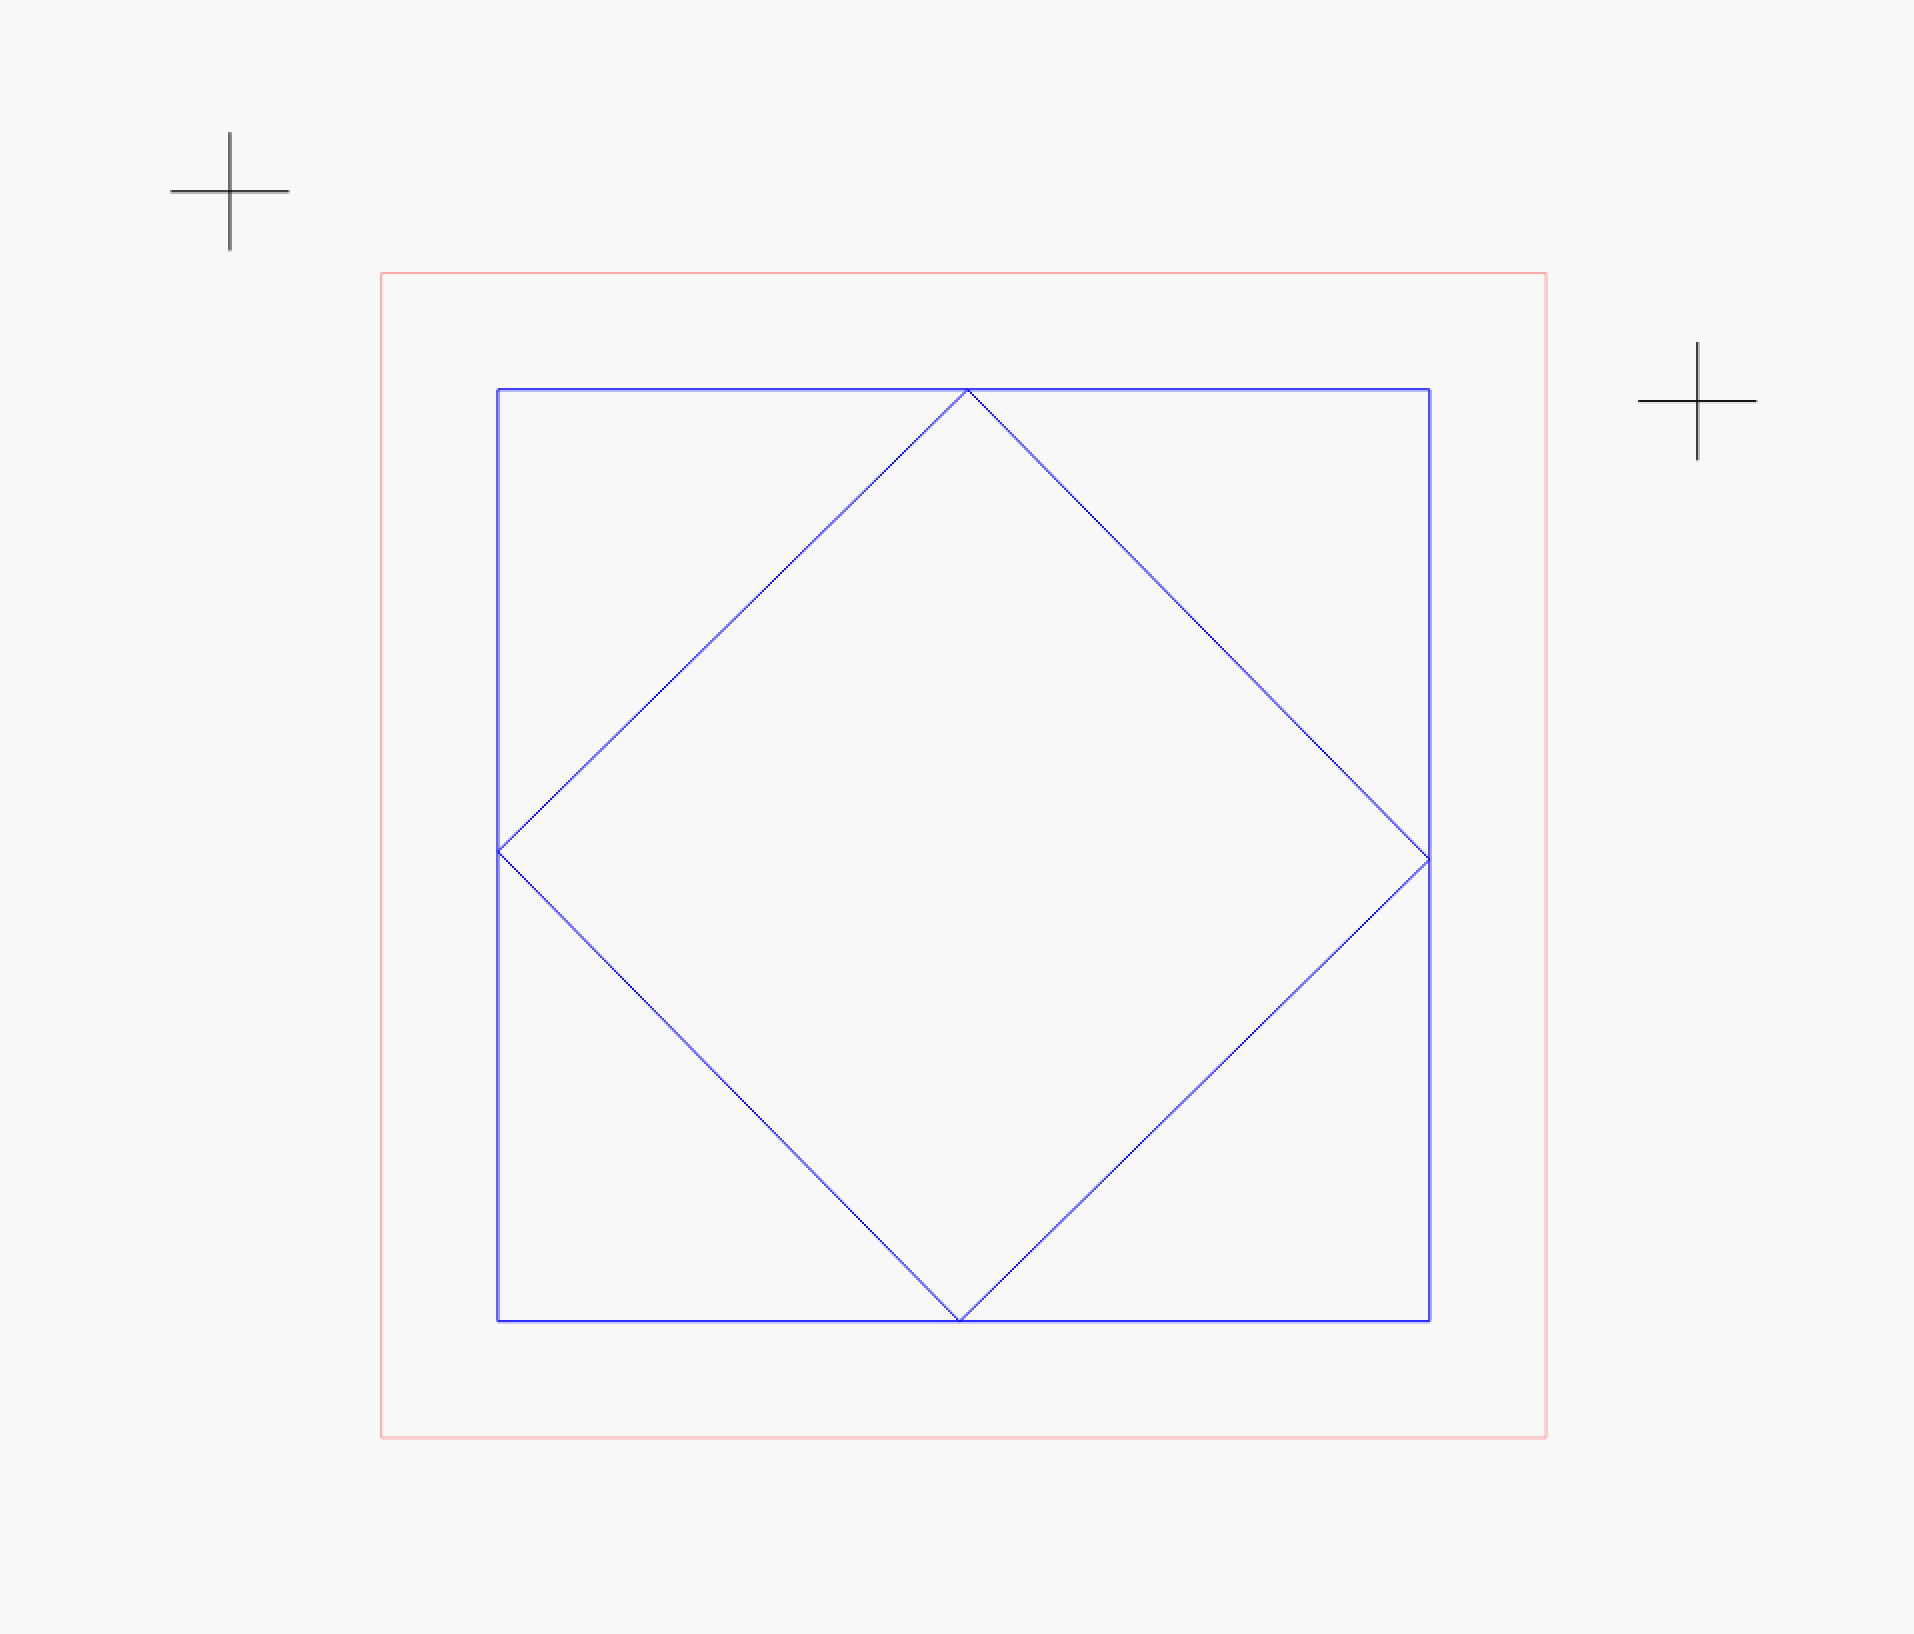
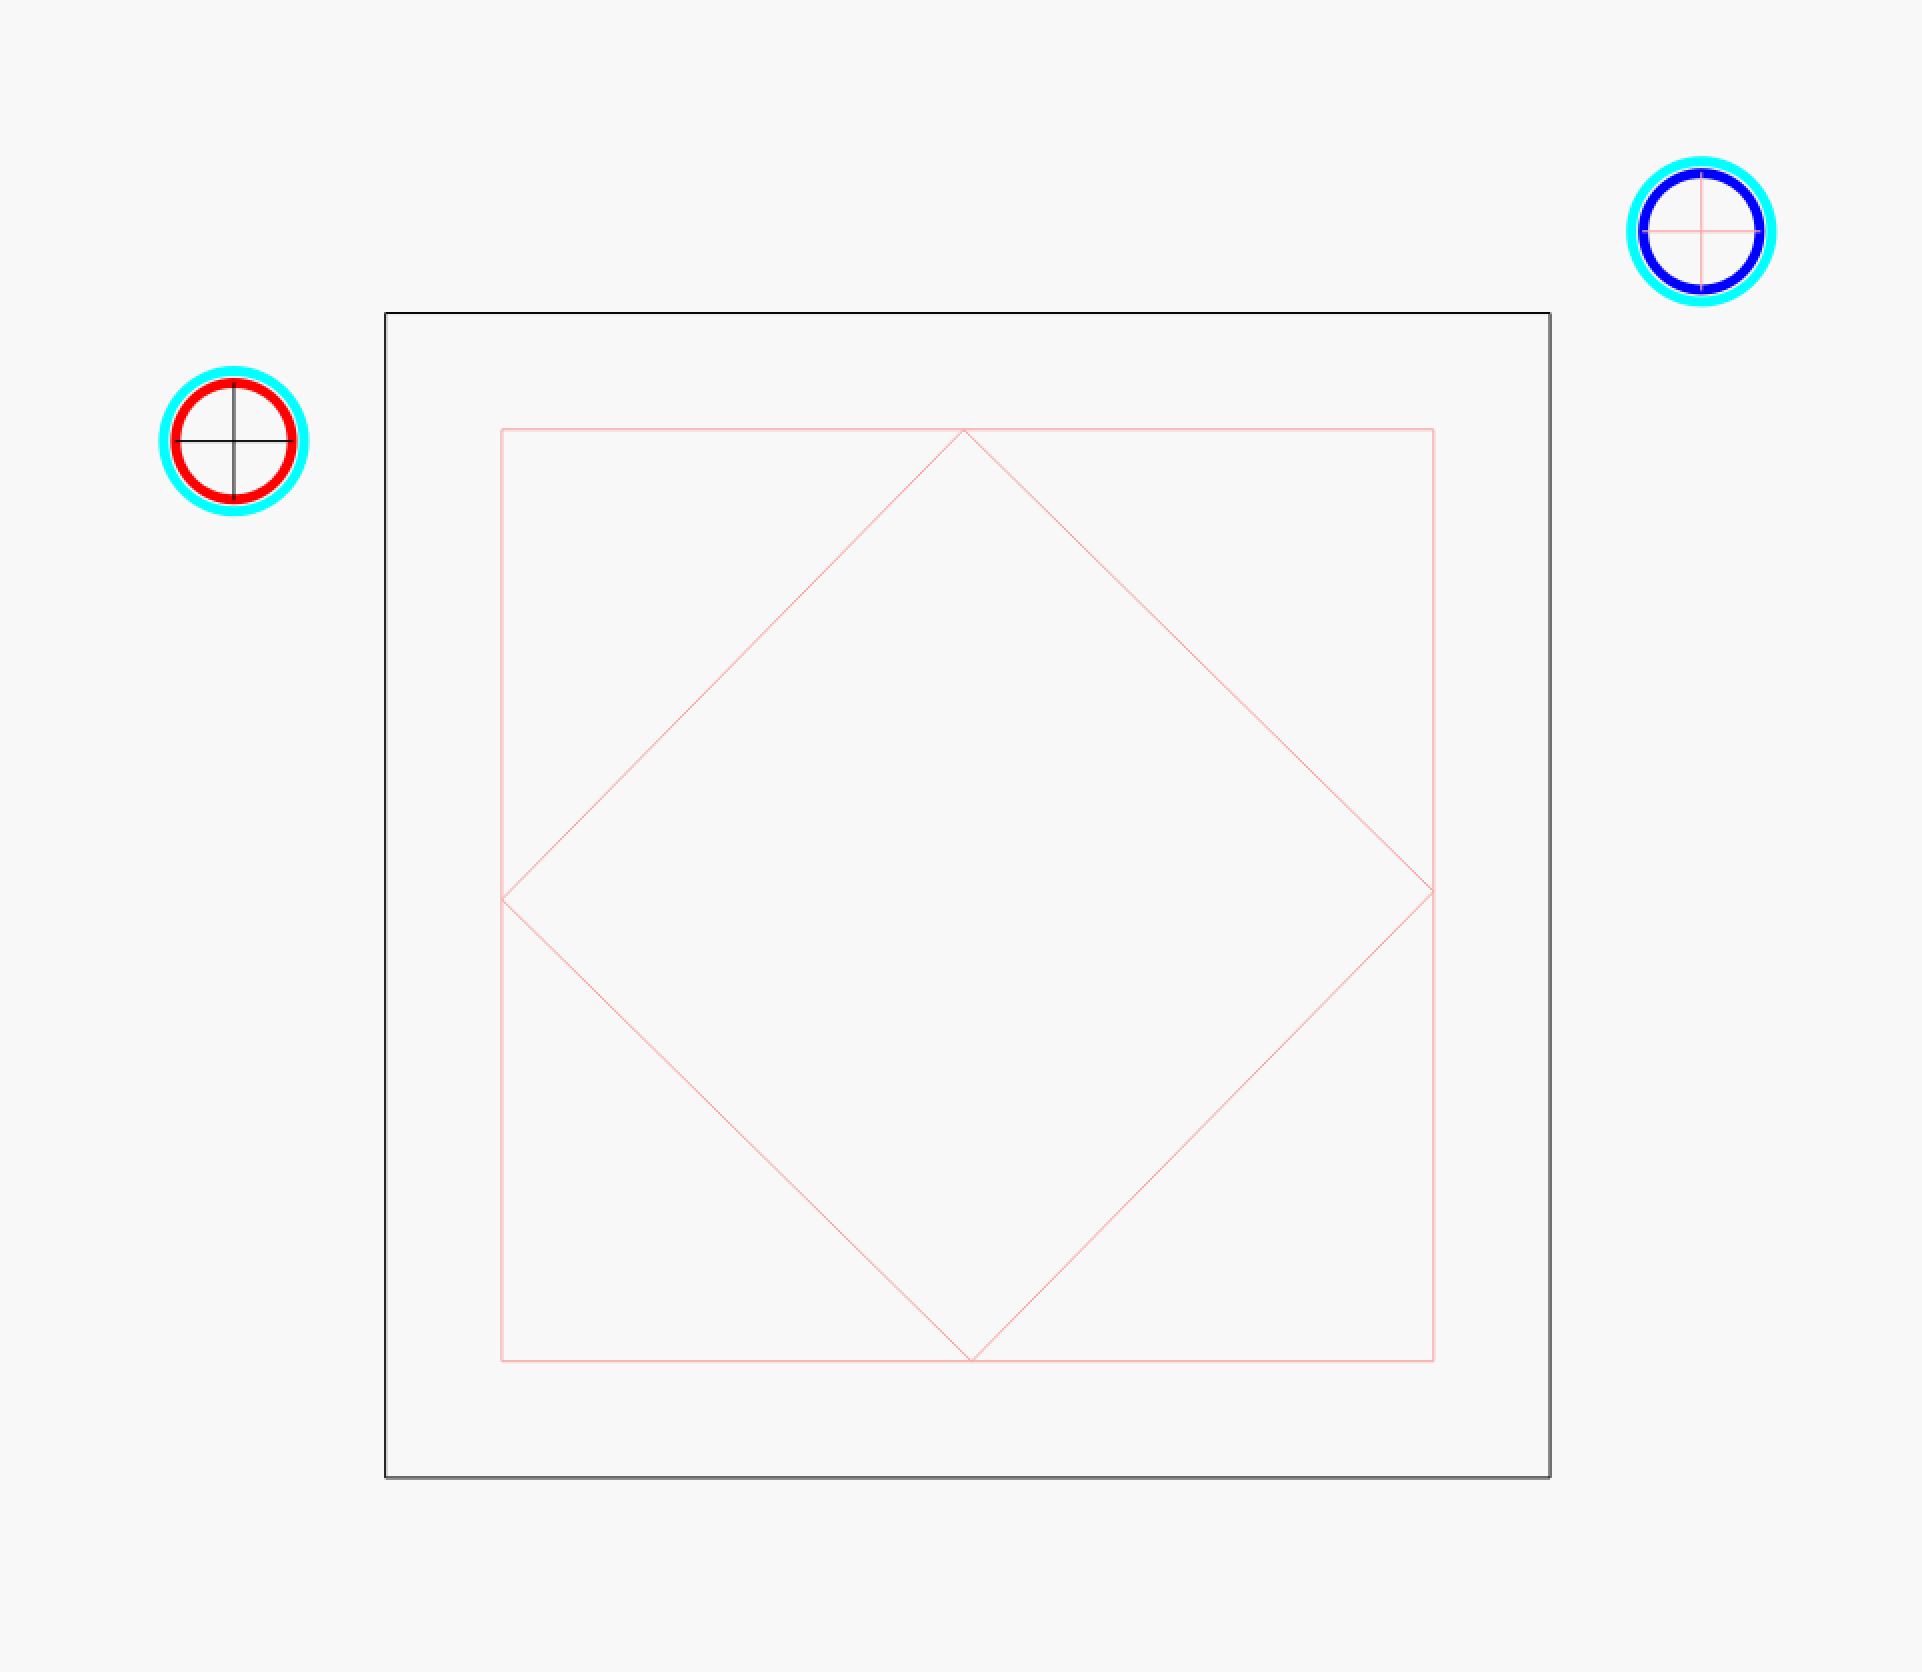
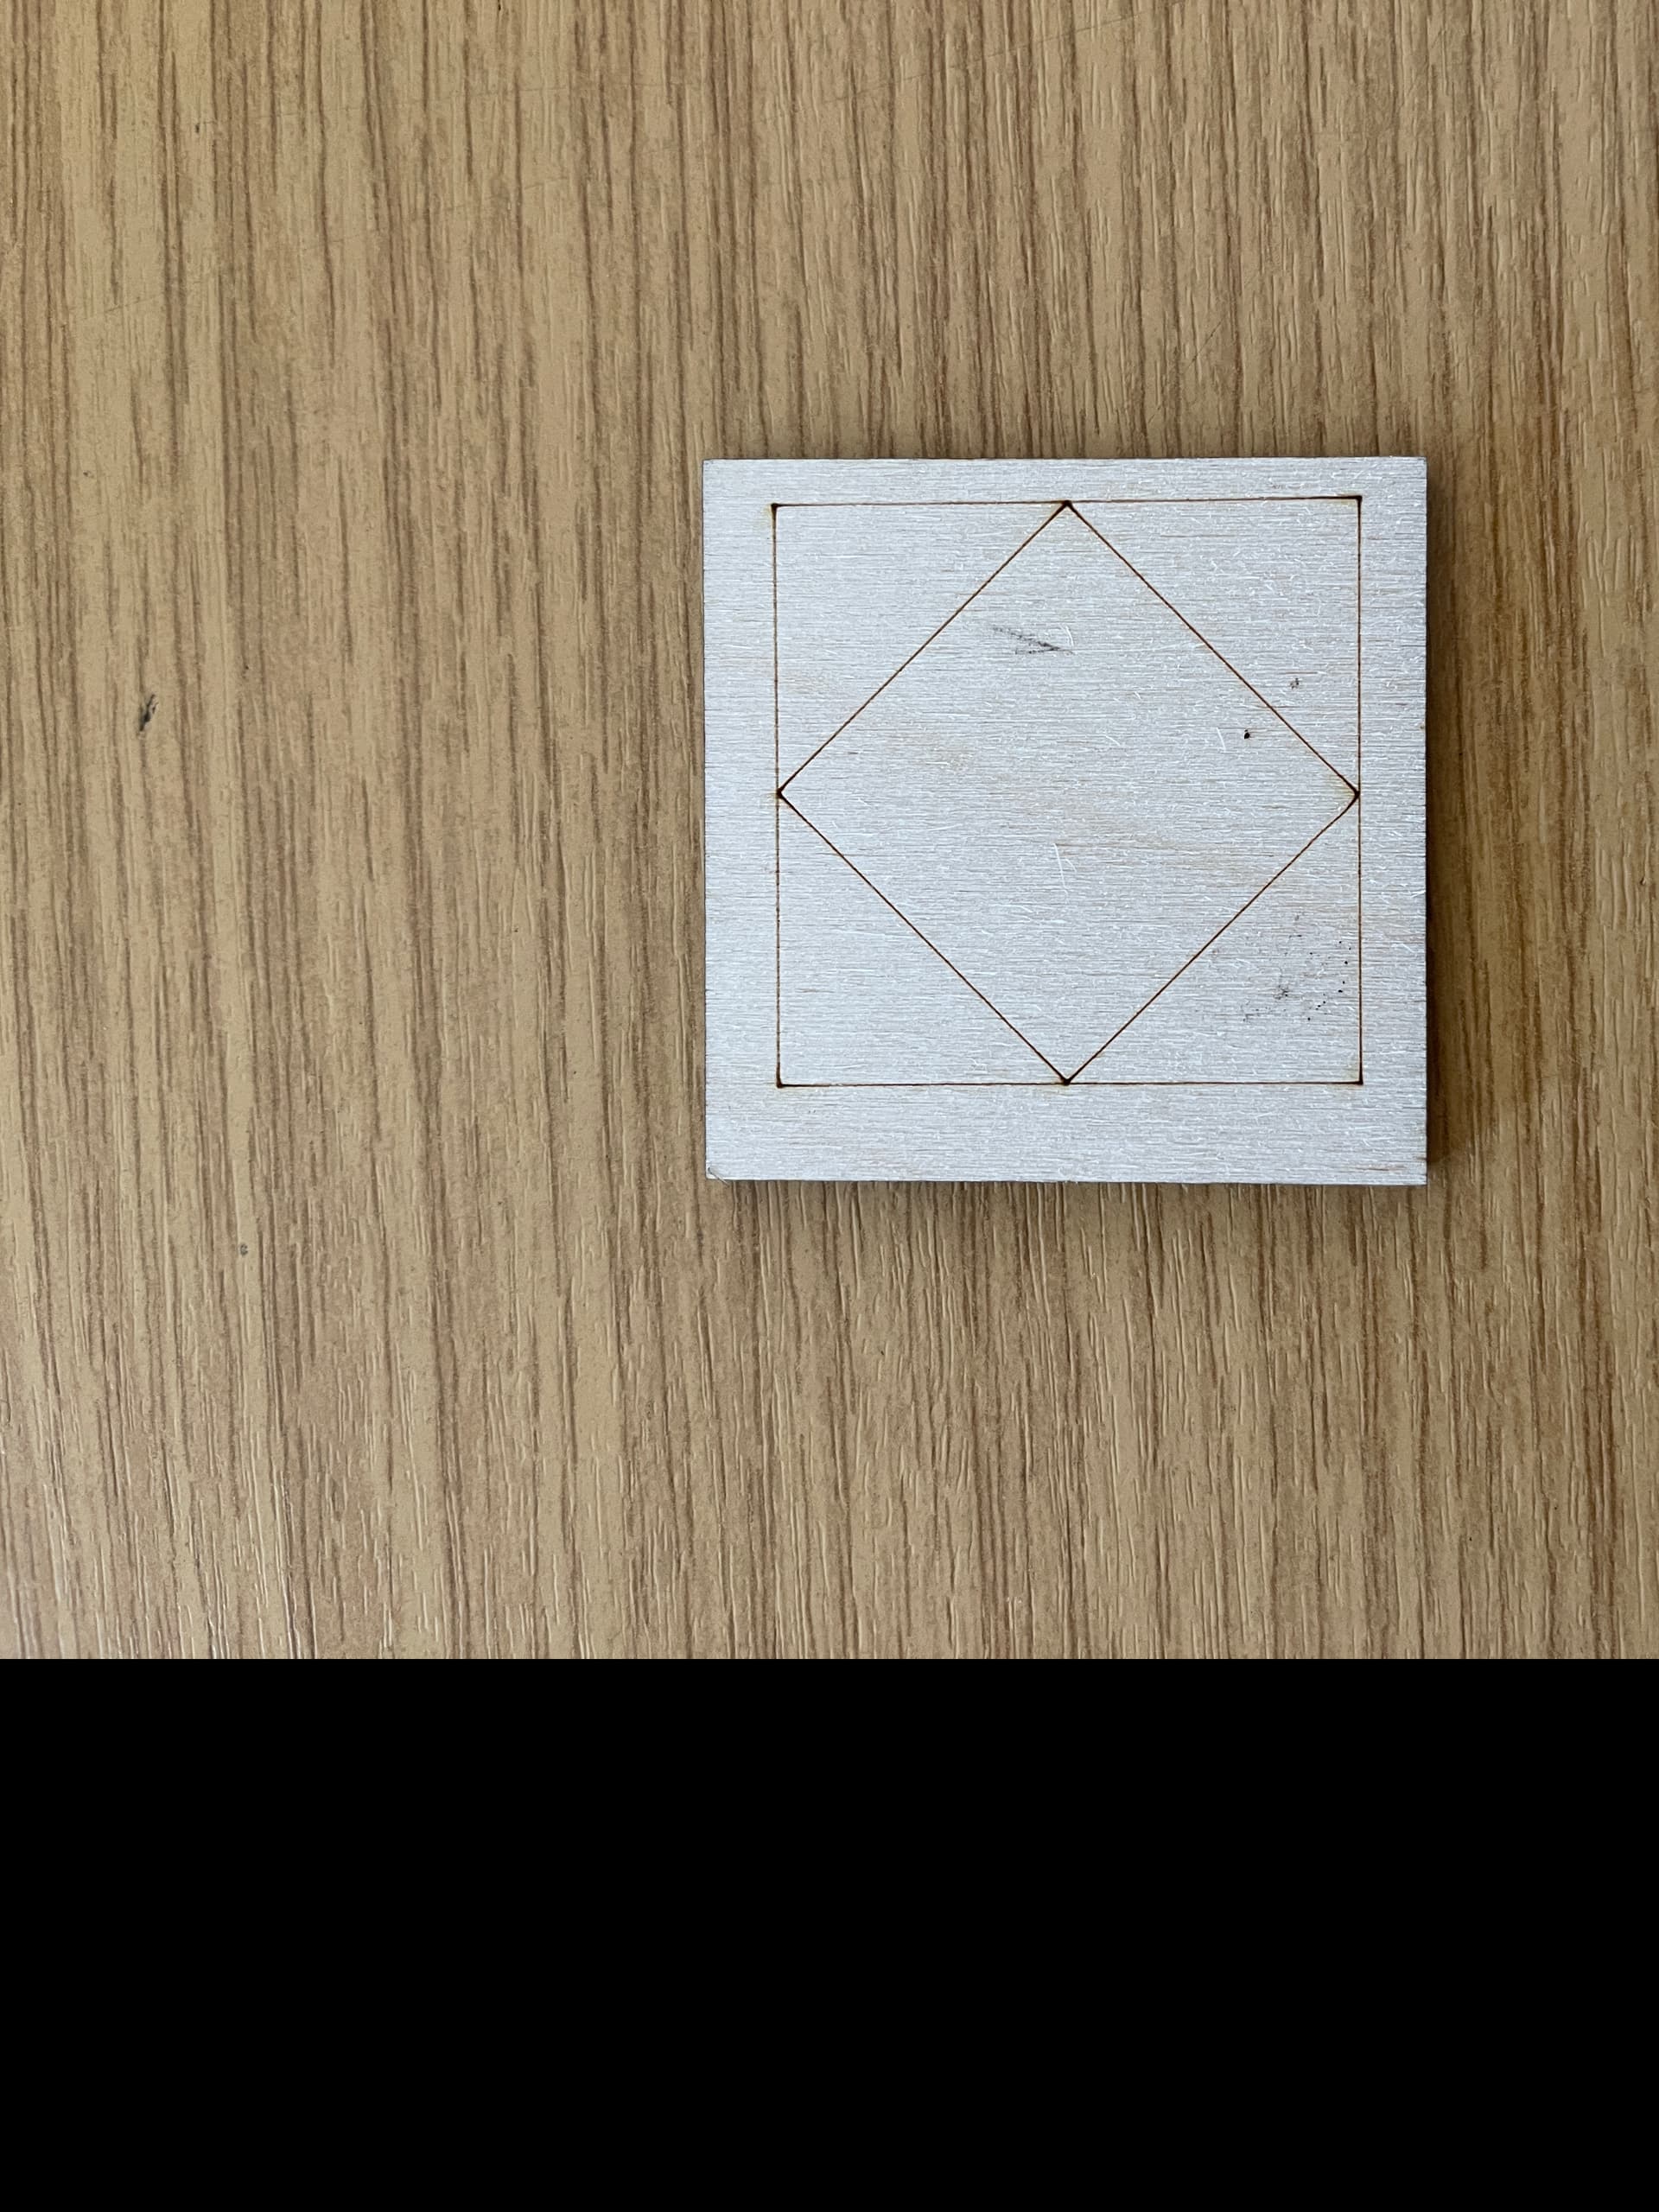
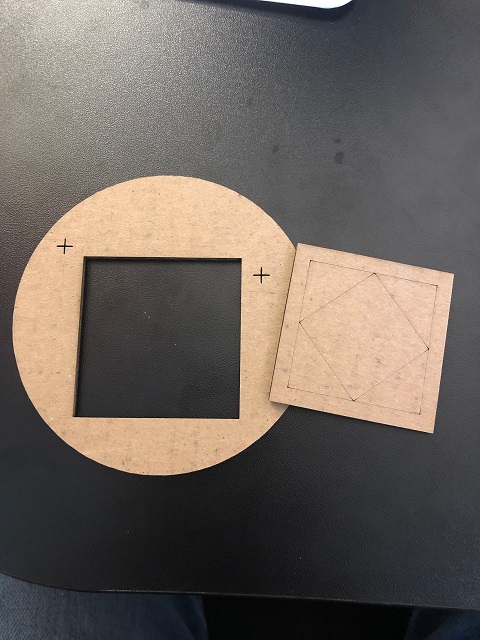
Thanks for responding Rick. I’ve attached a few images to illustrate the issue. The first image (Blue Square and Diamond) and the cross hairs were engraved or cut into the material. The second image (Black Outer Square) as cut on the flip side. You’ll see from the 3rd image I’ve left the wizard Print & Cut marks to show which way round I had them The final image is the cut out object you’ll see the inner square and diamond is off to the right. This happens all the time.
Did you mirror the design (including the registration marks) before you used the Print & Cut to align the back?
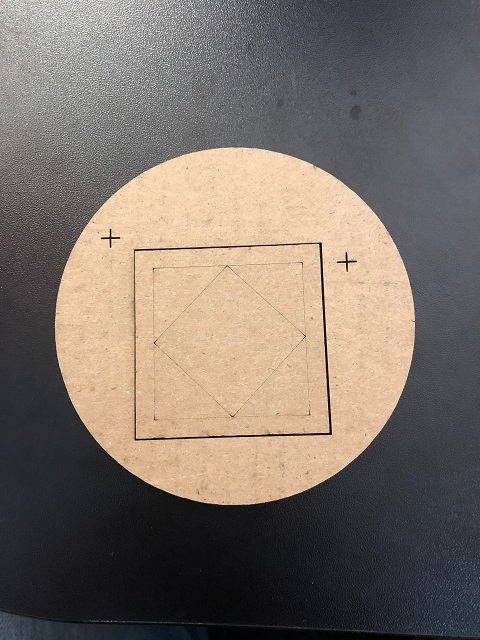
I just ran your file on a scrap piece of cardboard, and as long as I mirror the file before I use the P&C to run the back, it comes out perfectly.
Mirroring it is necessary before you P&C, because the software can’t tell the difference between rotating it 180 degrees or flipping it over from just two registration points.
Thanks for the response. Yes I mirrored the file before using the P&C feature. Here’s the steps I followed:
Create the file
Engrave the inside shapes and cut the registration marks
Flip the piece in the laser
Flip the art in Lightburn (Including the registration marks)
Positioned the laser head over the 1st Registration mark (left side mark)
Ran P&C Wizzard and selected 1st Registration mark
Used Lightburn sent laser position to move the laser to the 2nd mark
Selected 2nd Registration mark
(No upscaling)
Ran the job.
Cried because it didn’t work again : - (
I’ve tried several shops all appear to have the same impact.
Joe was enquiring about my controller and that’s made me think. I upgraded the controller from a Leetro myself over 8 months ago and never had any issues (other than the engrave speed being slower but it’s liveable). If I cut a 10cm square and measure it, it’s exactly 10cm so no issues there. Could there be setting on the controller that I need to ‘tinker’ with. I’m a novice but always willing to learn!
After step 7, did you adjust the position of the laser at all, so it accurately pointed at the 2nd mark, or did you just leave it where LightBurn sent it?
That button has no idea where the exact position is - it sends the laser to where it thinks it’ll be, and then you adjust from there. If you didn’t do that, there’s your issue.
Yep when I sent the laser to the 2nd Mark I checked and adjusted it before running the job.
Is there any chance it could be a setting on the Ruida Controller?
Do you have a config file I could compare to mine? As I mentioned before I upgraded the controller from Leetro accepting most of the default settings. I’m pretty sure I will have missed something as, for example., the engrave speed is no where near as fast as the old controller. Clutching at straws here but the boss lady of the house is wanting to engrave both sides to the pressure is on ;-).
I am experiencing something very similar and came to the forum for that reason. My cut is consistently right and down from the fiducial markers. Thank you for posting your question. Watching closely. I also have a Ruida controller.
For both of you: is the red-dot pointer accurate? If you test-pulse the laser, does it land precisely in the center of the red-dot? Is your red dot one of those “off to the side” ones, or is it following the laser path through a beam combiner? The function is only as accurate as the dot alignment.
The Red dot pointer is attached on the side of the laser head and pointing exactly where the beam hits the material. I’ve checked the height of the bed and that is also fine. Thanks for posting the tutorial I actually follow him (he’s very good), helped me with my swap of controller too. The interesting thing about this issue is that no matter what I try (simple shape or complex design) the flip side is always off by the same amount. Lots of head scratching going on still!!!