I run a small business making home decor. I glue cardstock to 1/4 and 1/8 mdf then cut the design out on my bandsaw. Business is booming and I cant keep up, thinking a laser cutter is my best option. I’m thinking I can use print then cut or reference points to line stuff up, but thats not my main concern.
My concern is that the cardstock will burn when using higher power to cut the mdf. I’ve tried reaching out to local people to help do tests but I can’t get in touch with anyone. If the cardstock burns, the design on it will be ruined thus I cant use the cutter for my designs. If it is an ever so slight burn, I have designs with black borders, so it may not be noticeable. I have no problem cutting two or three times to avoid this, just need to get the issue resolved quickly as halloween is my biggest season. Does anyone have experience with this that can give some assistance?
Some have suggested cutting the paper and cardstock separately, then attaching them together. I’ve tried this, it never works and takes longer than cutting by hand on the bandsaw
If you must cut the two together (I understand why) you could either try wetting the card stock so it doesnt burn, or sealing the card stock/image then mask it with painters or masking tape before cutting…
As a side note, a CNC might be more suited for what your looking to do.
I have tried doing them separately and it takes more time and effort than just cutting it by hand together like I am now. Lining up complex designs is impossible as well.
Yes I’ve heard a bit about coating it or taping it in some way, though I’m afraid to buy an expensive machine and try it only to find it doesn’t work for my needs
I have not seen what you are doing, so of course you know more about it than I do. But if you are able to cut the two layers together then I would assume that both layers have exactly the same shape. I have made lots of pretty complex layered designs and if the two shapes have exactly the same shape then lining them up is not that hard. It does start to get more difficult when you have more than 10 or 20 small complex shapes that must lay in exactly the correct spot on the bottom layer. But that does not sound like what you are doing
Erik - what type of glue are you using to attach the cardstock to the MDF? If I have that adhesive available I can run a test and let you know how it works.
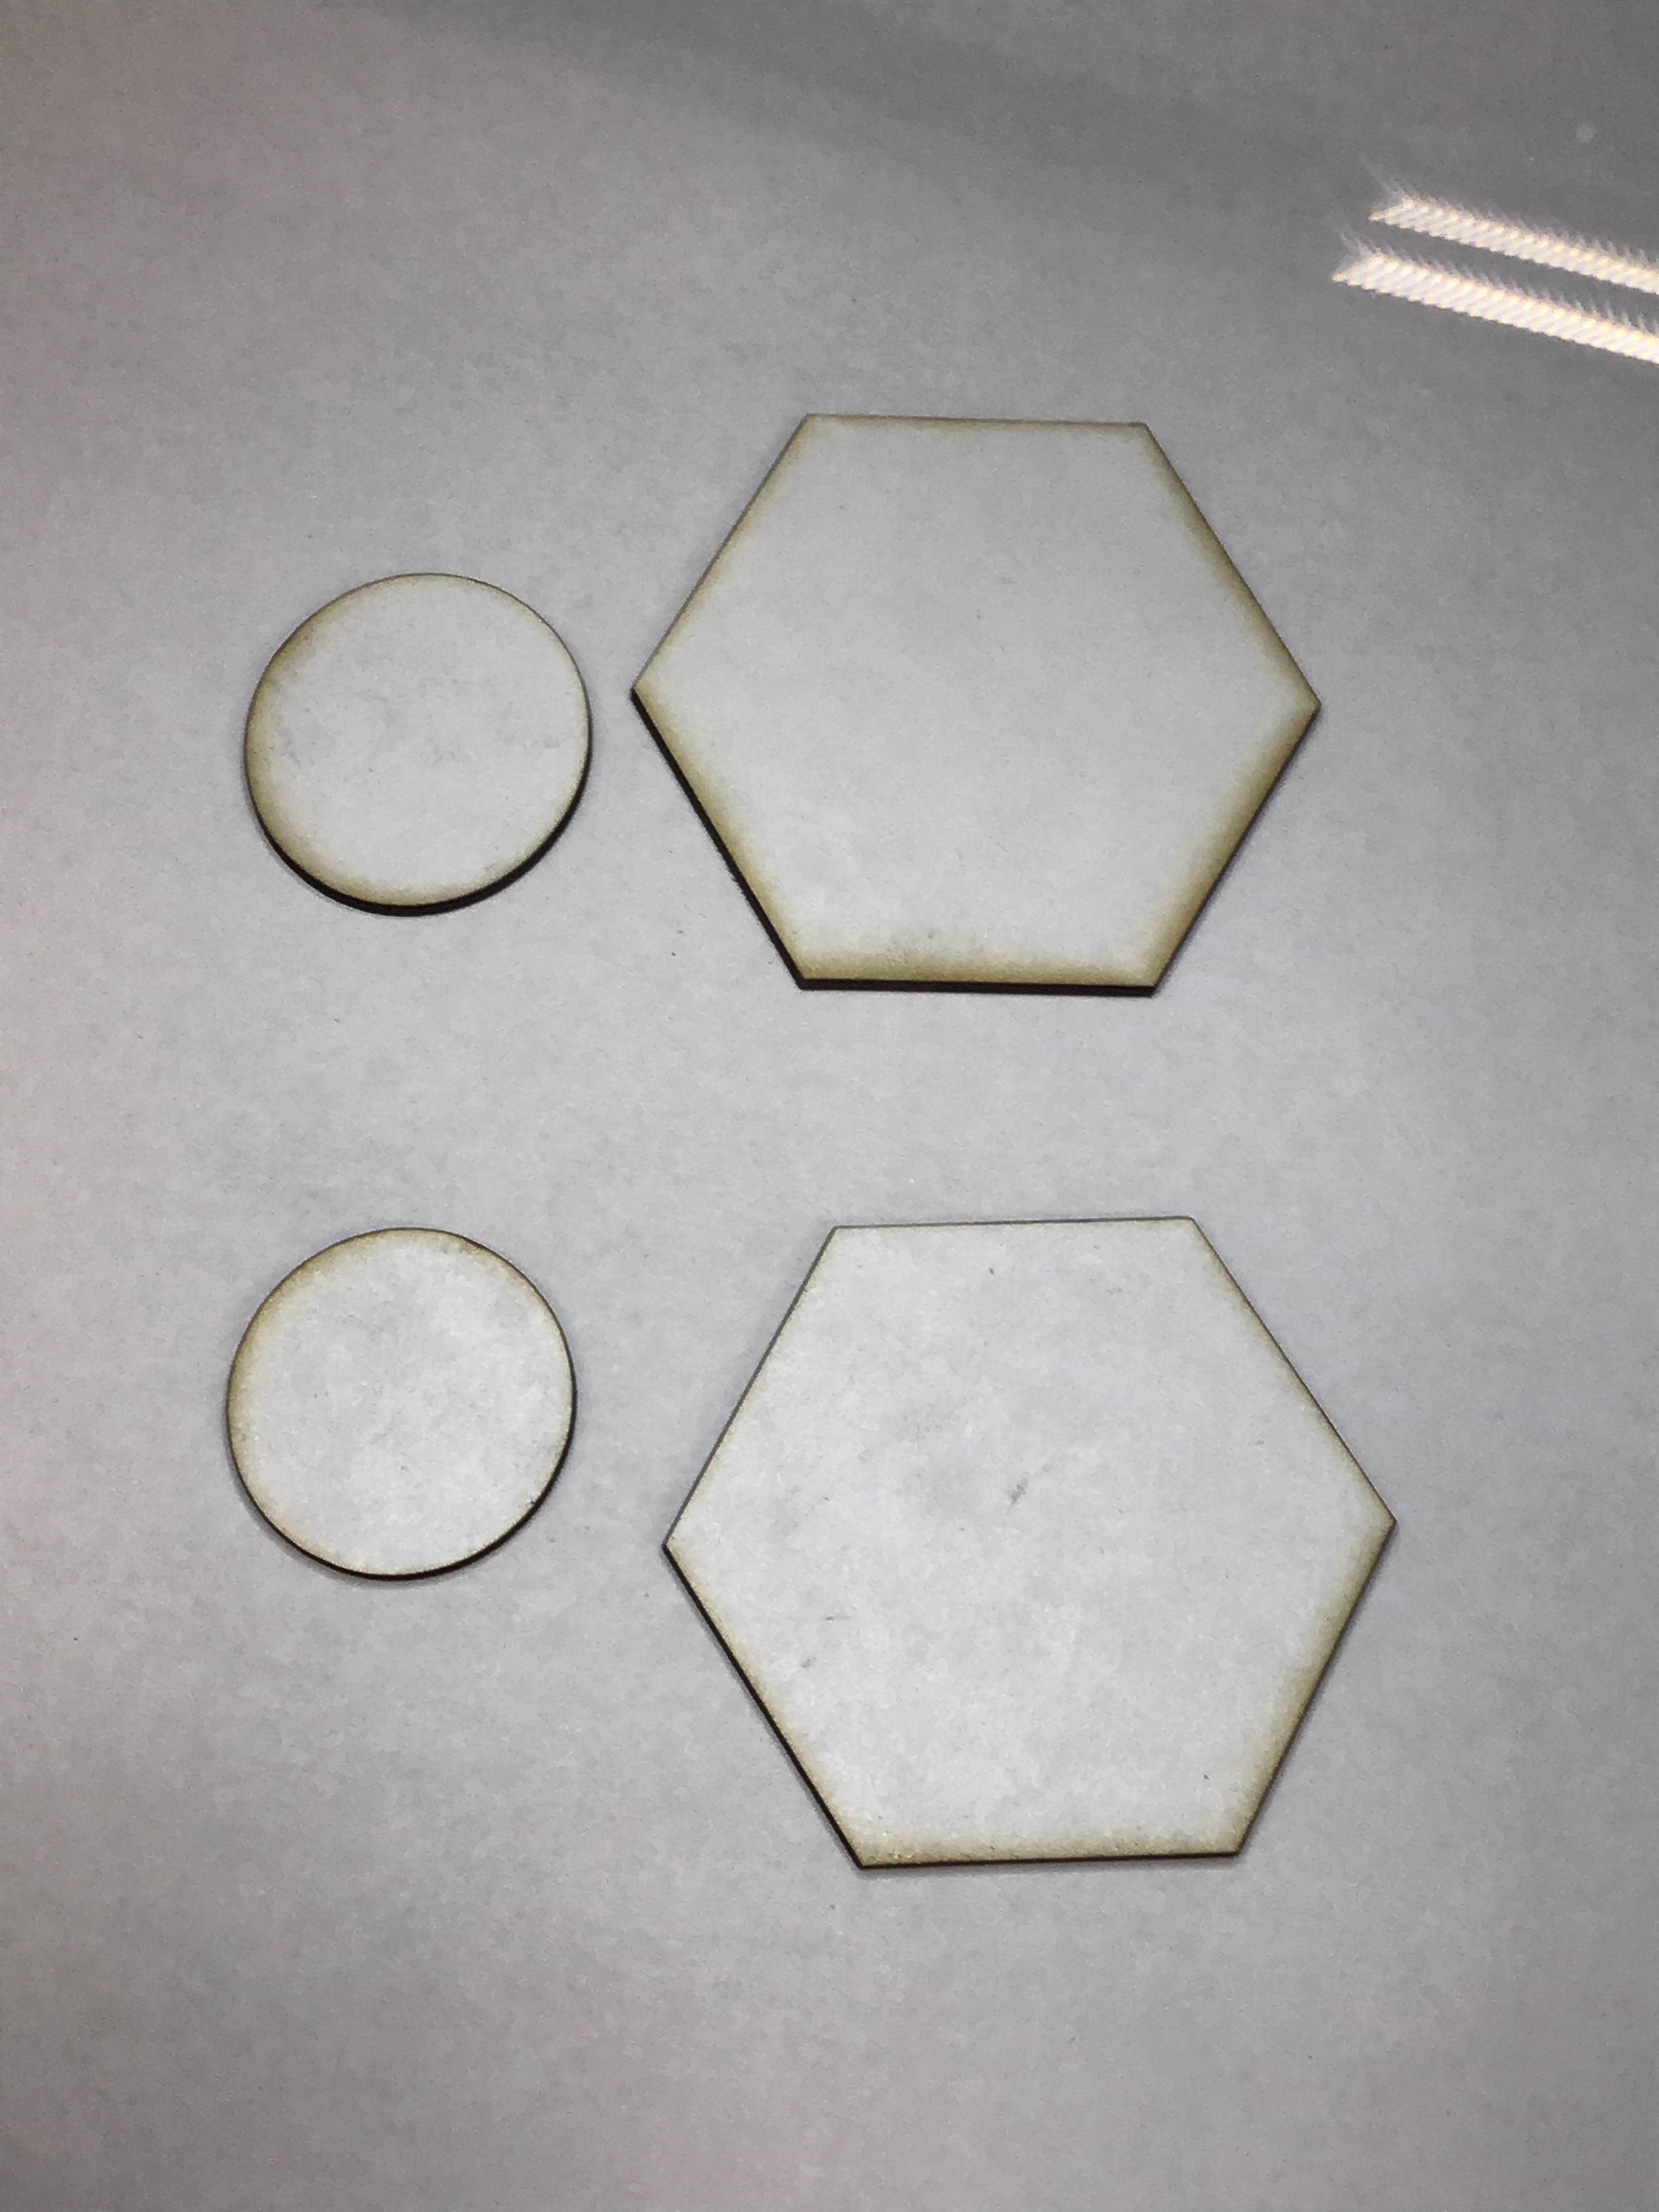
Erik - since I was interested in cutting something similar for making puzzles I went ahead with some trial cuts. I used 1/8" mdf with 110 lb card stock applied with a spray adhesive. As you can see there is some discoloration around the edges but that could be hidden with a black or other colored border.
Hope this helps.
Excellent! I appreciate you checking. That looks like maybe 1/16in of light burning, the black borders I have are at least 1/4 so I’m thinking it will work!
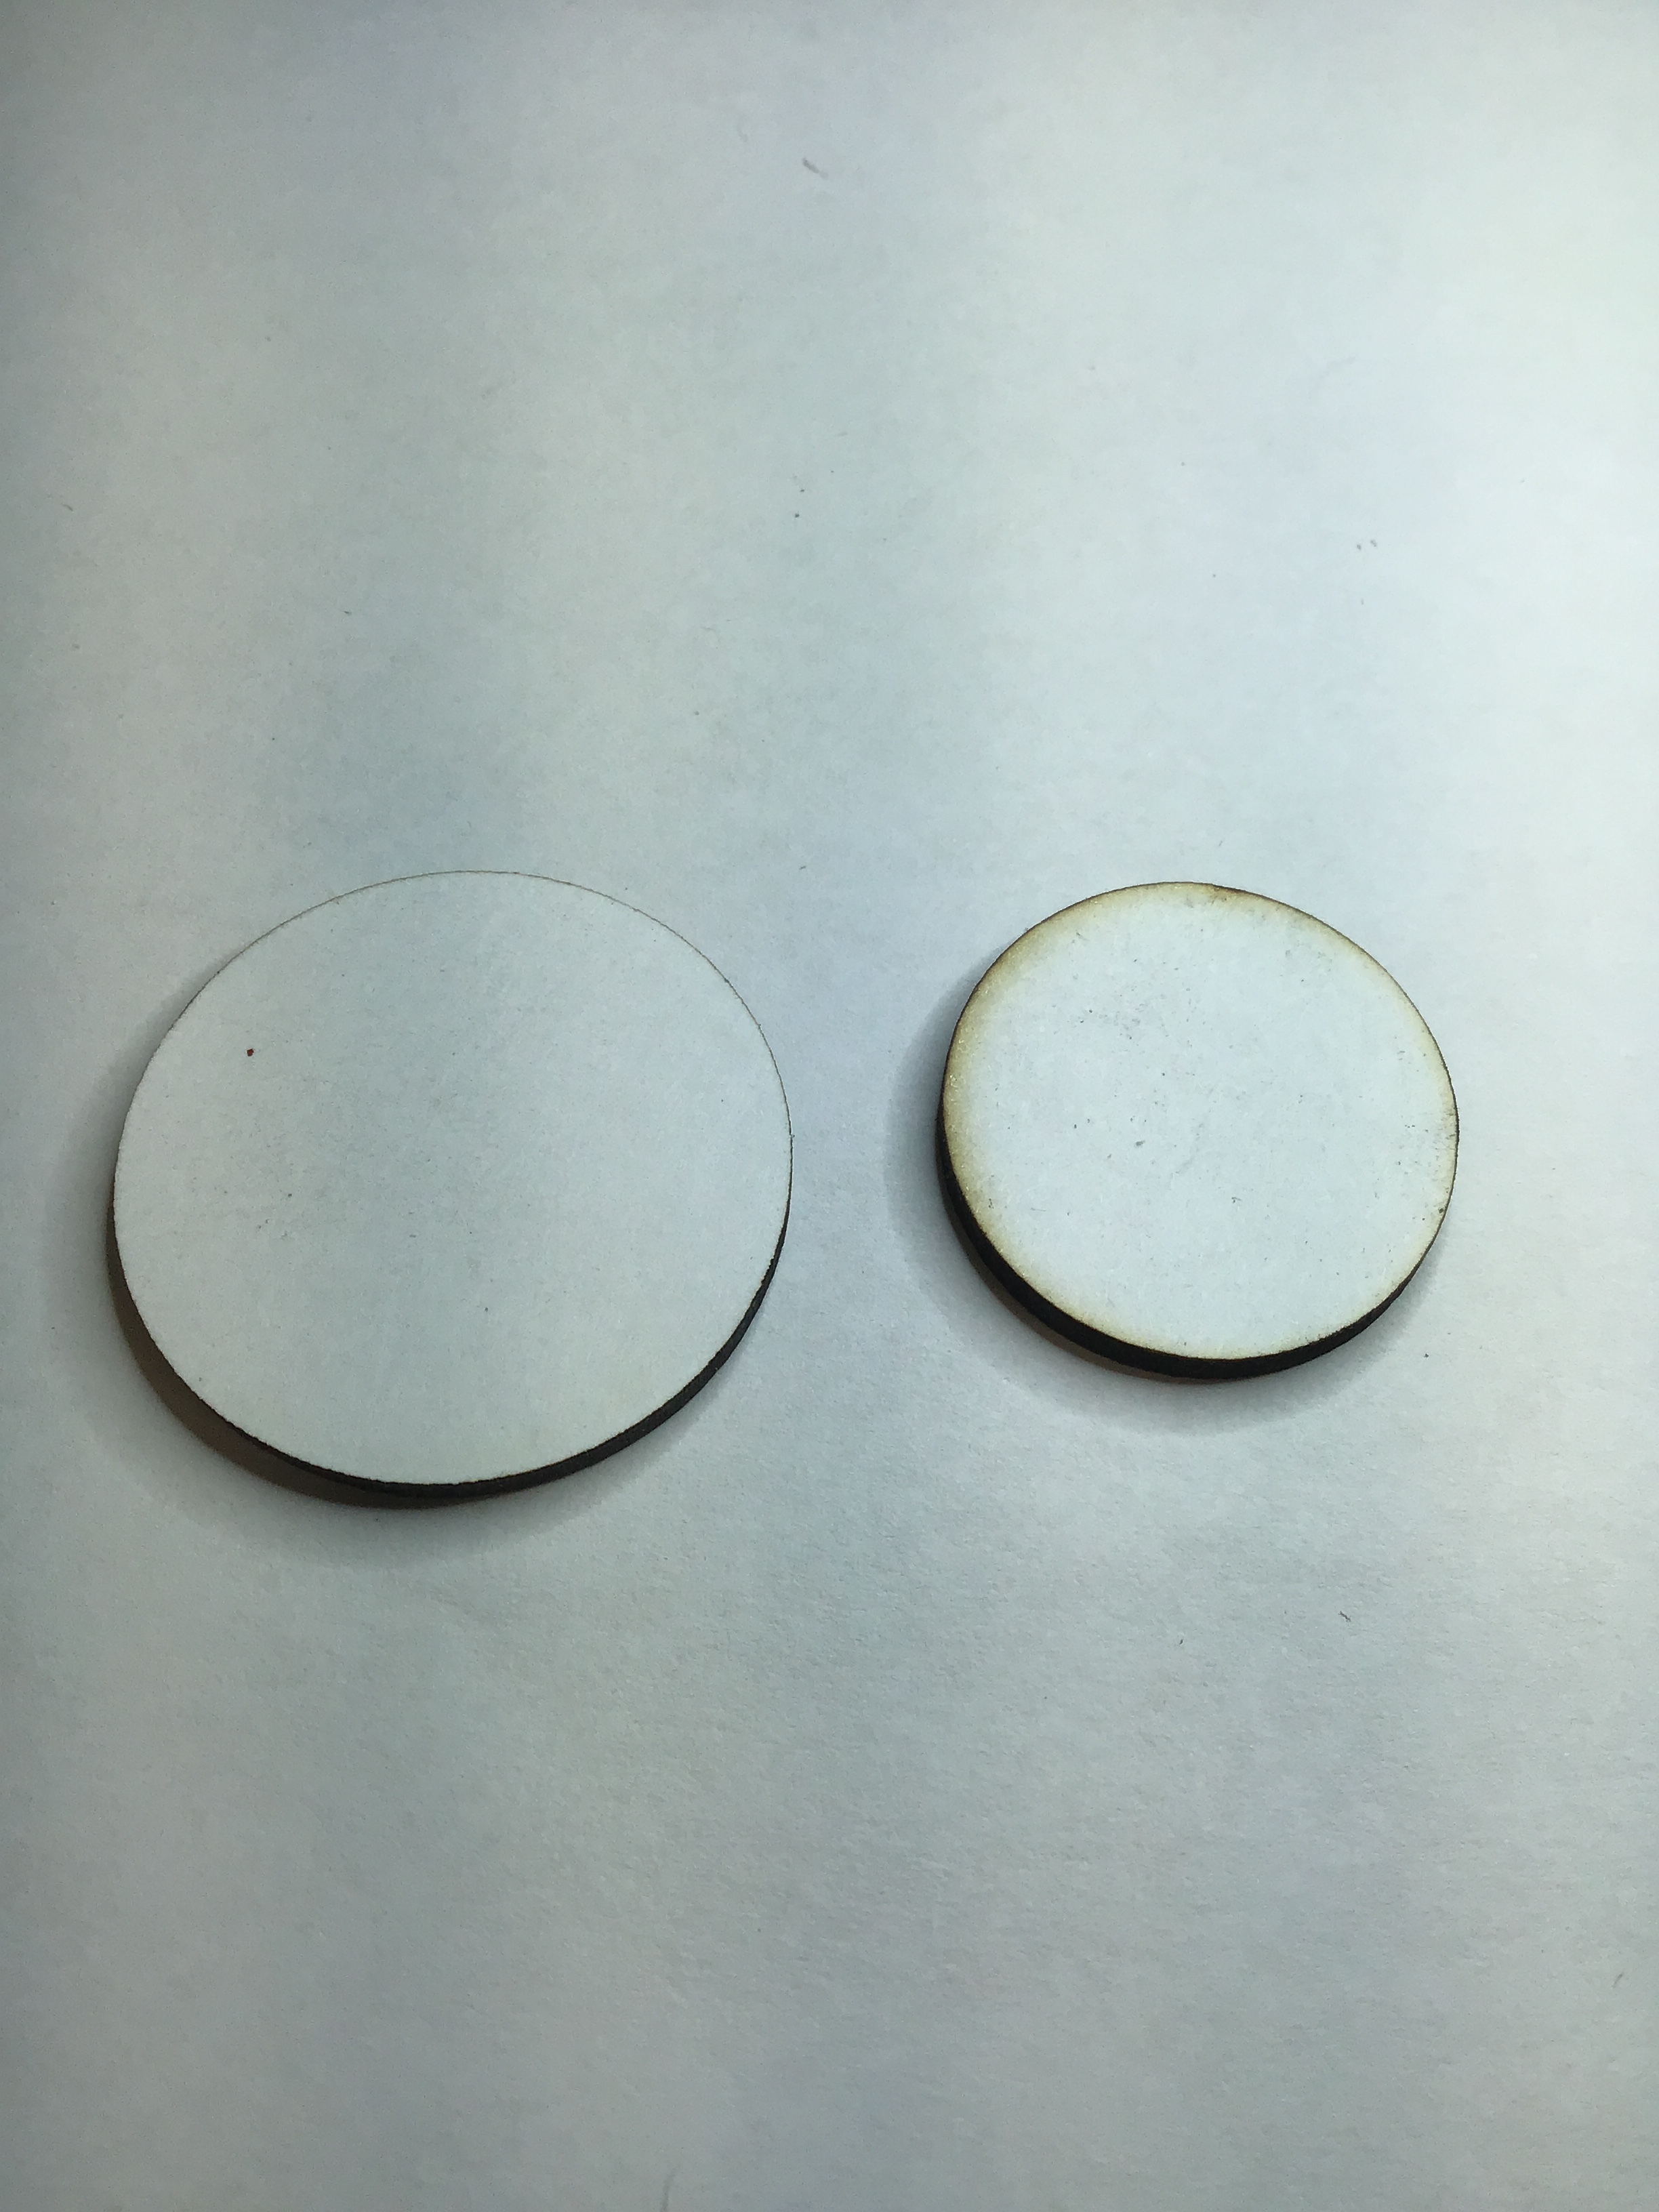
Here is another option. The piece on the left was cut face down. I cut it on a knife edge bed rather than a honeycomb to avoid the flash from the bed. The tricky part will be indexing since the printed reference marks will be on the bottom side rather than the top. I’m sure there is some work around to solve that issue.
Thats pretty brilliant, perhaps I could print two index marks on the printed side, then drill a hole straight through to serve as an index on the other side. Would mean I can cut stuff even without a black border
What you would need to do is import your printed image into Lightburn, use the flip horizontal function, and then use the holes that you drilled to serve as an index to line up your cut. Good luck, I’ll eventually give this a try for cutting a custom puzzle.
Something that works better than drilling a hole for the index mark is to align your laser to the index mark on the printed side and hit pulse for about 1/2 second (on 1/8") and it will burn a nice clean spot on the backside to use as your index mark.