Problem with "cut shape"

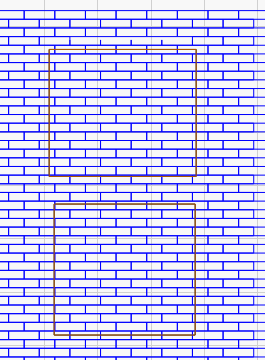
Okay. Here’s what I want to do. I have a brick wall and I want to put 2 windows in it. I’ve precisely lined up the windows the way I want them.
image
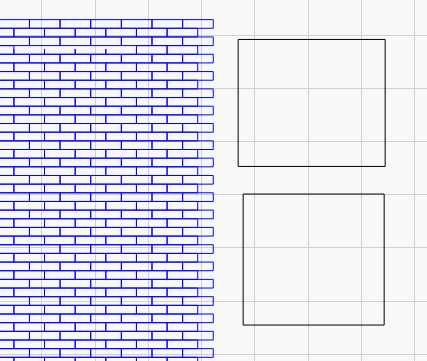
Now I’ve moved the windows inside the brick wall. After I moved them in, I hit control +D to add another layer. I then clicked “off” on the black layer so there are just the 2 layers.
image

When I go to “cut shapes”, it will only cut out one of the shapes, not both.

Because I have established the exact location of the windows relative to each other, I can’t just move each window onto the wall as separate operations. Multiply this example by 10 and you can see why that just wouldn’t work. I’d lose all my precise positioning.

Any suggestions?

Try this.
May or may not work.
Line up your windows where you want the spacing to be.
Group all the windows.
Move the group over the bricks and do the same thing as you did for one window.
May or may not work.
I think it will.

Just ungroup windows once you place them and select one at a time and cut each separately.

Sorry, my reply was directed at OP, I wasn’t making commentary on your video!

We mostly use Final Cut Pro, which is a ‘proper’ video editing tool. You might like to look into Camtasia, potentially, it has lots of tools to make screen grabs quick/ simple.

Cut shapes treats the last shape you select as your ‘cutting shape’, so it can’t be used to cut multiple things out a the same time.

The final shape (the ‘cutting’ shape) must also not be a group, but a single closed shape.

What I’d recommend you do is:

  1. Group your bricks to make the rest of this easier.

  2. Move the windows into position,

  3. Deselect everything (esc), select your bricks then add your first window to your selection with shift+click.

  4. Run cut shapes,

  5. Delete the bit inside of the window that don’t want.

  6. Then deselect everything, select your bricks again, add the window to the selection and run the cut again, and repeating this last step for each window.

1 Like

Thank you.
I finally figured out most of that already, and that’s now the sequence I’m using. Didn’t know about the “esc” though. I’m just clicking on an open area and that seems to do the trick. What was missing was the “hold shift” command. That’s happened before on other operations and the Lightburn documentation doesn’t always mention that very important detail.

I do appreciate your and everyone else helping a total novice with this.

Would it be possible to obtain the pattern for the HO scale brick Please

Here’s my method for making brick walls:

A real life standard brick is 2 ¼”H x 8”L. In HO, that translates to .0256” x .0918”. The mortar line is roughly 3/8” thick, or .0043”.

It may seem very picky to draw rectangles using 10,000th of an inch accuracy, but since Lightburn lets you be that precise, go ahead. After all, we want things to be as accurate as possible, right?

In Lightburn, draw a rectangle .0256” x .0918”, the HO equivalent of a 2 ¼” x 8” real sized brick. You could add .0021” to each dimension to account for ½ the mortar thickness. Since you’ll be stacking the bricks and placing them side by side, that .0021” will double and account for the mortar thickness.

Using the “array” button, click on the “x columns” box and make a line of bricks as long as you want.

Select that entire line of bricks, use the “array” button again and add one additional row in the “Y rows”. Then put .0469 in the “Y row shift” box. Now you have two rows of bricks, each row overlapping the other by half, simulating a common running bond pattern.

Now select the all the bricks, click on “array” and add as many rows as you want by clicking on the “Y rows” button. Voila’. You now have a giant brick wall you can use as a template for any size wall you want. I made mine an actual 8”W x 12”H. Any wall I make will probably be smaller than that. Save that page as a wall template and you’re all set.

Once I design a wall for my building, I copy and paste that outline onto the template. I then copy and paste just that section onto my design page. Don’t group the individual bricks into one mass; if you do, you won’t be able to copy and paste just part of it.

The beam on my laser is .06mm x .08mm. That’s .0024” x .0031”. That’s close enough to the mortar thickness that it’s acceptable for me. After the wall is painted and I fill in the laser grooves with slightly thinned joint compound, the mortar lines look just fine.

Hope that helps. Any questions, let me know.
This topic was automatically closed 30 days after the last reply. New replies are no longer allowed.