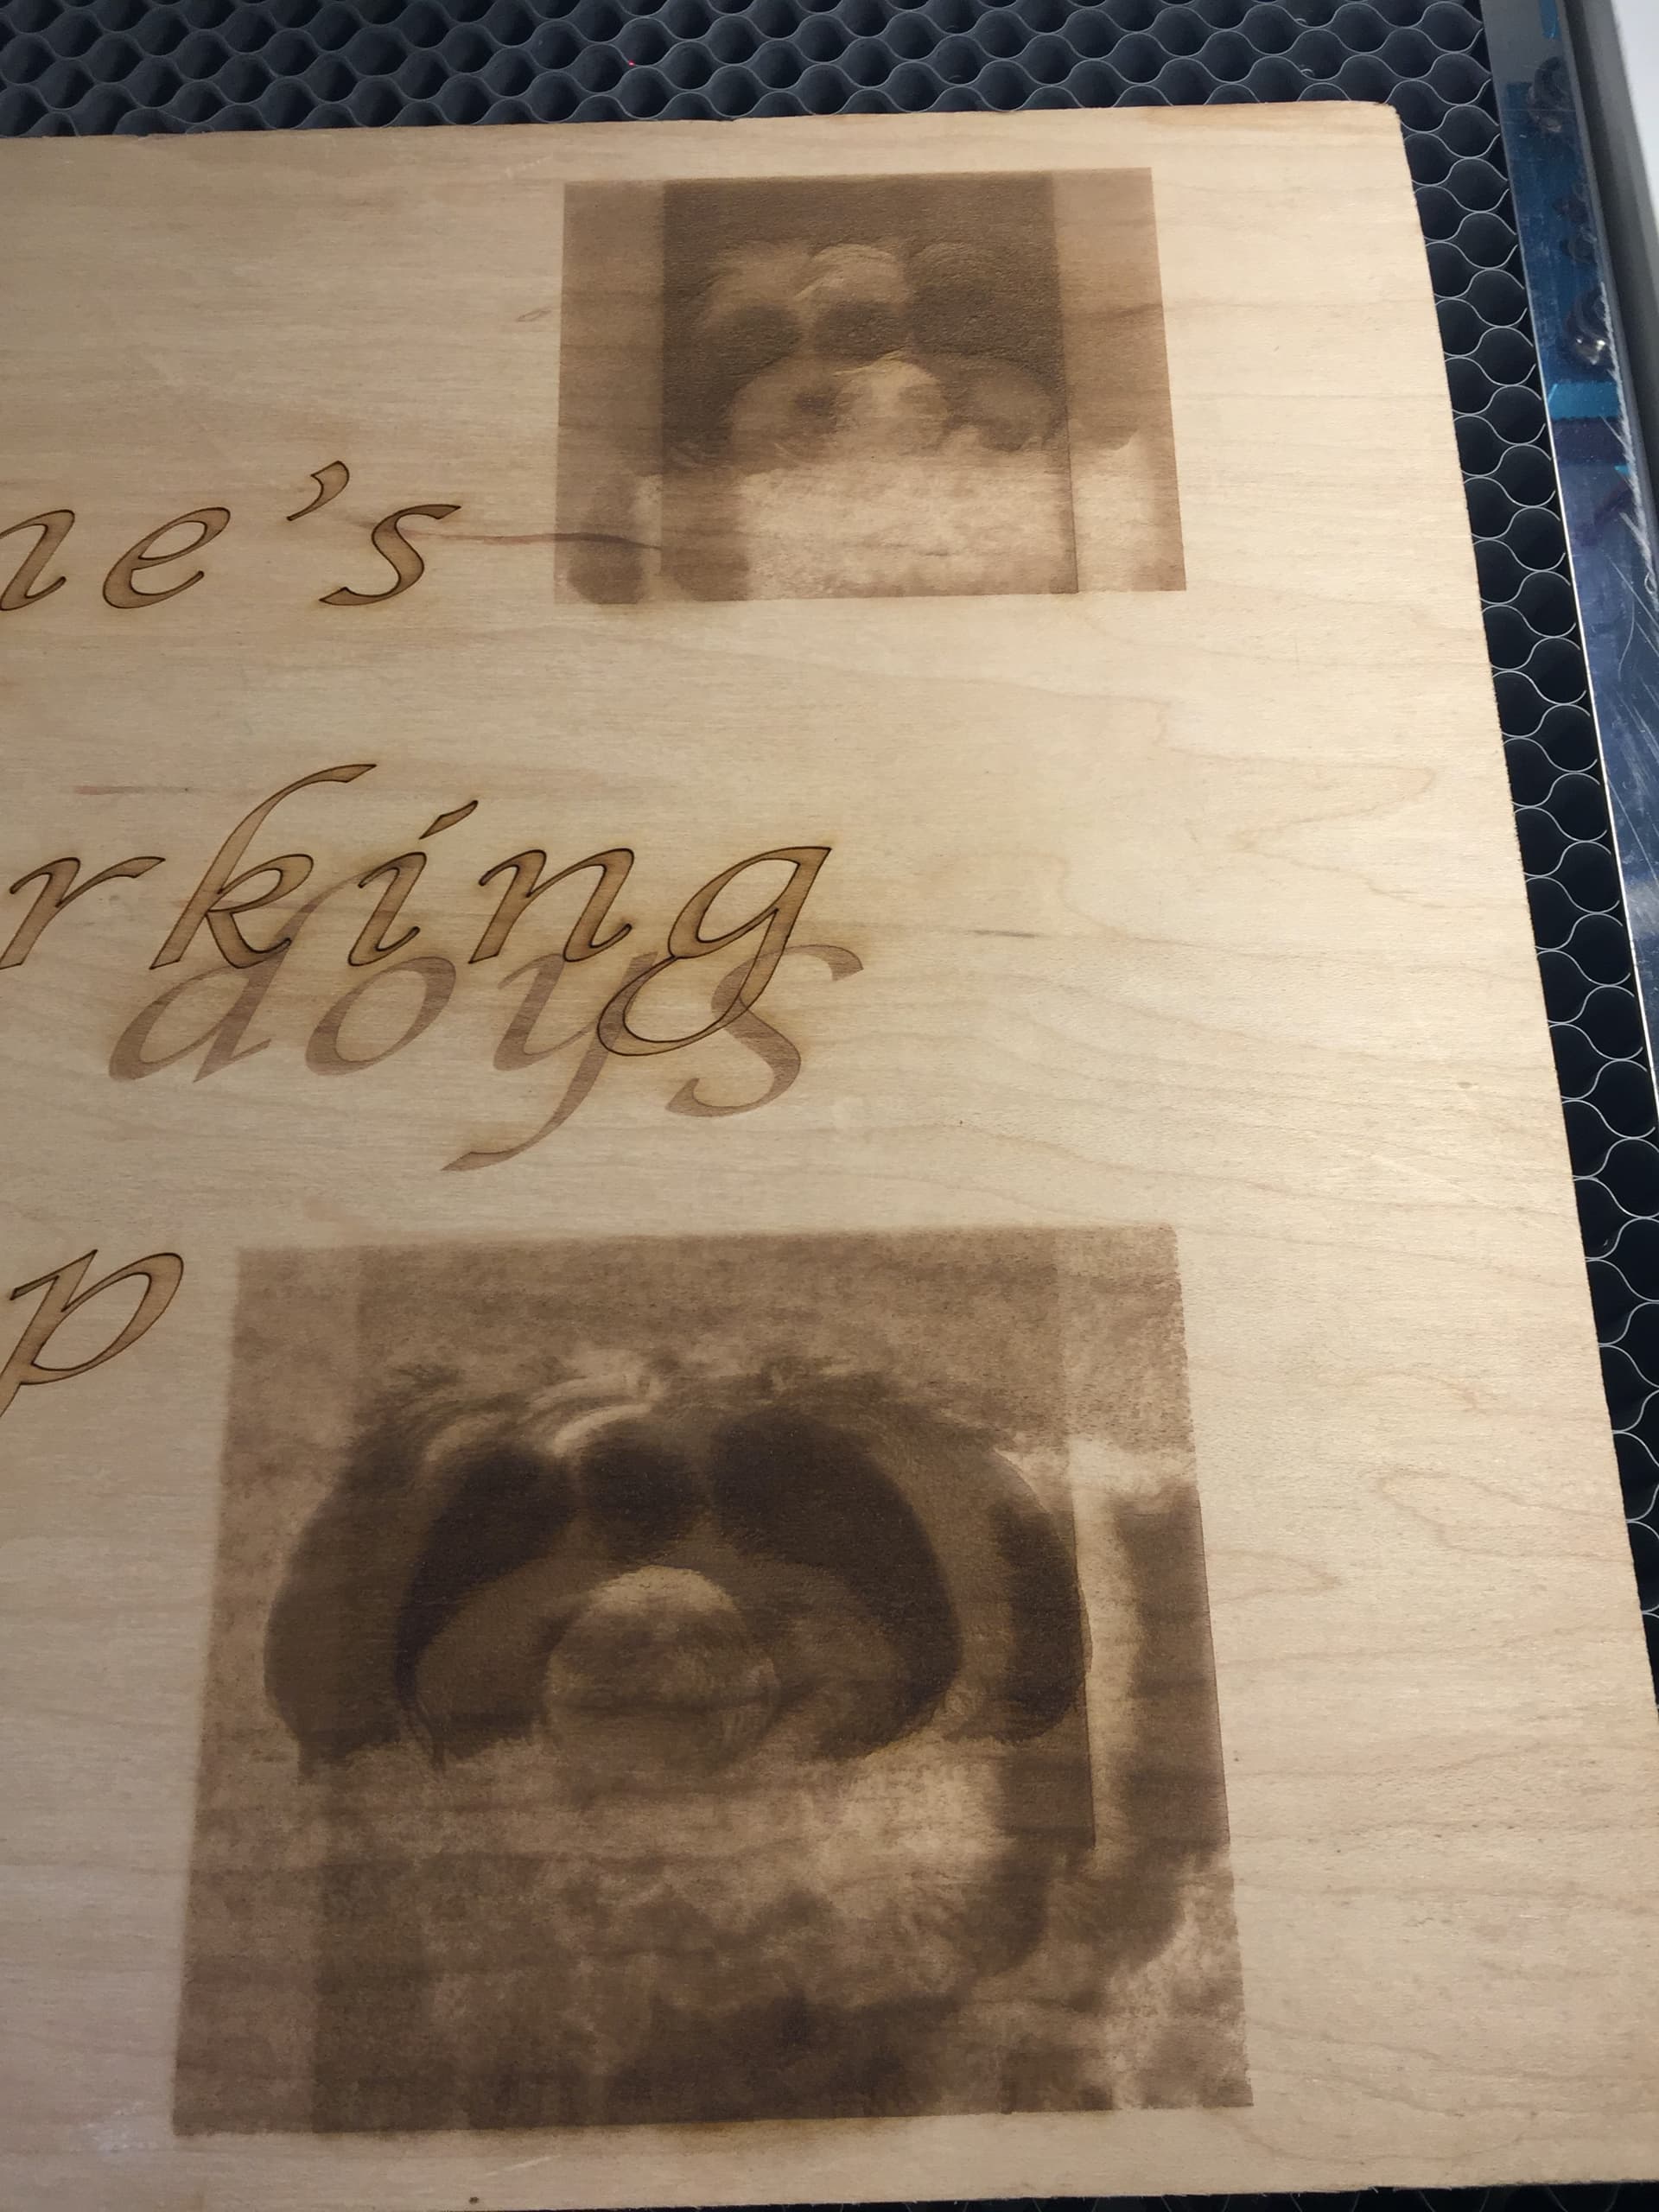
Every time I engrave a photo I end up with a vertical line to the left side and right side of the dog’s head. I have the speed set at 400mm/sec and the power at 25 percent using Jarvis, Stucki, and Dither on a Thunder Laser, Nova 24, sixty watt laser. I have used DPI of 600, 400 and 300 but end up with the same results. I have used Baltic Birch and Maple and end up with the same results. I have deleted the file in Lightburn and the Ruida Controller and started over but end up with the same results. Also, as you can see from the attached photo it is not clear and sharp. I am using Lightburn V1.1.03 on a Mac computer.
Any idea what I am doing wrong?
We’ll start at the lowest resolution you’ve mentioned, 300dpi at 400mm/s…
The lps on these machines are rated at 90% of rated voltage @ <=1mS. If your supply can normally do this, then the most ‘dots’ you can put down in 1 second is 1000 = 1mS (1s/1000) response time.
The best dots you can do with this restriction is 1000 dots/inch. 400mm/s is equal to 15.74 inches/s and you wish to put down 300dpi.
You would have to put down, in one second, 15.74 inches x 300dpi = 4724 dots. The lps can respond to 1000, you want 4724. That’s over 4 times the speed a 1mS lps can respond…
Could be part of the issue…
How big of a dot can you make? With a normal 1.5" I can do about 0.2mm dot. That means the best resolution is 127dpi. If you can produce a 0.1mm dot, your resolution can be 254 and at 0.05 you can do 508… I can do a 0.05 dot but only with a compound lens.
Take these into consideration when you are working with this. The physics always apply…
What happens when you attempt to drive it faster.? beats me, seems it’s not as predictable…
This is a group of small dots to check how small of a dot you can make. You will have to click on ![]() to view it after it loads… it’s pretty small…
to view it after it loads… it’s pretty small…
dotSize.lbrn2 (4.9 KB)
This is a link to Russ Sadler formula for engraving… should browse it, it’s short…
Good luck
![]()
1 Like
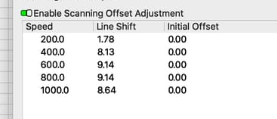
It appears that the Scanning Offset is out of adjustment.
This may be worth review:

It looks like you may have entered your scanning offset values in inches instead of mm. Did you set the software to use inches as your units before you entered the scanning offsets? That’s a very common mistake - Thunder ships the values in millimeters.
1 Like
I made the changes you mentioned and it did help. However, I still have a dual image of the dog. The dog still has four eyes, two noses and two mouths. It reminds me of when I am focusing a camera and there are two images of the subject and as I continue to focus the camera the two images merge into one image. Any idea what I am still doing wrong?
Go to Edit > Device Settings, and take a screen shot of that window. Post it here so I can have a look.
1 Like
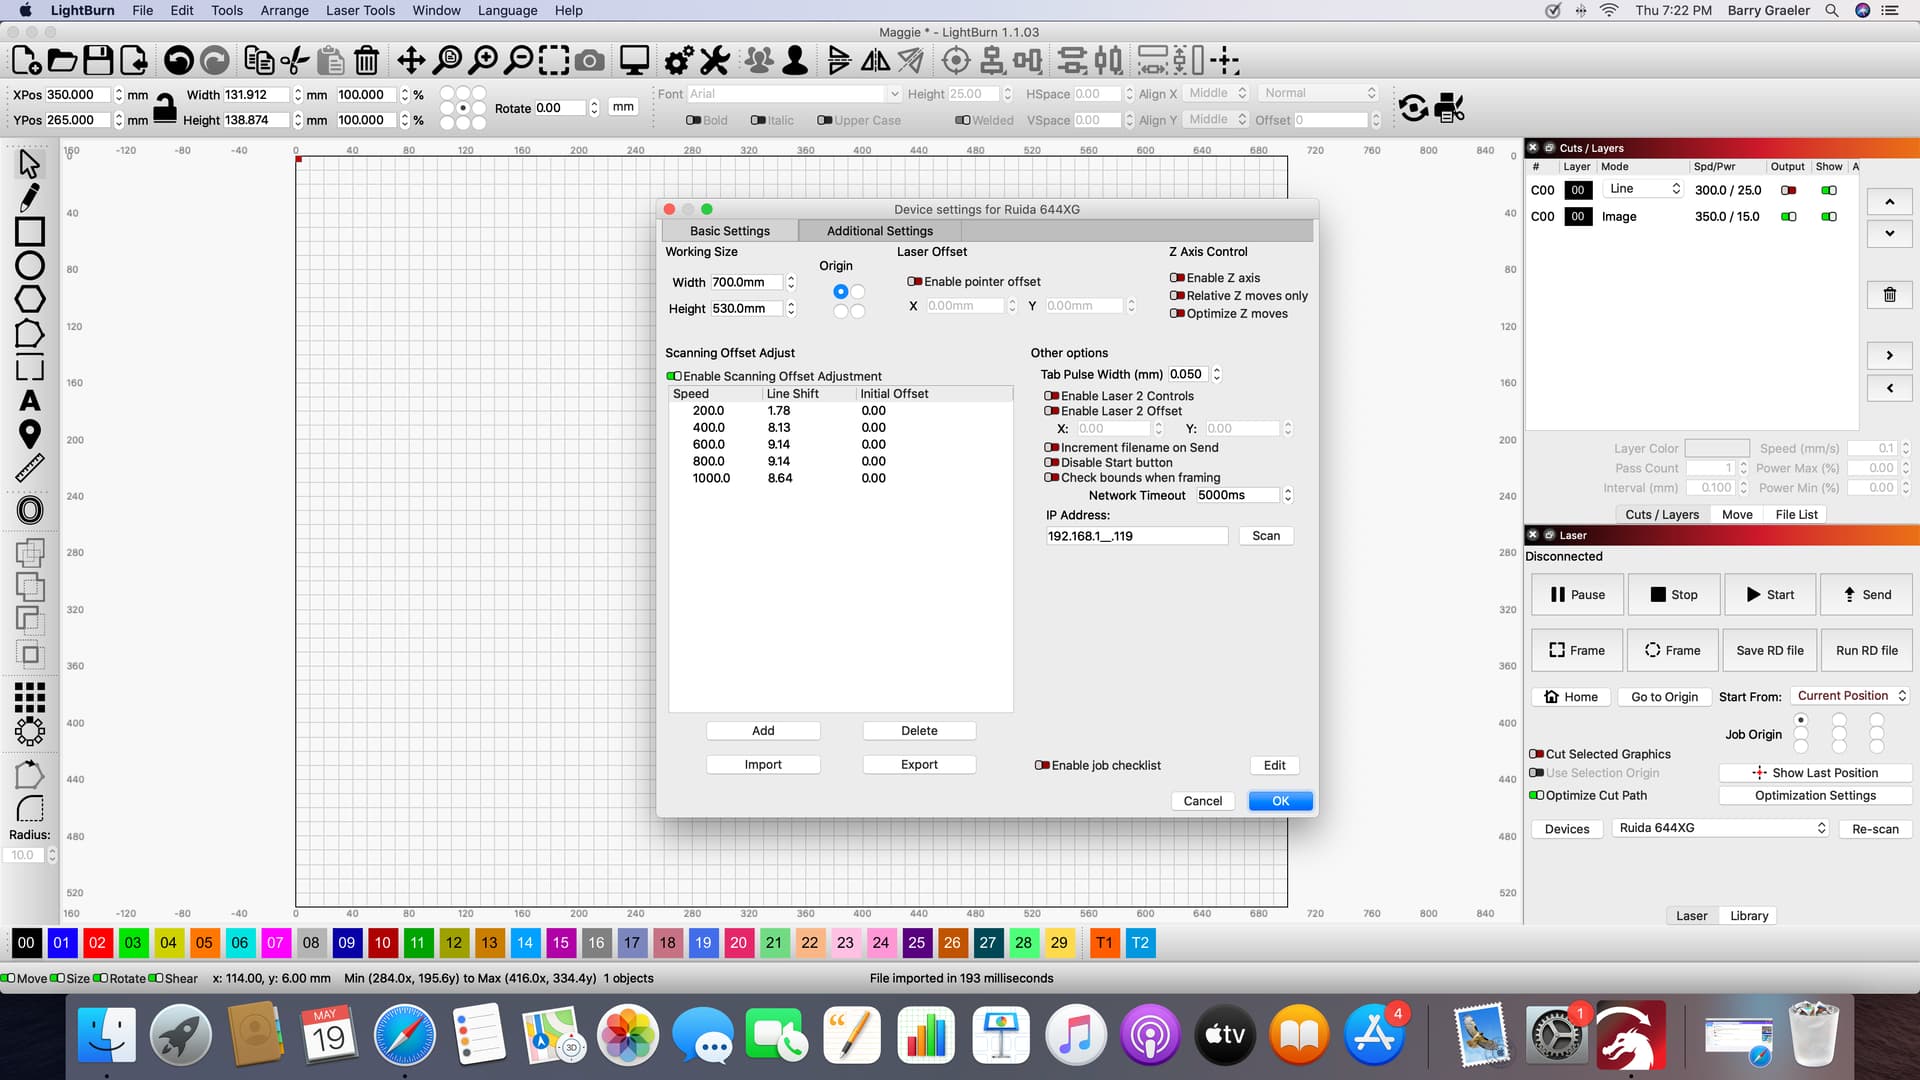

These numbers are huge for scanning offsets. a 2mm shift at 2mm/sec, and an 8mm shift at 400? I suspect you have a Thunder Laser, switched LightBurn to inches, then entered the values on the scanning offset card, which are provided in mm, not inches. Entering them when in inch mode would make them 25 times larger than they shouldbe.
That worked, thanks! What I don’t understand however, is since Lightburn converts inches to millimeters and millimeters to inches what difference does it make if the measurements for the photo of the dog are in inches instead of millimeters?
You ‘machine’ speaks in ‘units’ not inches or mm. So both of them have to know what ‘units’ they are speaking in.
Make sense?
![]()
This topic was automatically closed 30 days after the last reply. New replies are no longer allowed.