Bonjour à tous
J’ai installé correctement mon laser CO2 Ruida 600X400 mm
la gravure se fait qu’à 50%
si je coupe un rectangle de 200X100 mm
ma coupe est de 100X50 mm
et lorsque je dépasse 300X200 c’est à dire la moitié de ma surface de travail le laser se mets en erreur.
quelqu’un aurait il une solution à ce problème?
Un grand merci à l’avance.
Philippe.
Hello everyone,
I have correctly installed my Ruida 600x400 mm CO2 laser.
The engraving is only 50% complete.
If I cut a 200x100 mm rectangle,
my cut is 100x50 mm.
And when I go beyond 300x200 mm, which is half of my work area, the laser goes into error mode.
Does anyone have a solution to this problem?
Thank you very much in advance.
Philippe.
What do you mean by that? Have you retrofitted it in your laser?
Whad does it say in “Machine Settings” in LB?, can you see the correct parameters for X and Y?
Thanks Bernd for your answer.
On LB, my work surface is 600 x 400, but when I engrave something like 200 x 200, my actual engraving on the machine is 100 x 100.
And I can’t engrave more than 300 x 200, which is 50% of my work surface, otherwise the laser goes into error mode.
I could check the x and y coordinates in the machine settings when I get back to the office.
What should the x and y coordinates be?
Thank you very much for taking an interest in my problem.
Philippe.
Hi Filippe, here are my settings from my OMT 600x400 60Watt CO2 machine.
You MUST make a backup of your settings before you start changing anything and never “reset” to factory settings - (everything is lost).
But normal fine tuning and adjusting the parameters should not be a problem.
You have not answered my question about your Ruida installation. Is it an original machine or something you built…?
Hi bernd
I just upgrade my machine with Ruida Mother Board
Before I had a system that only worked with Corel.
Thank you very much for lbset, will try this morning and will say to you.
I really appreciate your interest in solving my problem.
Have a nice day
Philippe.
Hi Bernd,
I entered your settings into my machine, but apart from changing the “Home” from top left to bottom right, the problem persists.
I think it’s more of a Ruida motherboard configuration issue because when driving the motors directly from the machine’s controller, the X motor stops at 200mm to the right and the Y motor at 150mm.
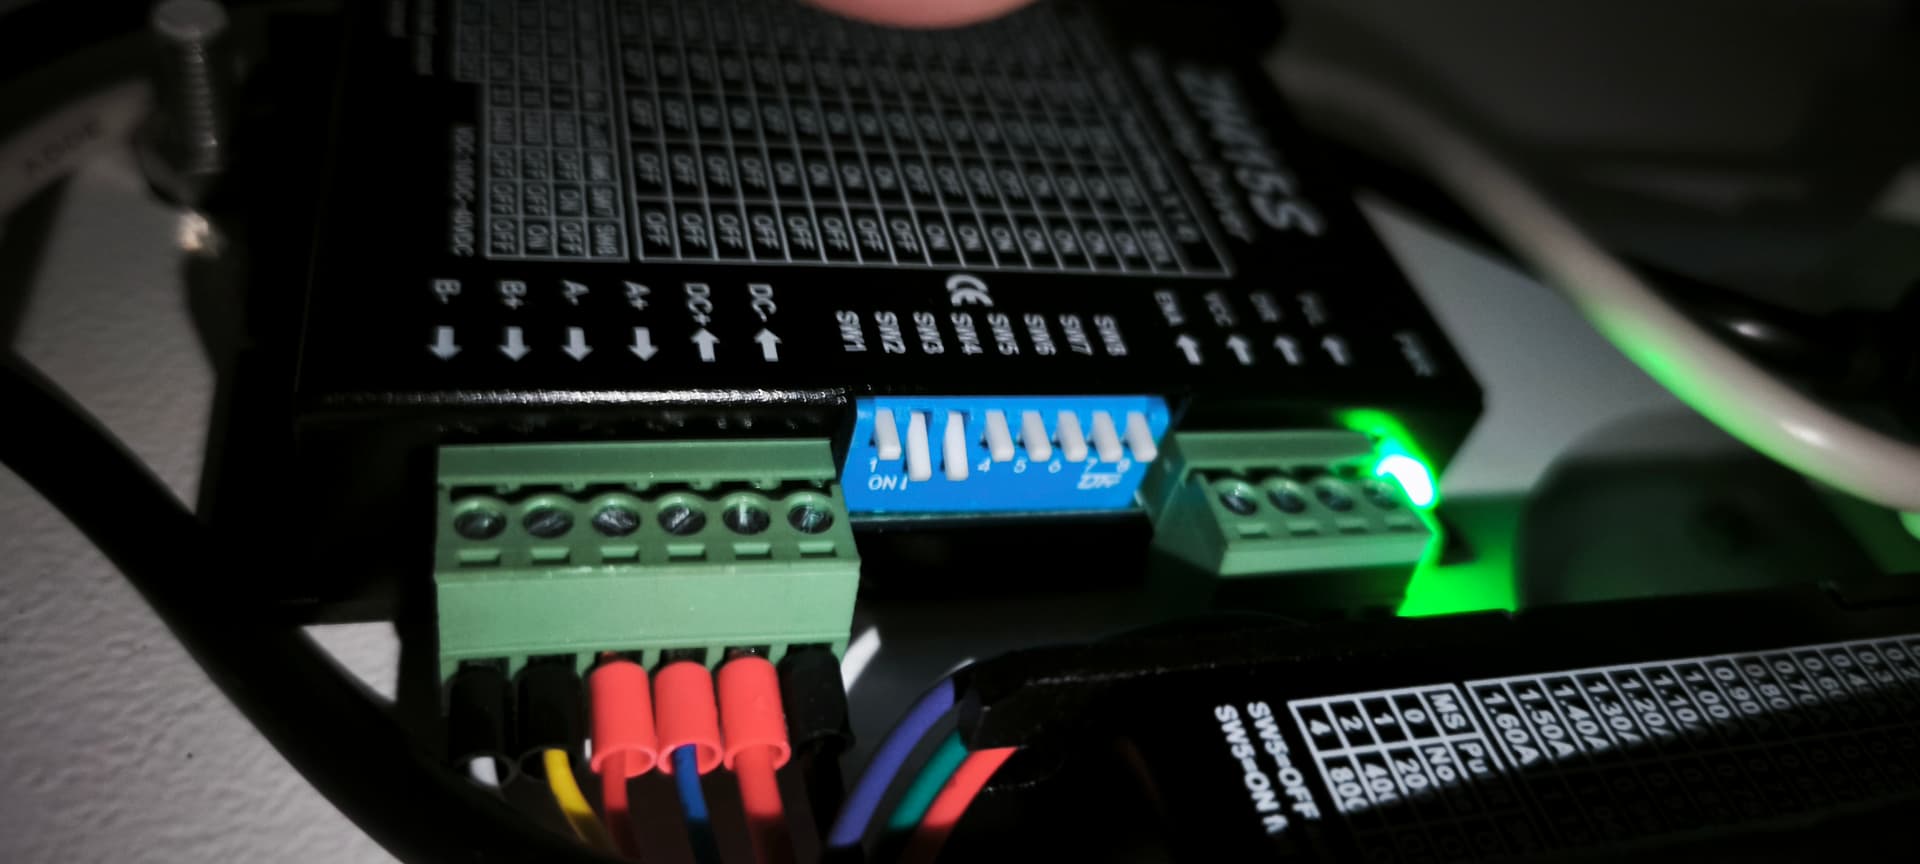
I’m wondering if the motor controllers are configured correctly (see photo of the black case). If you have the same ones on your machine, can you tell me if the jumpers are identical?
I’ve attached my Ruida settings in case you suspect something, but given that with your settings I can’t access more than 200x150mm, I don’t think that’s the problem.
Best regards
Philippe. original.lbset (12,6 Ko)
Unfortunately, I think that our controllers are not identical, there are many different ones and in order to use the whole lbset, the machines/controllers must be 100% identical. It was also meant more as a comparison file for “fine tuning”.
My Ruida clone is a “KT332N”, I’m sure there will be others here in the forum who have “your” setup and they will be able to give you information about the correct jumper settings.
Find your controller type/number, it will be a little easier for others to help.
…it will probably work out in the end
Hi, Bernd
I finally found the solution to my problem.
Actually, the motor step length in the Riuda program didn’t match the step length of the motors installed on my machine.
“Desc”: “Step length (um)”,
“ID”: “0x21”,
“Value”: 6.31
I changed the value to 3.15 to double the speed of my motors.
So everything works perfectly under Lightburn with a 600x400 working format.
Have a nice Day
Philippe.