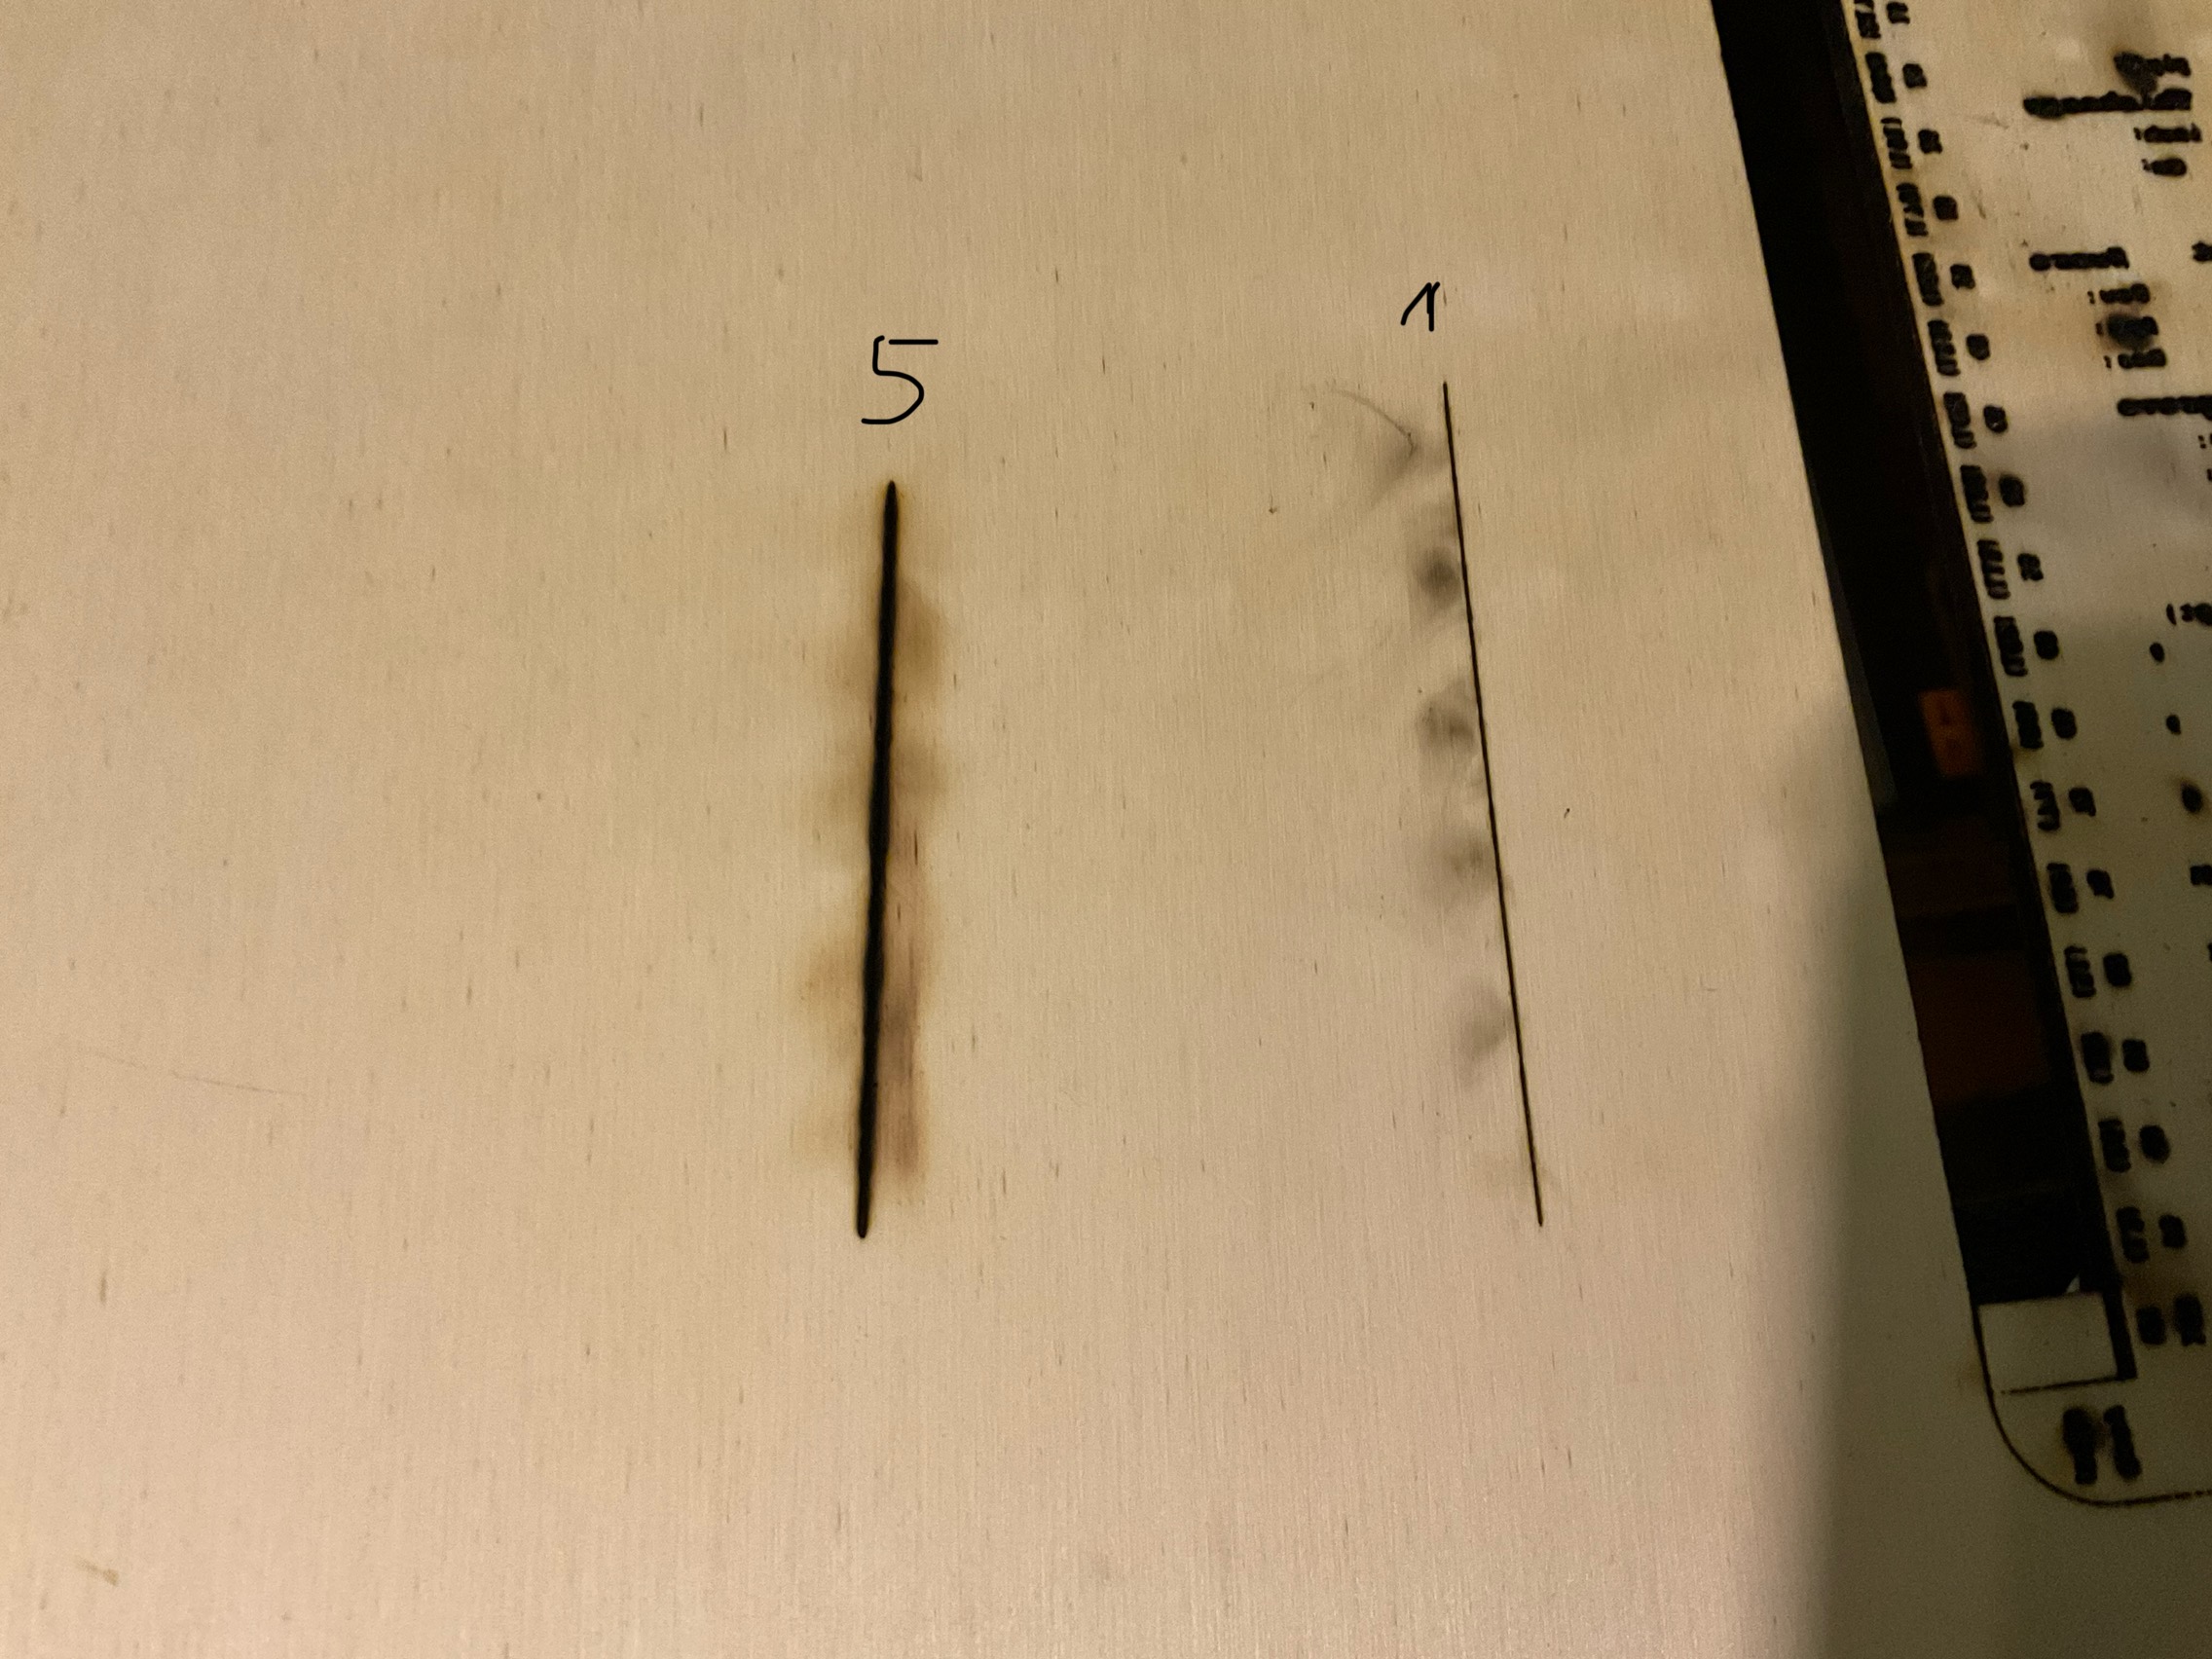
settings are in fact the best ones (lines 1 and 2) but the first line is still “smokey” on the back, is it normal or do I have to do something else?
PS: i have a matrix panel, not a honeycomb, to support the wood. They said it’s better
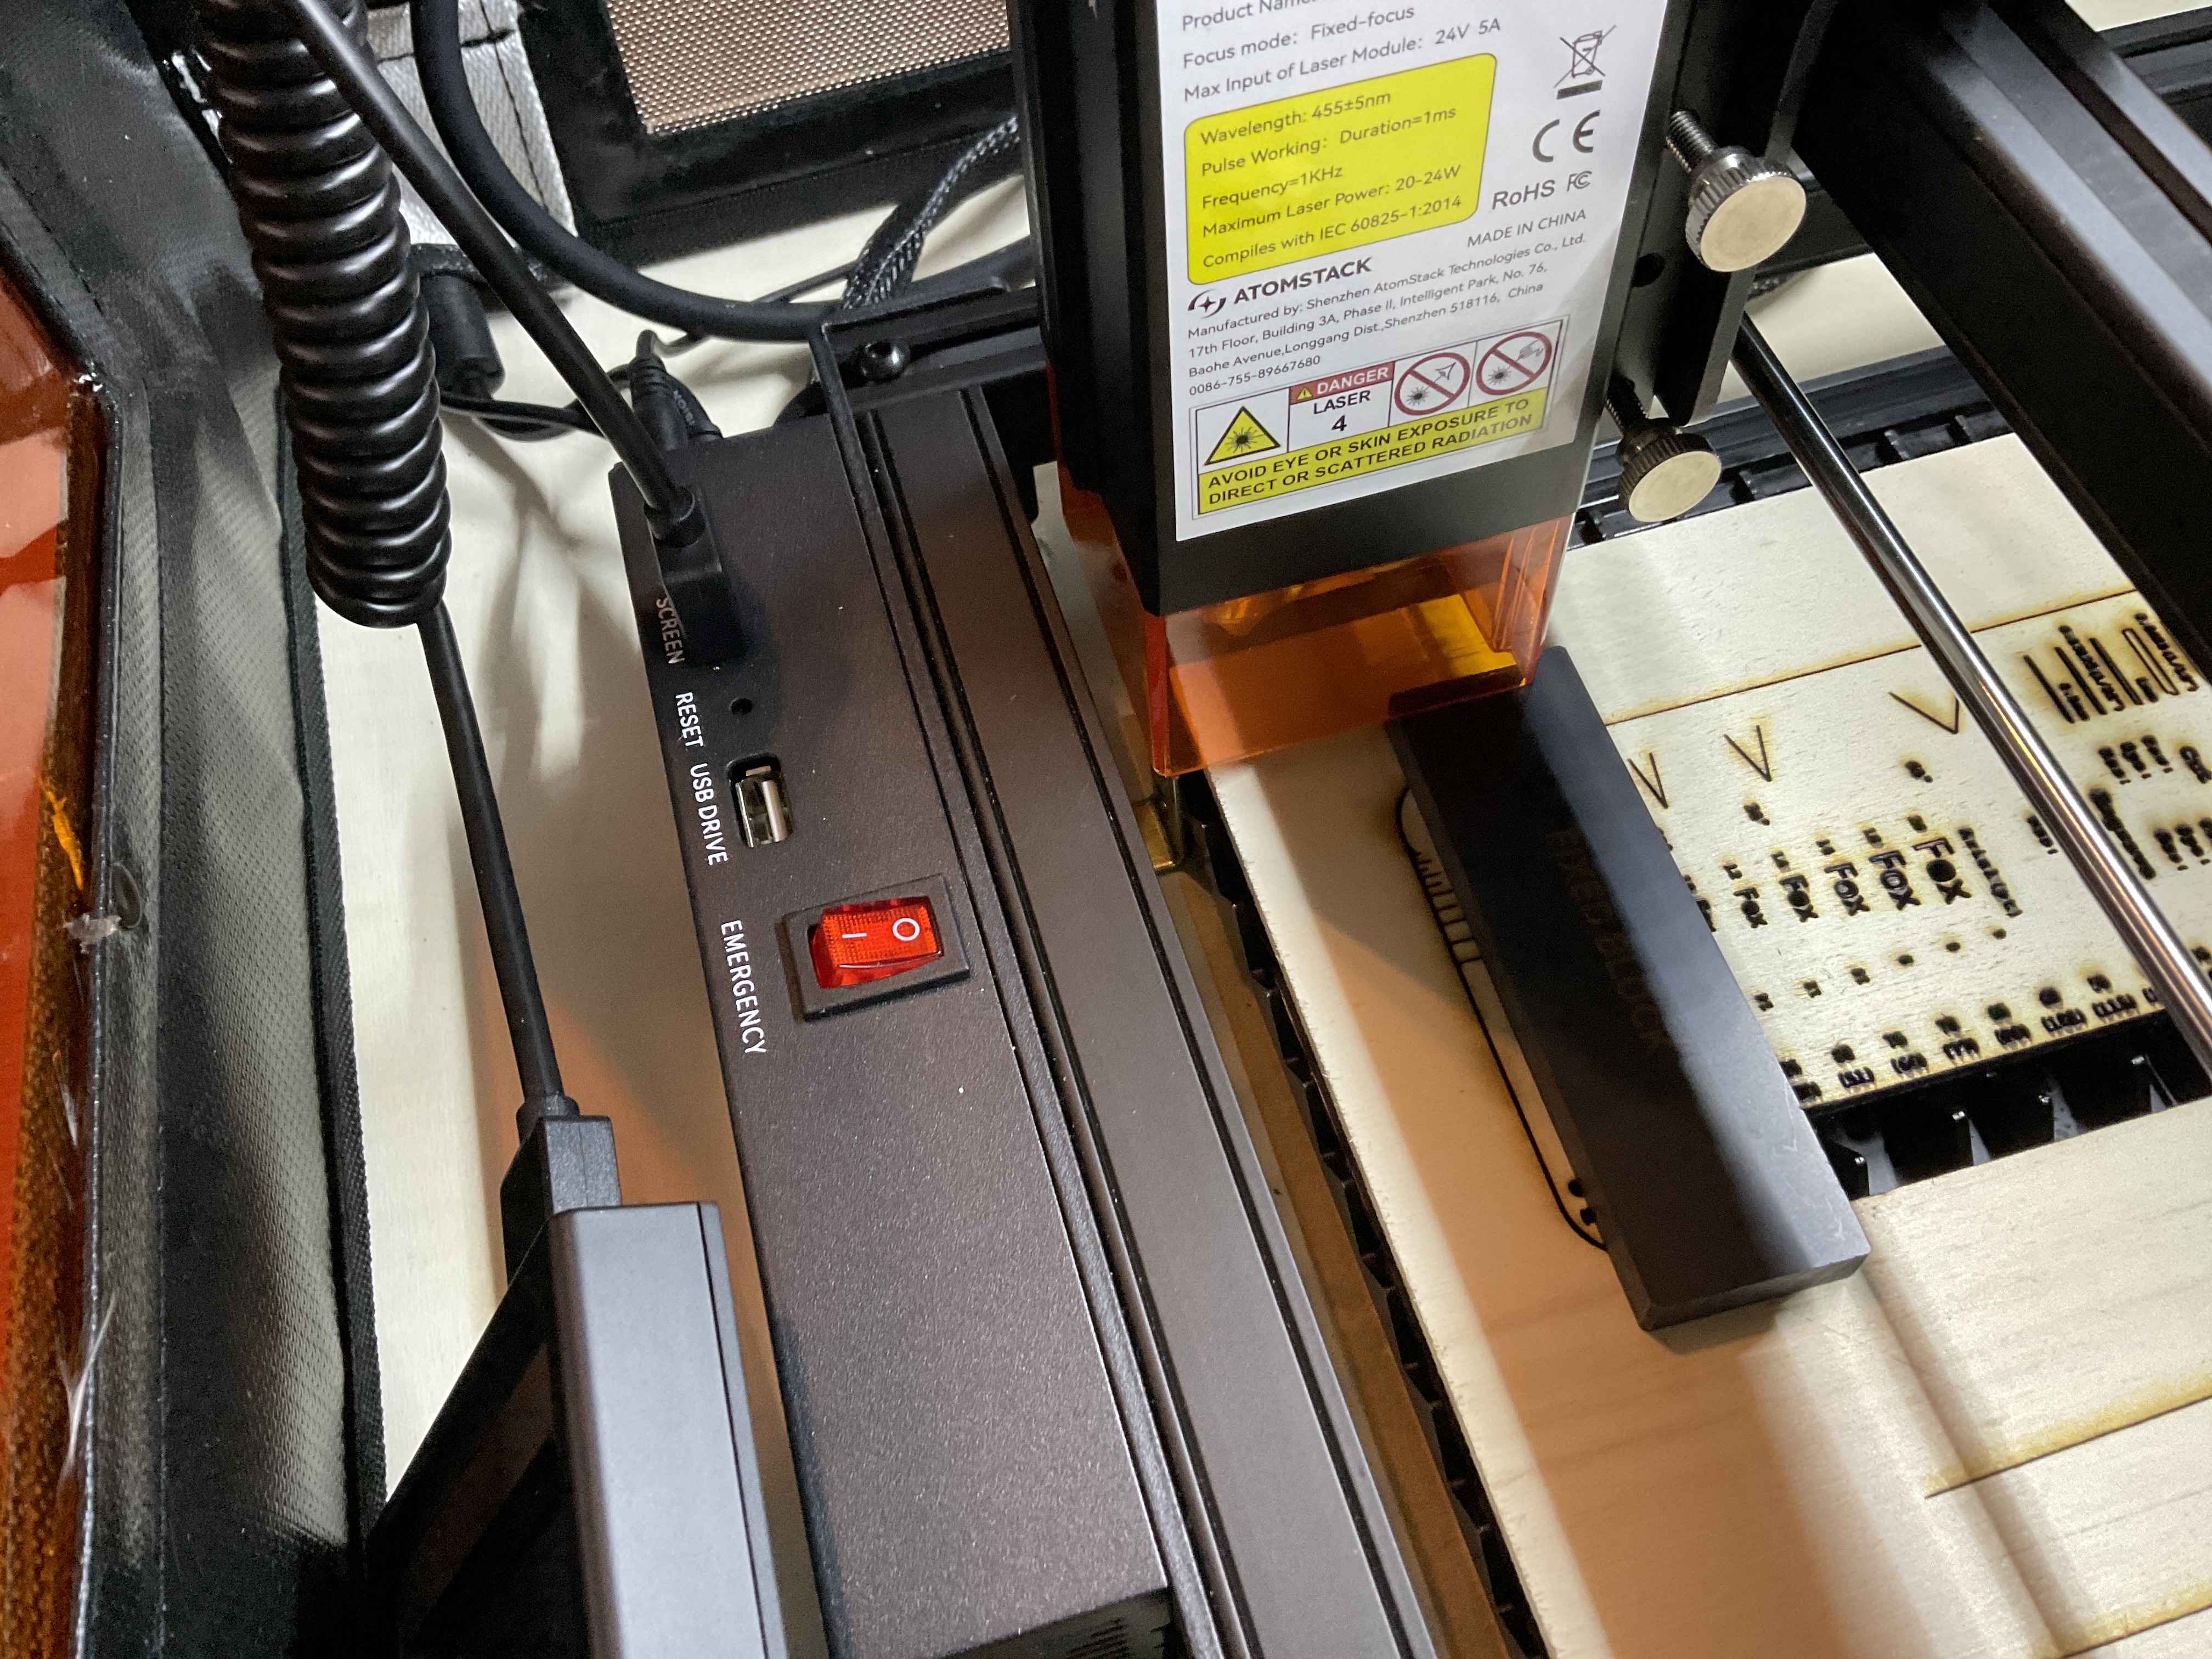
PPS: and the machine is atomstack 20w
Without a link to what Mikey said, I am not sure what you changed. Just for reference, I cut both 2.8mm Baltic and 8mm bamboo with my 40w diode setting and get very little smoke on the back. Even with the 40w, I use 3-4 passes on the Baltic and 20 passes on the bamboo (nasty stuff to cut).
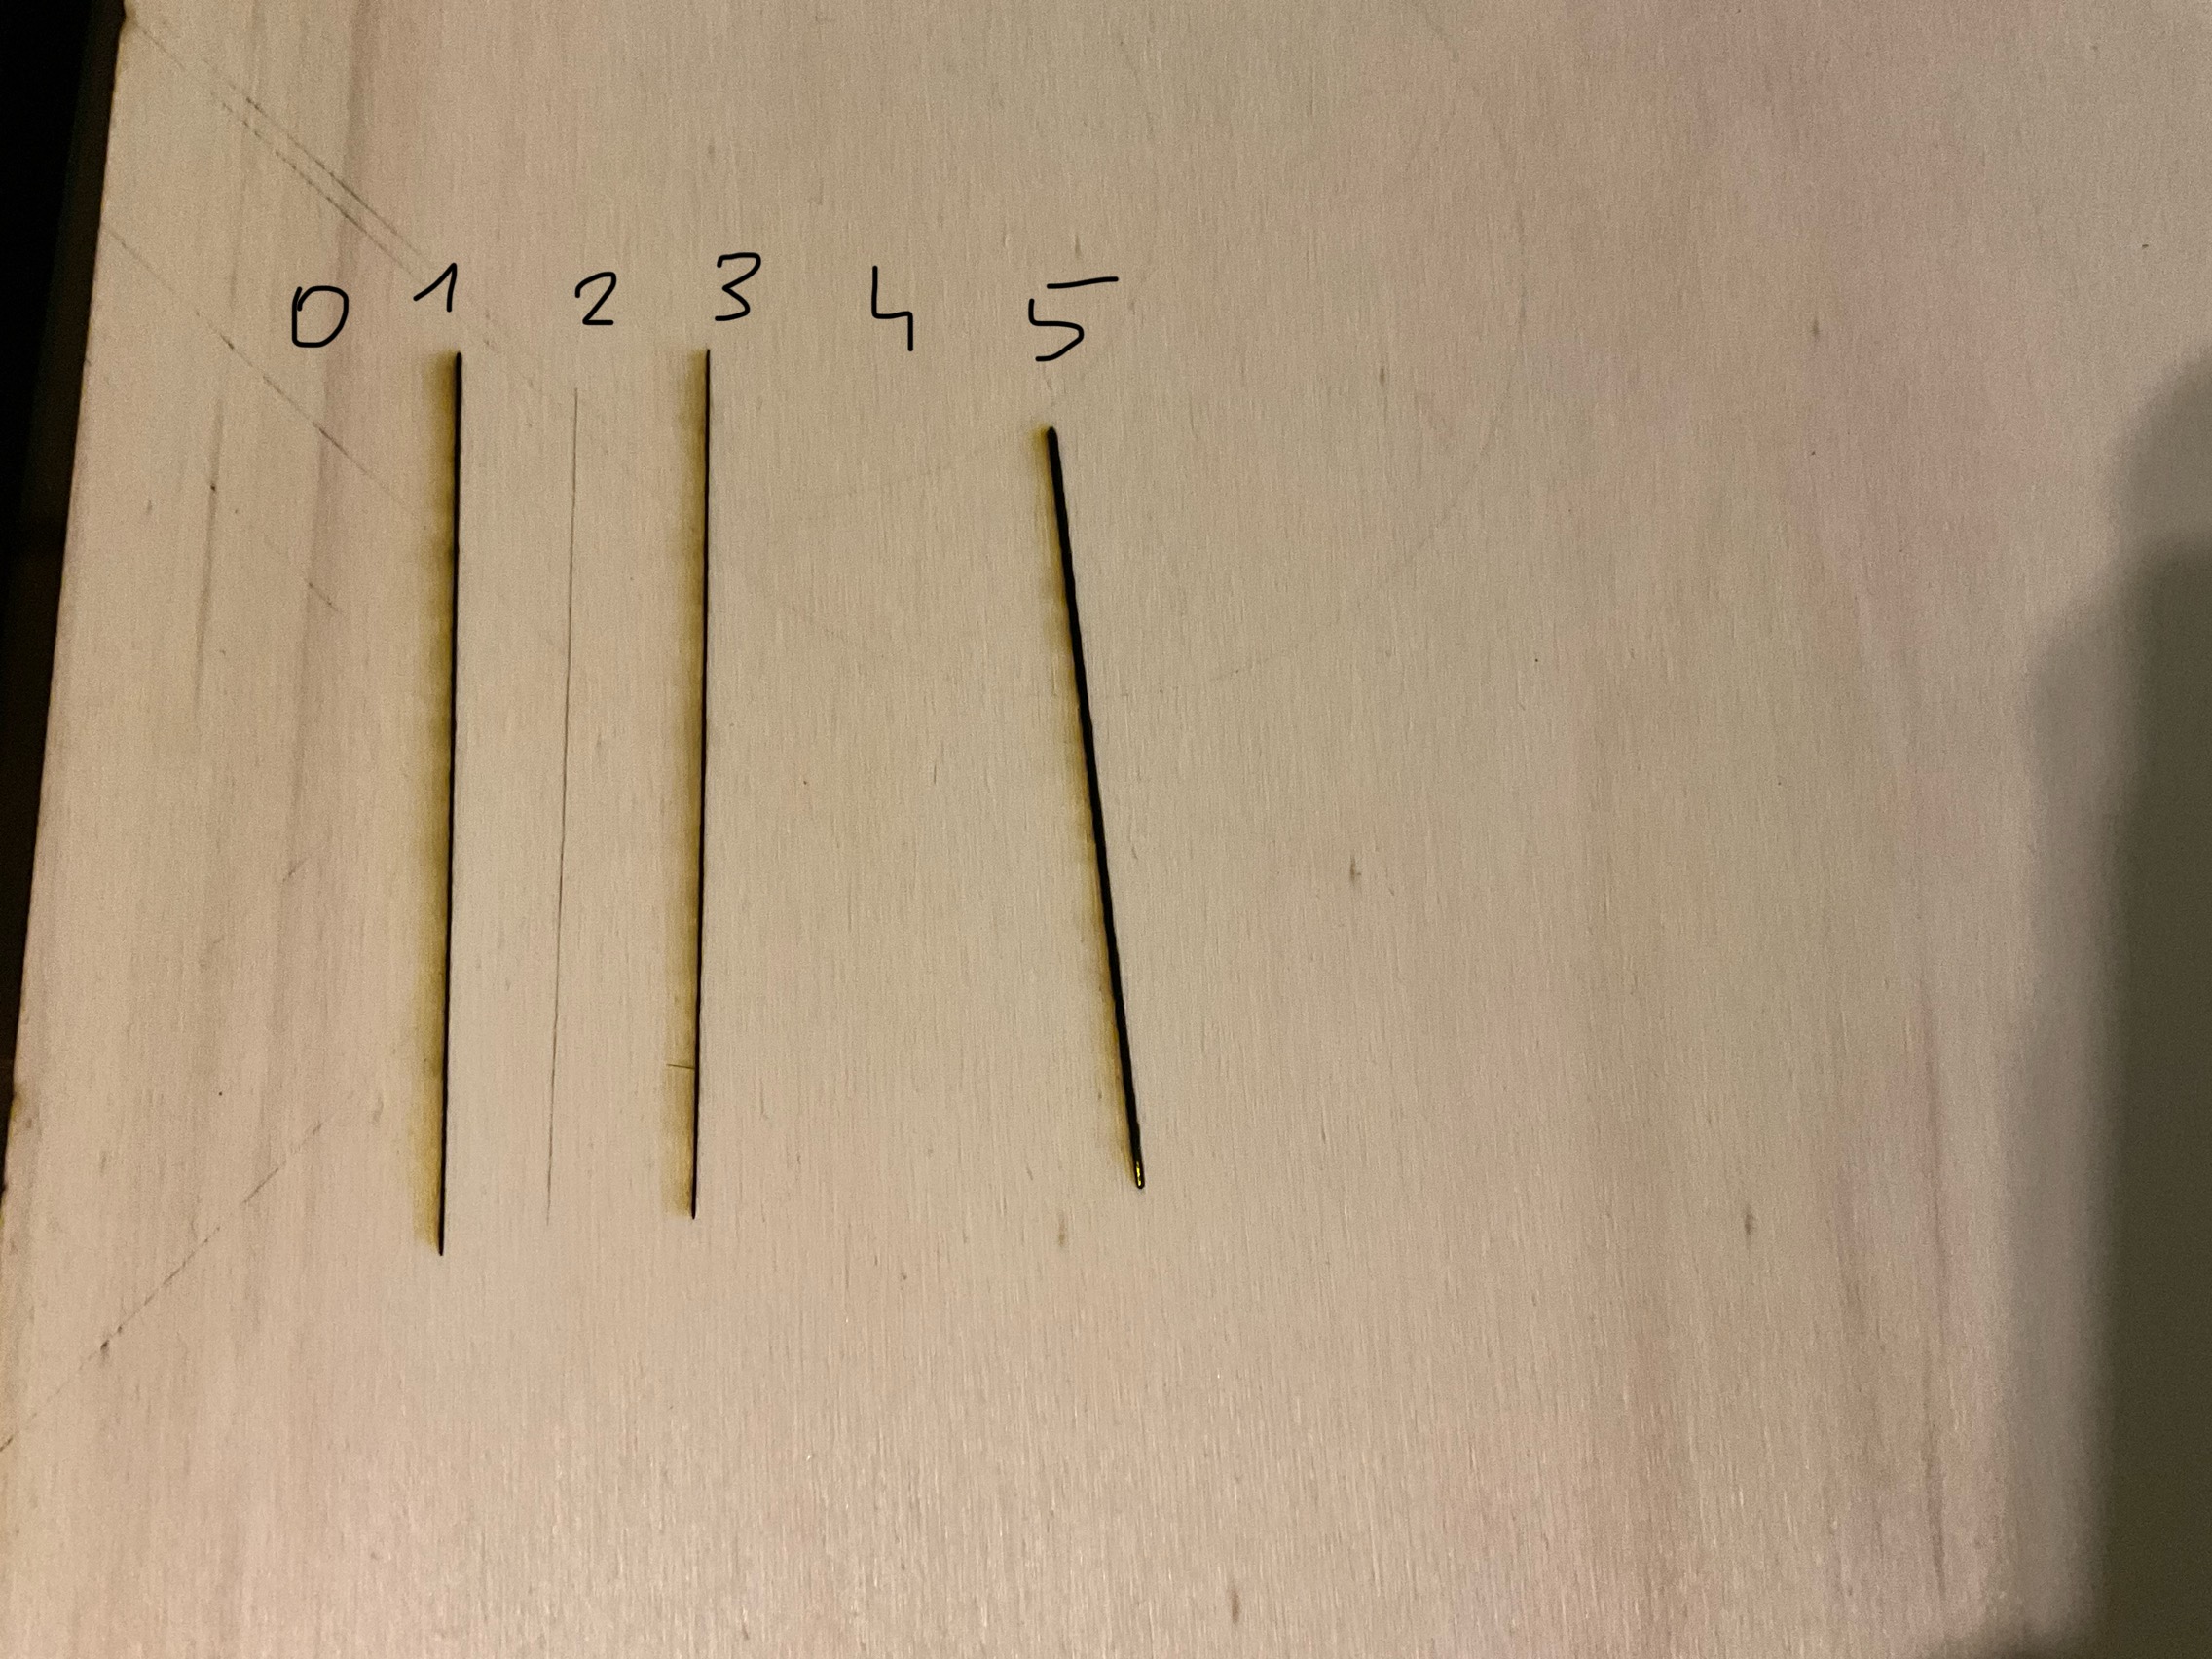
So my question is: How many passes for #'s 1& 3? I also bet #2 would cut through with a little more power or less speed, and without the smoky edges.
they are all 1 pass apart from the 1st (4passes) and the 5th (2passes).
i’m going to tweak on the 2nd line then, the mark is so thin I doubted it would cut but maybe less speed might make a difference, thank you so much.
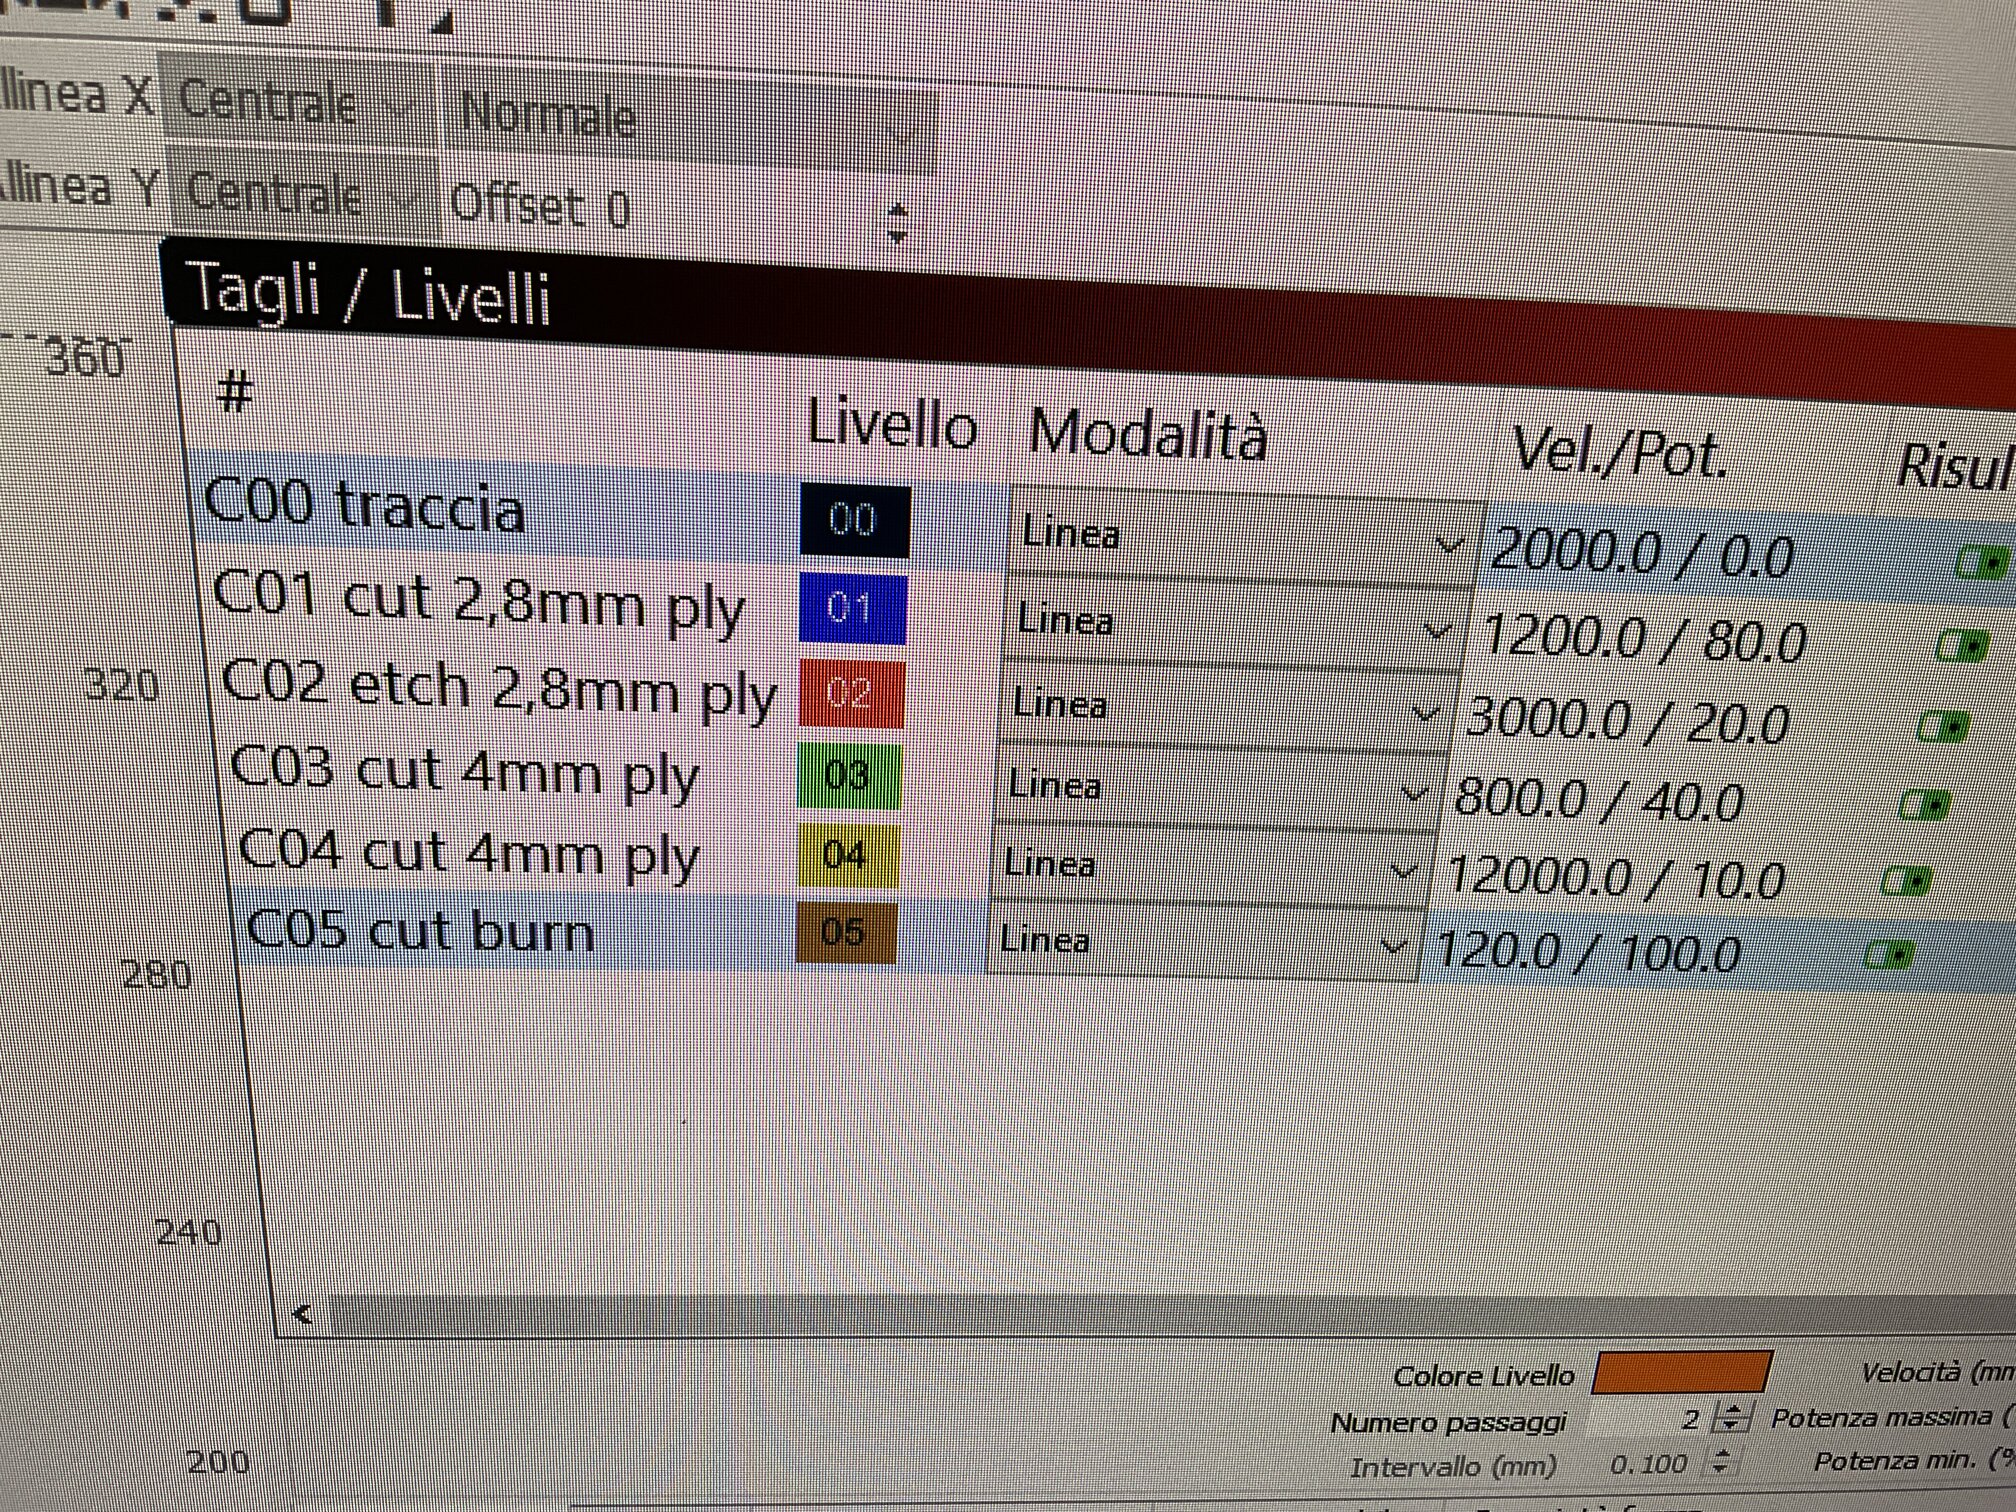
the second setting
I lowered the speed from 3000 to 1000 and power raised from 20 to 30 but it doesn’t cut in one pass, I have to give it at least 2 passes
To achieve a clean cut, both air assist and cutting speed play a crucial role:
Blow Away Smoke & Debris: Proper air assist helps keep the cutting area clear, preventing smoke from staining the edges and ensuring better cutting efficiency. Make sure your air assist is strong enough and properly directed at the cutting point.
Balancing Speed & Power: Since you’re using a 20W laser, cutting 4mm plywood requires careful adjustment. Increasing power to 50-60% while keeping the speed around 1000-1500 mm/min allows the laser to penetrate effectively. However, going too fast might result in incomplete cuts, while going too slow can cause excessive burning. Finding the right balance minimizes oxidation and achieves a cleaner edge.
Additionally, using masking tape can help reduce burn marks
ah masking tape… didn’t think of that!
my air assist is set to the minimum cause I think that lightburn bypasses the knob and just starts it at maximum. it’s an atomstack f30 v2.
I’m going to try your settings too, raising the power little by little.
Just a guess, since everybody is using a honeycomb and I’m using a matrix panel, could it be that’s a problem? has anybody else but me tried the matrix?
Do you know if its a long-focus or short-focus?
Am I correct in thinking the focus distance to material is 2mm.
Just wondering if you set the focus a bit lower (just below the surface of the material)..will you get the cut done clean in the least number of passes.
actually, the cutter came with a thick spacer, about 8mm, and I place it on the wood panel, then lower the laser until the orange plexiglass protection around the laser touches it,
Line 1 is the better cut and where the smoke patches appear on the back…what do those patches correspond to on the matrix.
Is there air movement through the matrix to move the smoke away.
it’s hard to see if the smoke stains belong to a particular point in th3 matrix, they might be thicker near the “teeth” of the matrix supporting the wood, but that could just be due the teeth creating a minimal barrier for the smoke, keeping it uderneat for a little more than it should be. I dunno, the videos showing people using it instead of honeycomb are mostly enthusiastic…
I was thinking, what if you could clean with some alcohol to get rid of the particle dust & this would give you a clear view of the underside cut and perhaps what has happened to the beam as it got further and further into the material.
Will the cut be visibly wider or charred on the underside…compared to the topside.
Is it possible to try another piece of material to compare quality.
Would it be better to cut out a shape, then you can look at the cut edge all the way through and across the cutting bed to see consistency of smoke marks and matrix.
I have an aluminium cutting deck with channels running left to right. So as an attempt to assist air movement I have some air moving through the channels toward the exhaust outlet end, and air moving over the top of material toward exhaust outlet and to further assist the laser air assist.
I have not fully tested this yet as I have Homing Cycle issues on new machine (Snapmaker Ray 20w) that was supplied with two identical Y axis..So had to flip one Y axis upside down..Dont know, but it could have caused the limit switch (Homing cycle) problem.
The air movement under and over the material may cause turbulance that will move the material…but I’ll burn that bridge when I get to it!..and I really want to test this smoke clearing, so I built my enclosure to do this.
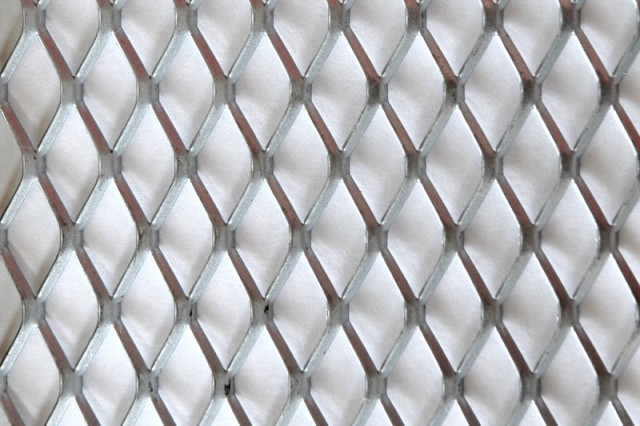
I have similar results and found out the reason is the metal part the product lies on → picture. It had the smoke and dirt from further cuts on it and where it was already used I also got these marks when cutting again.
This subject comes up a lot in conversations and there have been many attempts at ways to avoid it.
In general I think a good cleaning routine and air management may help most in general situations and also a work material support system that minimises contact and encourages exhaust flow..under and over the material and Power and number of passes.
The solution must suit the materials and such as ‘Punk pins’ seem to work for some but how may you clamp down light material like very thin wood, paper or leather.
Engraving may not require so much exhaust wind/air as cutting and soot should clear off quite easily with light air assist and enclosure exhaust.
If the majority of work is of a particular kind then a specific method can be designed to suit and if work is to be painted then a dust off will be ok
Just throwing some thoughts out here. I have a different make and model and my height gauge references off the bottom of the laser unit heat sink. I went and checked my amber shield and the thumbscrews are very loose in the shield holes. Maybe wrong reference point or the shield is moving and introducing an error in height?
ok, the soot or smke doesn’t go with alcohol
but a light sanding solves the problem.
I just wonder why in youtube the cuts (even with my same hardware) look better.
The wood is touching the matrix support very little because it lies on blades with saw teeth, the contact points are really small. Also I vacuum and clean after every job.
No, I don,t think it’s the contact points, it’s the smoke coming out from below and staining the wood.
Room temperature can also make a difference. I’ve noticed when it’s colder more smoke sticks to the wood, this can sometimes even be compounded on the top surface by cold/damp air from air assist pushing smoke back toward the surface.
On the underside, if smoke is lingering it will condense onto the wood more readily.
So…having a nice warm room, experimenting with air assist flow rate/jet size and proximity to the cut, and good air flow on the underside of the material are worth trying.
A spray bottle with soapy water cleans up the smoke residue pretty quick too if you don’t want to use masking tape. And I’ve found that baby wipes are pretty good too.
Would it be possible to to experiment with either pushing some extra air under the material using a fan/blower or drawing it away, maybe with a vacuum cleaner.
Nicholas made some interesting points on the work environment and there is still the difference in material to consider.
Also, is there a possibility that the Youtube example was cleaned up a bit before showing.
The only near-constant is the machine all other factors are variable.