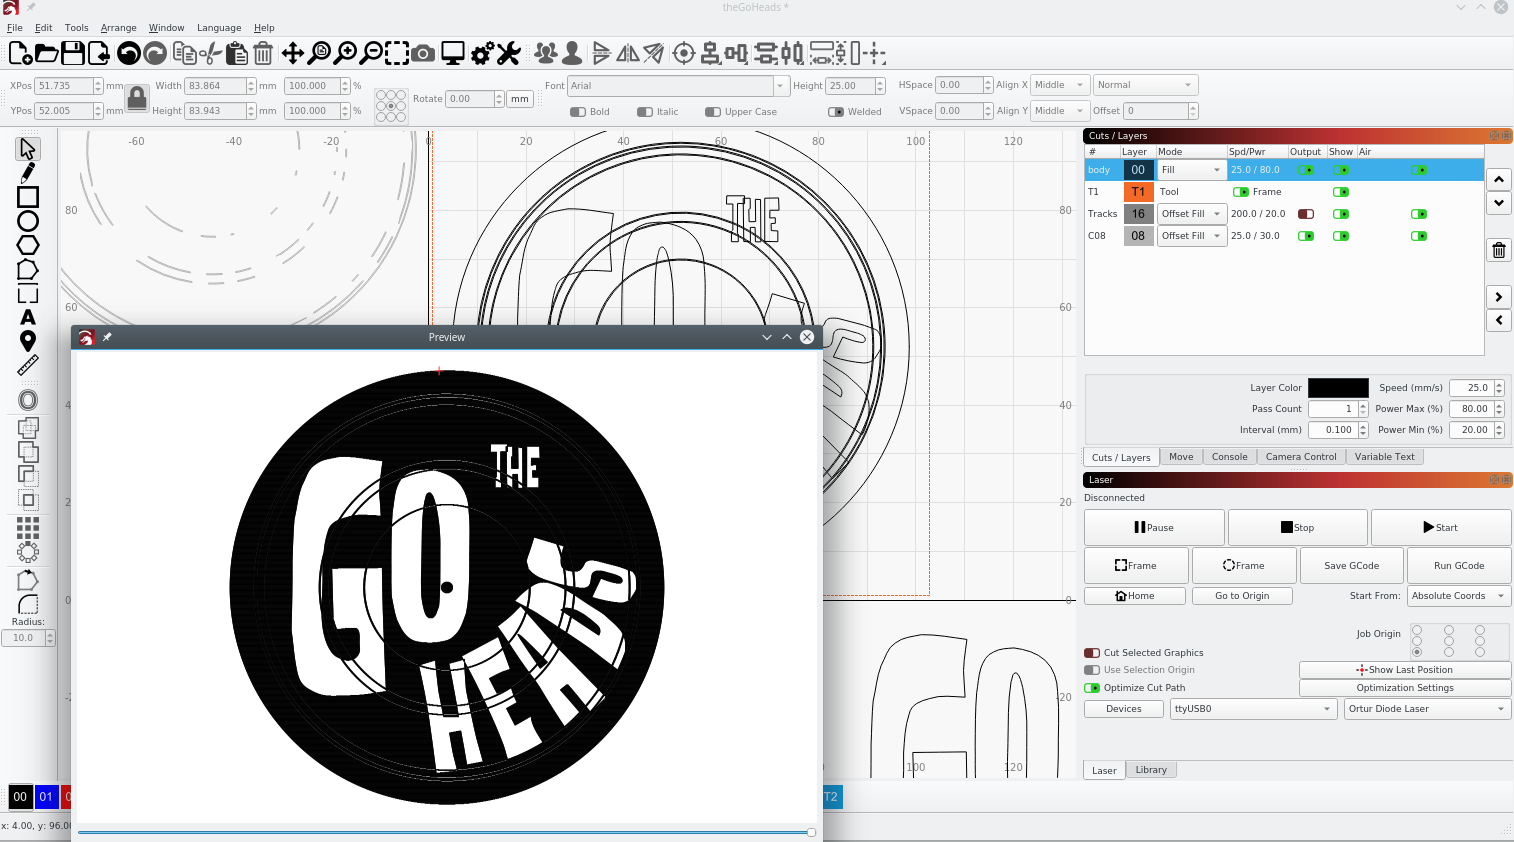
I’m trying to make a tile for a school teacher of his son’s band which has the band name over a black album with some track lines on it. See pic below. I’m trying to extend the track lines as unburned or different burn power(gray) where they extend over the blackness of the album itself. I can probably do this in stages by creating a few designs and burn one after the other but with all the editing features maybe there’s a way to do it in one design file. Ideas?
theGoHeads.lbrn2 (81.1 KB)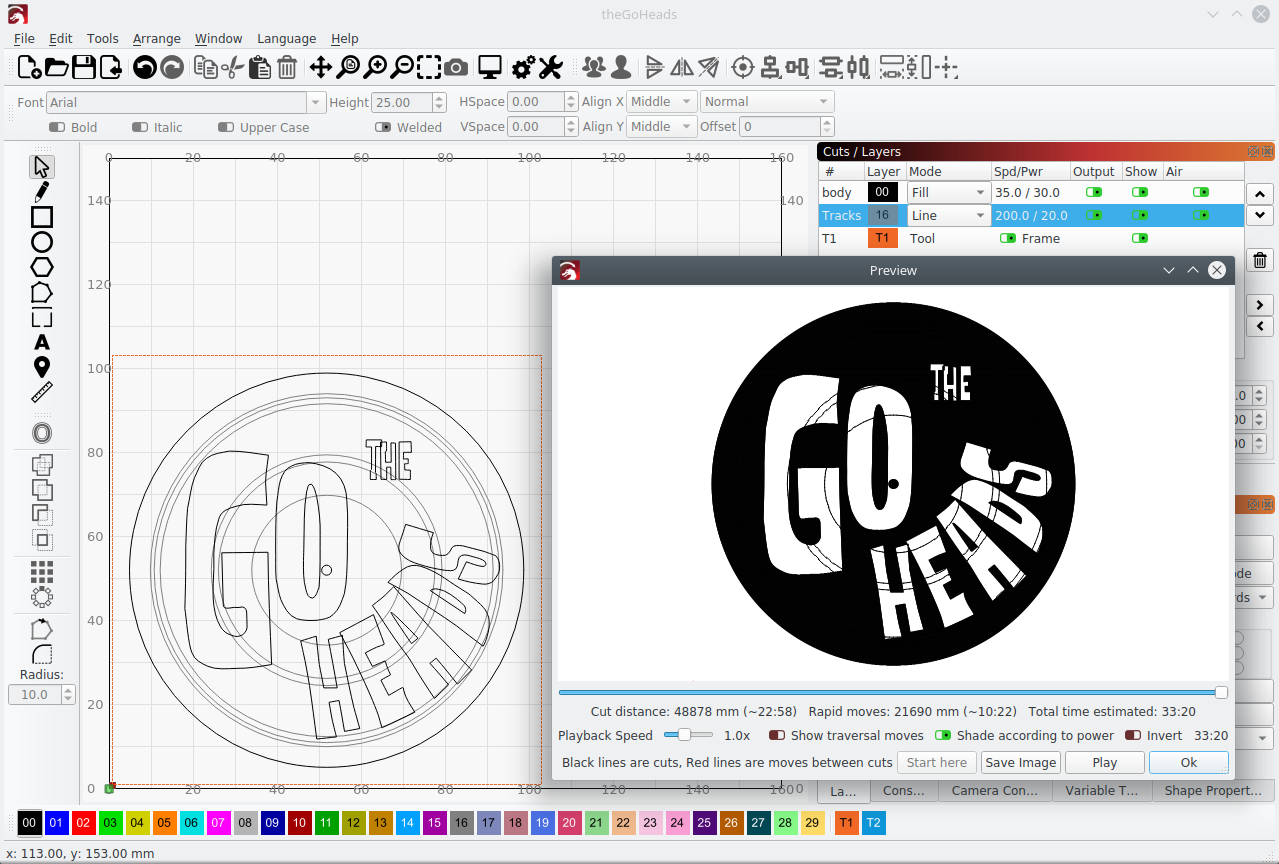
Here is my bid on the task.
Unfortunately I do not have the font you use on my comuter, so I use one that looks a bit like.
For the red layer you can use a larger offset, then the text becomes more prominent.
It may not be the most elegant solution, but it does not take much time and is very practical, in my opinion.
If you want the file itself, just say so.
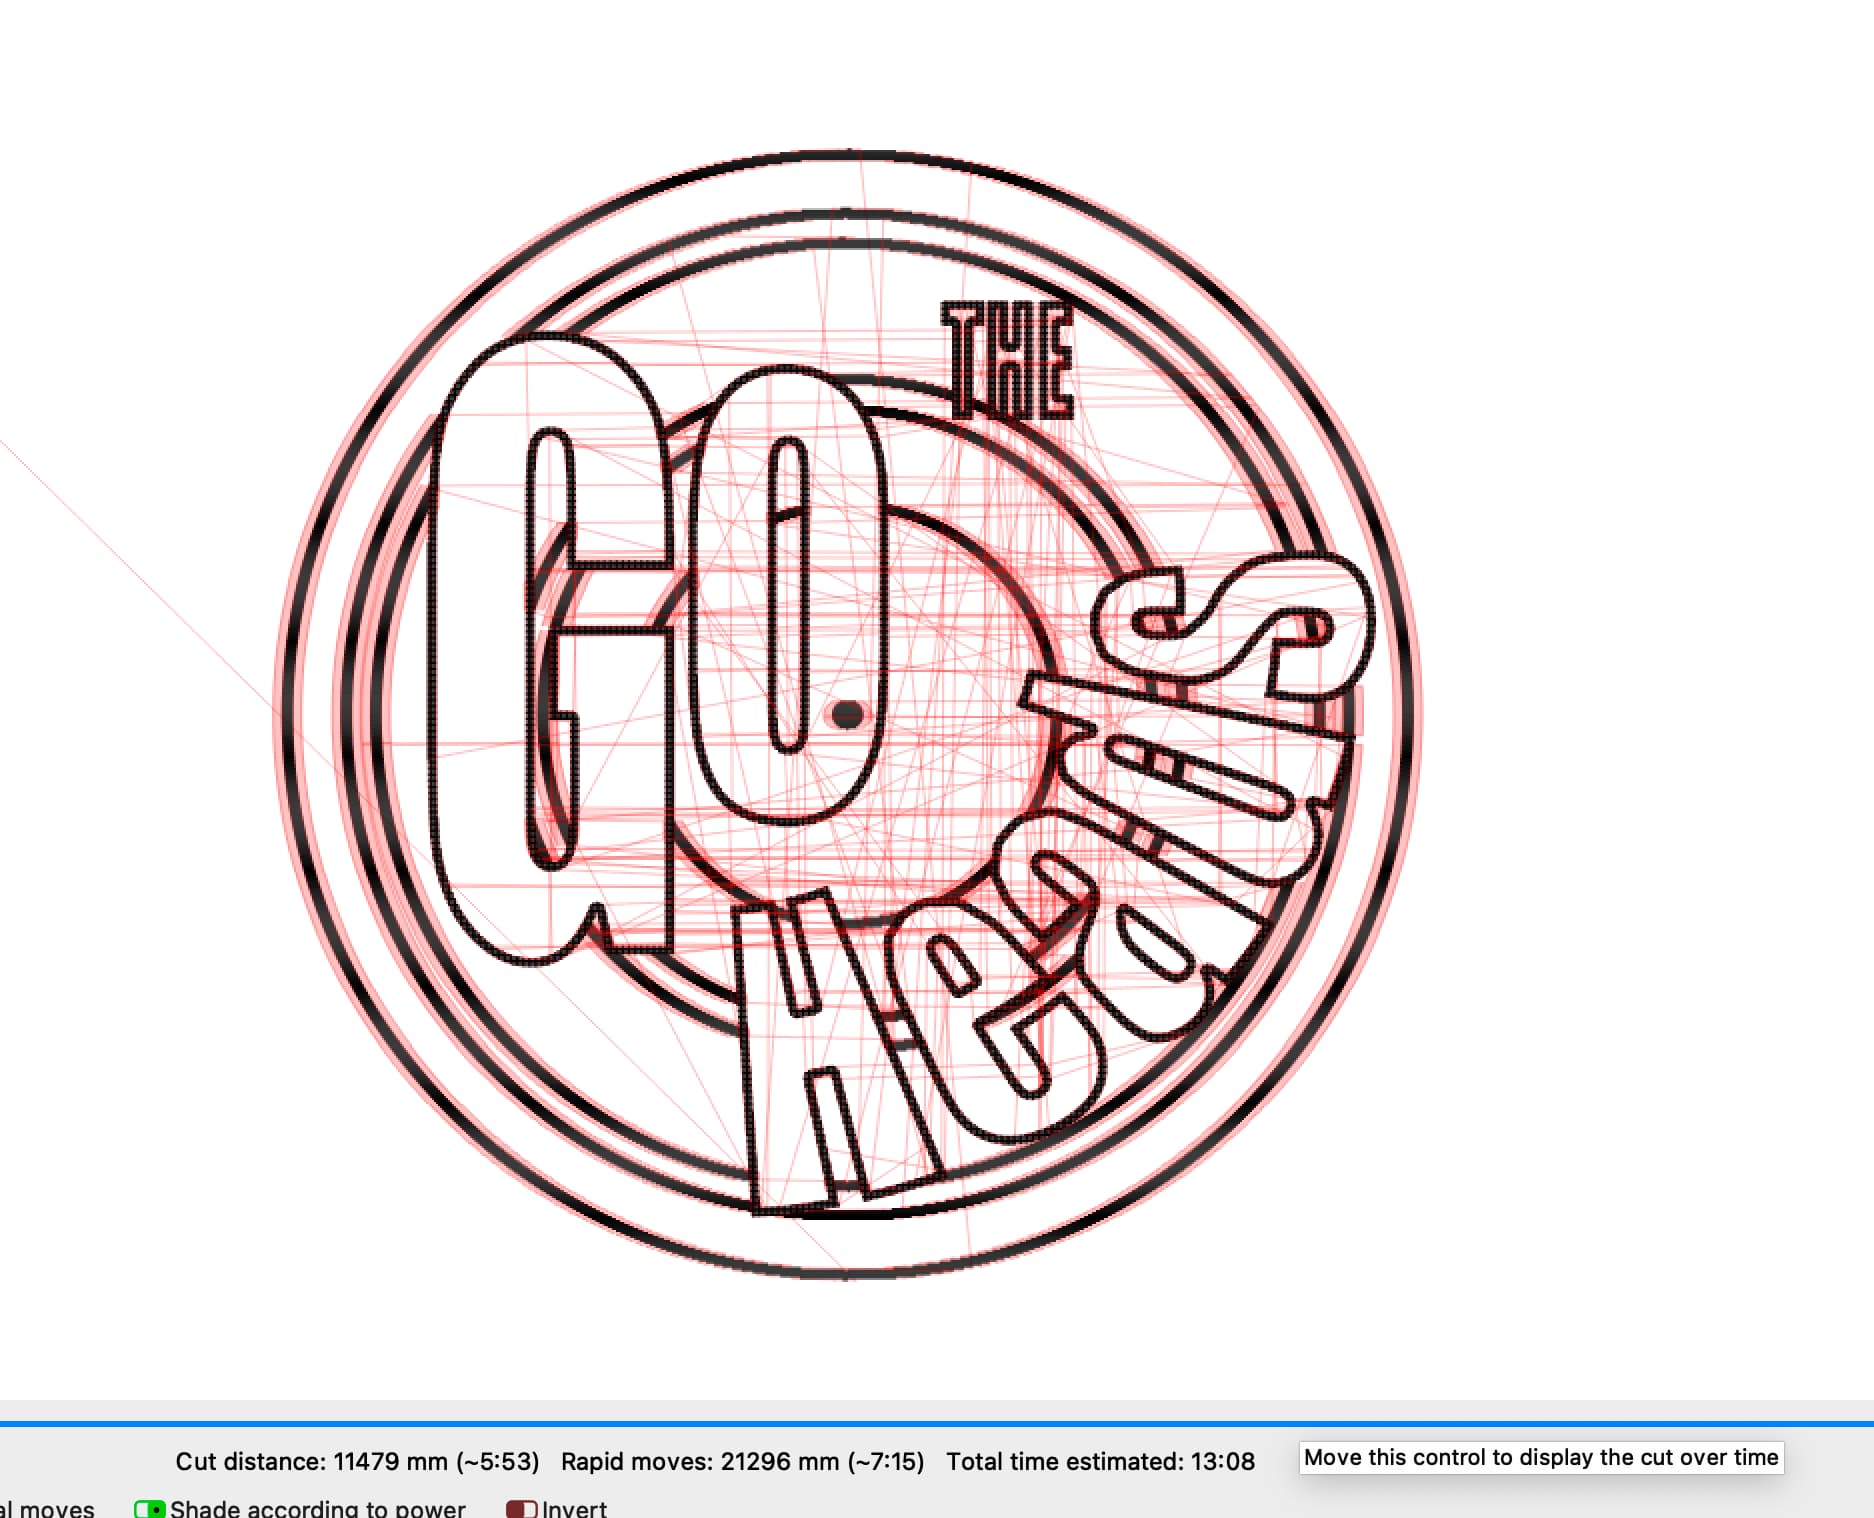
Thanks for helping out. I don’t have the font either and had to recreate the text vectors by outlining them and then applying Path-Simplify in Inkscape. The final goal is a black disk with white text and the track lines being black within/over the text and light gray over the black disk. I had just a single line for the track lines and I see how you used the offset tool to give the lines width and to create closed regions. Then by using the filling of the text the boolean operation creates the track lines outside the test.
With the ideas you showed, I believe I can also do the opposite boolean with a copy of the track lines inside the text to get the effect of alternating engraving colors for those track lines. Thank you.

So once you have the lettering on top of the design what tool do you use? Boolean? As far as design that part escapes me. I haven’t mastered those tools yet.
Hi Willie, yes it’s the LightBurn`s famous boolean operation, with the “new” assistant it’s just so easy to use, I love the fashion LightBurn has chosen to make it easy. Before, I always pushed all options through … 
I’ve only recently updated to the 1.0.2. as I had to reinstall so I’ve not messed with that part yet. Thank you for the reply.
sorry, I had thought I also attached the Lightburn source file to the original posting. I edited it and attached it.
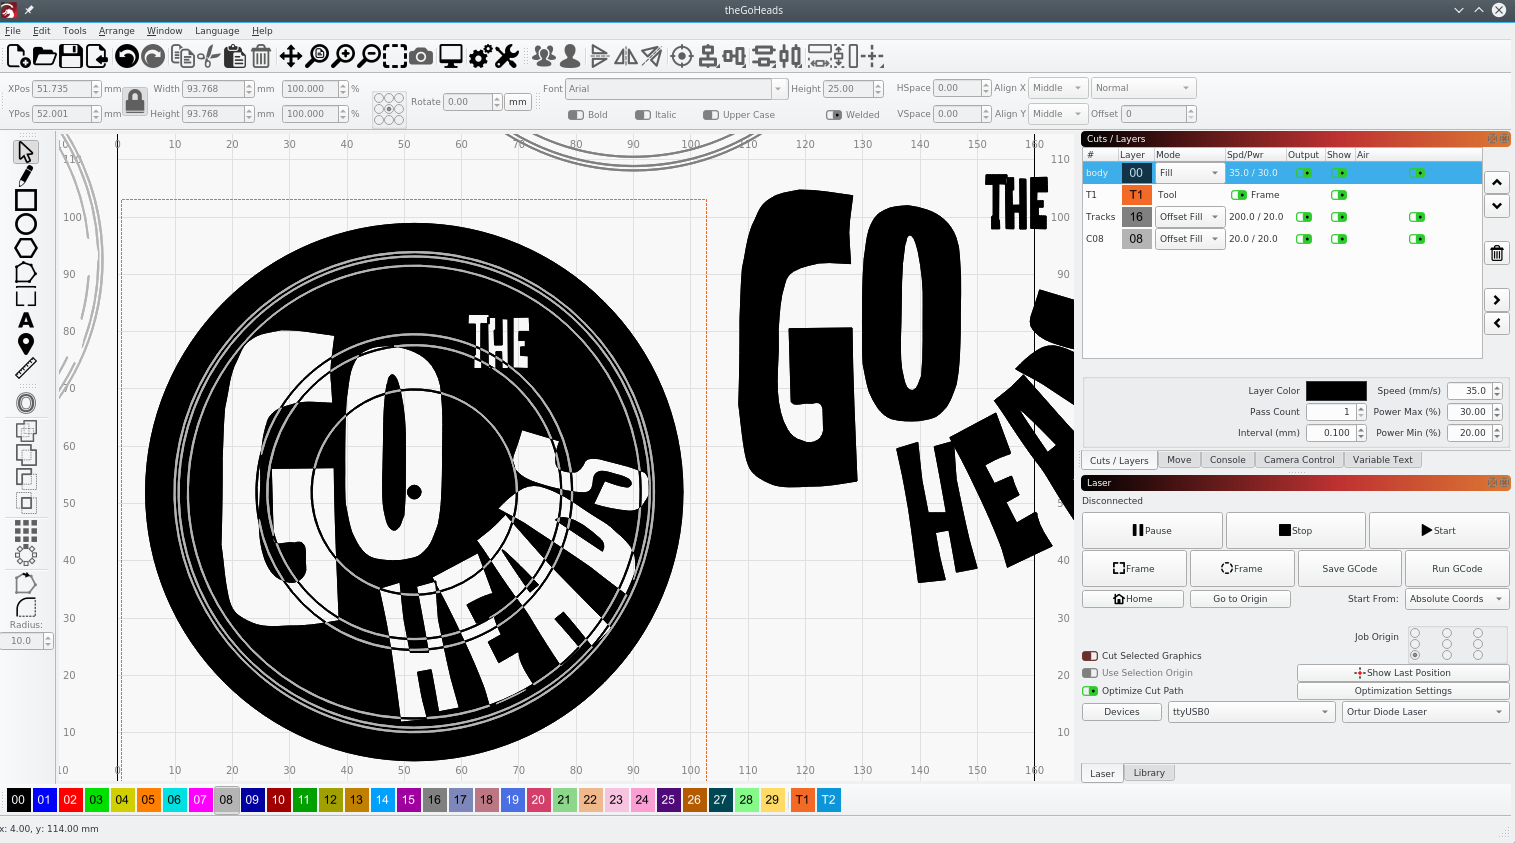
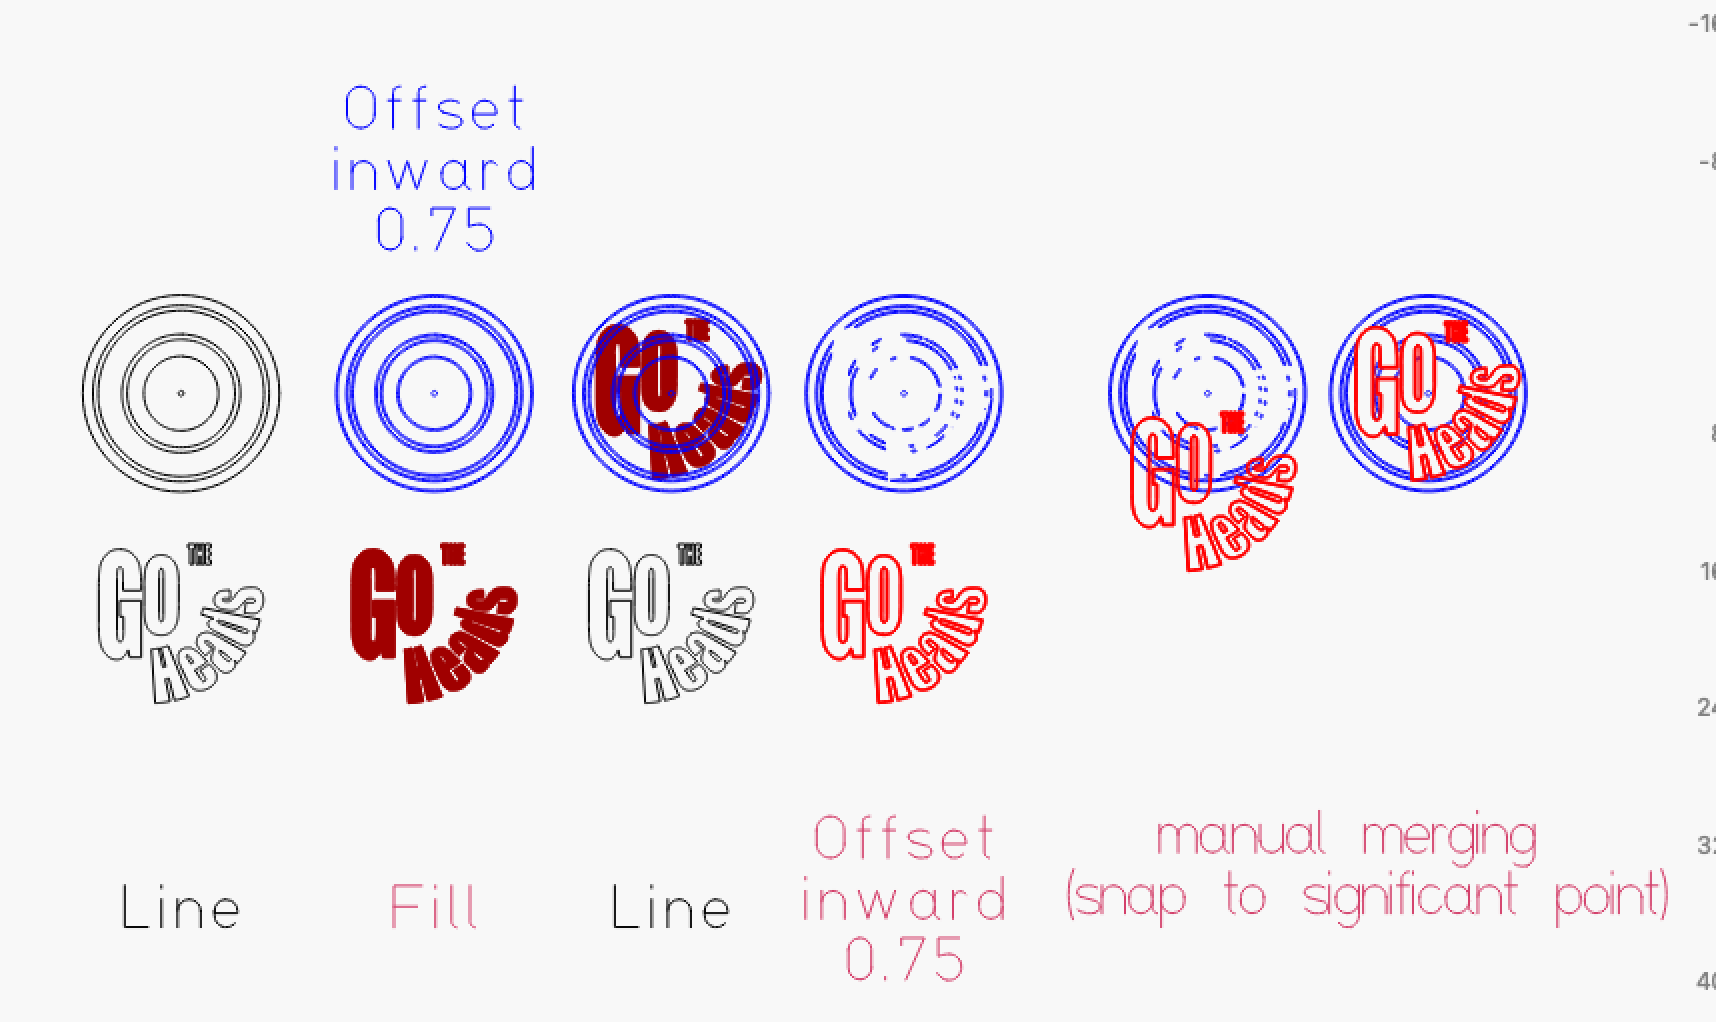
so I was missing the fact that the “alternating lines” effect for fills only applies to the lines in the layer. DOH! So I just needed to copy the track line segments in the “black” area, paste them and assign them to the same fill layer as the outer circle. Now that’ll make the one pass skip those track lines and the gray layer for those track segments can engrave with a lighter power inside the track segments to give them a gray look instead of white.
theGoHeads.lbrn2 (181.1 KB)