Hey there community!
Iam Steven, 34y from Berlin germany.
Iam very new to this topic of Fiber-laser and the awesome software called LightBurn.
And yes i checked the search-section before
I have a simple question that may have a simple answer (hopefully).
I saw thid video in YT :
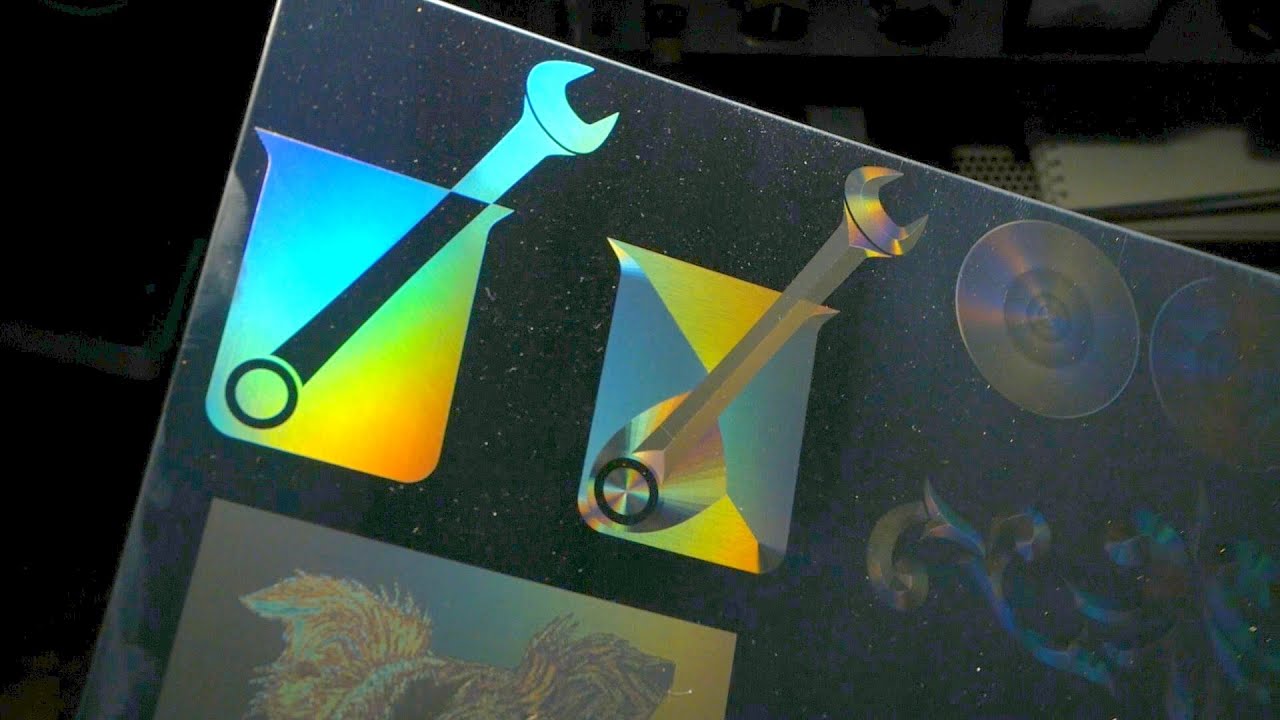
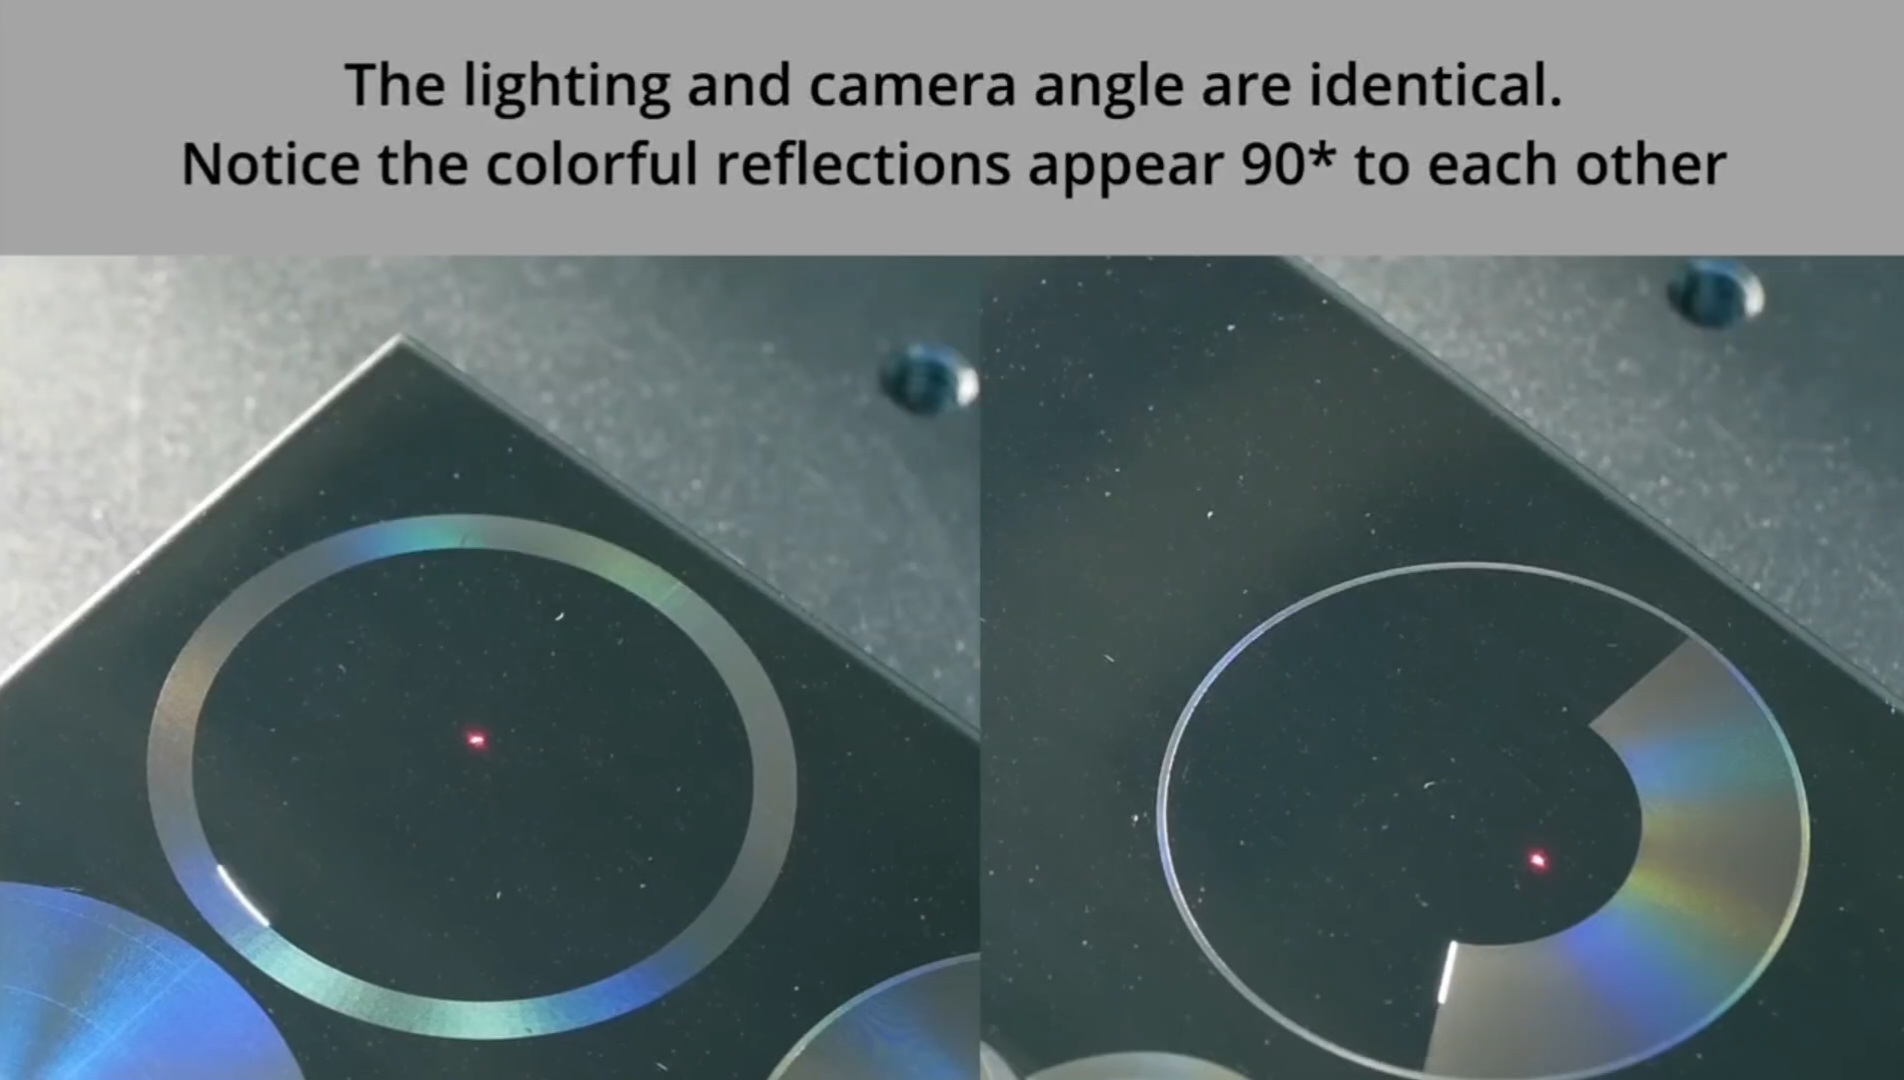
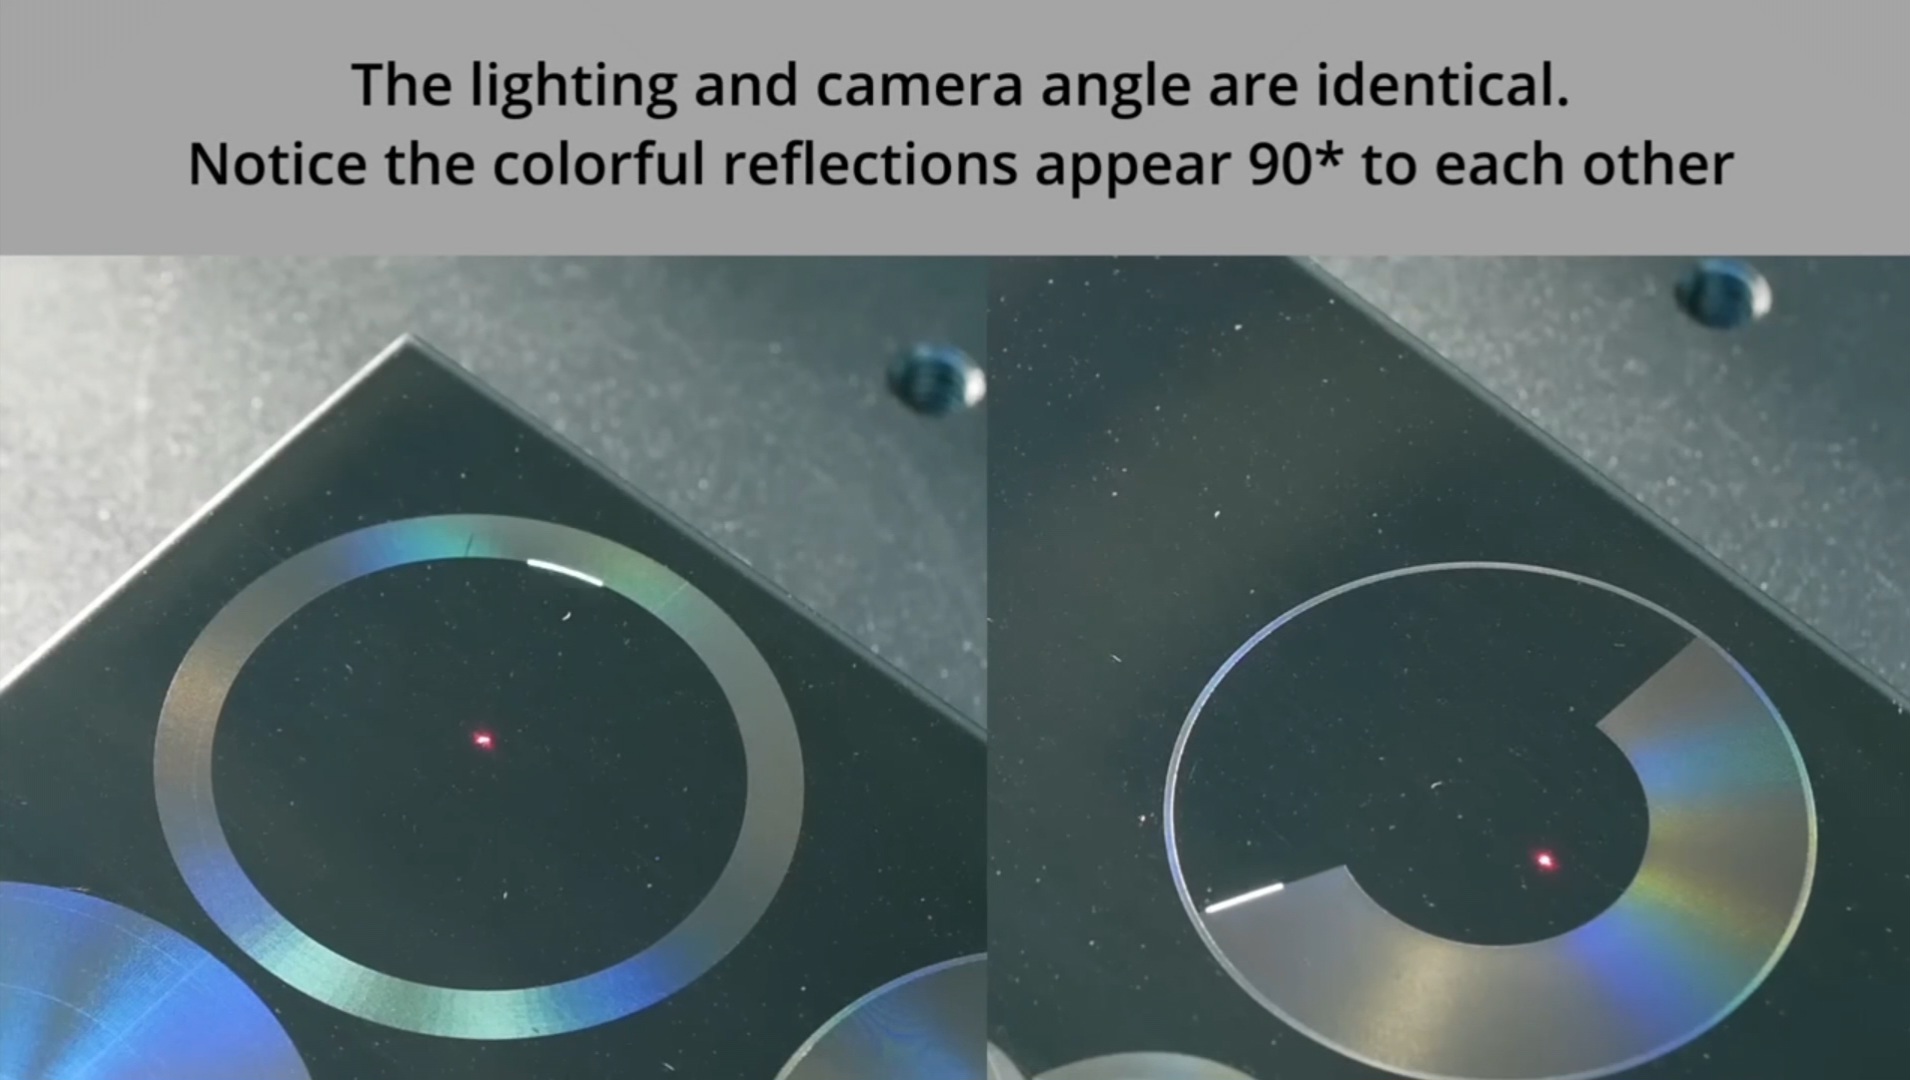
At 15:41min of the video, you can see that on the left side the circle is filled with concentric toolpaths created by offset fill (as far as i learned already).
How can i create the “radial fill” of the circle(s) shown on the right side? Its not “offset-fill” and not “fill” right?
How can i create this radial fill please?
My bad, didn’t see you were working with a fiber. TLDR: I gave an answer for a diode gantry laser. Sorry bud.
Off the top of my head, there is no direct way to make a circle from the center to the edge…aka radial fill. You laser spot is a known size, say .1mmx.8mm (common diode size).
You will have different overlap as you move outward from the center as the endpoints diverge on the circumference.
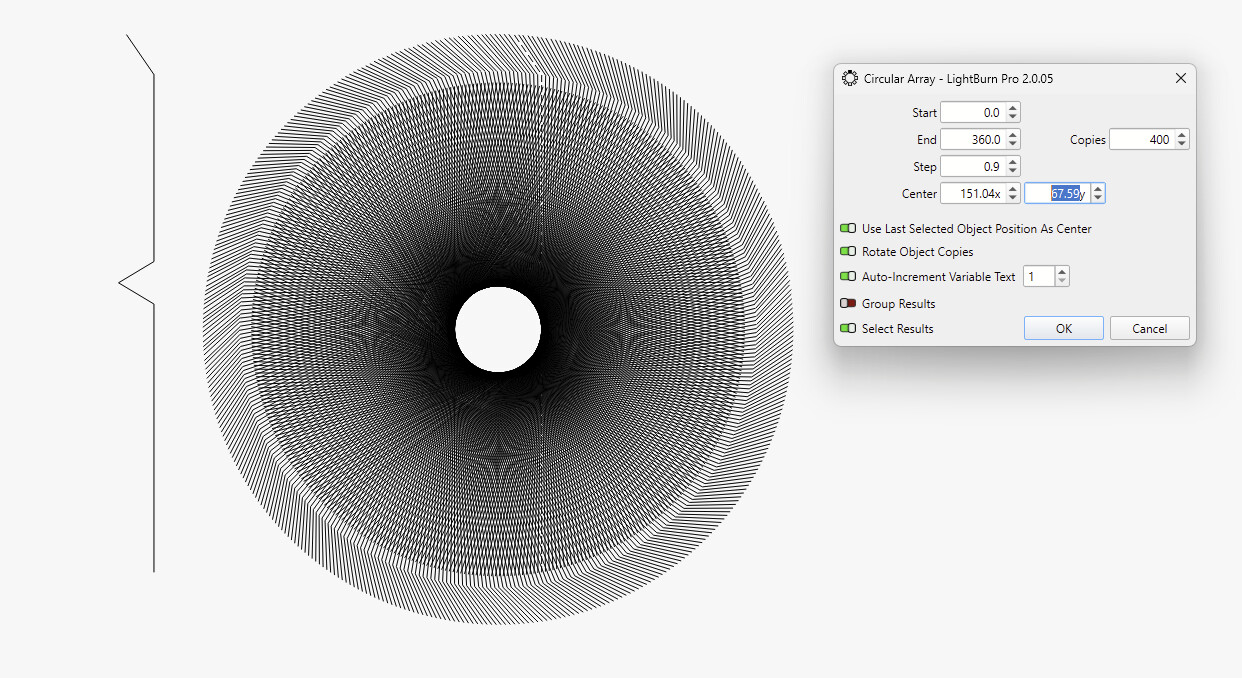
One inexact work around would be to make a line the diameter of your item, then use the circular array tool centered on the middle of that line to duplicate that line on a small offset, many, many times until the array makes a 180 degree turn.
Leave that layer on LINE setting. This is a very very time and machine intensive method. I predict the results will not satisfy you on a large circle, but the effect will be as you described.
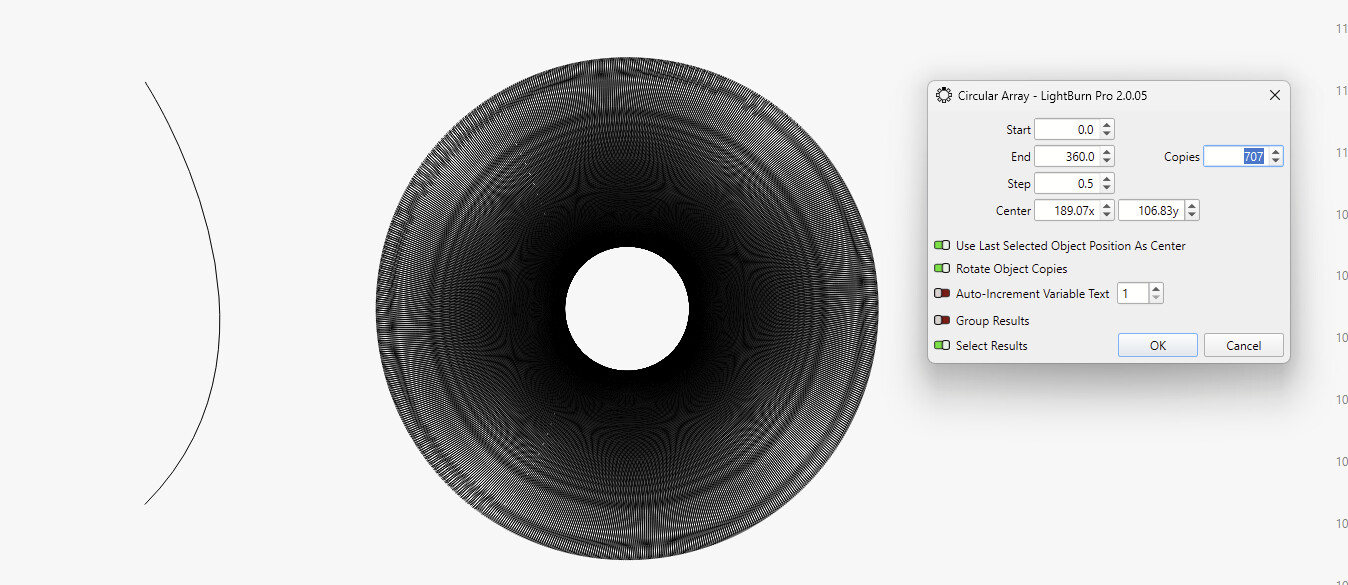
The star-shaped Moiré patterns are a result of the sampling and won’t be in the actual engraving, but a similar effect could show in the diffraction patterns you are aiming for.
Thanks a lot! Thats what i already had in mind too to do it manually, i just did not know if it would work since i wondered if it would work with “line” mode path engraving.
I will test! Thanks a lot mate for your fast help and ideas and even file shared