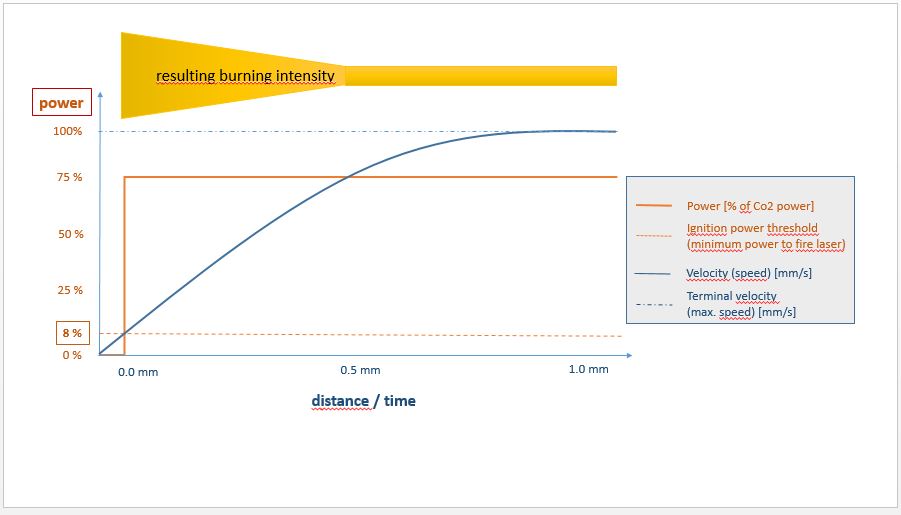
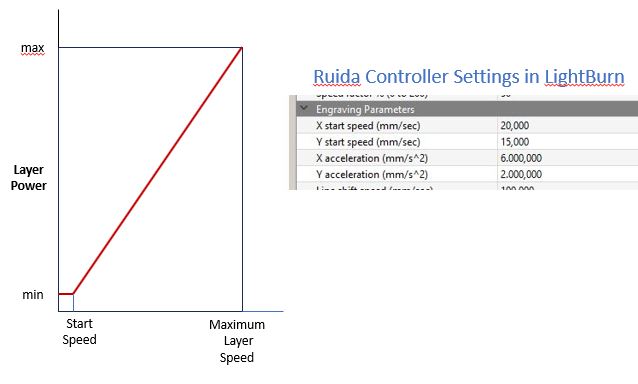
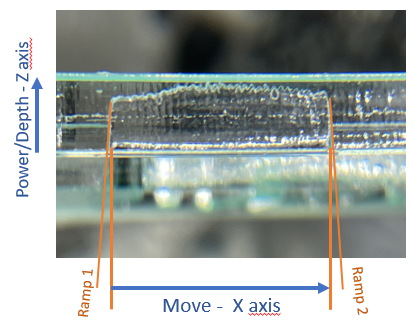
As my laser tube ignites beginning with 8% power and the movement
at the beginning accelerates for the first millimeters and slows down
at the end ==> the darkness at both ends looks too strong.
This effect shows especially with thin plywood or thicker paper.
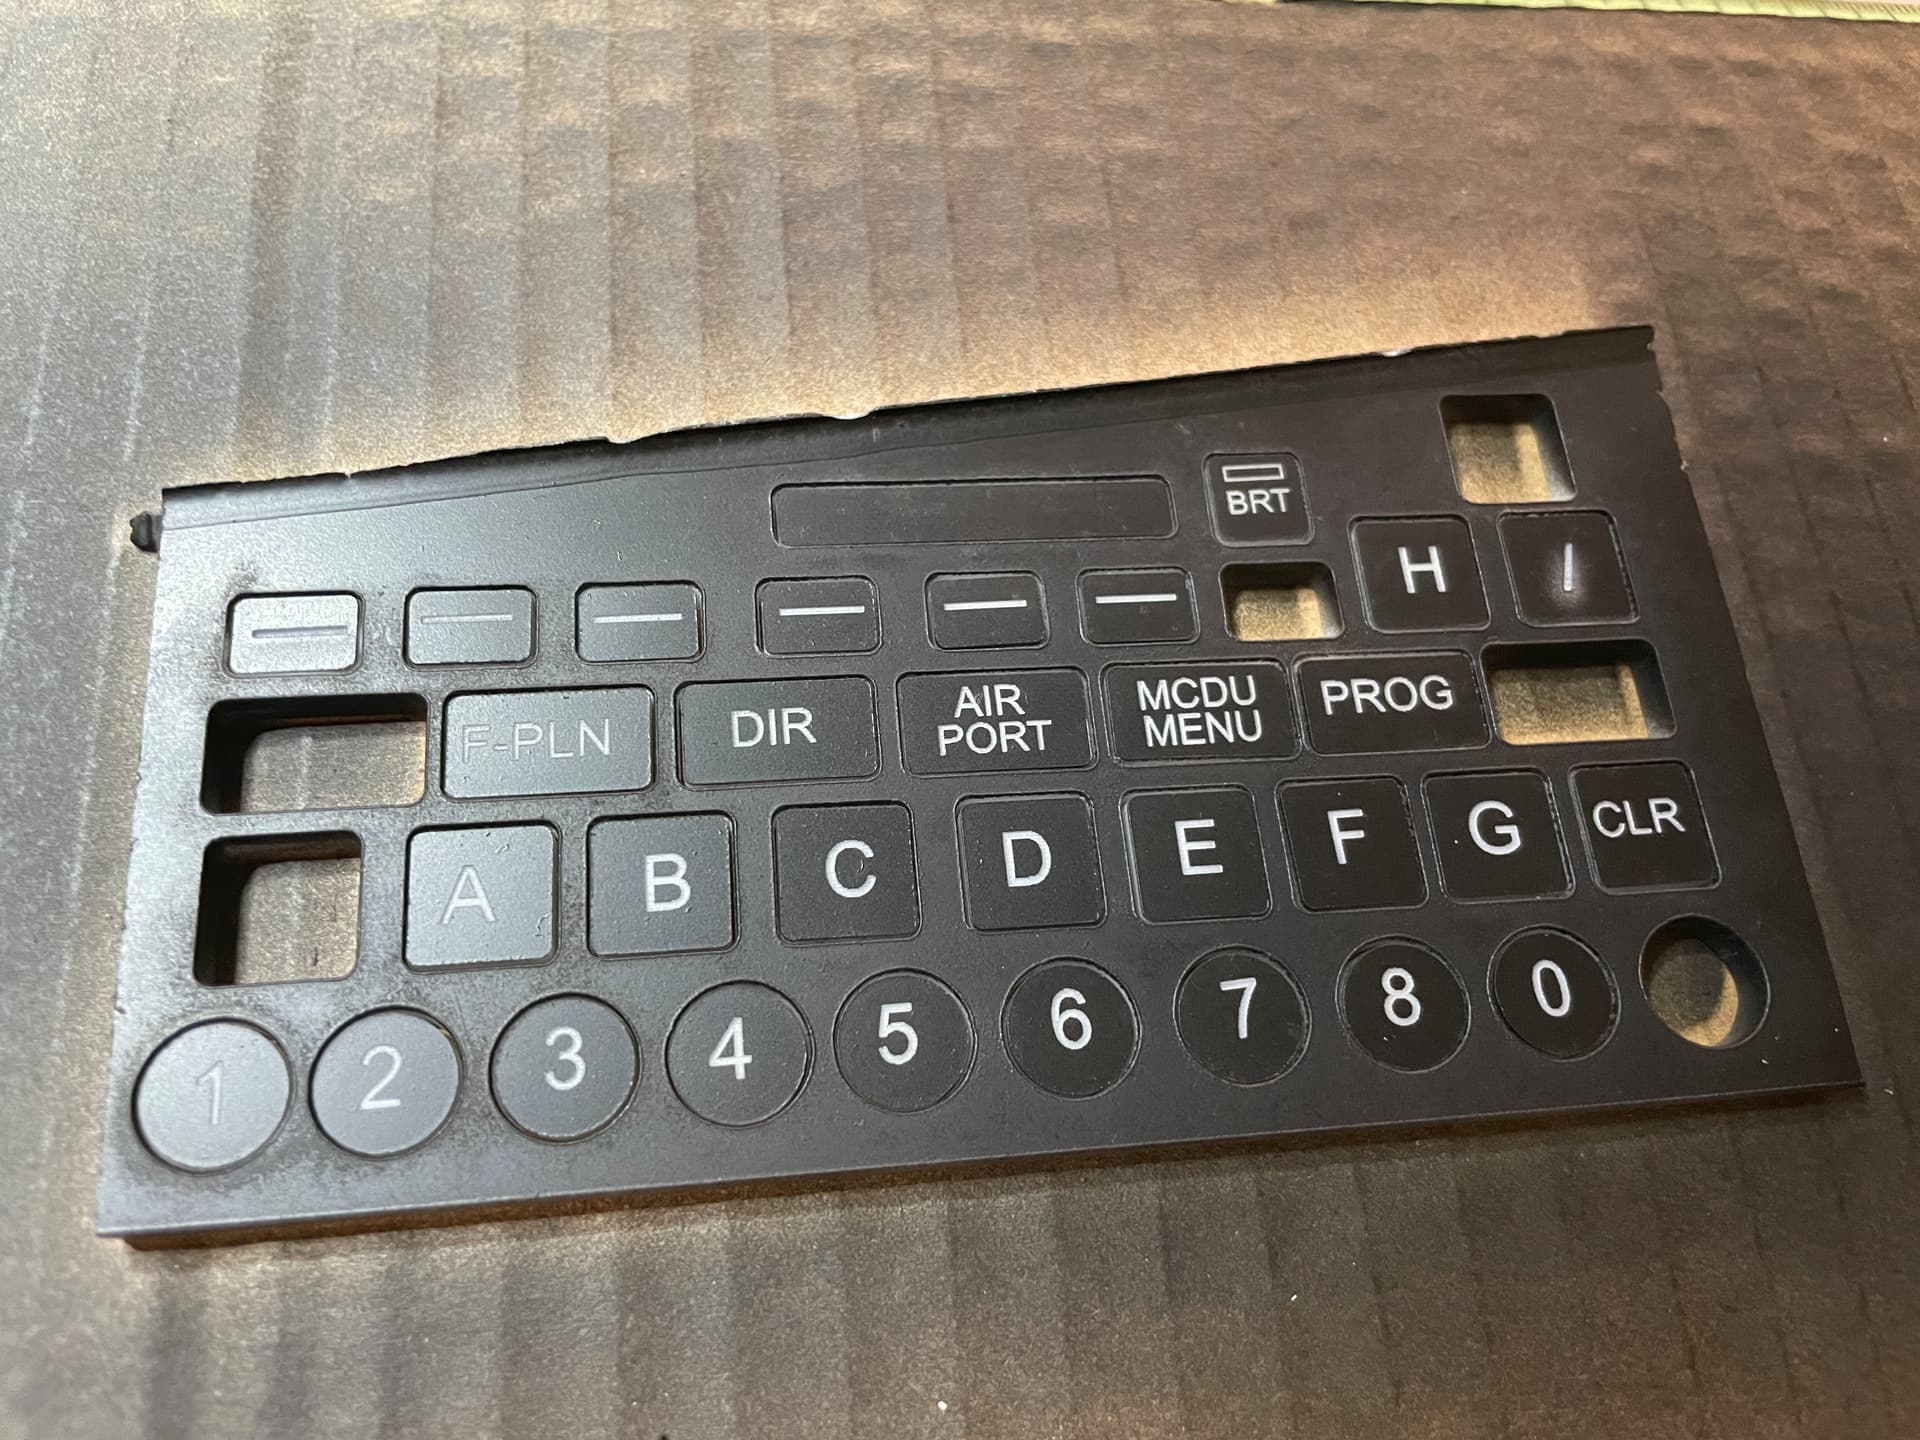
How are the Lightburn parameters correlate to the Ruida parameters,
and where can the speed or acceleration synced to the power output?
Yes - that’s a good advice!
I will experiment with start speed and acceleration values
for the RUIDA controller settings in LightBurn.
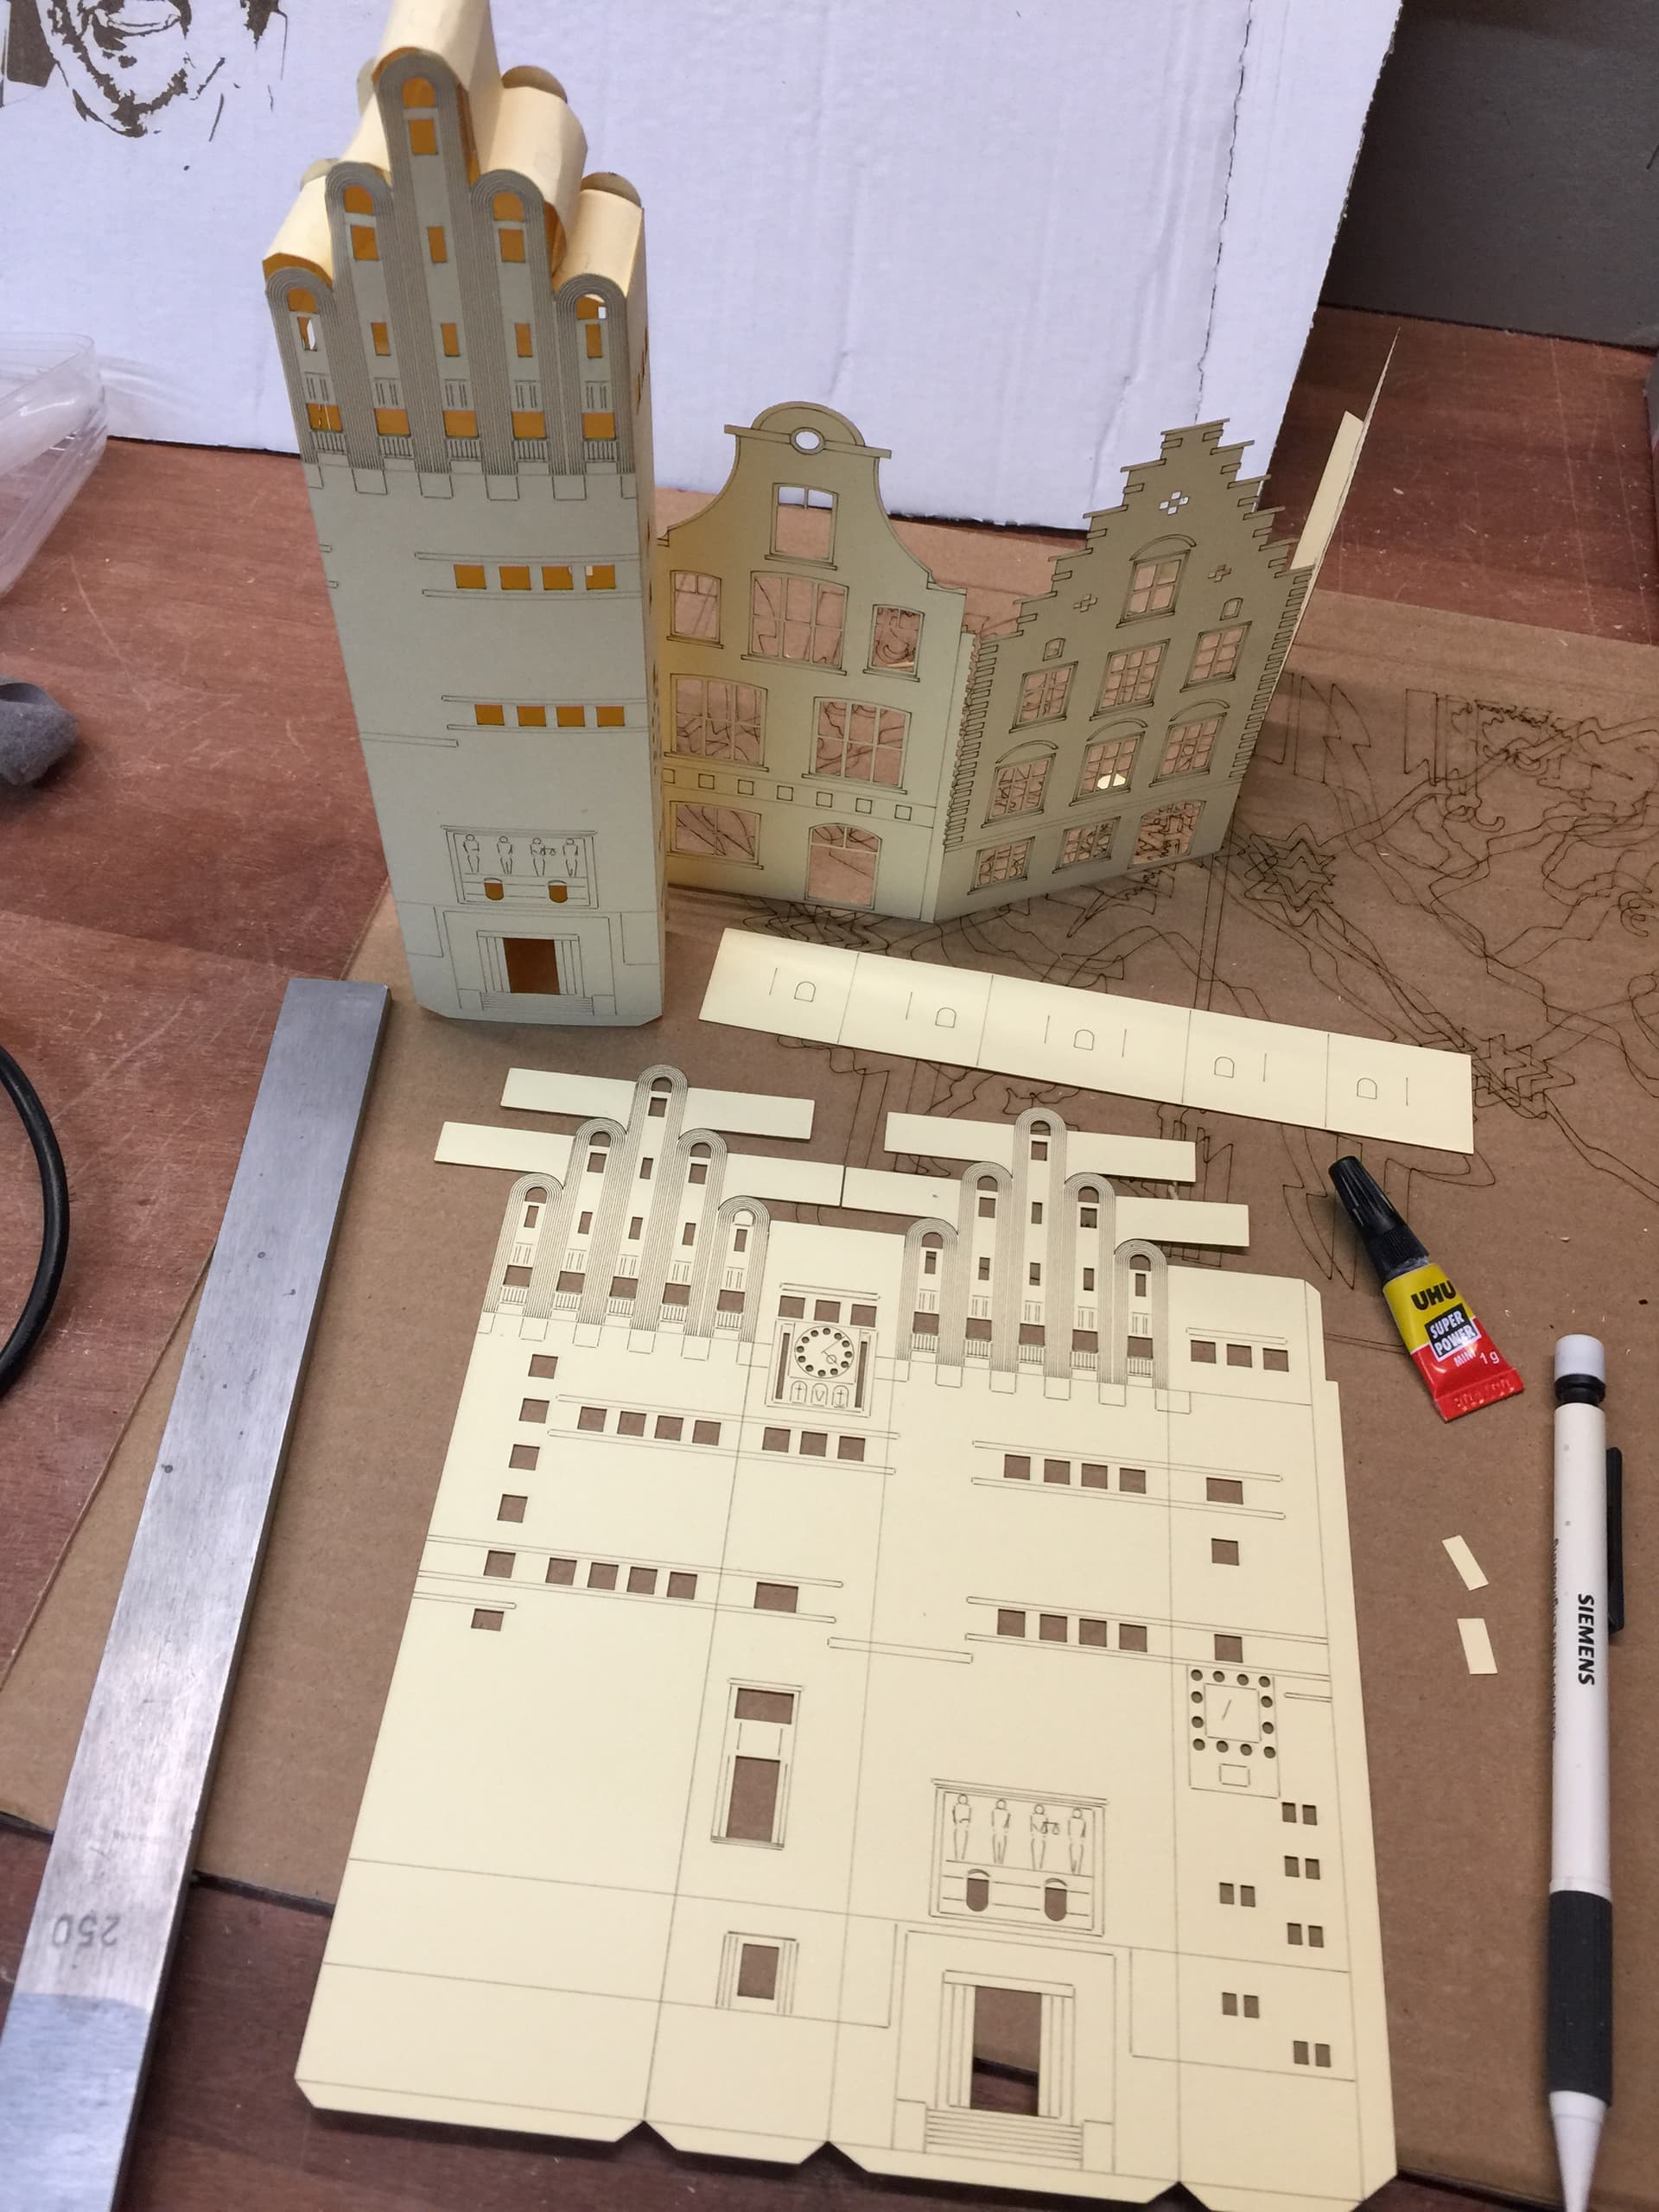
For line drawings and line cuts on 3mm plywood
I’m using 80 mm/sec speed and 10% of 60W for lines
and 40% of 60W for cuts (2 times to reduce dust).
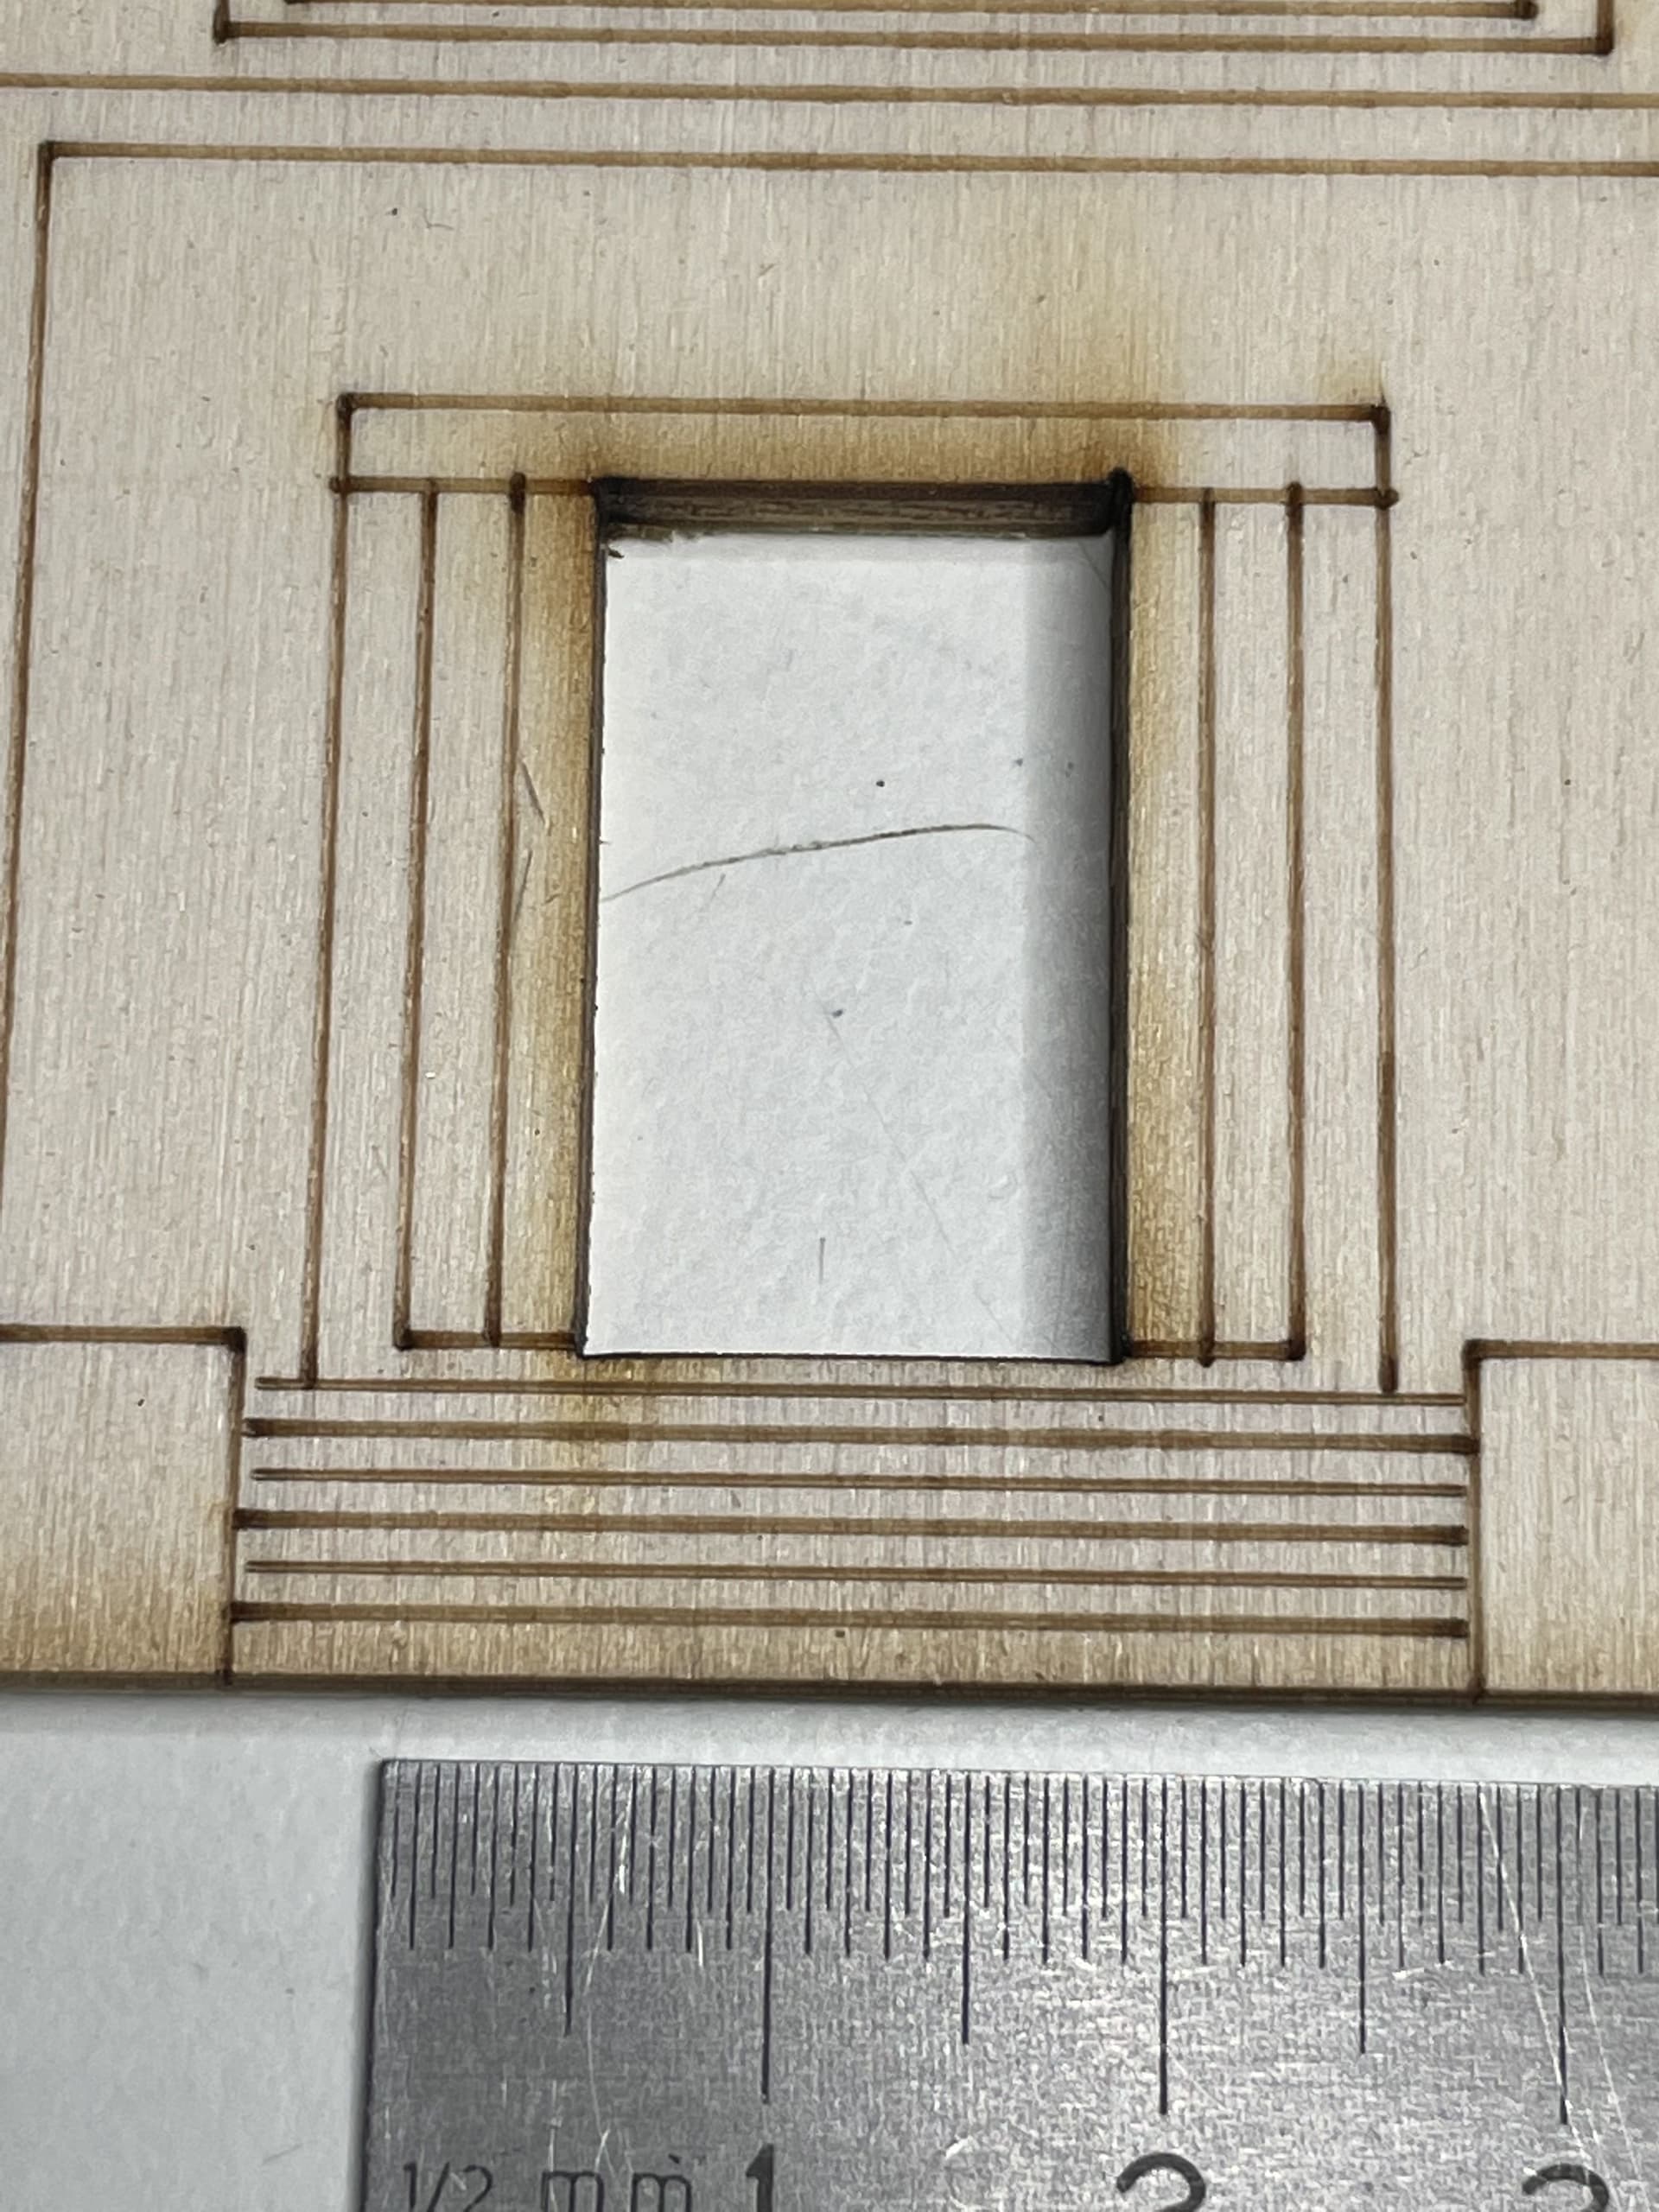
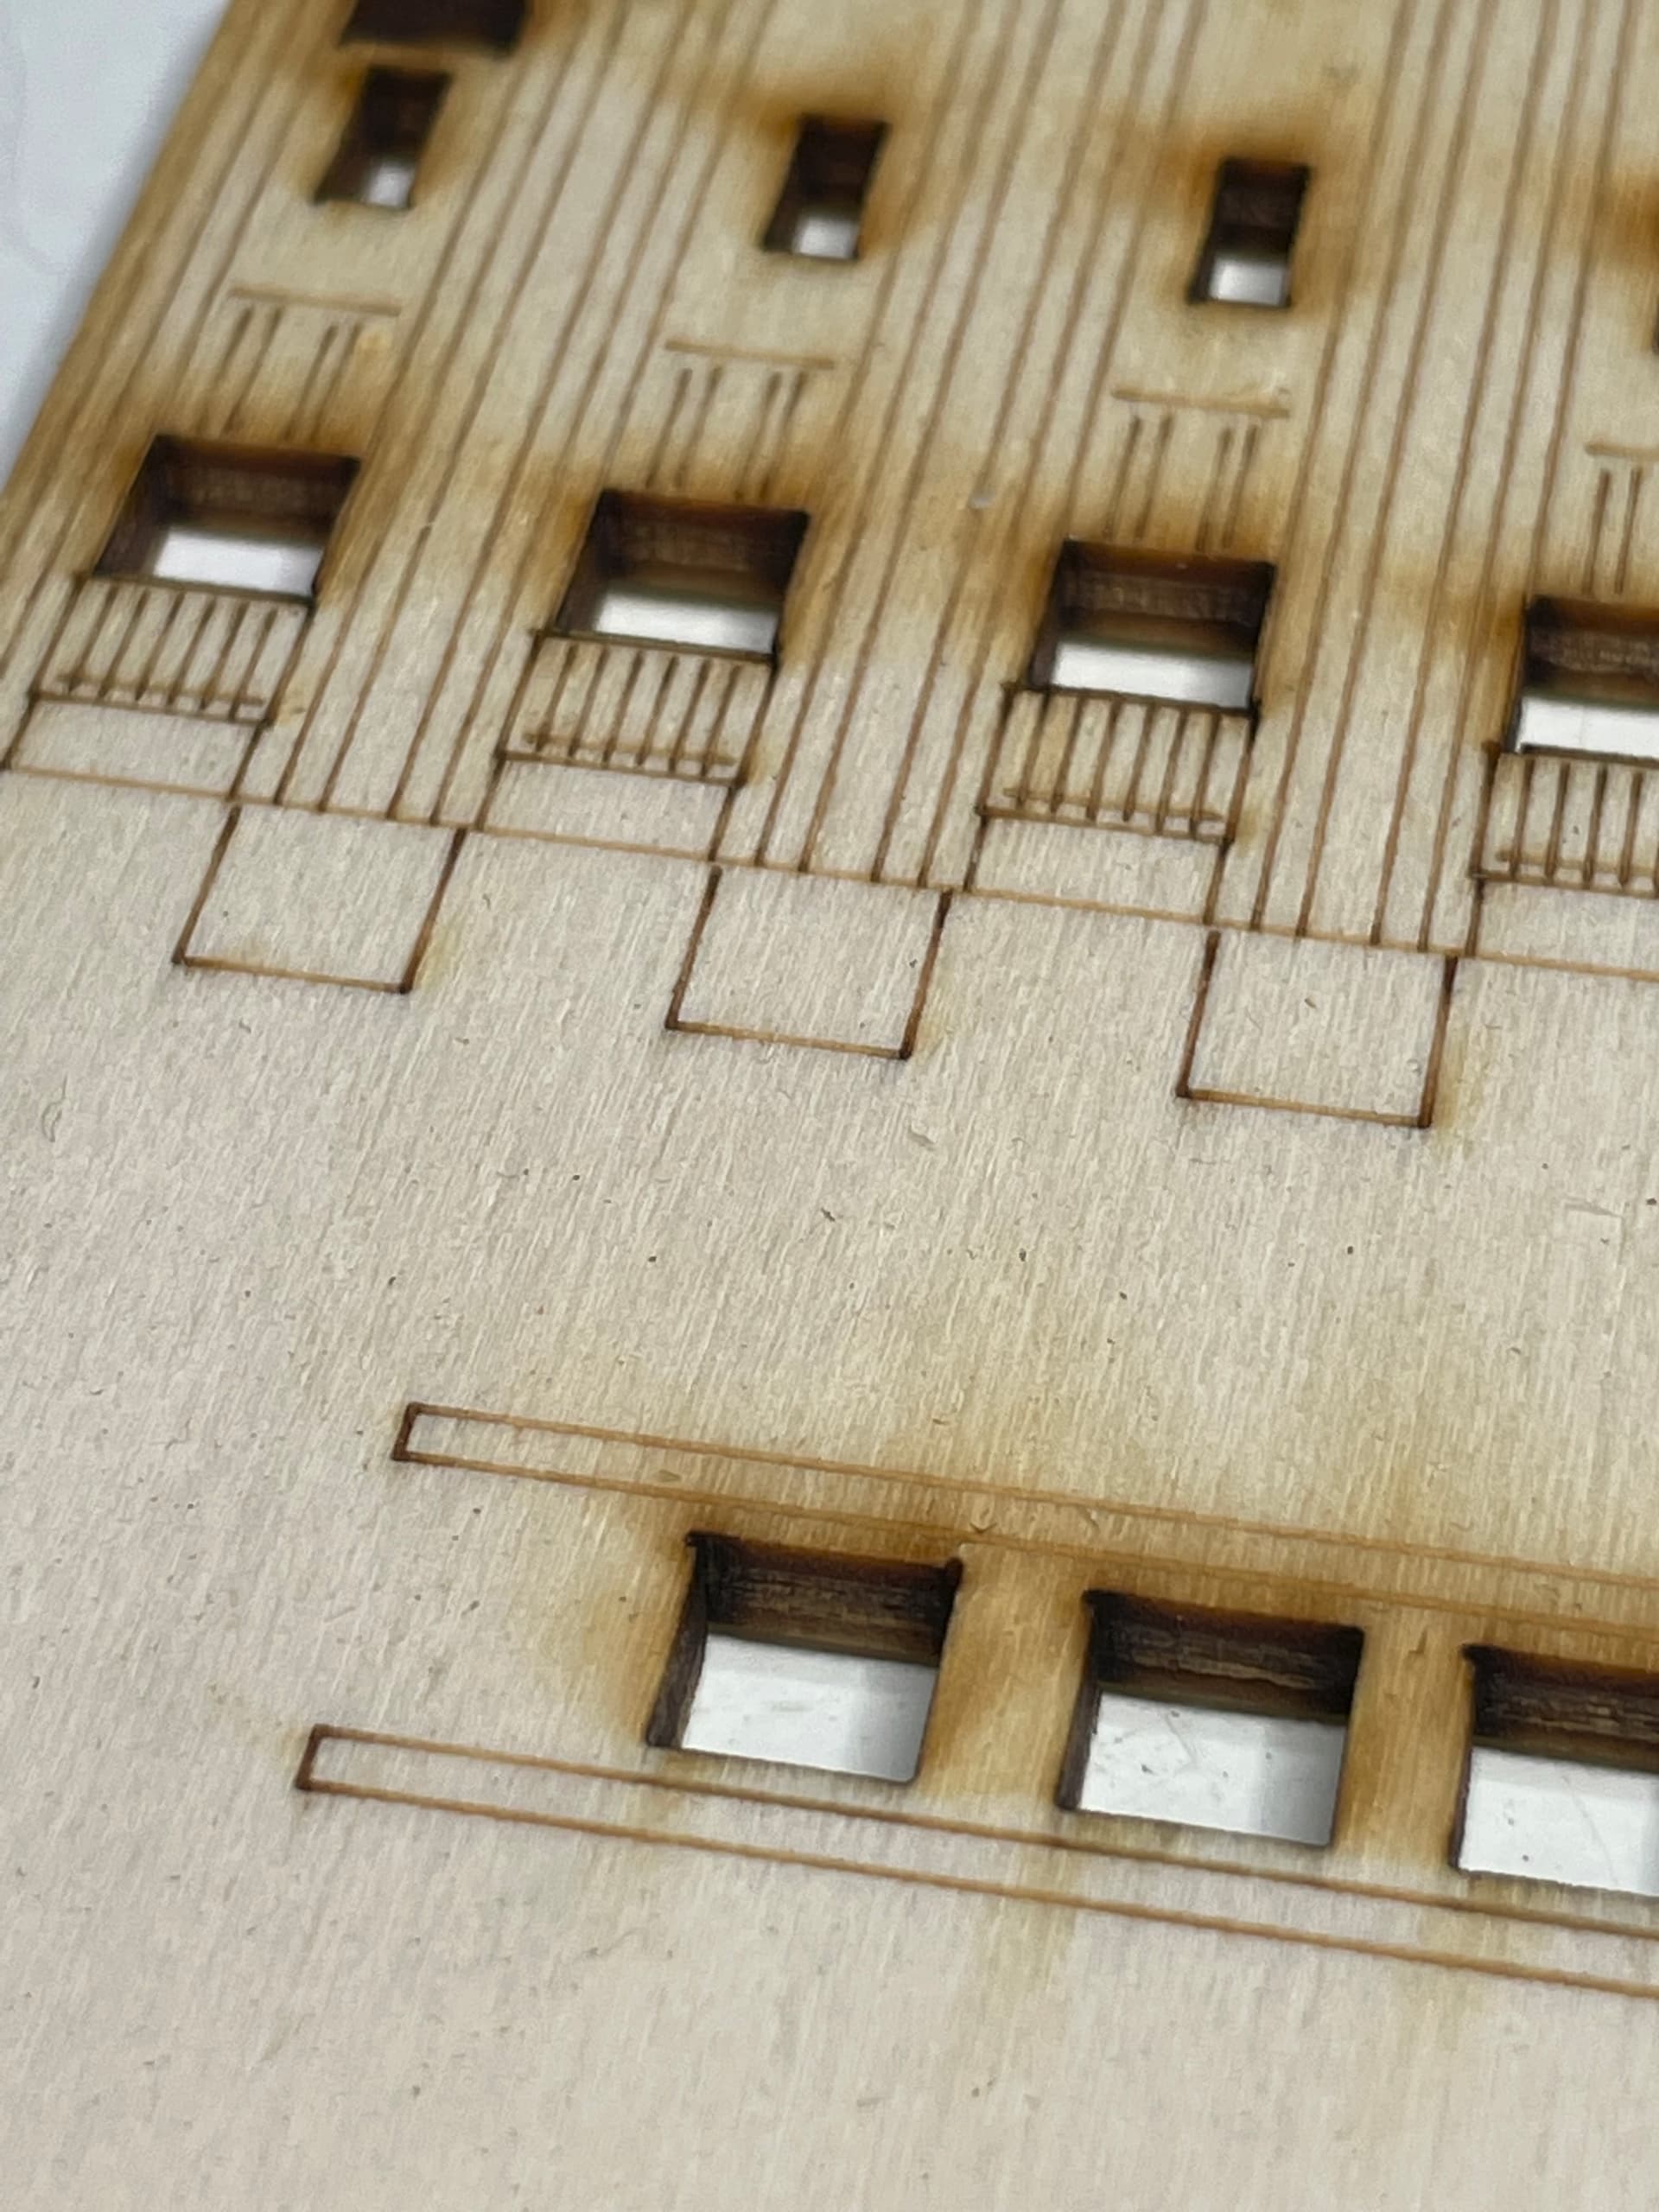
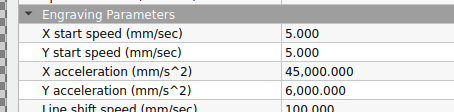
Up to now the first and last half mm is too strong with my settings, yet.
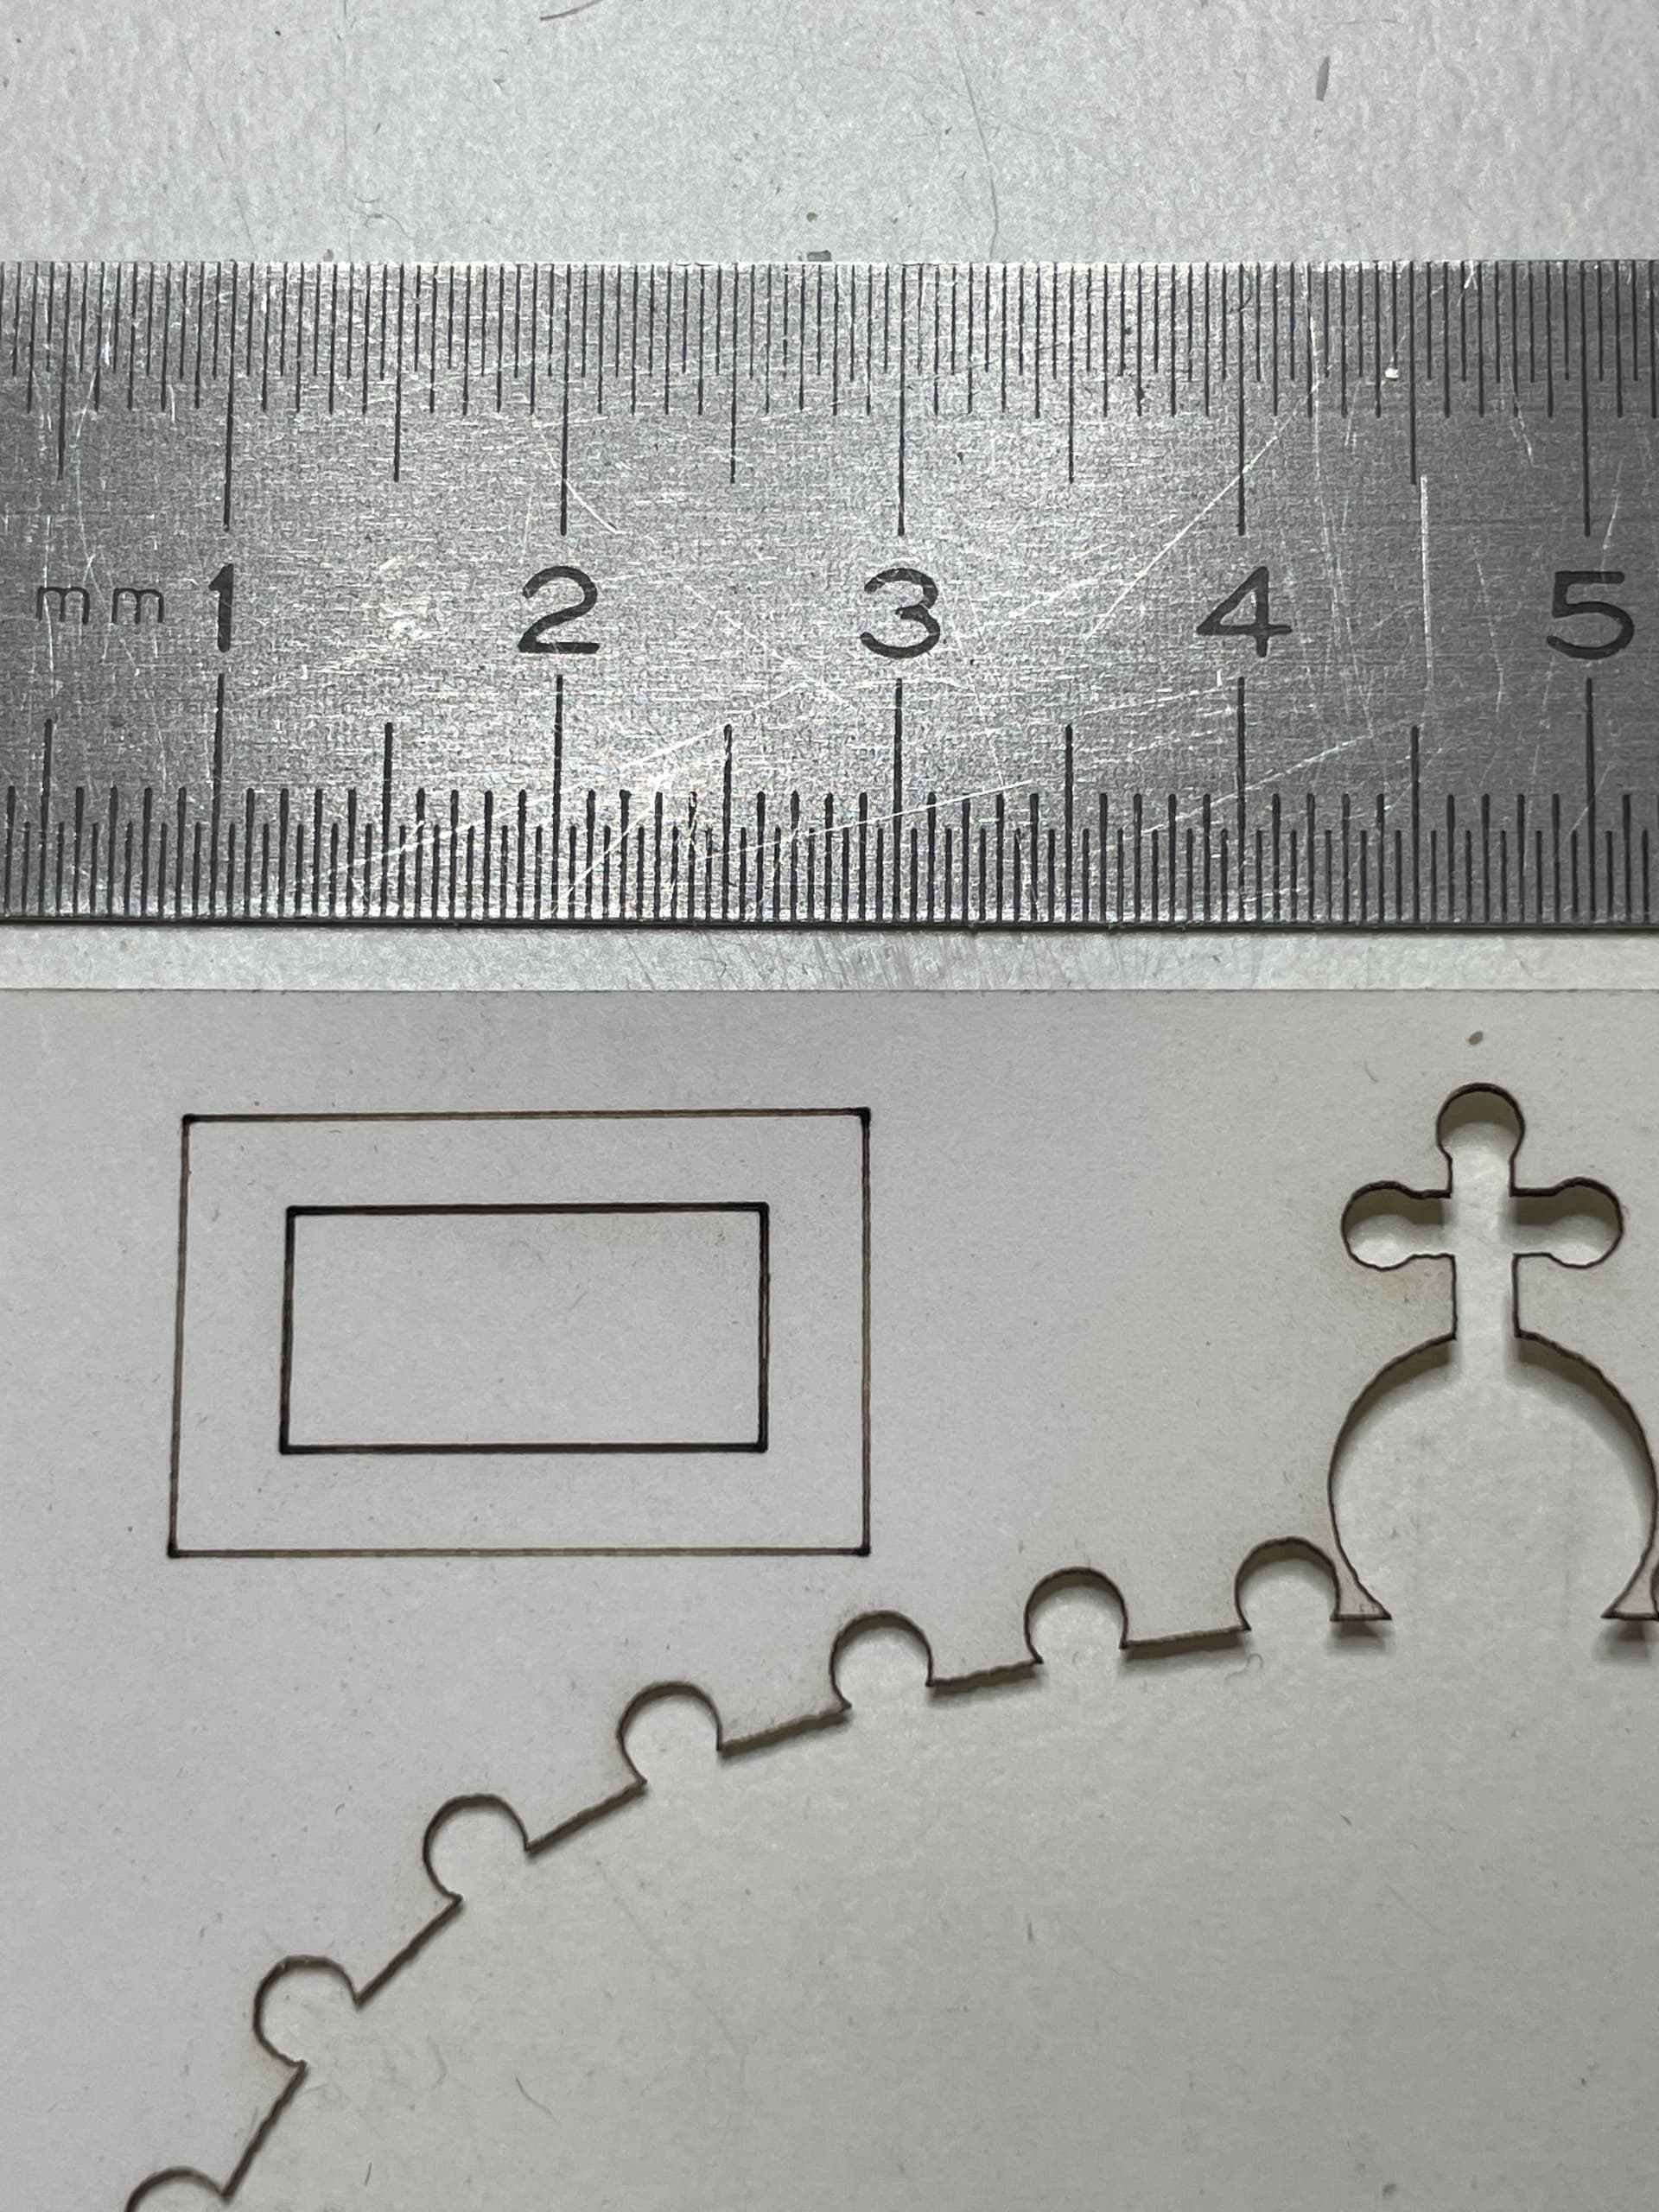
The thickness of the lines may be caused by magnification/scale of photo.
Another factor could be that the airflow from compressor thru the nozzle
could be a little too weak - especially when burning wooden material.
With the new setting of START SPEED it looks like this on paper:
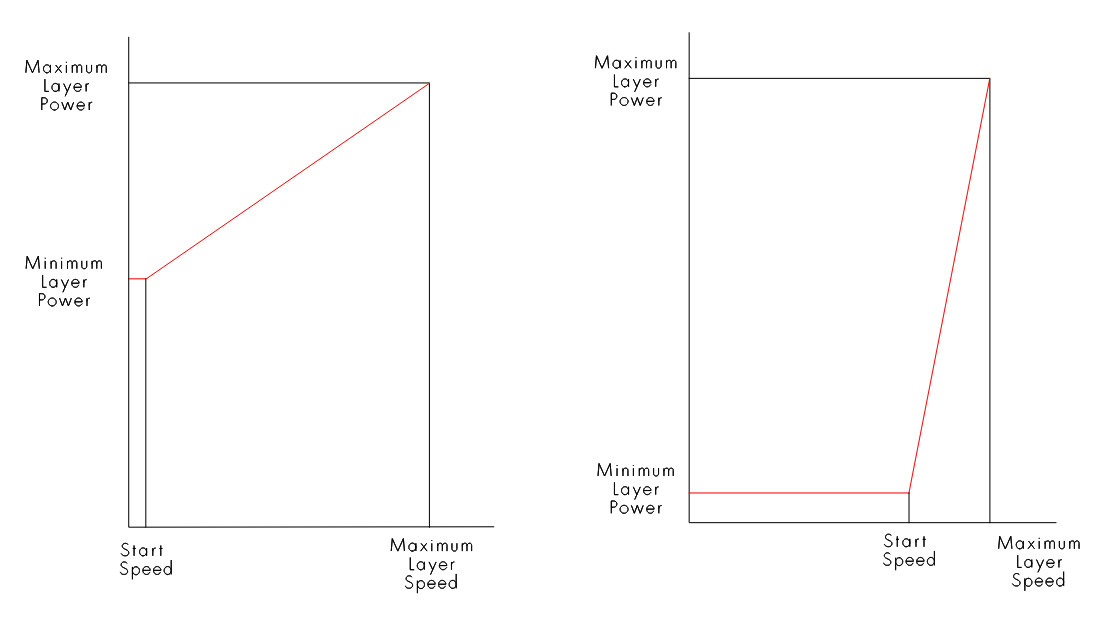
What I’m still struggling with is the setting of MIN POWER and MAX POWER.
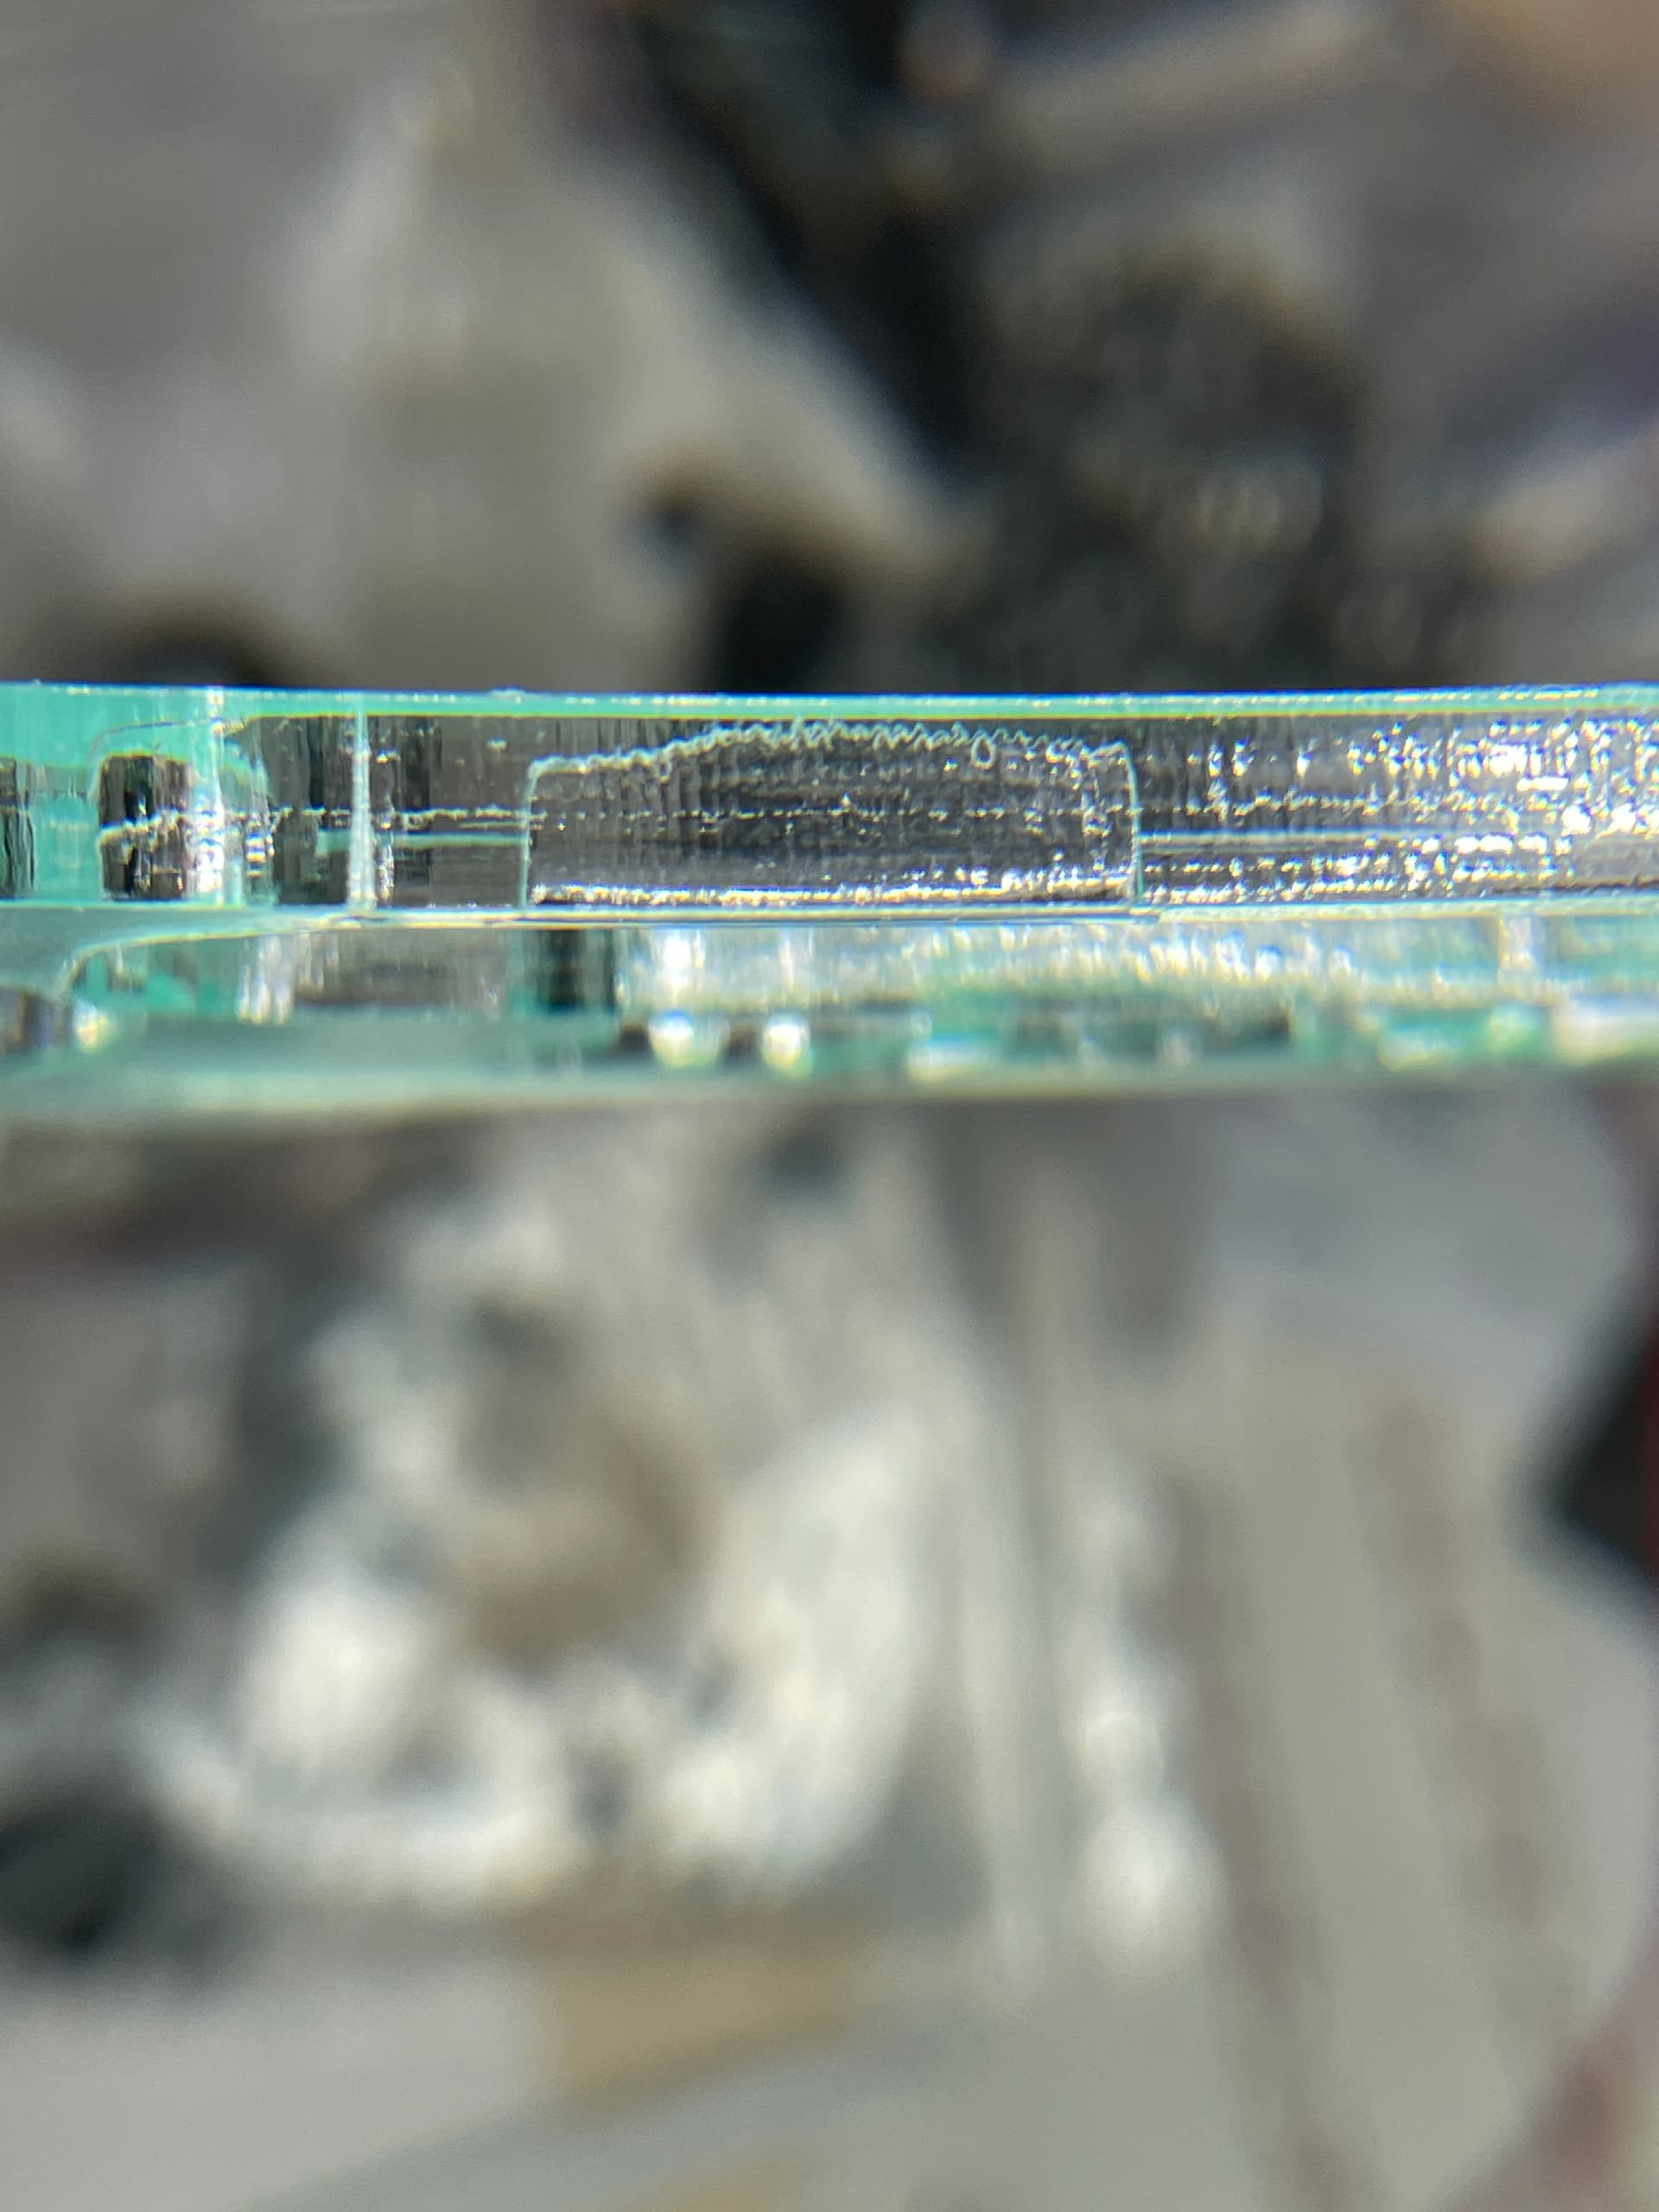
When cutting a line in Plexiglas (Polymethylmethacrylat, PMMA) the ramp
at the beginning and at the end is extremely steep, while the cutting depth varies a little. (Settings: 10mm/sec with min. 8% and max. 70% power)
OK with this slow speed. And I’m not a physicist nor RUIDA engineer who can calculate the theoretical settings for the values of acceleration to get a constant power per square mm over the whole contour on paper.
==> But I’m happy already with the output by now.
Probably I should get deeper in the dependencies of the settings in the RUIDA controller…
OK - I should explain the power-timing ramp example a bit more precise.
As I’m also only guessing it is not so exact by now
And the side view of the Plexiglas sheet shows some varying effects.
So cutting Plexiglas seems to be best with min and max power to be equal.
A different power setting for both parameters makes more sense for me when engraving prictures.
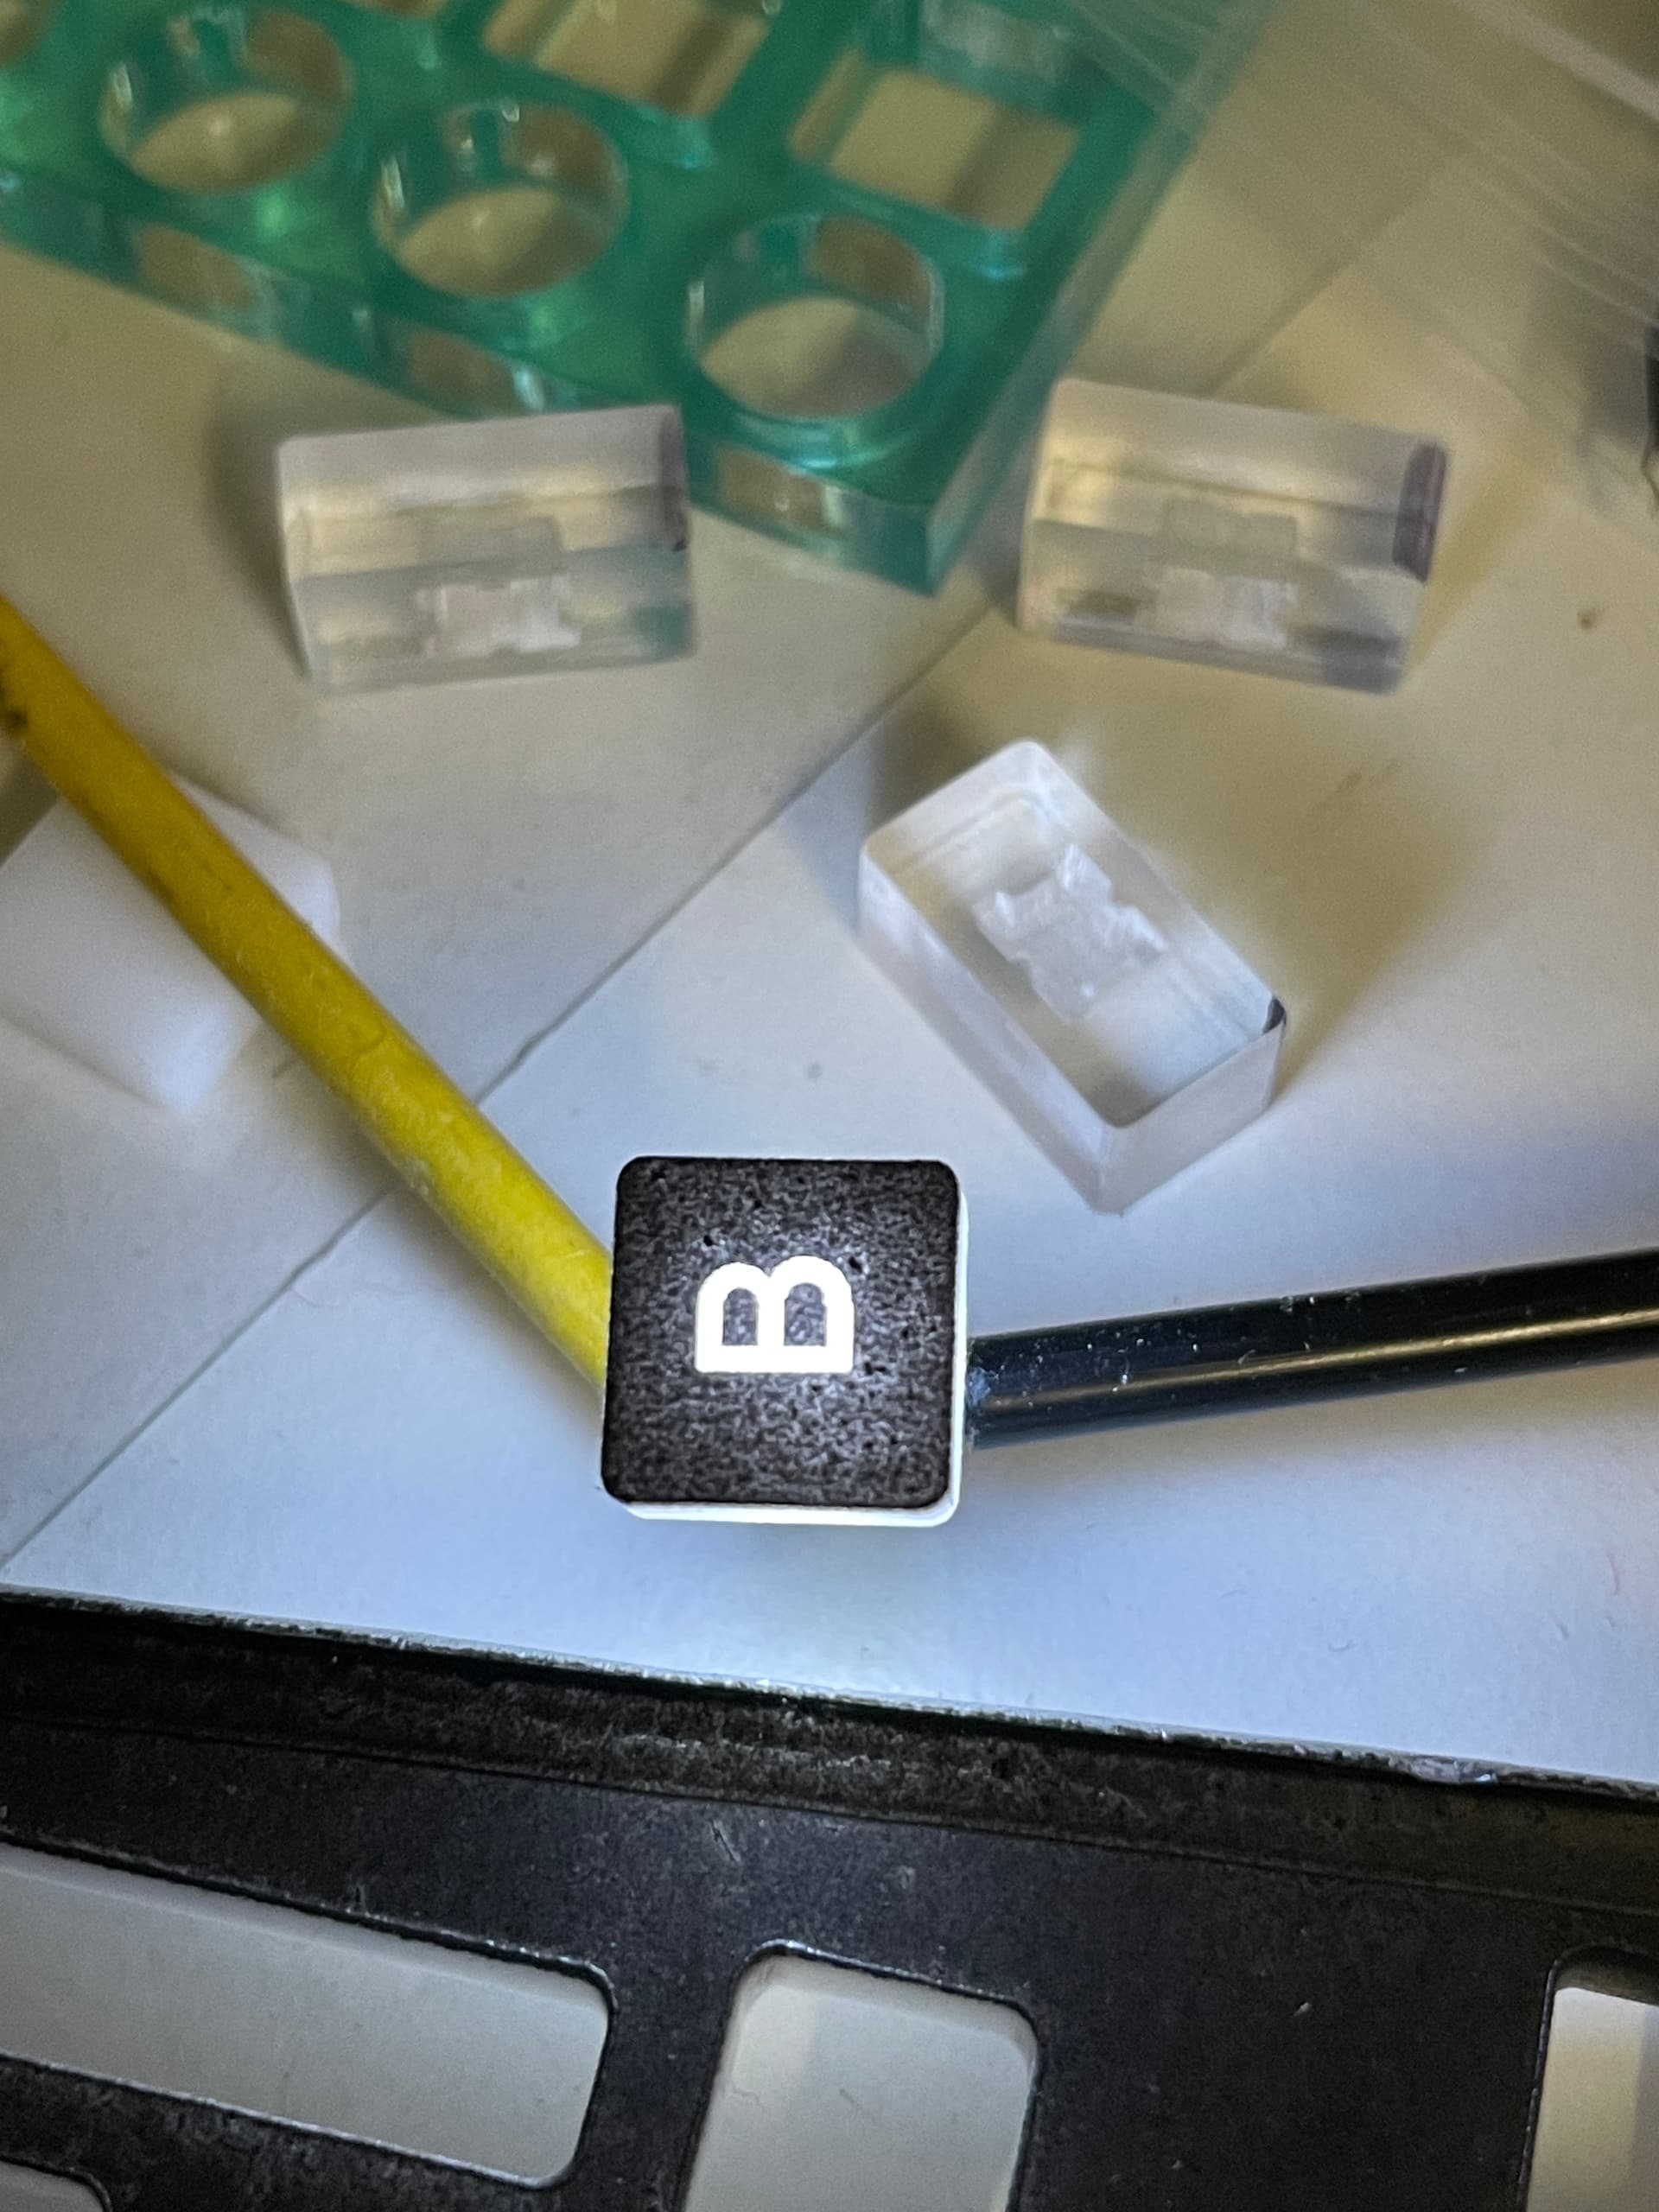
For creation of illuminated knobs I used original Plexiglas 4 and 6 mm.
Other translucent material showed irregular edges. And using PVC
may be dangerous to life. I used clear or opaque Plexiglas to test.
I spray-painted the front-side two times (three times recommended)
with the letters to engrave later on.
Engraving the backside led to 2 mm depth. Beside the challenge of
positioning it centric it is critical to avoid liquefaction - especially when
using OFFSET FILL method. So several pathes with lower power
and pauses between the threads may deliver cleaner results.
The illuminated switch should fit to the backside. And PMMA tends
to melt around 100 degrees Celsius.
Engraving the backside delivered 2 mm depth.
Cutting in PMMA is much stronger to have equal values for MIN POWER
and MAX POWER. And if the edges are burned stronger because
of speed acceleration and deceleration does not matter.
This is different when drawing lines on paper or wood.