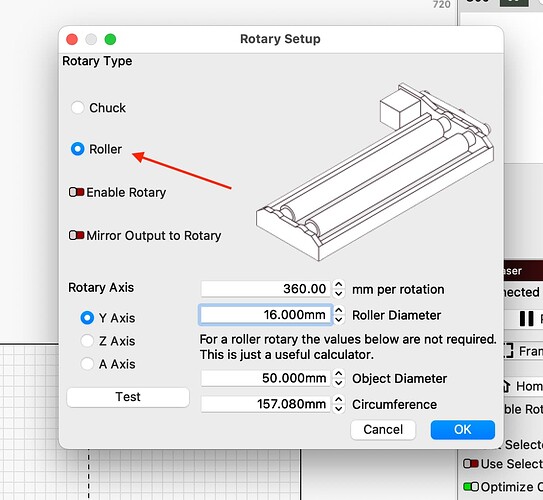
I was reading this thread with interest. Strangely enough, my rotary dialog is different. The setting you are referring to on my dialog is steps per rotation. In trying to understand why yours was different, and reading documentation etc, it seems that the differences in how various lasers handle rotary causes this inconsistency. In my case, the steps per rotation value was never provided by the manufacturer, and there was definitely trial and error trying to dial it in. In my case the value was 8000.
The test button tries to rotate the roller exactly one rotation. The goal is to get the value in that entry field dialed in, such that the roller does rotate exactly one rotation. Evidently it appears that not all vendors treat rotaries the same, and I guess there is some trial and error. It’s great that for your particular rotary you have dialed it in.
What is very important here is what I have watched on countless YouTube videos, where I believe the authors are “doing it wrong”. I have seen many videos where the author states to place artwork on an object on the rotary, they adjust the diameter of the roller.
Here’s what I believe is not perhaps understood, and why the roller diameter and the other parameter are important. When Lightburn deals with art on the workspace, it deals in linear distance, either inches or millimeters. Knowing the roller diameter, as you’ve mentioned, Lightburn can calculate the circumference , which is a liner distance associated with one revolution. Let’s say for convenience that my roller circumference is 50 mm. On my laser, LB knows it has to pulse the stepper 8000 times to move the roller 50 mm. Or put another way, LB needs to pulse the stepper 8000 times to drawn an object that is 50 mm in that dimension. As I understand it, on GRBL machines, LB has to tell the unit to rotate a certain amount of degrees, instead of # of pulses. But, basically same is true, LB would know to tell the laser/rotary to rotate 360 degrees to move the roller 50mm.
This is where I’m finally getting to what I believe others have done wrong. Just as when you are engraving on regular flat surface, you adjust the size of the artwork to fit you intended engrave area. You do NOT adjust stepper motor settings to change the scale of the artwork. The same is true when engraving with a rotary, is you adjust the size of the artwork on the workspace, to match the size required on the object on the rotary. Many YT channels I’ve watched suggest changing the roller diameter.
I believe the “useful calculator” in the rotary dialog is there to help you figure out the circumference of the object you’re going to place on the rotary, because it’s easier many times to measure the diameter with a ruler, than to measure the circumference. Ultimately, as with regular engraving (flat surface) you want to know the size needed to engrave where you want on the object. I hope this is helpful
Ray

