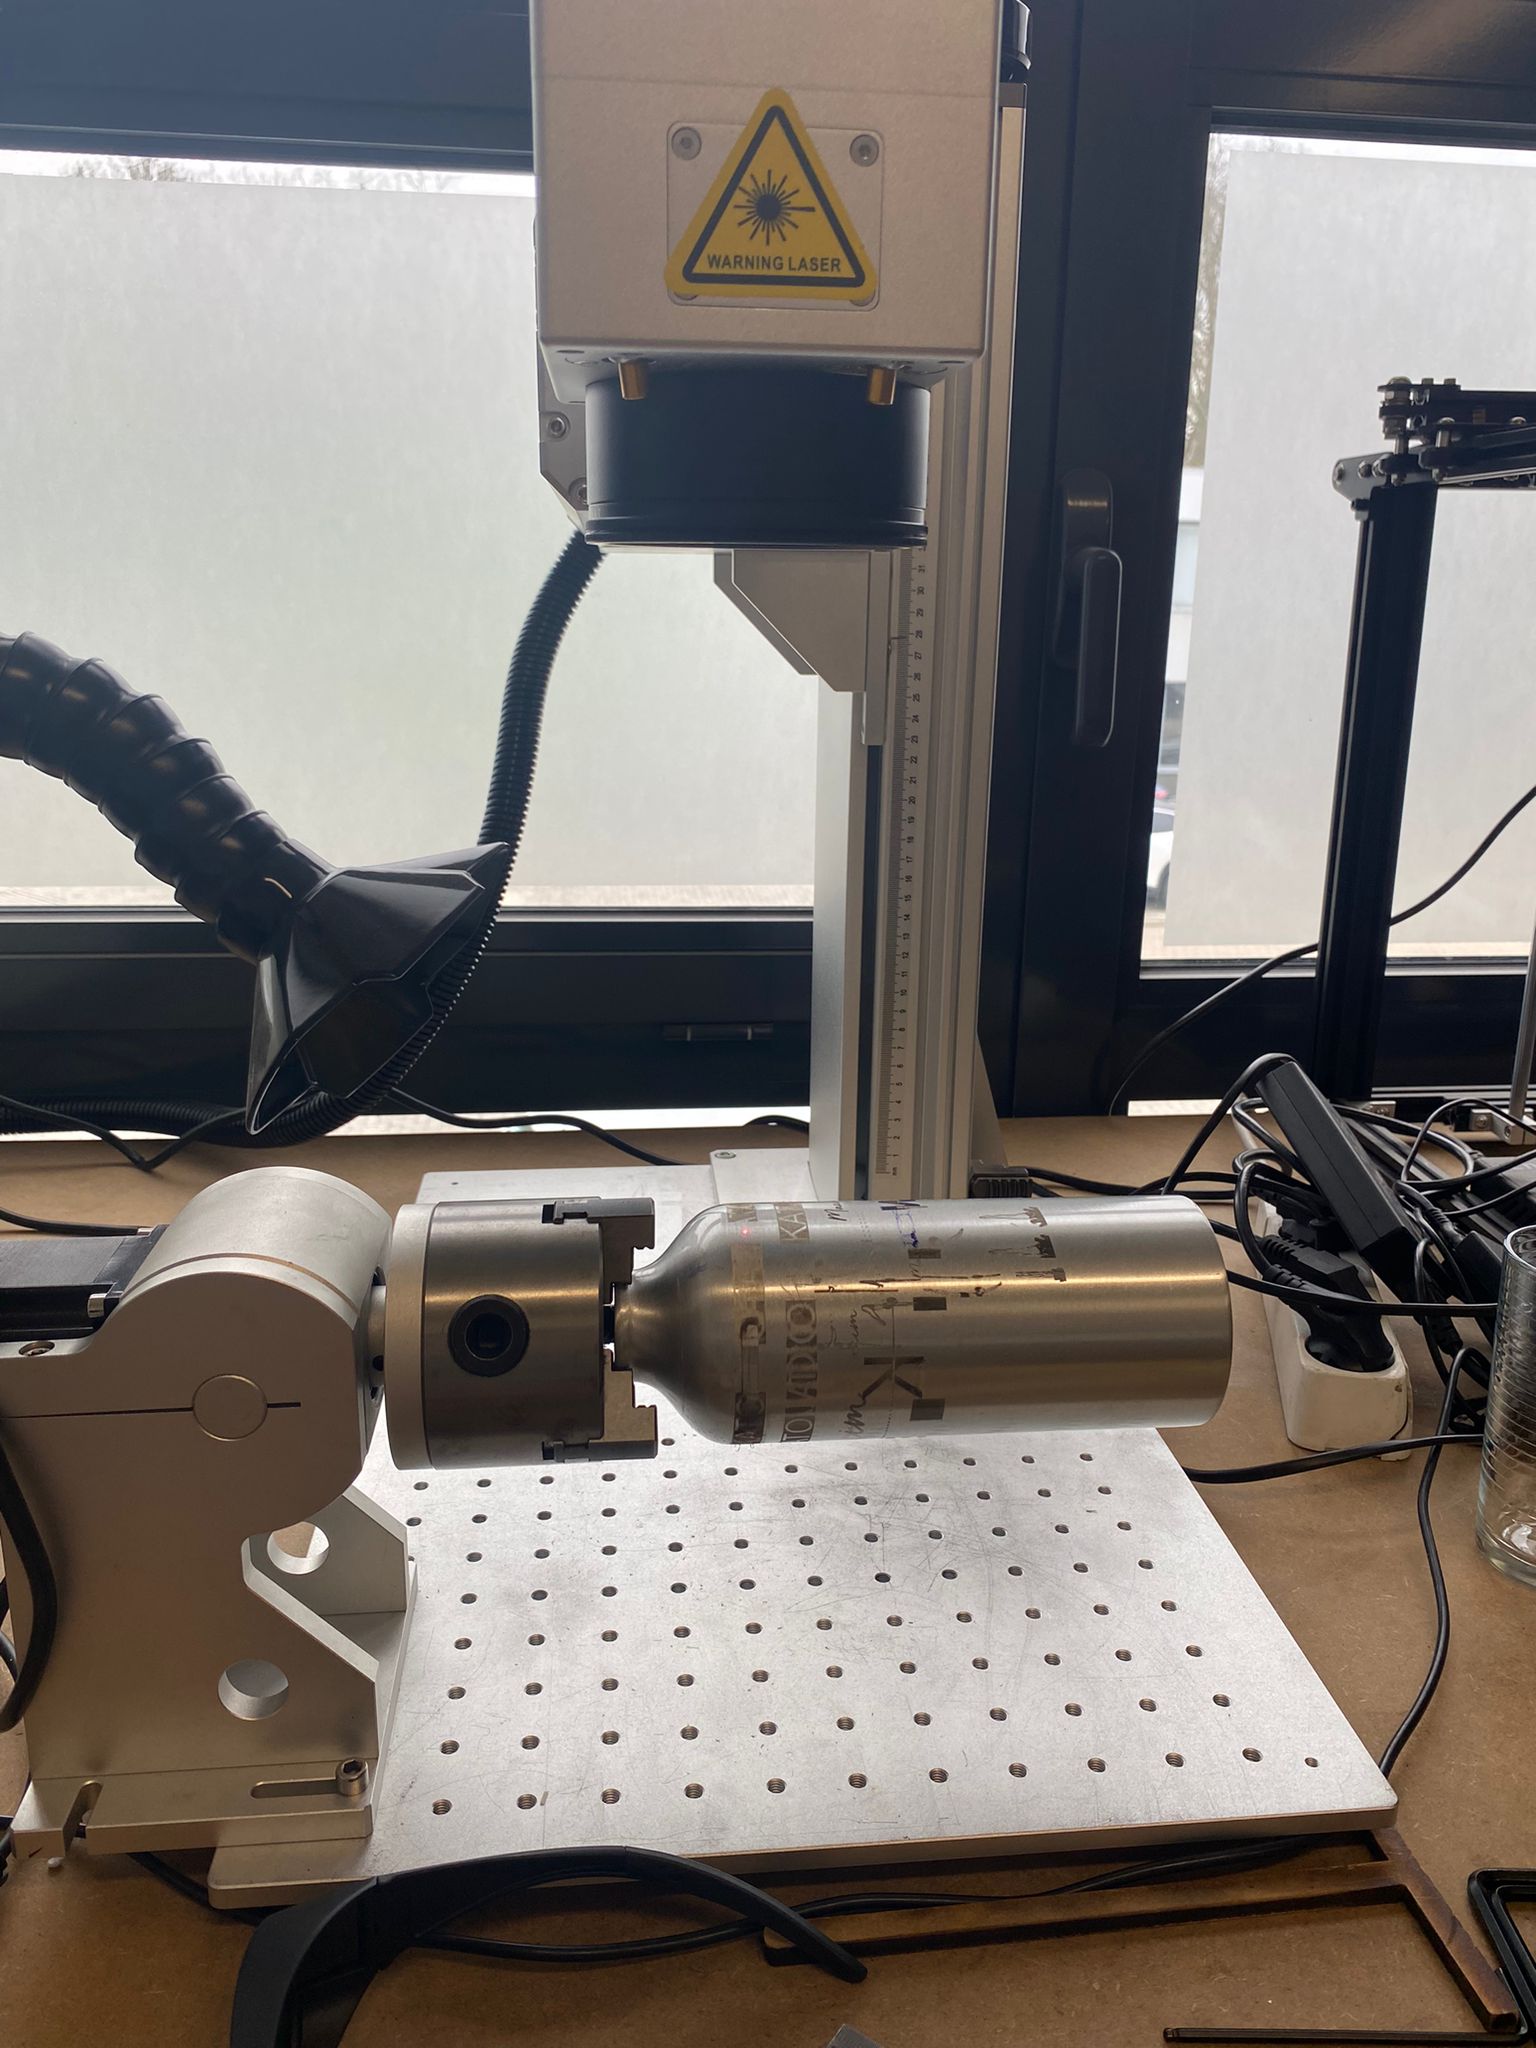
A question, we have used our rotator for the first time, when we clamp a piece, and we place the square on it (the place where the laser should be placed), when we press start, the piece rotates for a while first, can you advise what we are doing wrong. Thank you in advance
Don’t use absolute coordinates, use “current position” as starting position.

With your type of laser, the Absolute Coordinates option is not available, and isn’t the cause of your issue.
Have you adjusted the steps per rotation value in the Rotary Setup window? If you haven’t got that set correctly, that could cause your rotary to turn too far.
In the Rotary Marking window (the last window reached before starting your job, with Rotary mode enabled), make sure the Rotary position is 0 before starting the job, and try zeroing it before beginning if it is not.
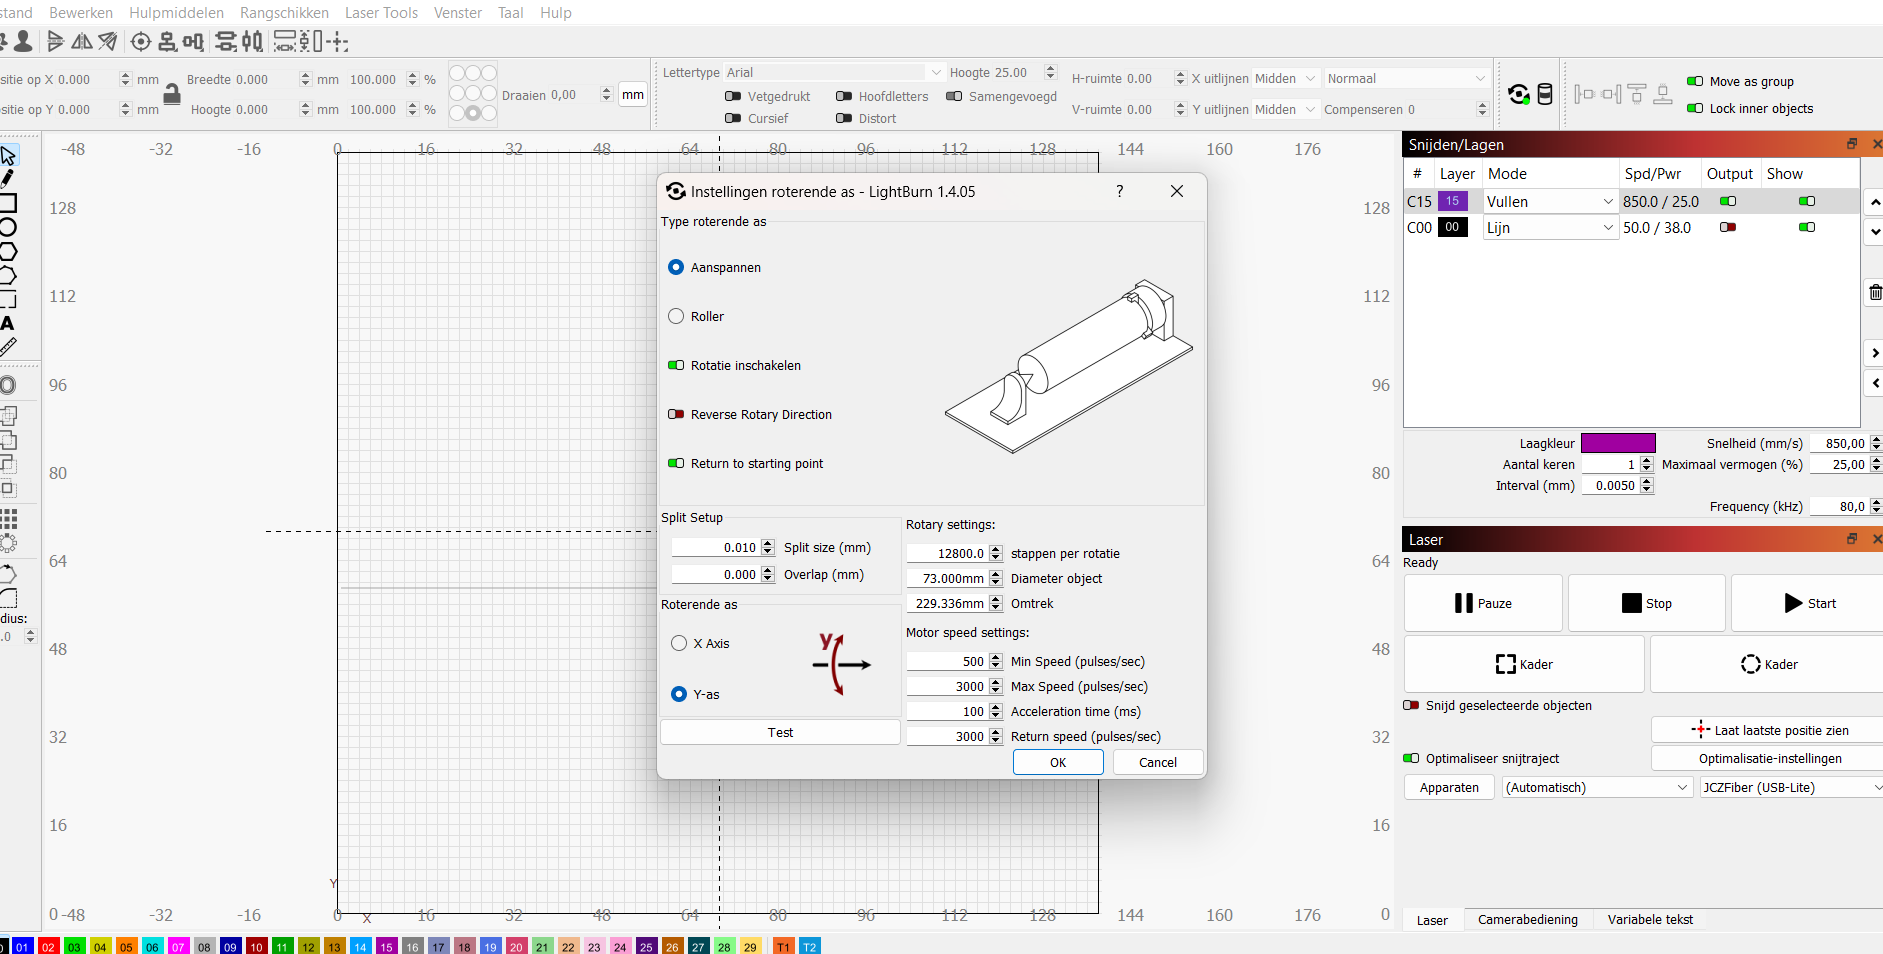
firstly we’ve used these Rotary setup variables
then when contiuing with the Rotary marking window i’ve first went to zero and then obtained my desired position with the help of the jogging buttons.
It frames it correctly, but then when starting it moves to another position and starts there

How far is the rotary moving before beginning? You have your graphics positioned in such a way that you should expect the rotary to jog a bit before beginning.
Think of the center line of your LightBurn workspace in Y as the 0 point on your rotary - any graphics positioned above that line require your rotary to turn one direction to mark them on your object, and any graphics positioned below require your rotary to turn the opposite direction to mark them on your object.
When you have graphics straddling the center line, you should expect to see your rotary jog one direction, to the bottom of the graphic, and then mark the entire graphic starting from that point, rotating past 0 to reach the part of the graphics above the center line.
If you want the rotary to start outputting right where it is and proceed from there, the top or bottom of your graphic must be positioned right at that center line. It looks like you have a 140 x 140 mm workspace, so, in your case, that would mean you need to move the top or bottom of your graphic to Y 70.
How to determine the output centre?
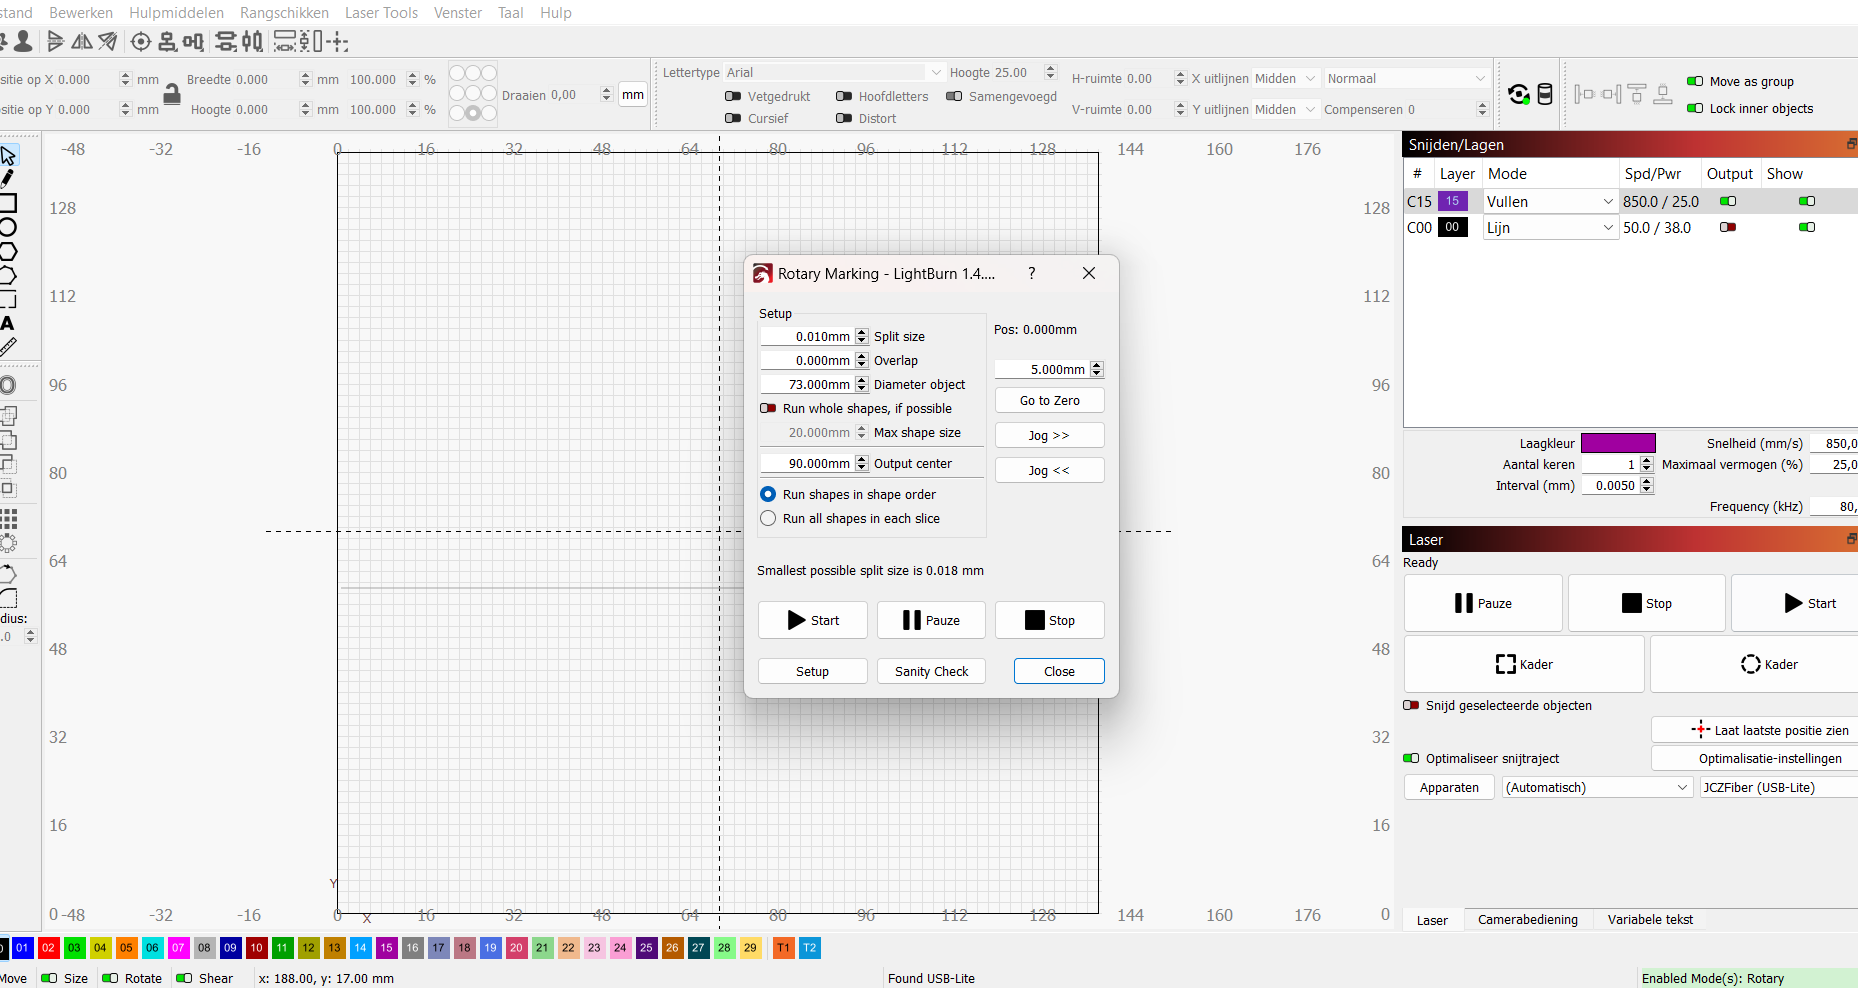
The Output Center determines where in your physical workspace the output will be. At 90 mm, it is 90 mm up from the bottom of your physical workspace.
If you create a single line along the halfway point of your LightBurn workspace (70 mm if your workspace is 140 x 140 mm) and frame just that, you can see where the Output Center is. If it doesn’t match where your rotary is, you can move your rotary, or adjust the Output Center value.
This topic was automatically closed 30 days after the last reply. New replies are no longer allowed.