Hi All, been doing alot of reading on this forum for some tips on this query,
I’m a rubber stamp manufacturer coming off Trotec machines as gone to expensive to replace. They have excellent driver software so outputs from CorelDraw which we use and are very proficient in are very simple, Its just a simple print output with stamp mode selected with various parameters saved depending on your specific Trotec model etc etc.
So in coreldraw we just out put a simple black/white drawing with a red cut line. I can see from lightburn similar set up colour are set to specific needs, power, speed, dpi etc.
So I would like to export from coreldraw it seems an .ai or .svg file, I will be upgrading to possibly indesign too as the coreldraw is on very old XP computer. As I know there is a Macro for coreldraw and even RDworks.
So if I concentrate on just the importation of a file into lightburn to keep it relatively simple,
What do I need to do to run that image or multiple images quickly in rubber stamp format in lightburn,
I see some are mirroring the image but some are also inverting it etc but surely there’s a simple enough solution to make it quick?
I was in a similar situation, 12 years with a Trotec Speedy 300 using JobControl as a rubber stamp manufacturer. Our laser ran out of TroCare due to age and I bought an Omtech 50 Watt desktop laser. I missed my Trotec so much that I actually contacted Trotec to see of there was a way to continue using their software, they informed me that they get this call a lot and the answer is no.
Anyway, I struggled on with no support from Omtech as they are US based and basically tried everything that I could within LightBurn to figure out how to make rubber stamps. I have to confess that although LightBurn does do some very clever things I really do not like the software as it tries to be too clever and it will change settings without notification. With use and plenty of head banging you will discover this and learn what to look out for.
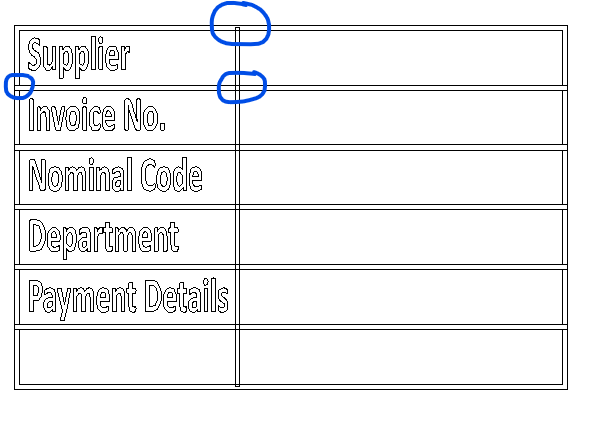
I still actually create all of my rubber stamps in CorelDraw X6 and export them as .ai files to LightBurn. But it is a lengthy process! For smaller stamps I tend to put a hairline around the text, convert the outline to an object and then weld. All lines need to be made 1MM or 2MM thicker and then converted to an object. JobControl used to recommend 1.8mm gap around the edge of the stamp but in LightBurn I have learned the hard way to increase this to 3MM. What I now do is draw a box in CorelDraw, fill it in black and remove the outline. Make what is left 3MM larger than the stamp artwork, change the stamp artwork to white and centralise it over the box, making sure that the white text is on the front I click Front minus Back so that I have one object which is what is exported to LightBurn.
I think that is the part that you were looking for help with rather than the LightBurn settings? If not let me know and I will find the time to construct another 10,000 word essay on what I have to do in LightBurn!
Thanks so much for the comprehensive reponse, yes its the design setting more so than the lightburn settings, i might have a quick go in corel and is it possible to drop a sample file on here for you to view ?
Corel file attached, the .ai file is very larger, a cut line can be added I guess from lightburn, i wish is was bit easier, volume is quite high, shame about JobControl not being available its so good at the stamp side of it, It wont allow the attachement of the corel file so will have to edit thursday and try then
I do not normally post on the forum as I am by no way a knowledgeable user of LightBurn, in fact there is still a lot that I do not actually know. If it is easier for you to email me over a file I am happy to have a look, unless you would like to keep things anonymous, we are after all competitors in the same market
That is assuming swapping email addresses are permitted on this site?
I’m based in Ireland so perhaps not competitors in anyway, file attached, once i’m on the right path, I’ll figure it out swiftly enough I hope Graphic2a.cdr.txt (28.1 KB)
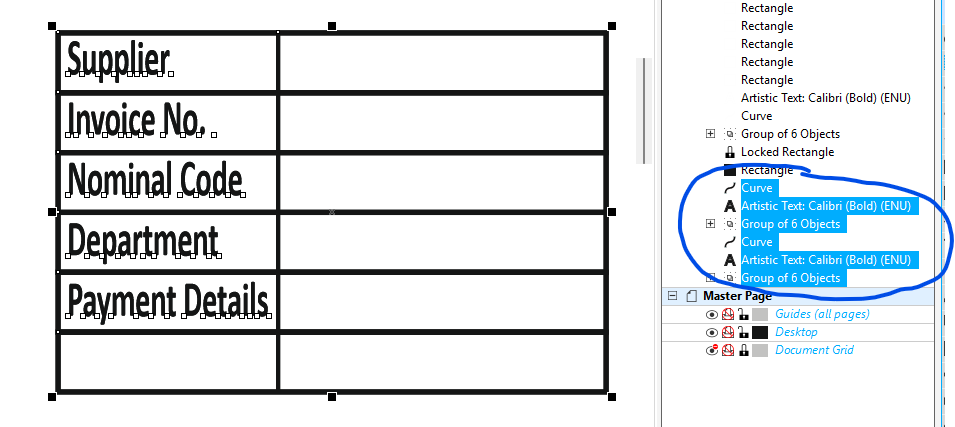
I’ve noticed that there are duplicates in your CDR file so you’ll need to remove these. This is ideally done in Corel but LB does have the ability to detect duplicates and delete them This doesn’t always work though.
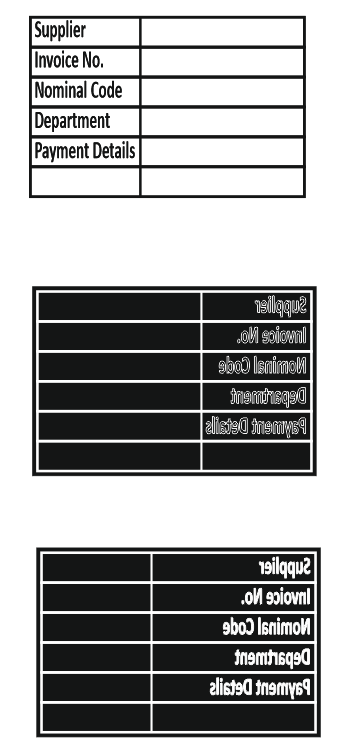
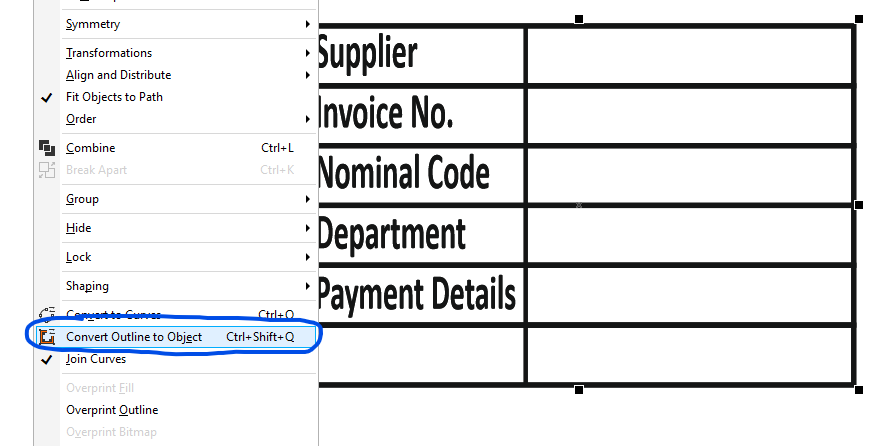
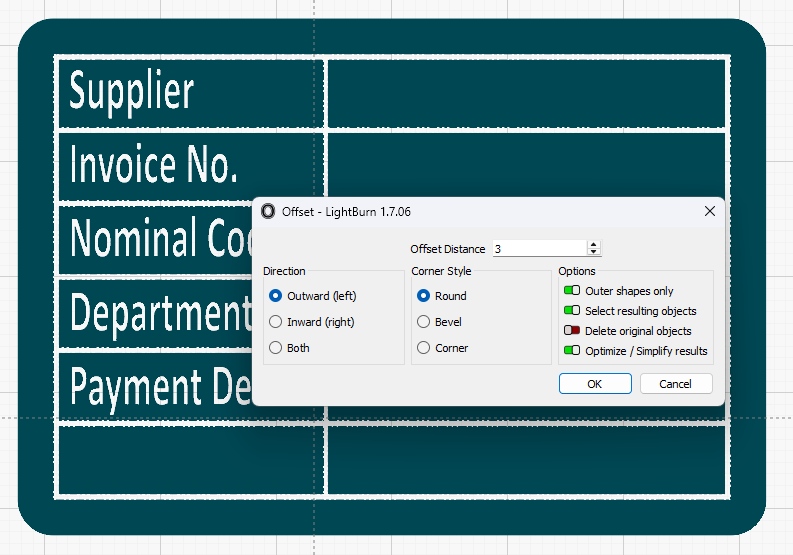
Once in LB I would offset the graphic by an appropriate amount. Make sure you select ‘Outer shapes only’. This will invert the lasered/unlasered areas:
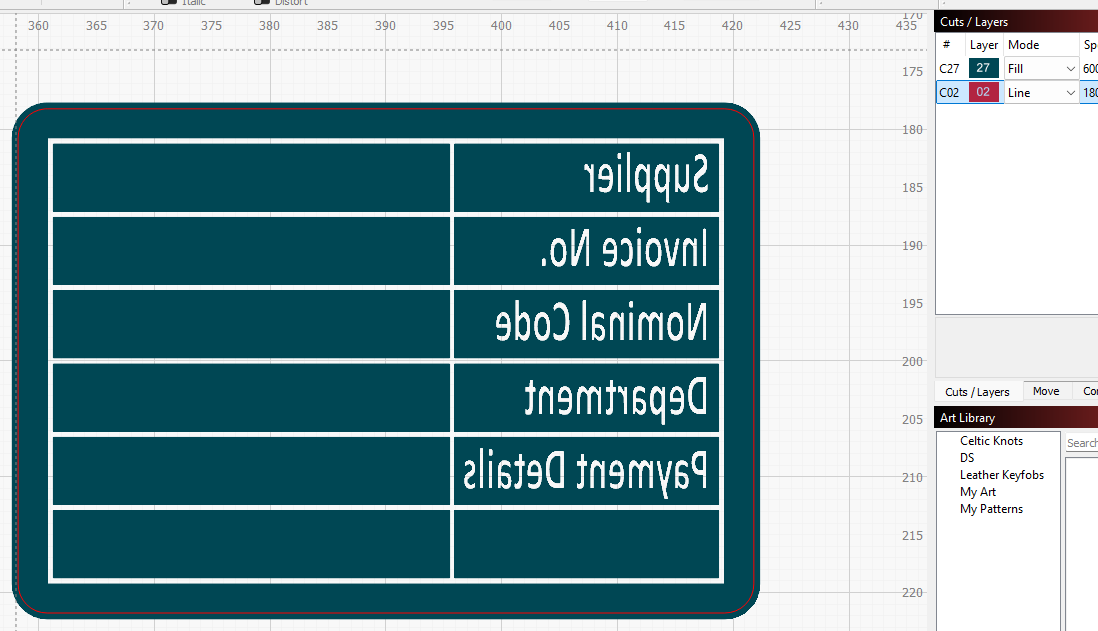
I would then offset the resulting outline slightly inside to get your cut outline (obviously move this to a layer set to line/cut Then mirror everything.