Installed a new laser power supply this morning after it failed me 2 days ago. Everything was working fine up until that point. Lightburn has had an upgrade and I’m wondering if my settings got changed.
I was getting bad backlash so I adjusted my scanning offset adjustment for the speeds I use. I am still not engraving correctly, losing small details. I’ve dropped my power from 50 which is what I used to use prior to the power supply replacement down to 18 and still getting the same results. I’m at a loss.
I had to walk away yesterday after spending 12 hours messing with it and this morning Lightburn will no longer detect my rotary.
Any assistance would be greatly appreciated.
LightBurn never “detects” a rotary, so I’m not sure what you mean there.
Regarding the scanning offset, I believe I saw a post on Facebook with pictures showing your issue. If you changed the power supply, that’s your culprit - the software update would not have changed your scanning settings.
If you create a simple square, and set it to Fill+Line, and disable the scanning offsets, what does the output look like?
Thank you. New power supply due here Friday. Fingers crossed!
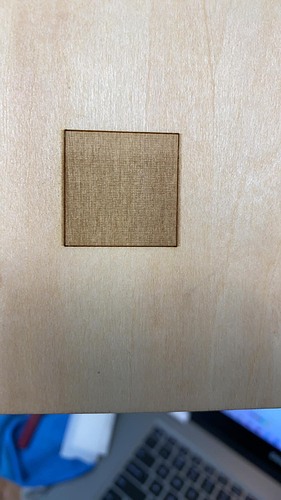
Scanning offset disabled and fill + line
That doesn’t look terrible - what speed was that?
Do this:
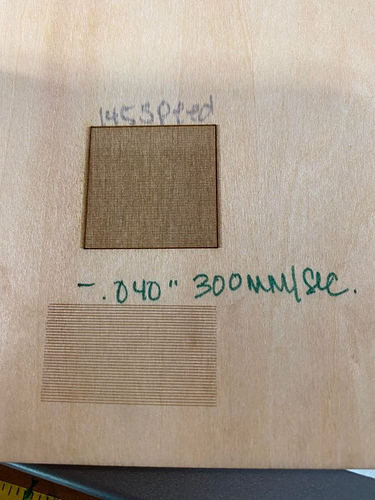
Run another one at 300mm/sec. Then go to Edit > Device Settings, enable the scanning offset, create an entry that is 145mm/sec and measure how far that fill goes outside the line, and enter that. Then do the same for the 300mm/sec one. Make sure the switch to enable the offsets is enabled, and then try to run one.
It should look something like this when you’re done:
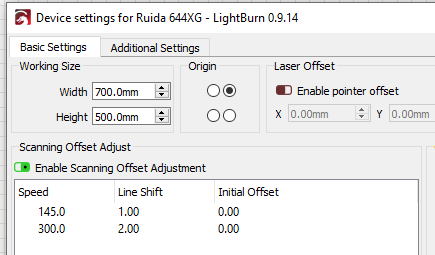
… but the ‘Line Shift’ numbers will be your measurements. You will likely have to tweak them a little unless you’re using calipers or something to measure.
I have one created for 145 mm/sec. Can I use that setting? This is what’s in there currently:
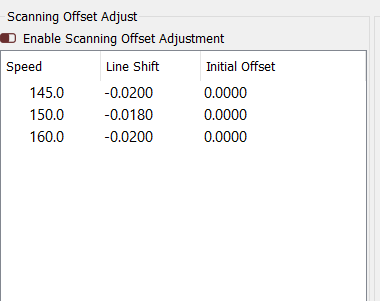
Making 3 settings 10mm/sec apart isn’t going to do much. You can use the 145 setting - delete the other two and add one for 300 mm/sec.
0.02 mm? (or are you in inch mode?)
ok, I had watched a video that said you needed one setting for each speed you use - that’s the reason for those 3 
I’m using inches and will add a 300mm/sec now and test
You can go in increments of 100, and the software will fill in the stuff in between. You don’t need one for every speed, just a few so it can figure out the rest.
Are you showing me that it’s now fixed? If you don’t use “Fill+Line” mode it’s harder to measure the offset., and you can’t do the measurement if you have Scanning Offset enabled.
Sorry, here it is with the Fill+Line, I’ll continue to work on it.
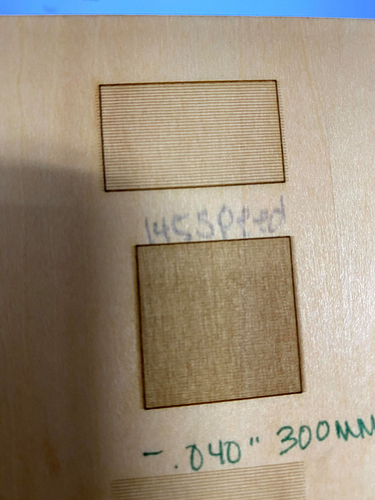
That last photo is the closest I could get it. The lines outside of the box are straight, any other value makes them uneven.
That is very strange - it looks like your power supply is firing early / late. Did you connect the L-On and the L-PWM wires between the controller and the new power supply? If so, can you show a pic of how they’re connected?
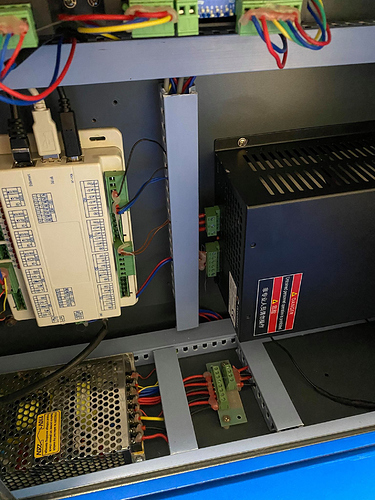
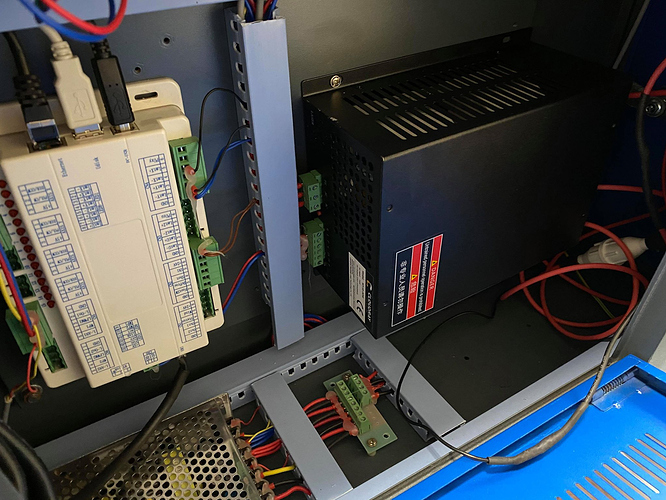
2 AC wires went to the AC plugs, FG wire went to the FG plug, black wire went to the ground on the tube, red wire from PS went to the red wire from the tube. Here are pictures.
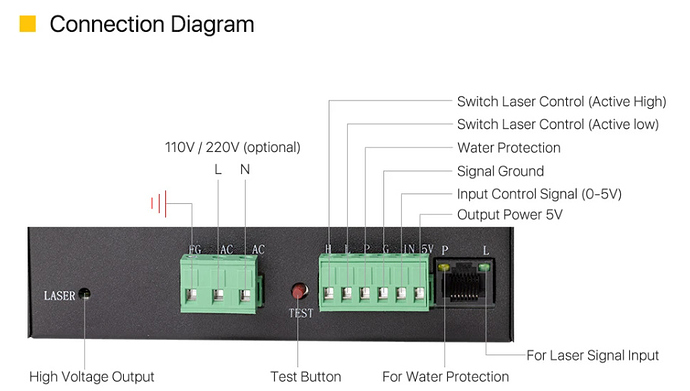
Follow these connections and figure out where each one goes:
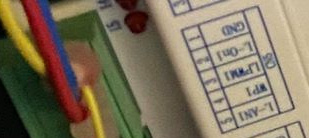
Unless the new power supply you purchased is identical to the previous one, there is no guarantee that the wires go to the same places, so it’s worth checking.
L-ON1 is going to P on the laser power supply, L-PWM is going to G on the laser power supply
Check to make sure - if what you’re saying is true, it’s wired incorrectly:
- P is water protection, and might need to be grounded or connected to 5v to make it work.
- L is “Laser / active low”, which is where L-On from the Ruida should plug in.
- G is ground, which should connect to a ground terminal on the Ruida
- IN is the laser power signal, which connects to L-PWM on the Ruida
