Sculpfun S30 Ultra 33W with upgrade expansion kit and wiring harness running on MacBook Pro Sequoia 15.6.1 is jumping going across x-axis.
I can’t even run the materials tests or anything accurately.
Is this a Lightburn setting or the laser issue?
Any help on how to correct it?
Thank you!
Under program control or by using the Jog button? When was the last time you cleaned and oiled that linear track?
Did it work without the expansion kit? You hopefully tested this.
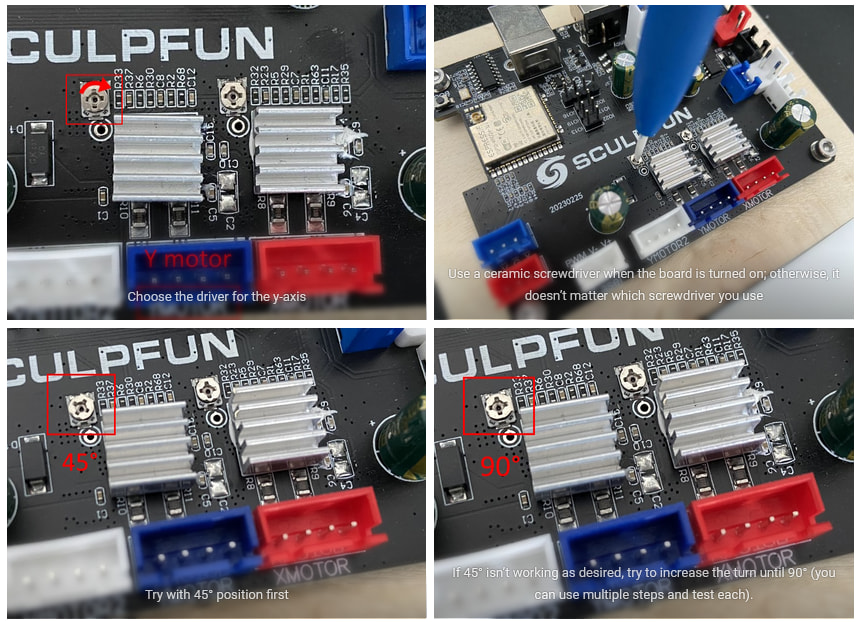
I guess you adjusted the stepper driver voltage during upgrade? Make sure to only turn the potentiometer 45° maximum. Not 90°, as the manual suggests. That caused issues for many users.
It’s brand new, so never.
This is when I’m using Lightburn, so program control. I don’t know what the JOG button is.
I have had a S30 10W for a few years and have no problems with it. This one was never ran without the expansion kit so I don’t know if it was a laser problem or if it’s because of the massive size increase it has.
I have been going through the “Guide to mechanical adjustments and maintenance” info that came up on a prior thread after I posted my question.
I was hoping it would be something simple as toggling a setting (like bilinear or something) but seems like it might end up being that I’ll have to check a lot more than that.
That’s something I was wondering about but in a different way. The upgrade instruction video shows turning the motor setting on ONE of the screws but when the woman is telling to do it, she says it plurally. I’ve tried it both ways but doesn’t seem to be what is causing this. If it’s only to be 45 degrees instead of 90, that would change a lot.
Only change it for the Y-axis driver. Do not adjust the X-axis one. The x-axis still has one motor, but the y-axis is driven by two. That’s why the power has to be increased on that one, but the video tells too much. Many users complained. With 45°, it worked fine for all (myself included).
1 Like
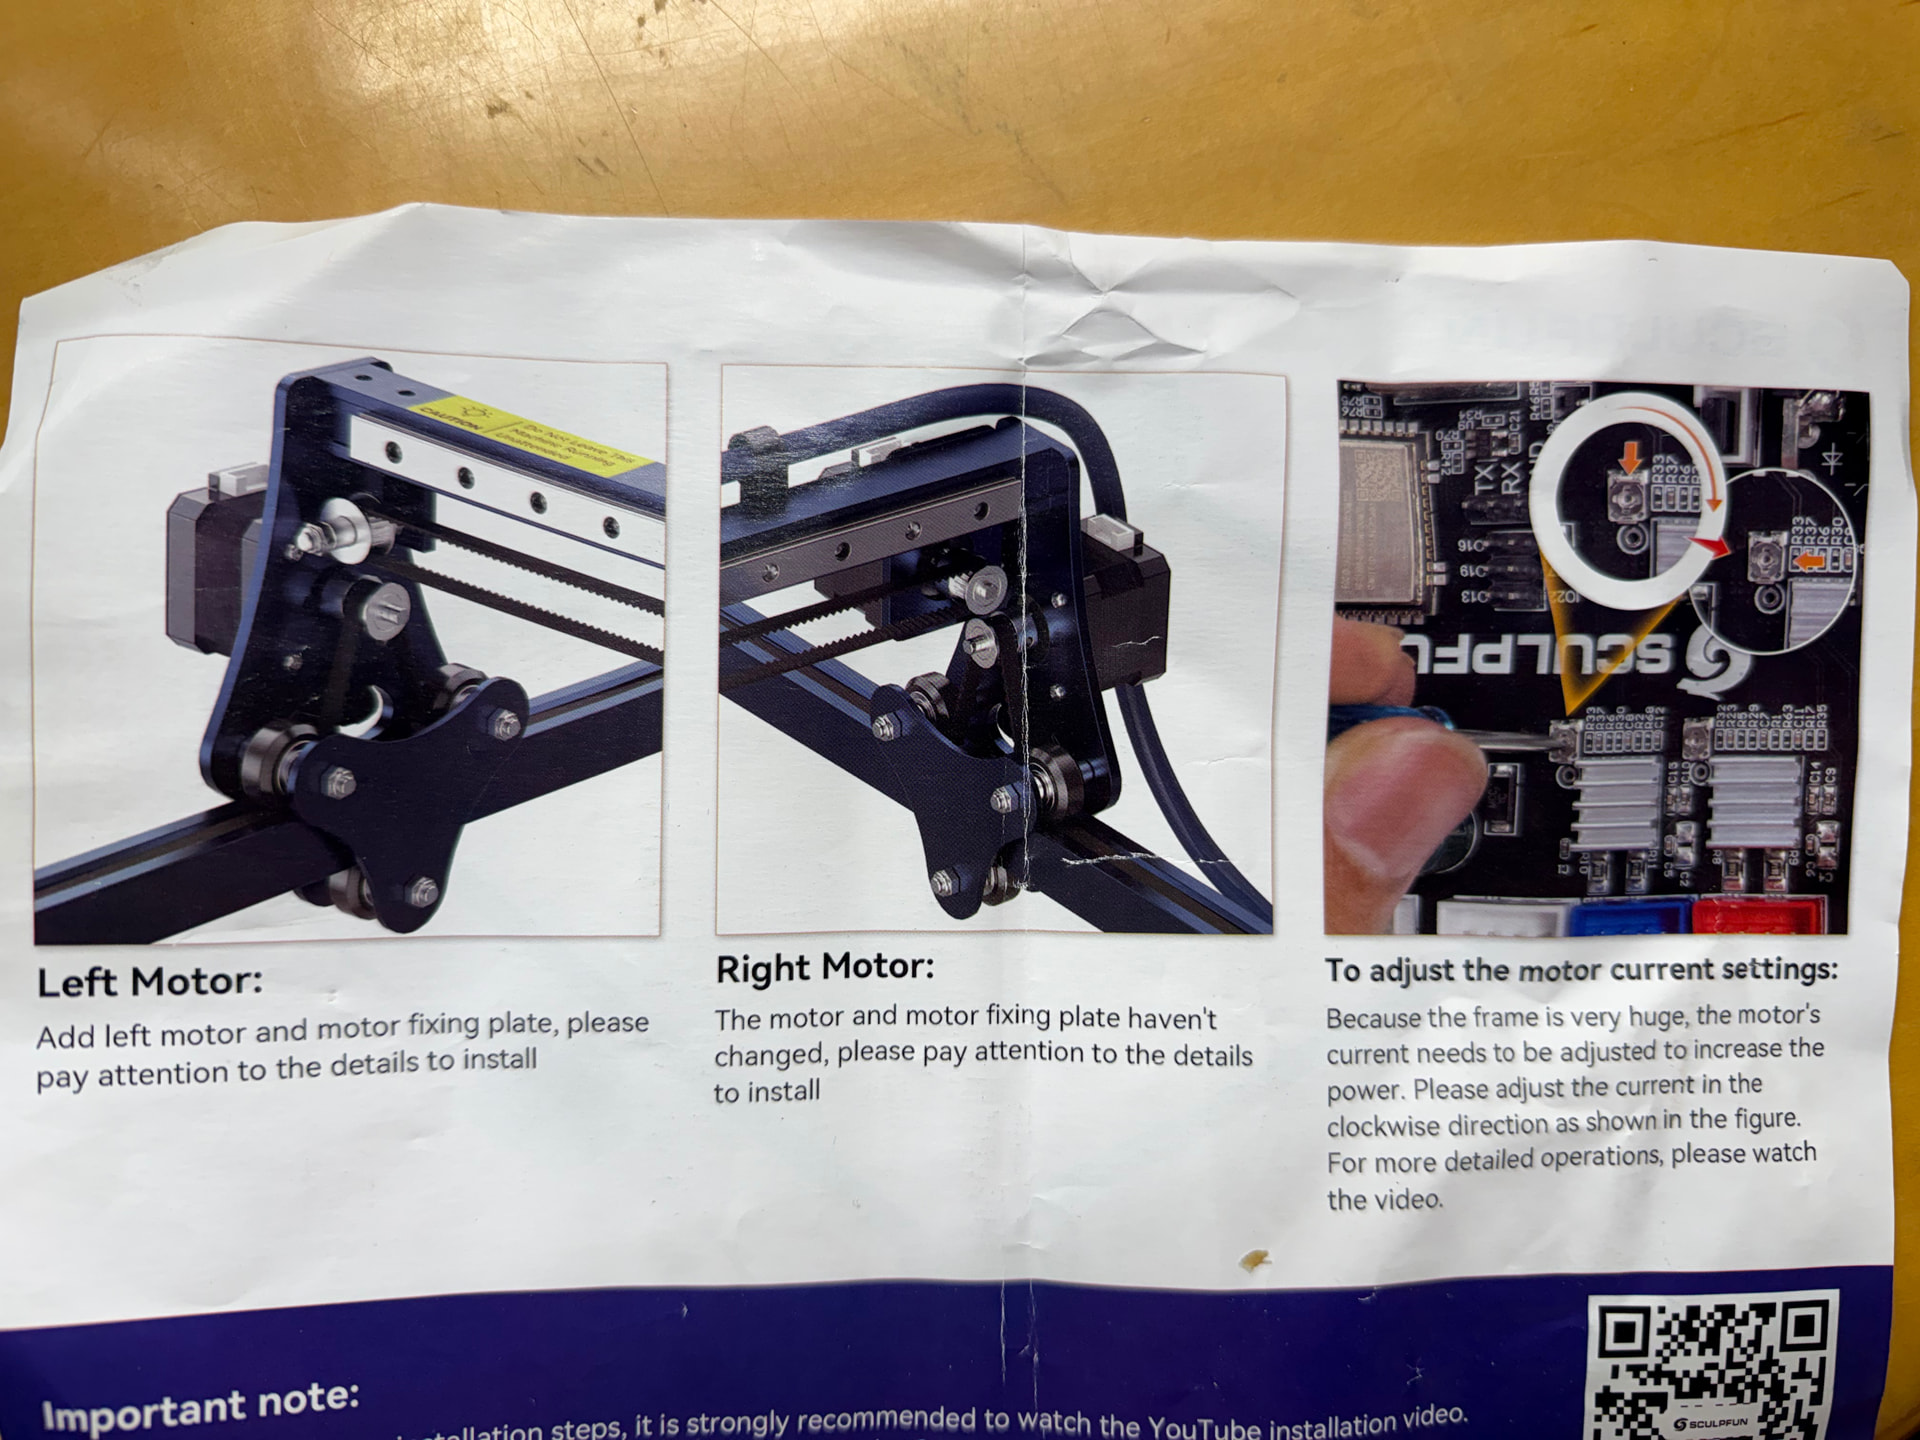
Ok, so in case I’m getting my axes confused, here’s the instruction pic for the expansion. the image on the right is adjusting the current on the LEFT screw. This is where you’re saying to only turn to 45 degrees, right? I am to NOT touch the second one to the right of the one in the image, is that correct?
You can also use my guide: Workspace extension kit - Diode Laser Wiki
1 Like
Both correct.
Ok, I can fix that.
Also, did you have problems with the ports on the white, blue, and red connectors not being the same colors? I’d forgotten about that until seeing your images.
Yes, they might have changed the mainboards in the meantime. Colors do not count; check where the cables are going, the labels on the board are correct.
1 Like
That seems to have been the perfect solution!! Thank you!!!
I bought this months ago, waited for the cable which took forever, then realized the 600x600mm honeycomb I’d ordered (also taking a long time) wouldn’t be the right size with the expansion so I was working with someone via (many) emails to stop it before it was ever sent out, cancel that part of my order, and allow me to order the 80-x800mm honeycomb. It never did get straightened out via Harvey (I suspect may have been AI) so when I saw they were putting the 800^2 on clearance, I just bought it instead of risking it getting sold out by the time the money for the smaller would be returned. It did all finally get worked out and today is the first day I’ve had the time to focus on the mechanics again after building the enclosure and expanded frame and then found out something was causing this mess. I’m thrilled that I didn’t have to mess with the Eccentric nut and tweak each individual set screw along the x-axis/gantry adjustments. Whew!
Thanks again!!! Happy New Year, too!
Screenshot 2026-01-01 at 4.08.06 PM
2 Likes