Here are my Tests on Card Stock paper. Note what i call “splash” spilling out to the left.
Here’s the purpose of the Tests:
Abundant Splashes. And probably not just at the Left edges. Note where the round magnet had been to the left.
Why the soot to begin with?
Then since i haven’t been able to put on my Flowmeter, the Air Assist is charging out 30 L/m i suppose.
Is the material involved?
Thank you for your own experiences with these parameters.
You’re burning paper.
The assist air blows the smoke away, but the smoke will leave smudges on everything it touches.
High assist air flow tends to force the smoke downward into the surface, which is particularly obvious on light-colored material like paper.
The usual recommendation for engraving is to use the smallest amount of assist air that will keep the laser lens clean. Turning the air completely off will destroy the optics in short order, so you need a way to restrict the air flow.
Perhaps @misken has a recommenation for a Sculpfun Pro Max, but perusing his writeup may suggest something:
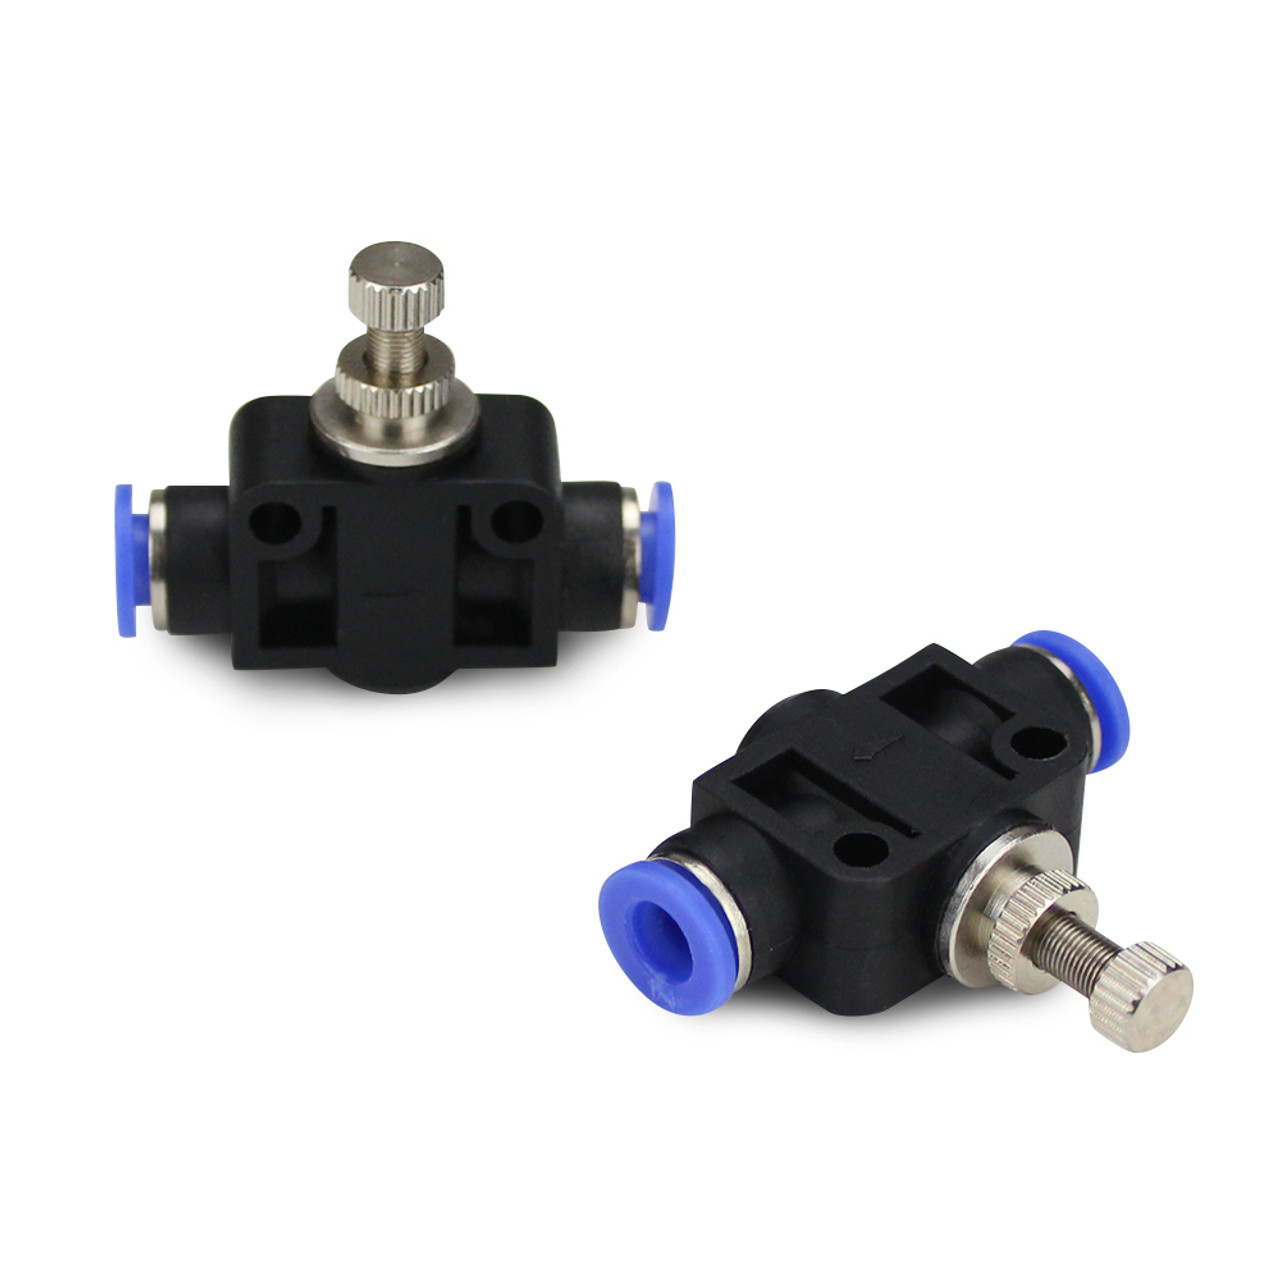
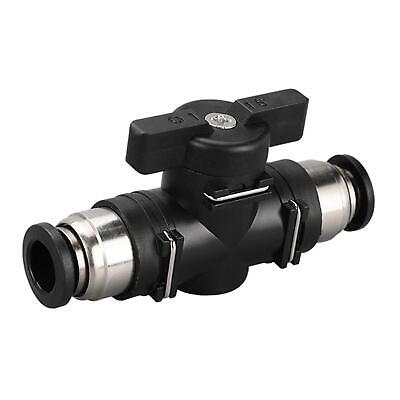
Seems most hobby lasers use either 6mm or 8mm air tubing. If throttling the pump directly isn’t an option, any appropriate sized inline quick connect valve can do it. Even with non pressure rated silicone tubing. I’m use both PU and silicone at ~35 psi, which is WAAY above what an aquarium pump can produce).
Cut tube with scissors at any convenient location, insert ends into valve. Done. Also re-usable and repositionable. And cheap. Available at Amazon and everywhere cheap Chinese goods are sold.
Can also get fancy and use a couple tee or wye (y) couplers to put two valves in parallel, one always set to “low” and the other switching between on and off. When on you get full flow, when off you get a preset bleed.
Ball valve or needle valve. Connection type typically called either “push to connect” (PTC), “John Guest”, or “Quick Connect” and spec’d by tube OD.
I get smoke soot on my wood projects. I either use a vacuum cleaner with the brush attachment, OR a microfiber cloth and use a dab-dab-dab motion to remove the soot.
People have built banks of muffin fans that sit at material level to direct the flow across the material towards the vent at a faster rate. Less time to make a mark …
Good luck
![]()
With the way things are going with potential orders, I may have to do that myself!
Thx for the tip. I did it on the Leopard ones showing here, and also on the test from yesterday. No removal at all.
Does the soot remove only immediately?
Are these banks replacements for an air assist at nozzle, or supplements?
Air assist keeps dirt off the laser lens. I keep it on for all cuts or burns.
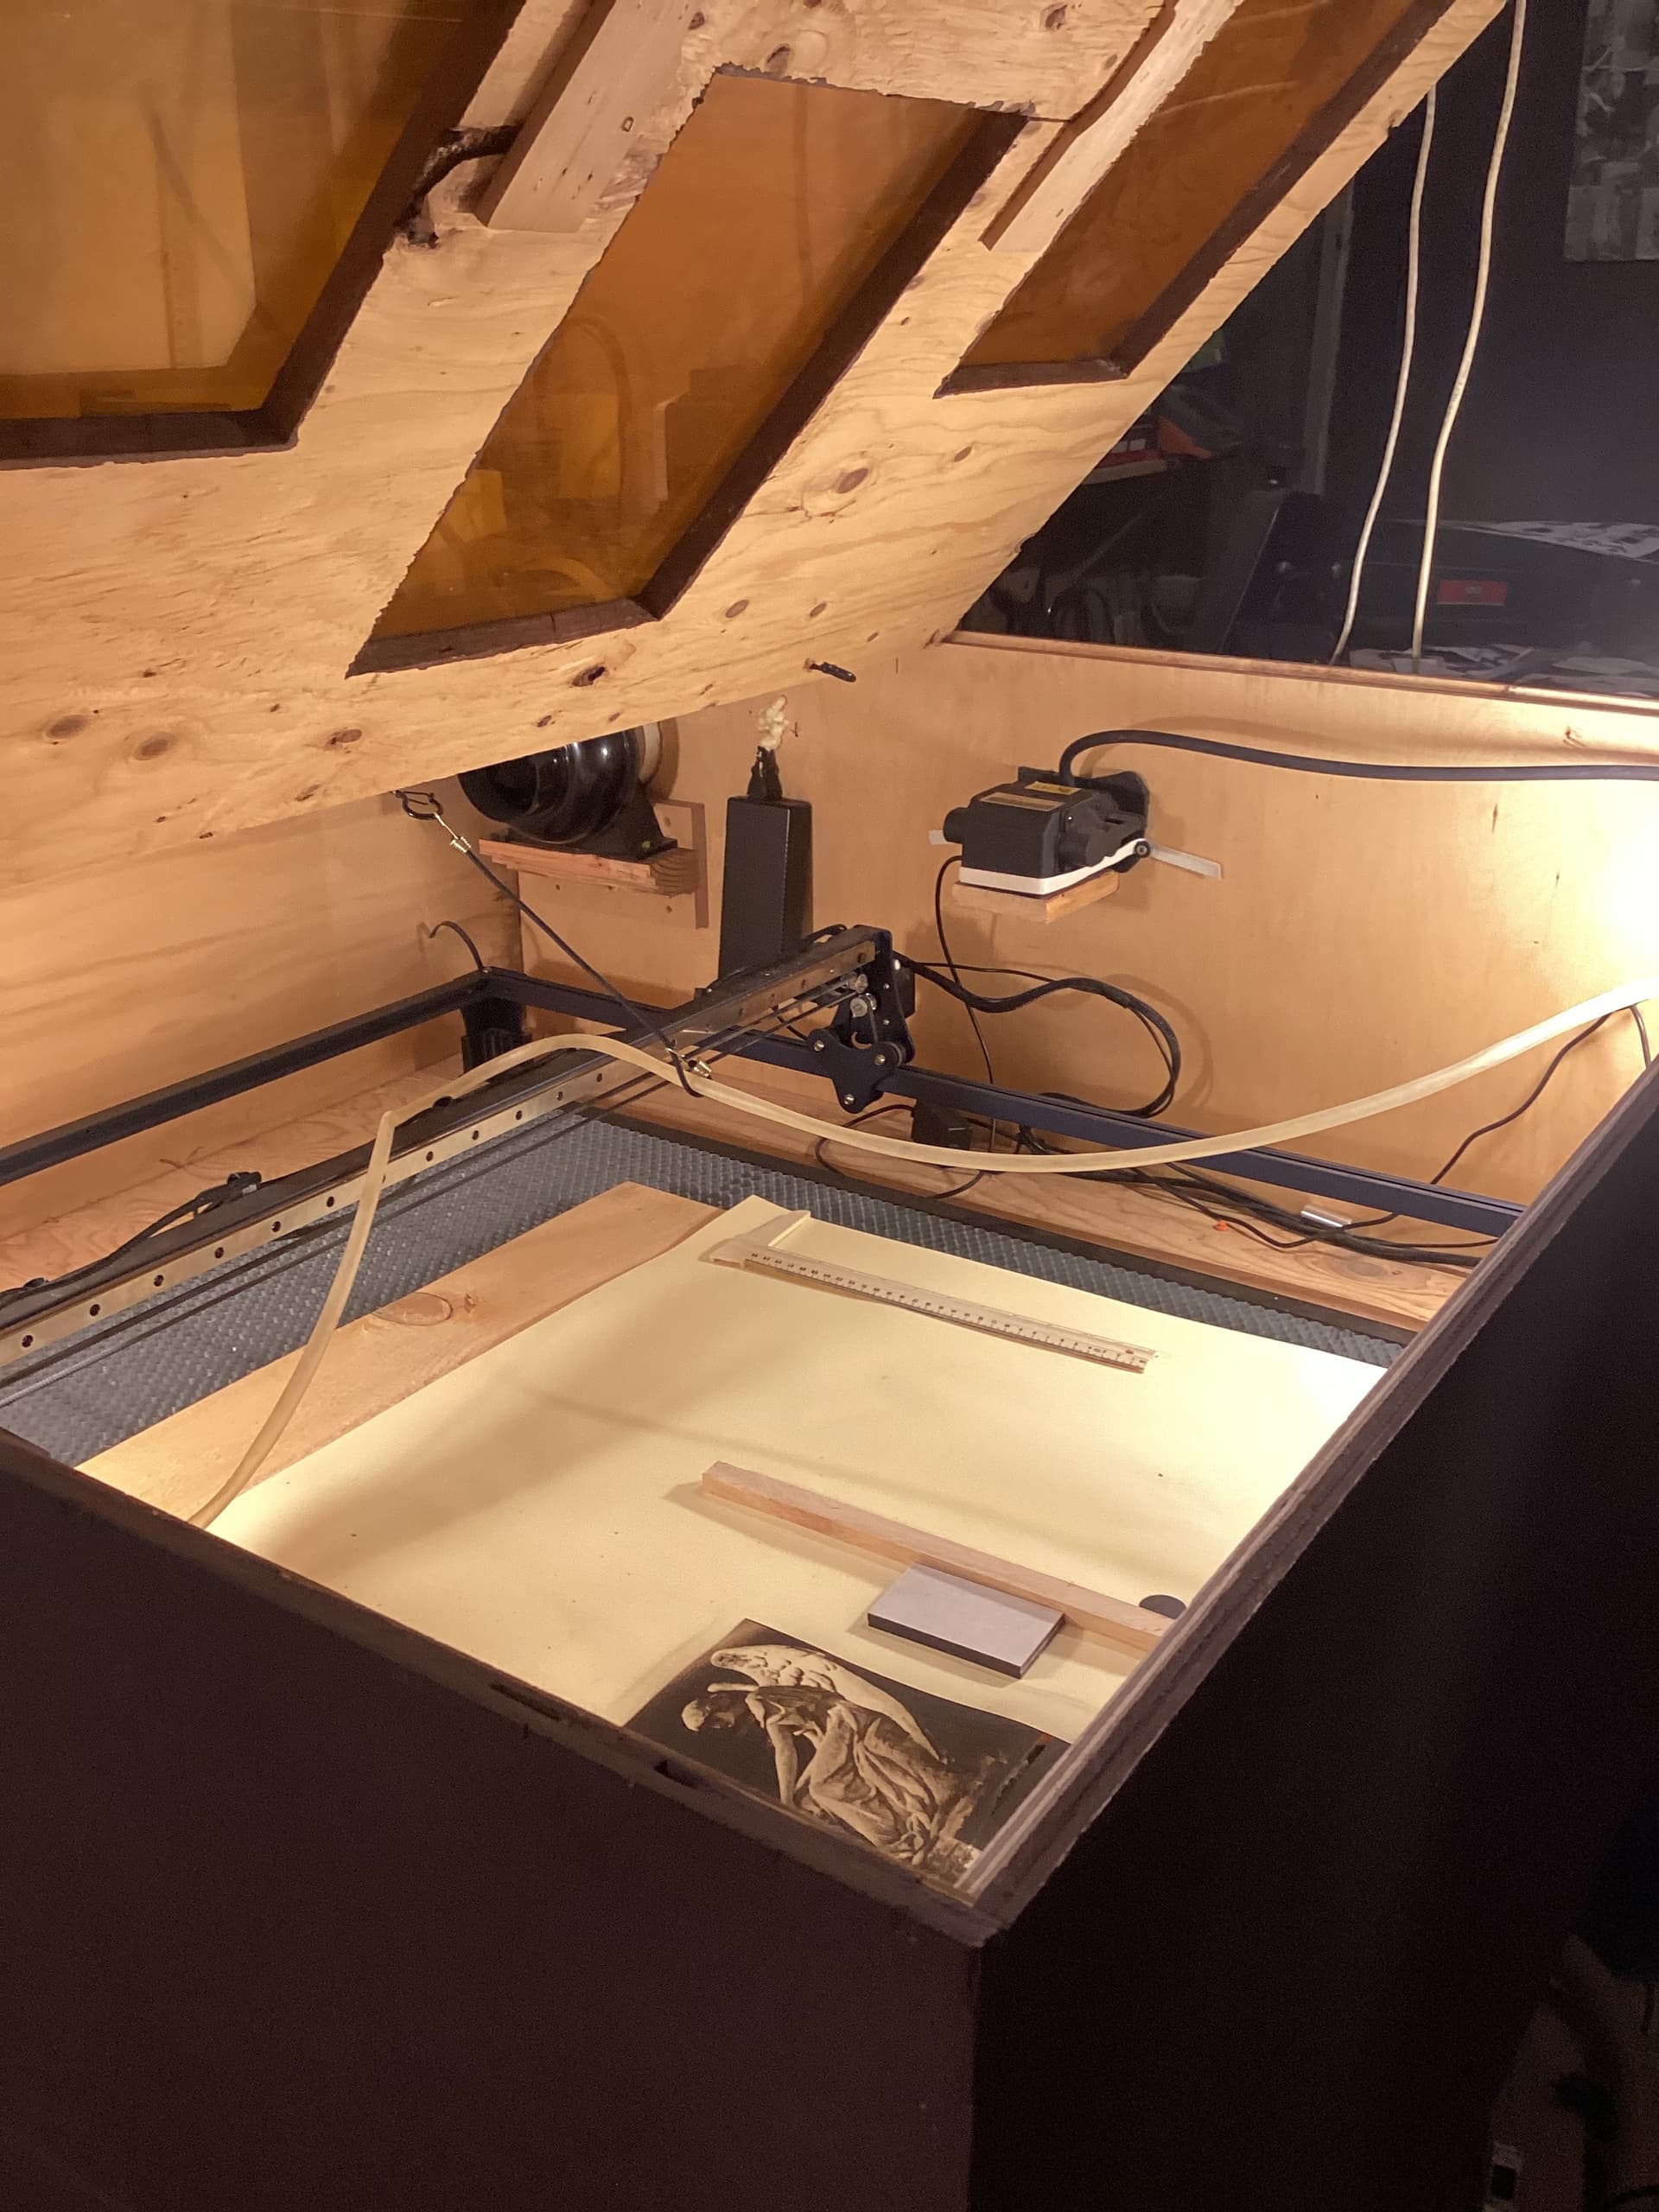
I appreciate the file. Here’s my Enclosure with the File’s NO-NO Inside Sculpfun Air pump strapped in on a ledge on right of the 3 objects. With the length of the tubing that was included with Sculpfun, this seemed the only & also most effective way. Perhaps it’s outa the way, and the sucking fan is to the corner Left pulling the smoke from the center and left where my engravings go on. I haven’t and may not do any cutting here. But it’s the only laser of my 3 that’s enclosed, and run by Lightburn.
You people think i’m doing a pay-to-go-later?
I was hunting for a photo… they used about 4 little muffing fans in a mount to assist in moving air across the material…
That’s it… no magic ![]()
![]()
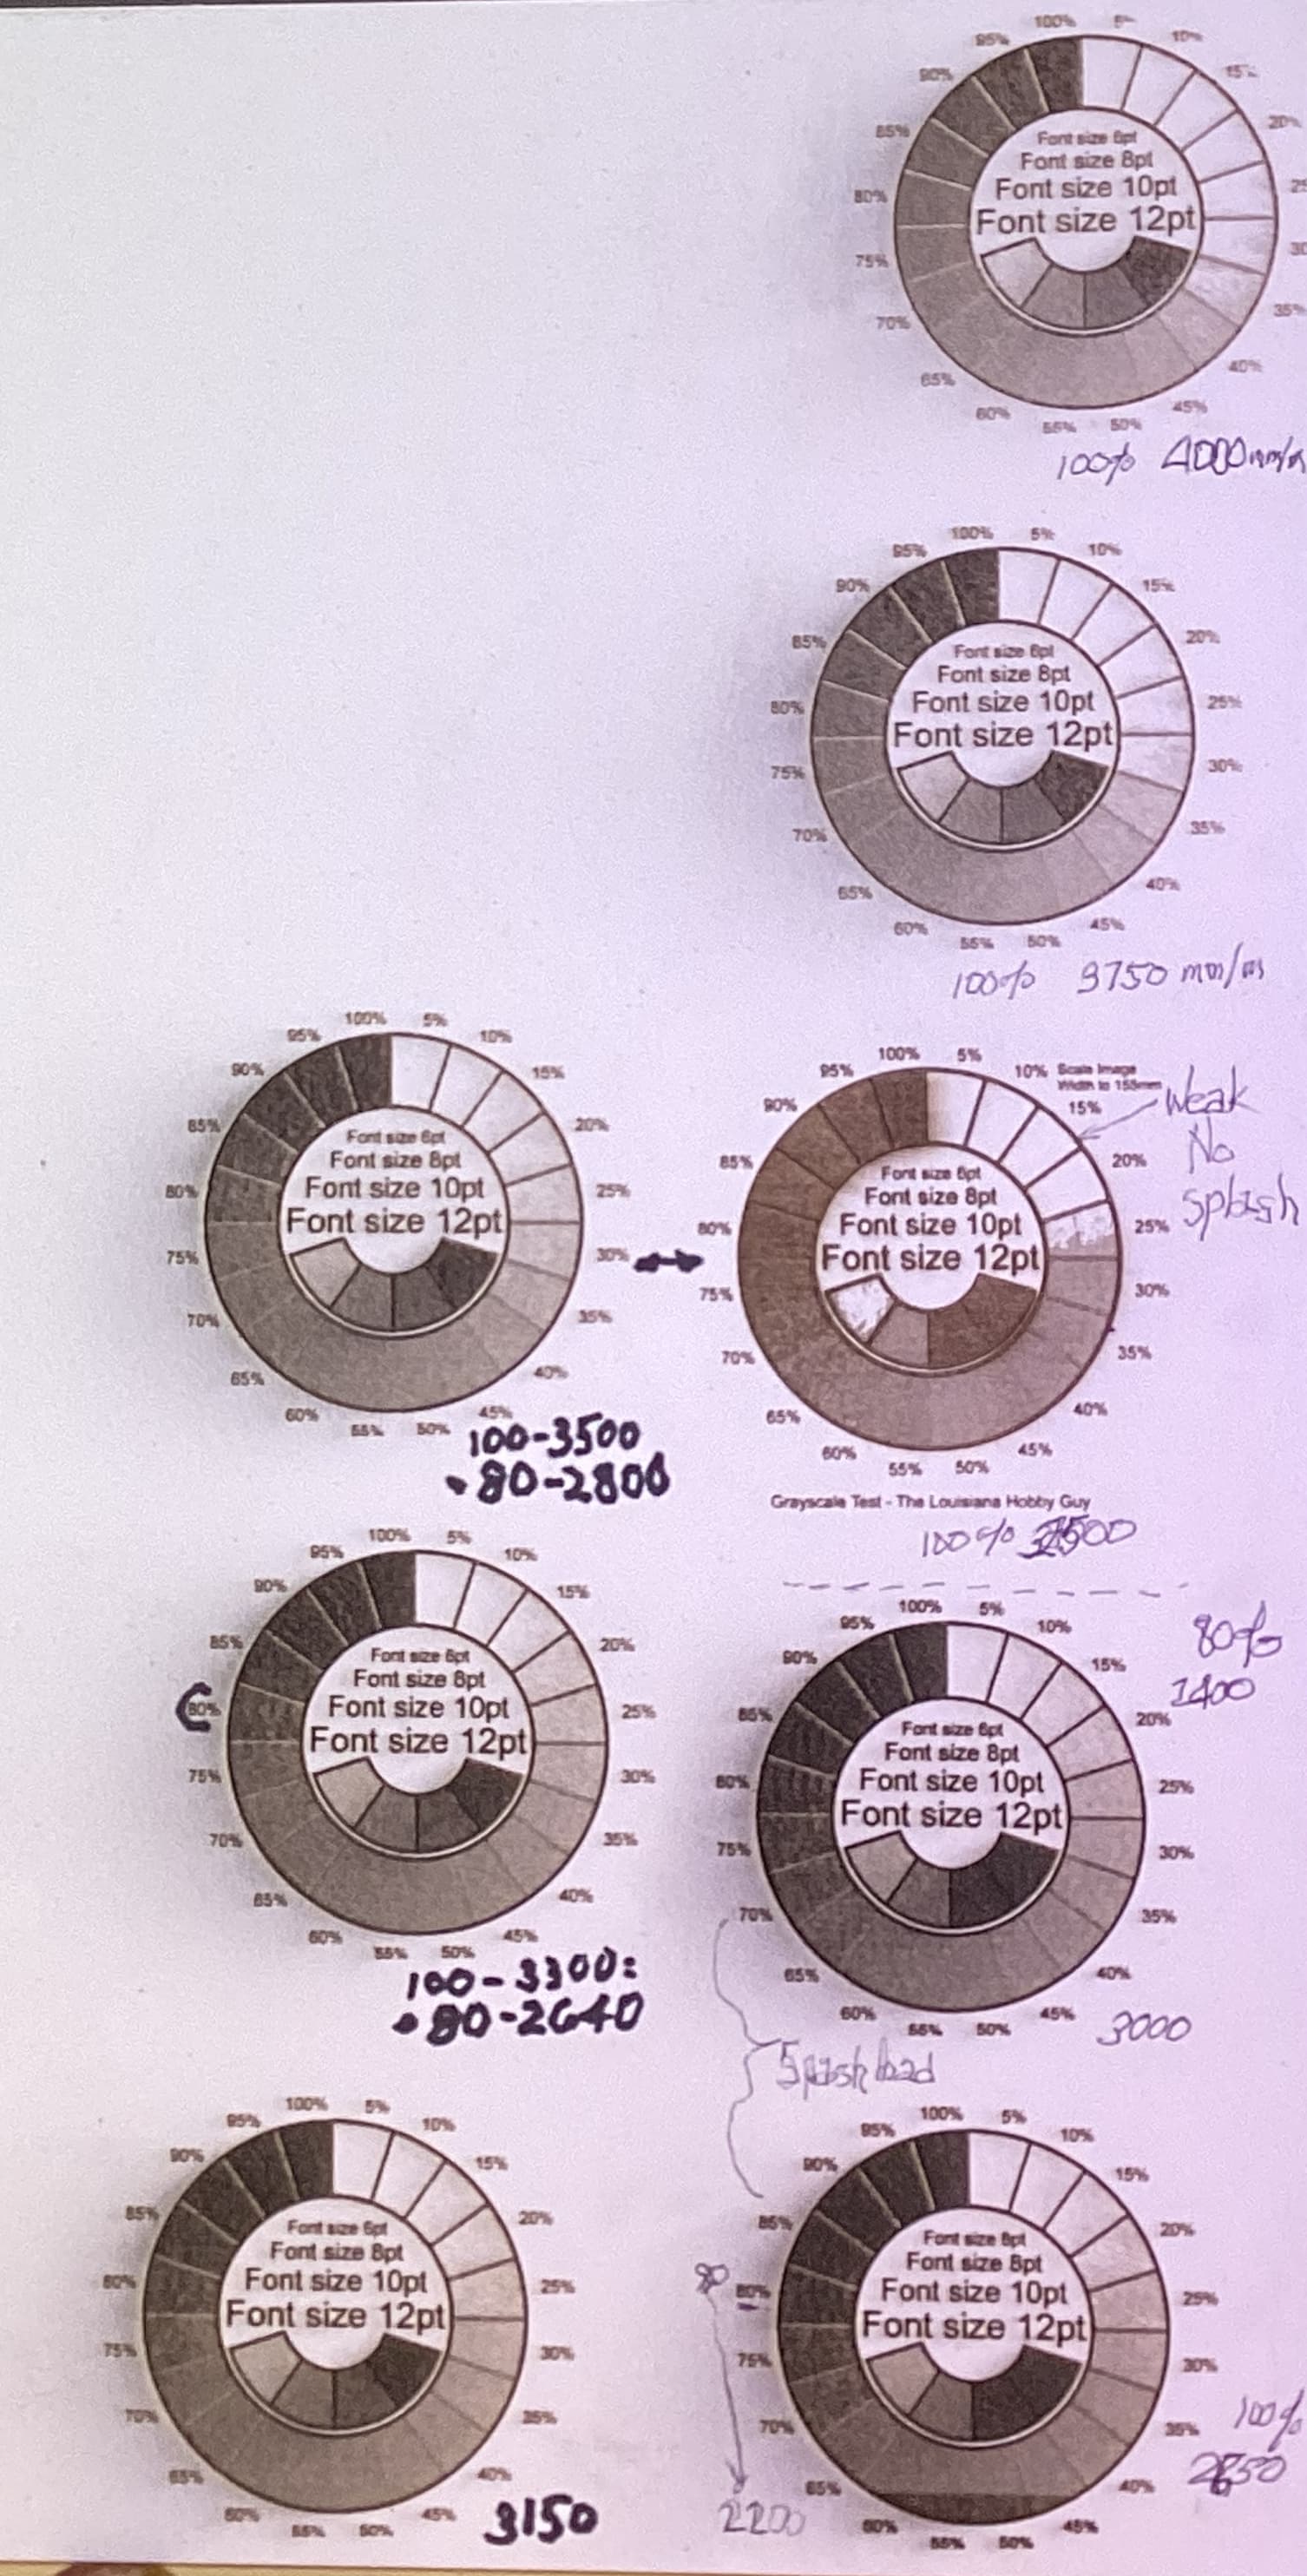
Well, here’s the Update: i finally got 1 of my ordered Flowmeters for my Sculpfun Air Assist for the Extension 900x900. However, it seems to be a bust like the whole Purchases because the bebe ball ONLY gives 8 L/m–not the 3 that i need for engraving (i’m told). Here are the Tests–previous above, & 2 new ones with the Assist 8 L/m:
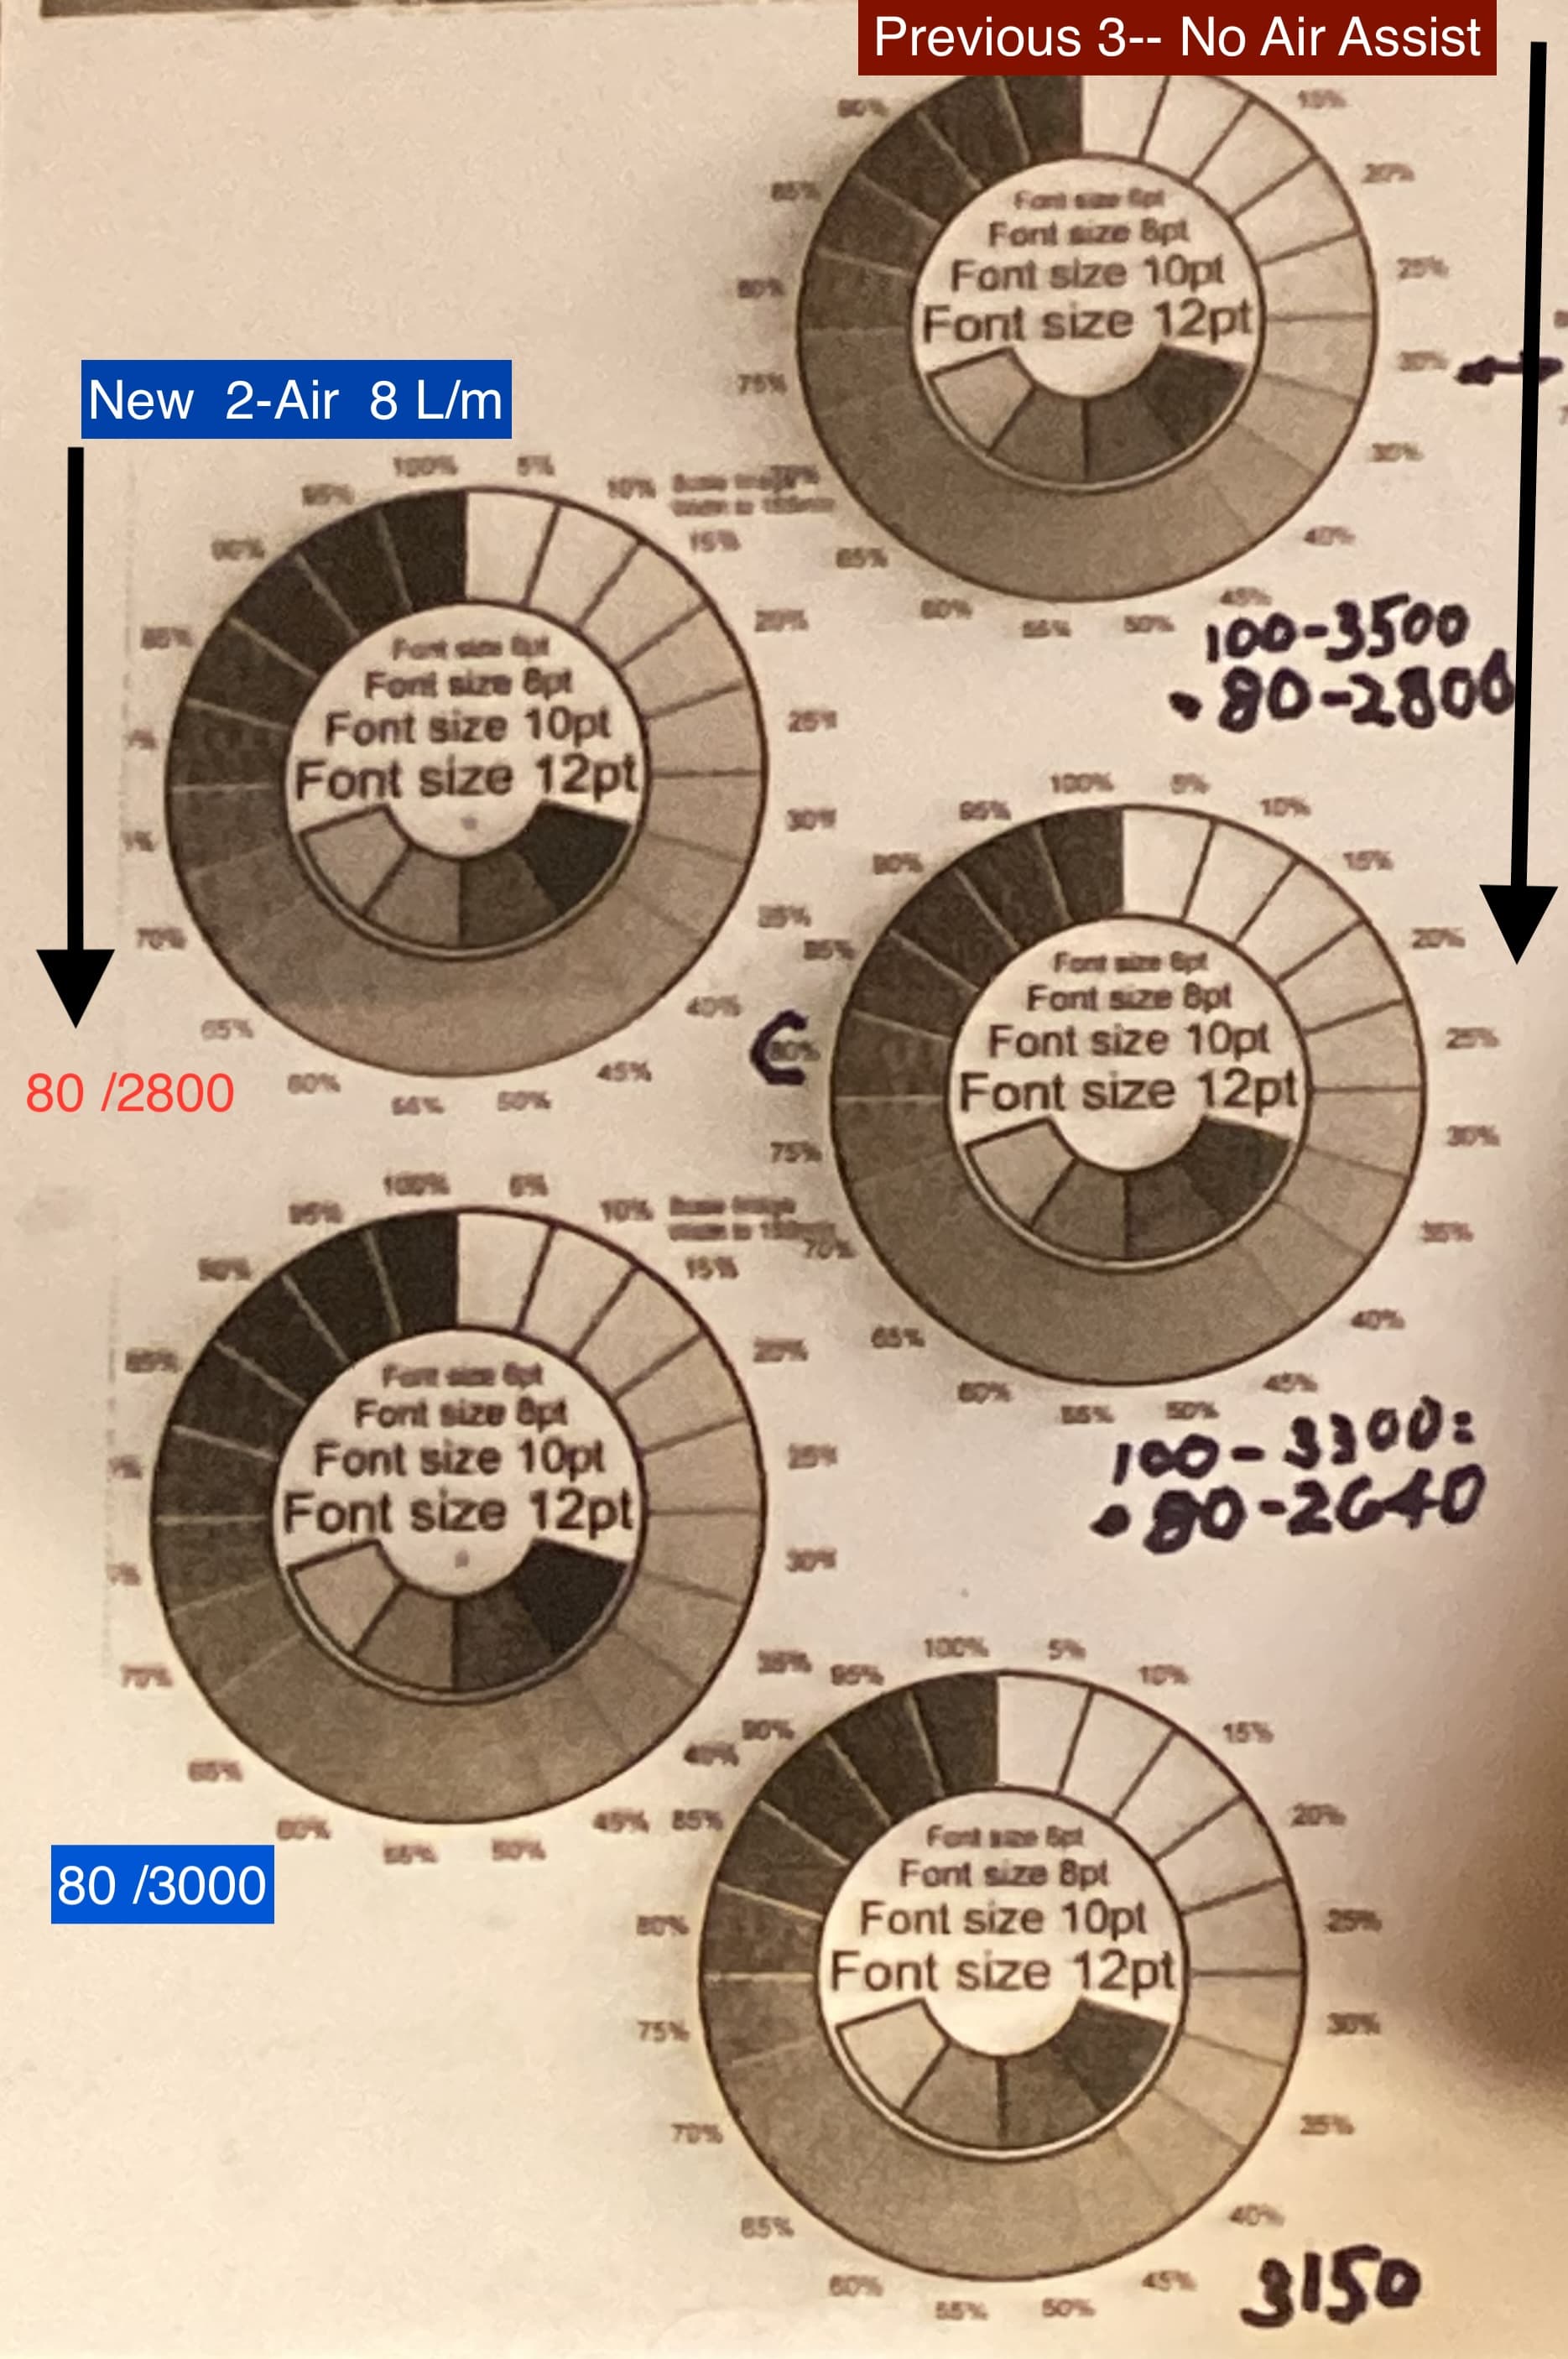
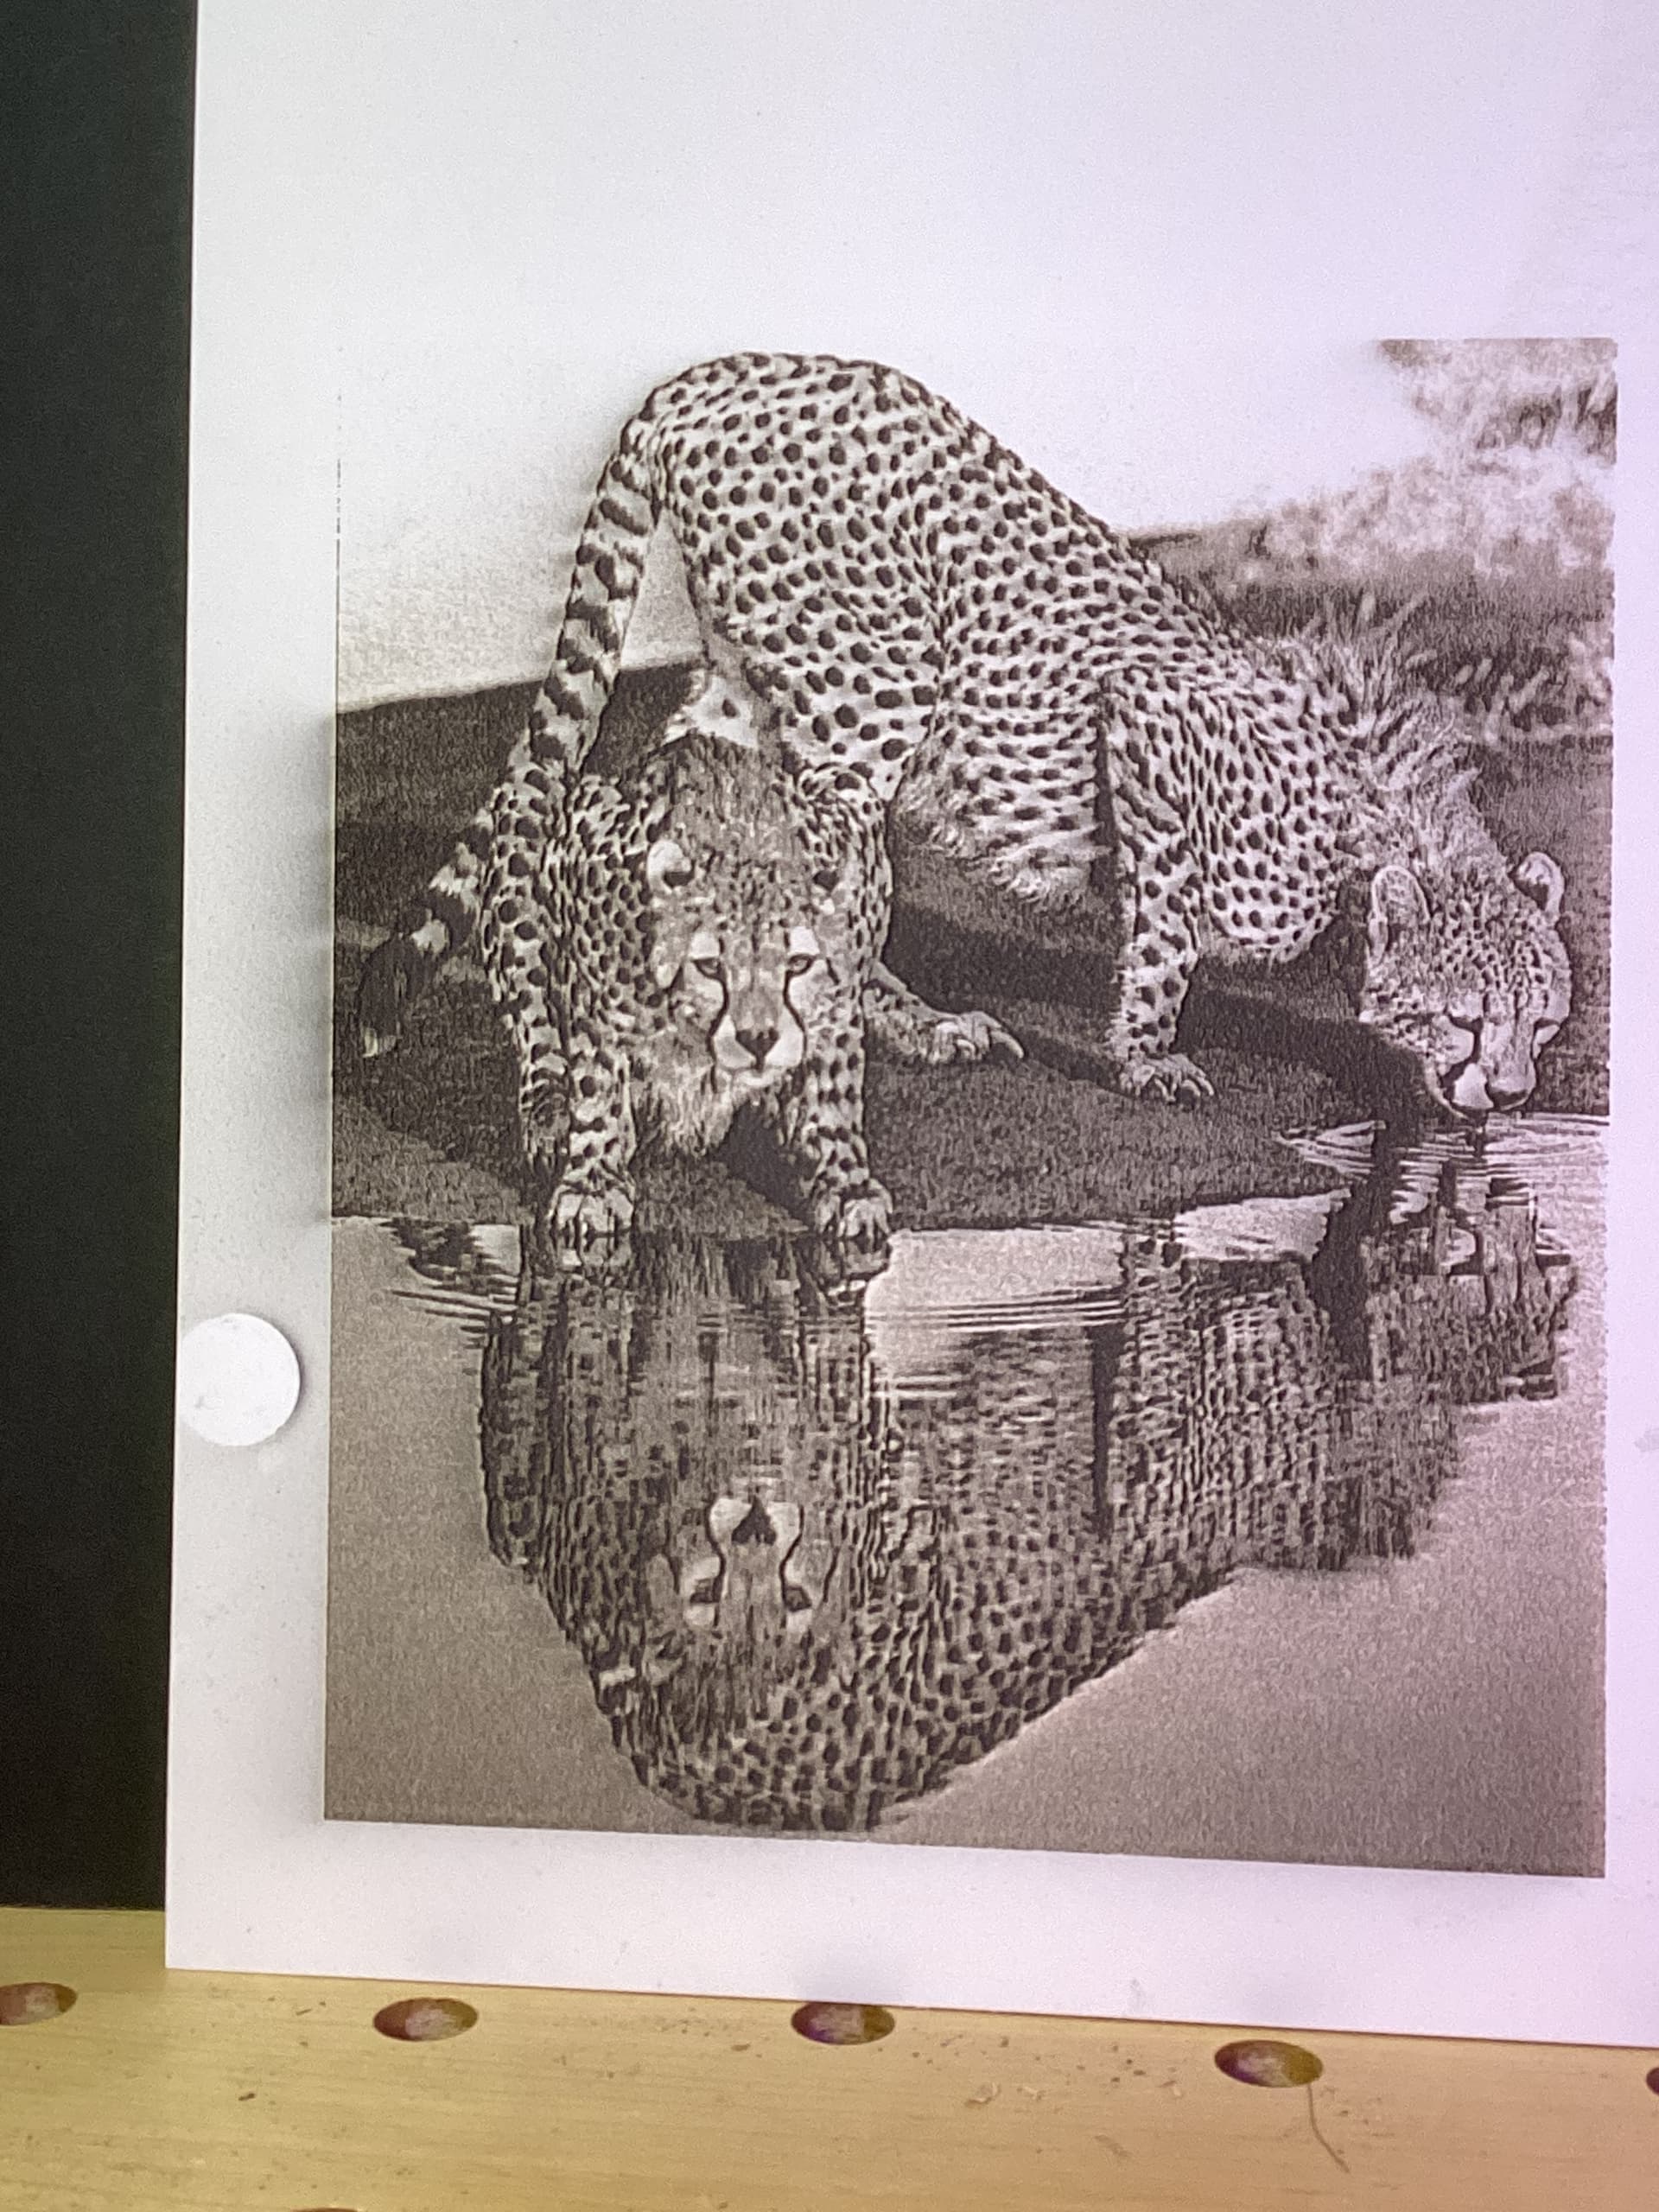
Definite improvement but still ‘splash soot’. The following engraving shows that Test improvement on the left side (at 8 L/m). The darkness at the bottom ‘border’ was mainly caused by starting over to change the speed up, because i hadn’t know how to do that in place with Hold.
The Catch-22 (i seem to live with them daily) is that faster speeds diminish soot and of course lighten the wings e.g., but lose the definition from shadows. So i may get less soot but a weaker image.
i’m going to try a 3rd one at a 60% instead of 80% ratio on the Test above.
Meanwhile i don’t know if 8 L/m increases soot or not, and i don’t know whether i should be using this/these Flowmeters:
LZQ-7 Flowmeter 2-20LPM Acrylic Air Gas Flowmeter with Control Valve for Measuring Controlling Gas Flow. All answers welcome.
There’s a fine line between JUST BARELY getting the darkest shade a particular wood can produce and achieving the exact same shade while producing TONS of soot/carbon. A few percent difference in power and/or speed can make a dramatic difference in your “splash”.
Move that air pump out of the enclosure ASAP. Pumping smoky air directly onto your lens will do it NO favors. Airline is cheap and plentiful. It’s probably standard 6mm or 8mm OD.
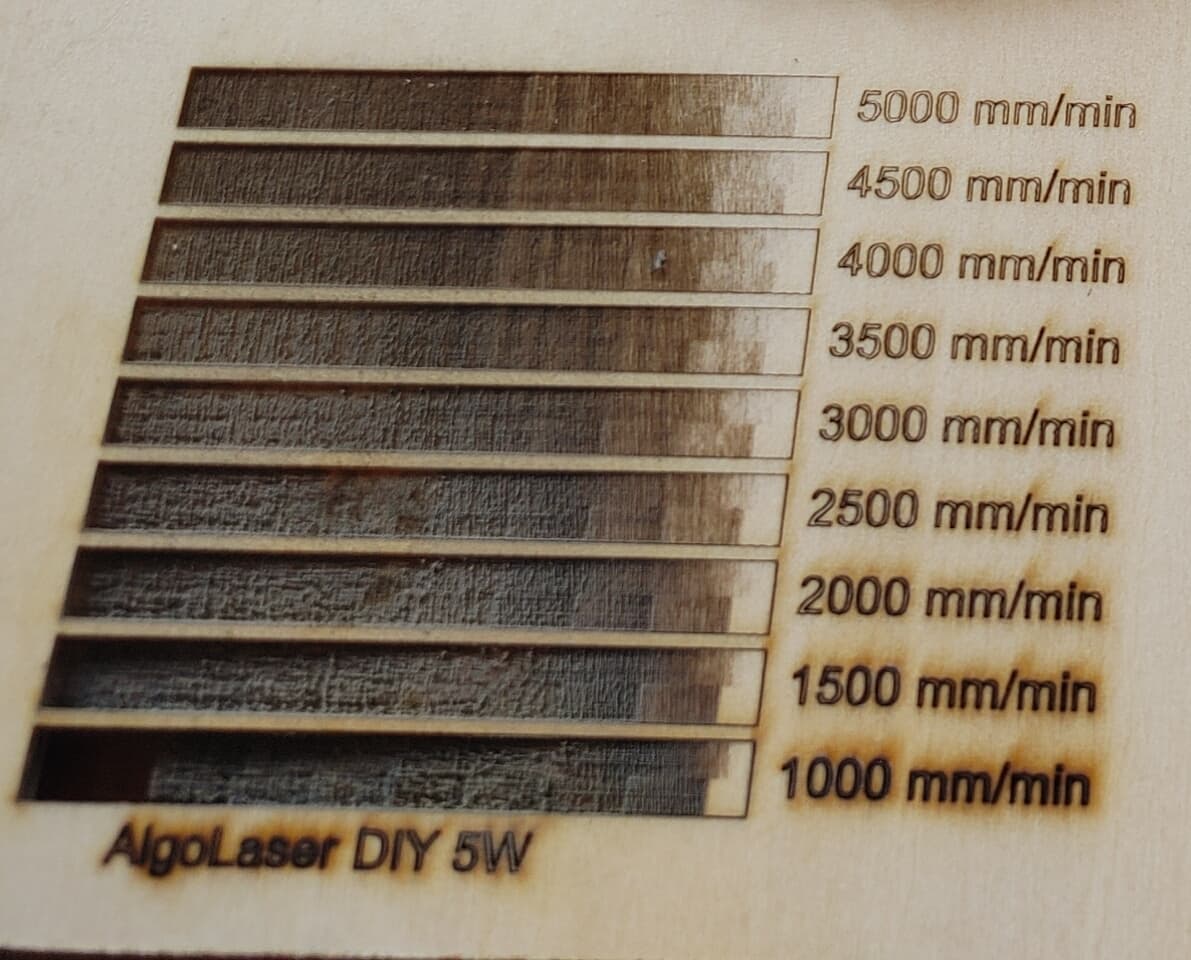
A greyscale test I ran some months ago on a new machine. Power range on all rows is from 100% to 0%. Notice how the darkest color doesn’t really change but the depth does and the amount of soot also does.
I can achieve basically the same color at 5000mm/min and 40% power as I can at the same speed with 100% power.
The bars actually contains two different gradients. The top half of each is a smooth gradient and the lower half is (IIRC) 10% steps.