I immediately dug into support forums and the most common issue was that the mirrors may have been knocked out of alignment in transportation. So I followed the steps to realign them, and I feel good about their current alignment.
But I’m still getting a double image every time I engrave. I checked the belts and pulleys and they seem tight but I don’t know what “right” looks like. I checked the machine internals and everything seems in order as far as the power modules and boards are concerned. So, I think it must either be a belt thing or a Lightburn thing. I watched all of the LB intro videos, which are great, but still can’t find a solution. Please help!
Congratulations on your new machine, I hope you will be as happy with it as you are (also have an OMT 60W )
…70% sounds very violent for engraving and probably also touches the recommended max settings. But, that has nothing to do with your stated problem, it just strikes me…
Have you fitted a (milli) ammeter?
You don’t mention your speed other than it’s “slow”, is it 200mm/s or 20mm/s? -slow is subjective.
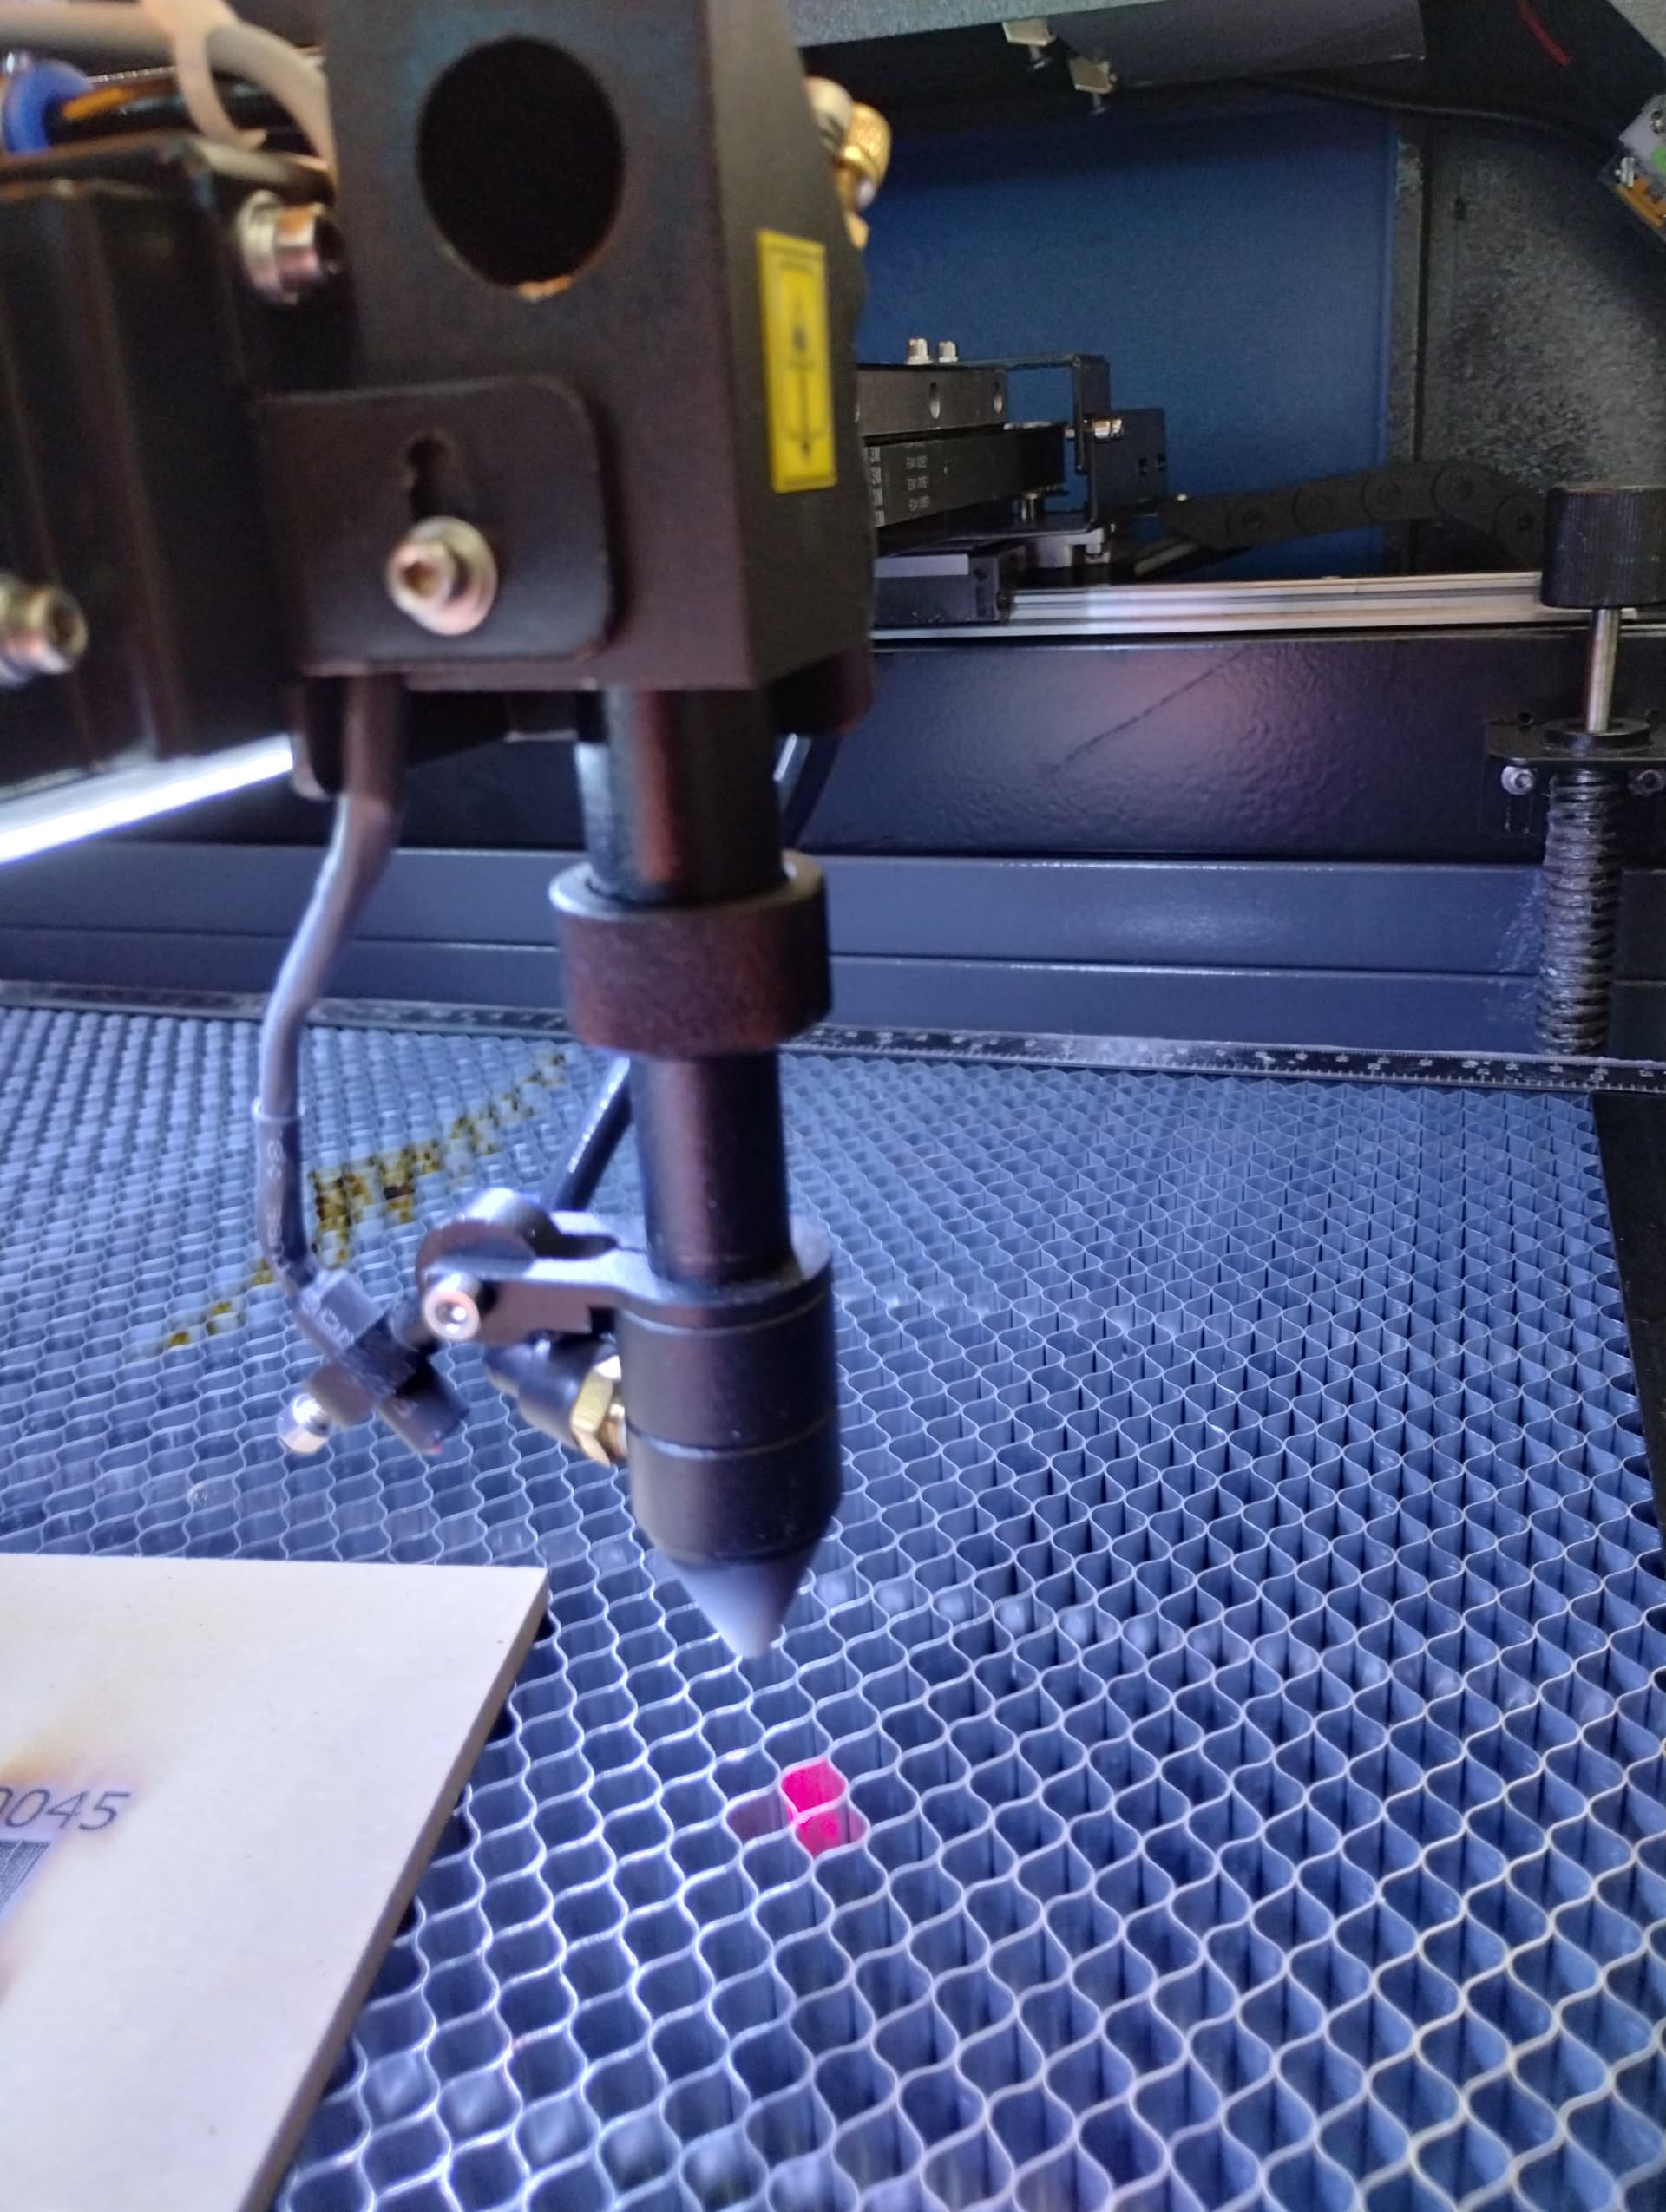
Is your mirror/lens calibration spot on?. When you unscrew the nozzle tip and do a “center test” is the shot 100% in the center?
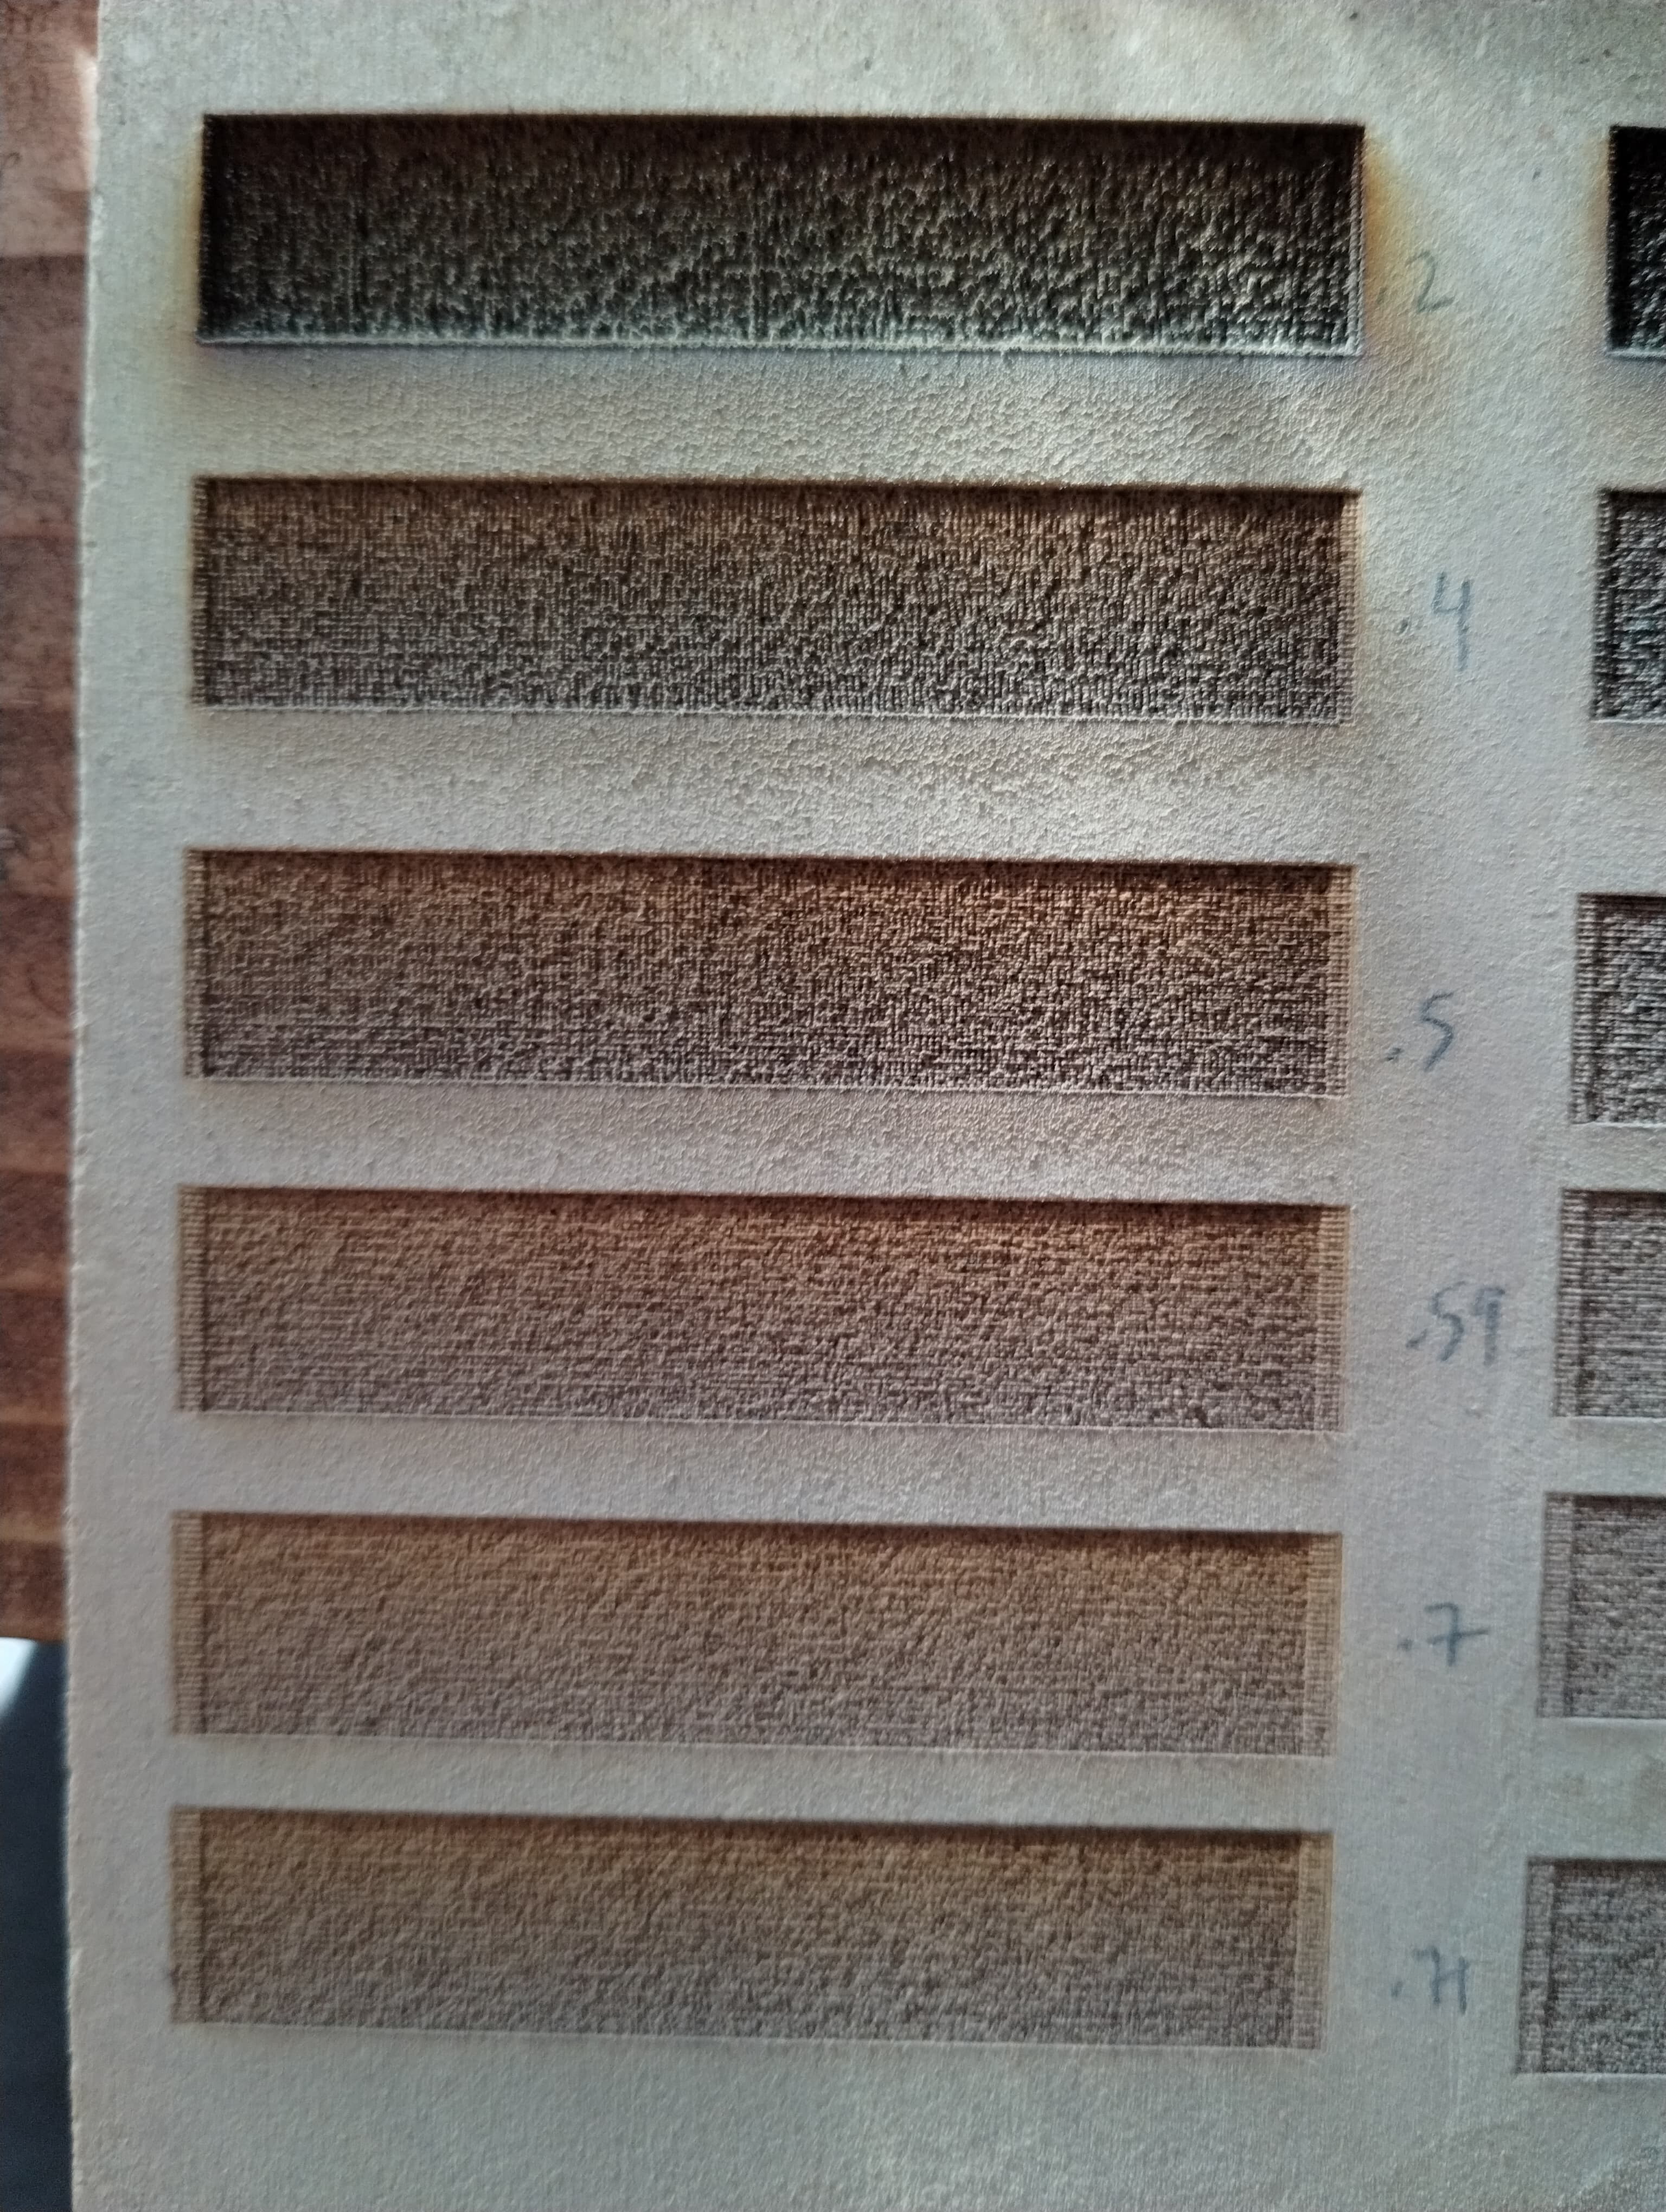
Writing is a bit difficult to judge, can you not do a test with lines, a grid with horizontal and vertical lines, then you will be able to see more easily if there are waves or other oddities.
…just for personal interest, what font is the example you show here?
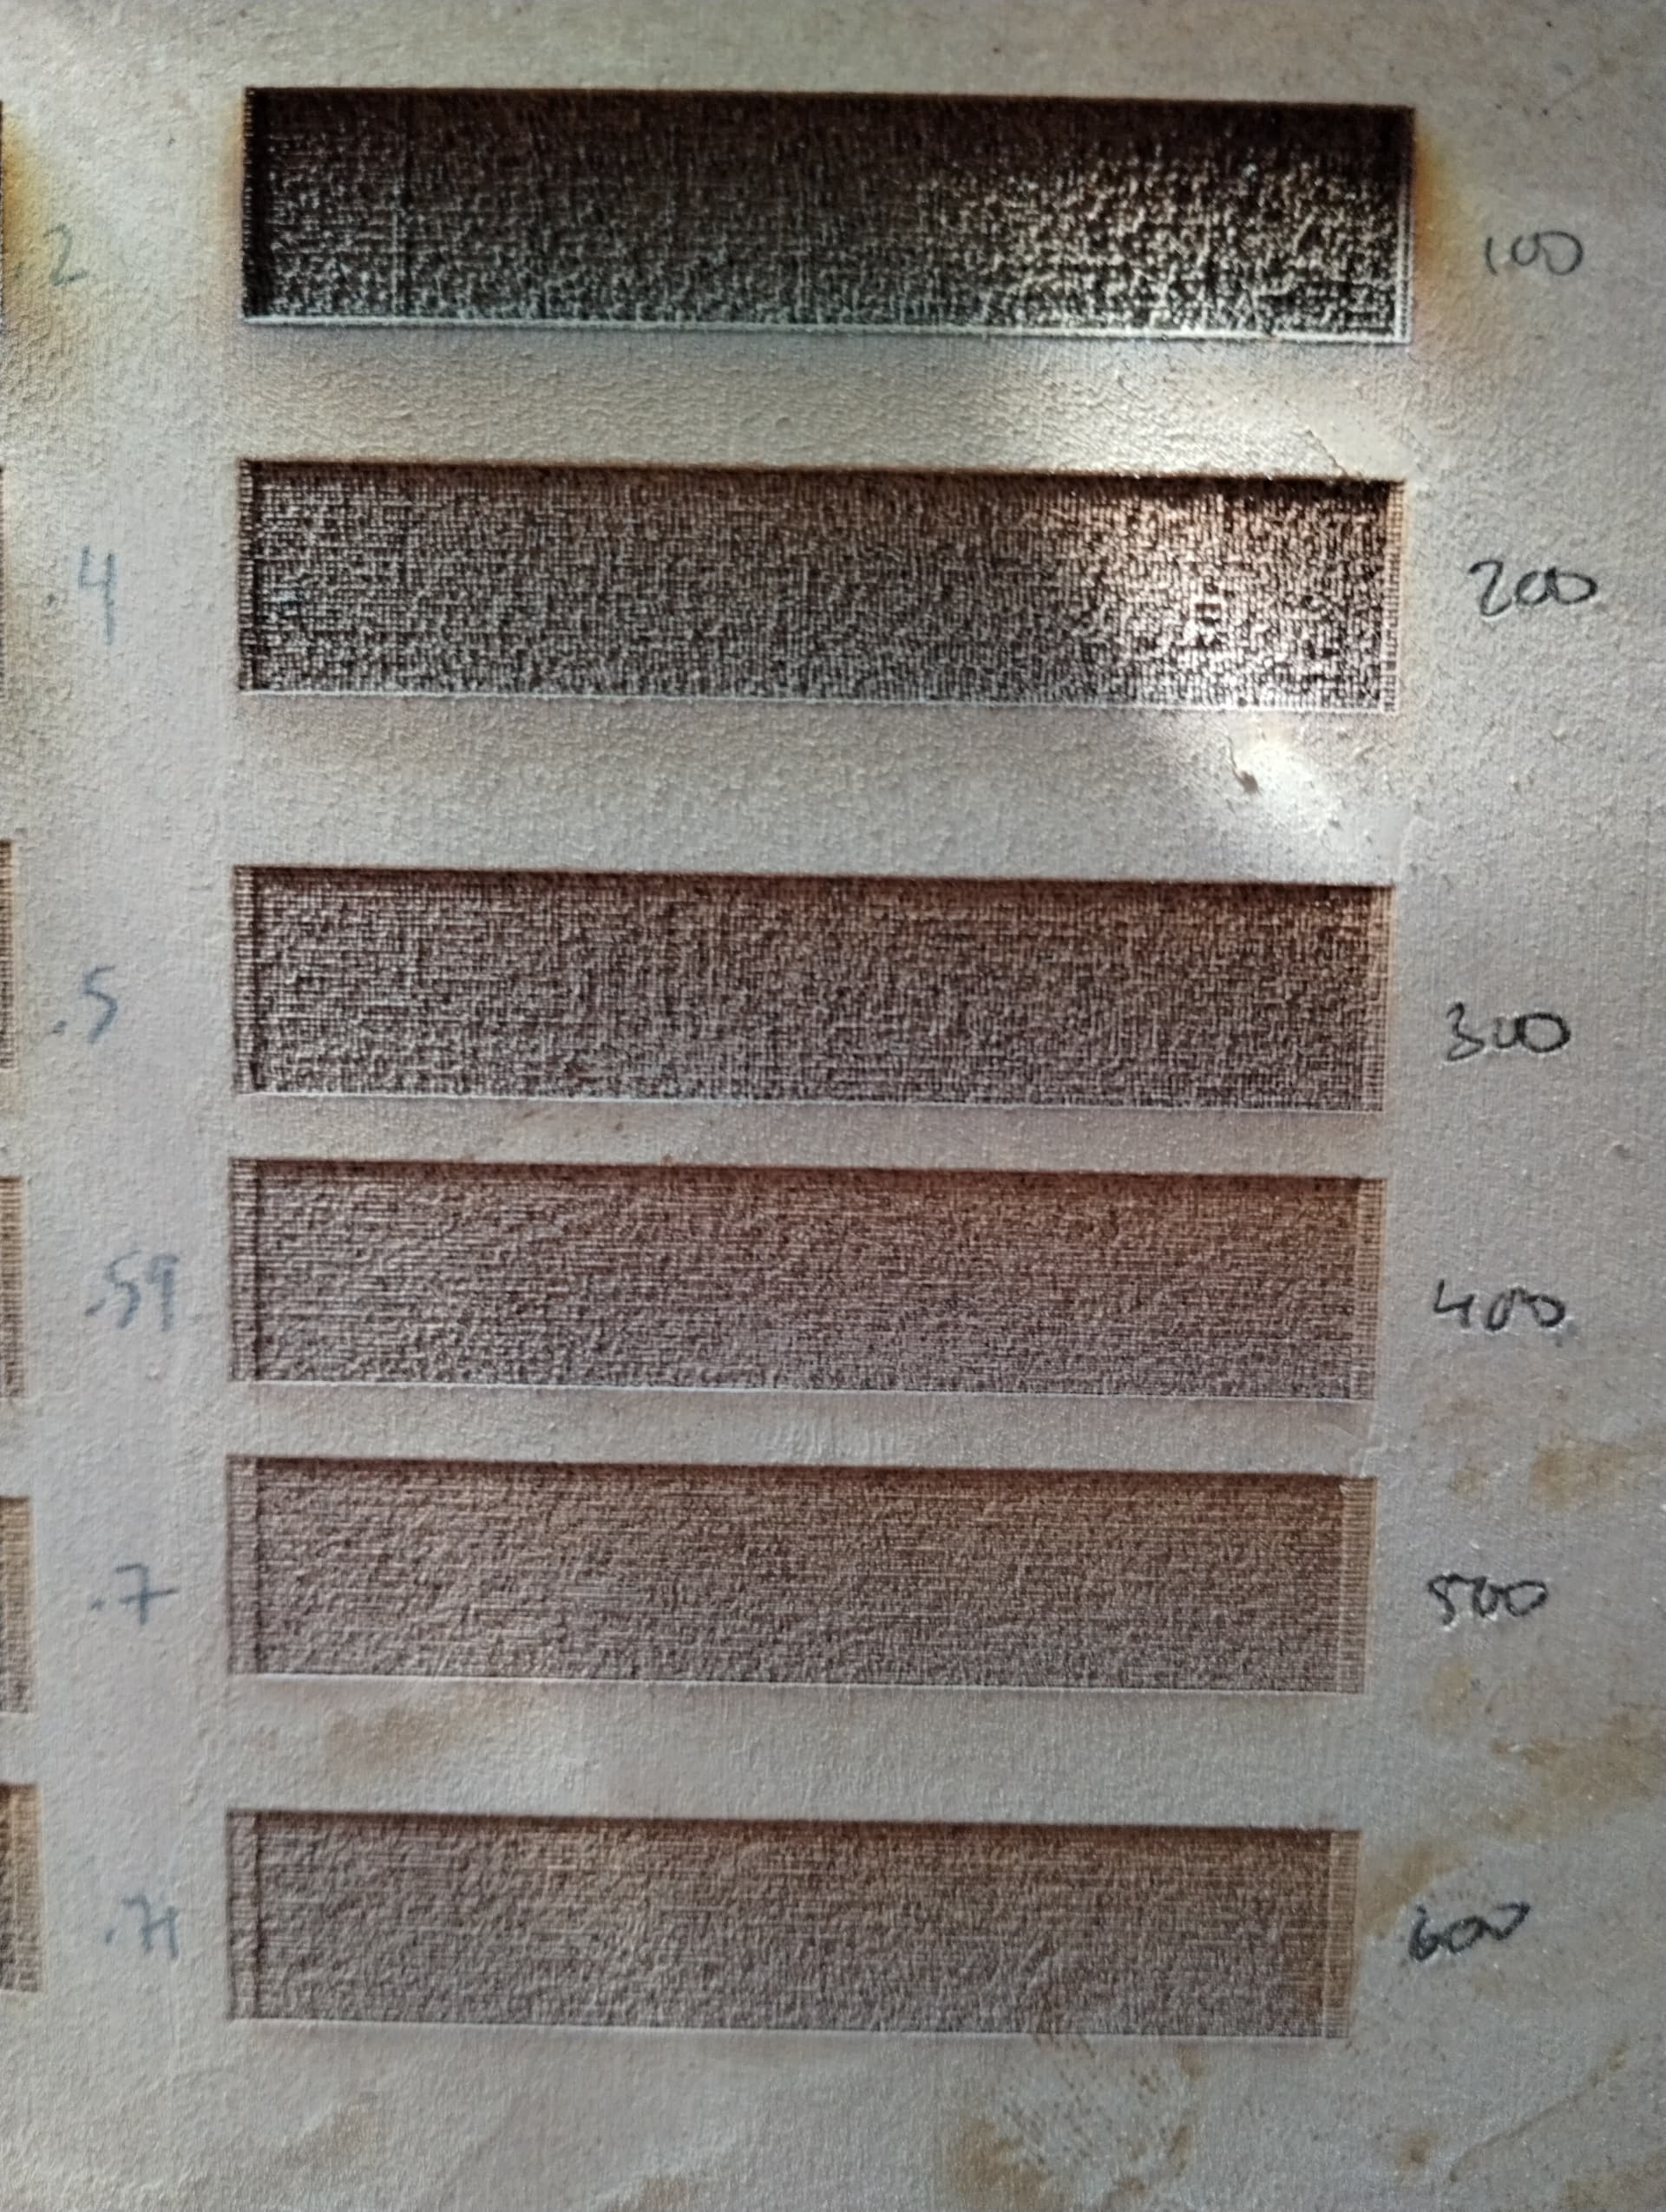
The first print was on Mesquite and I wanted it deep, so I was going for high power and slow, but I honestly can’t remember what speed it was.
However, with the other prints that I got the same double results, I did one at 400, one at 200, and one at 100.
The font for the first was from the file I made in Illustrator…Edwardian Script ITC, and Girassol Regular. The second one was a font that came with Lightburn… Grey Qo
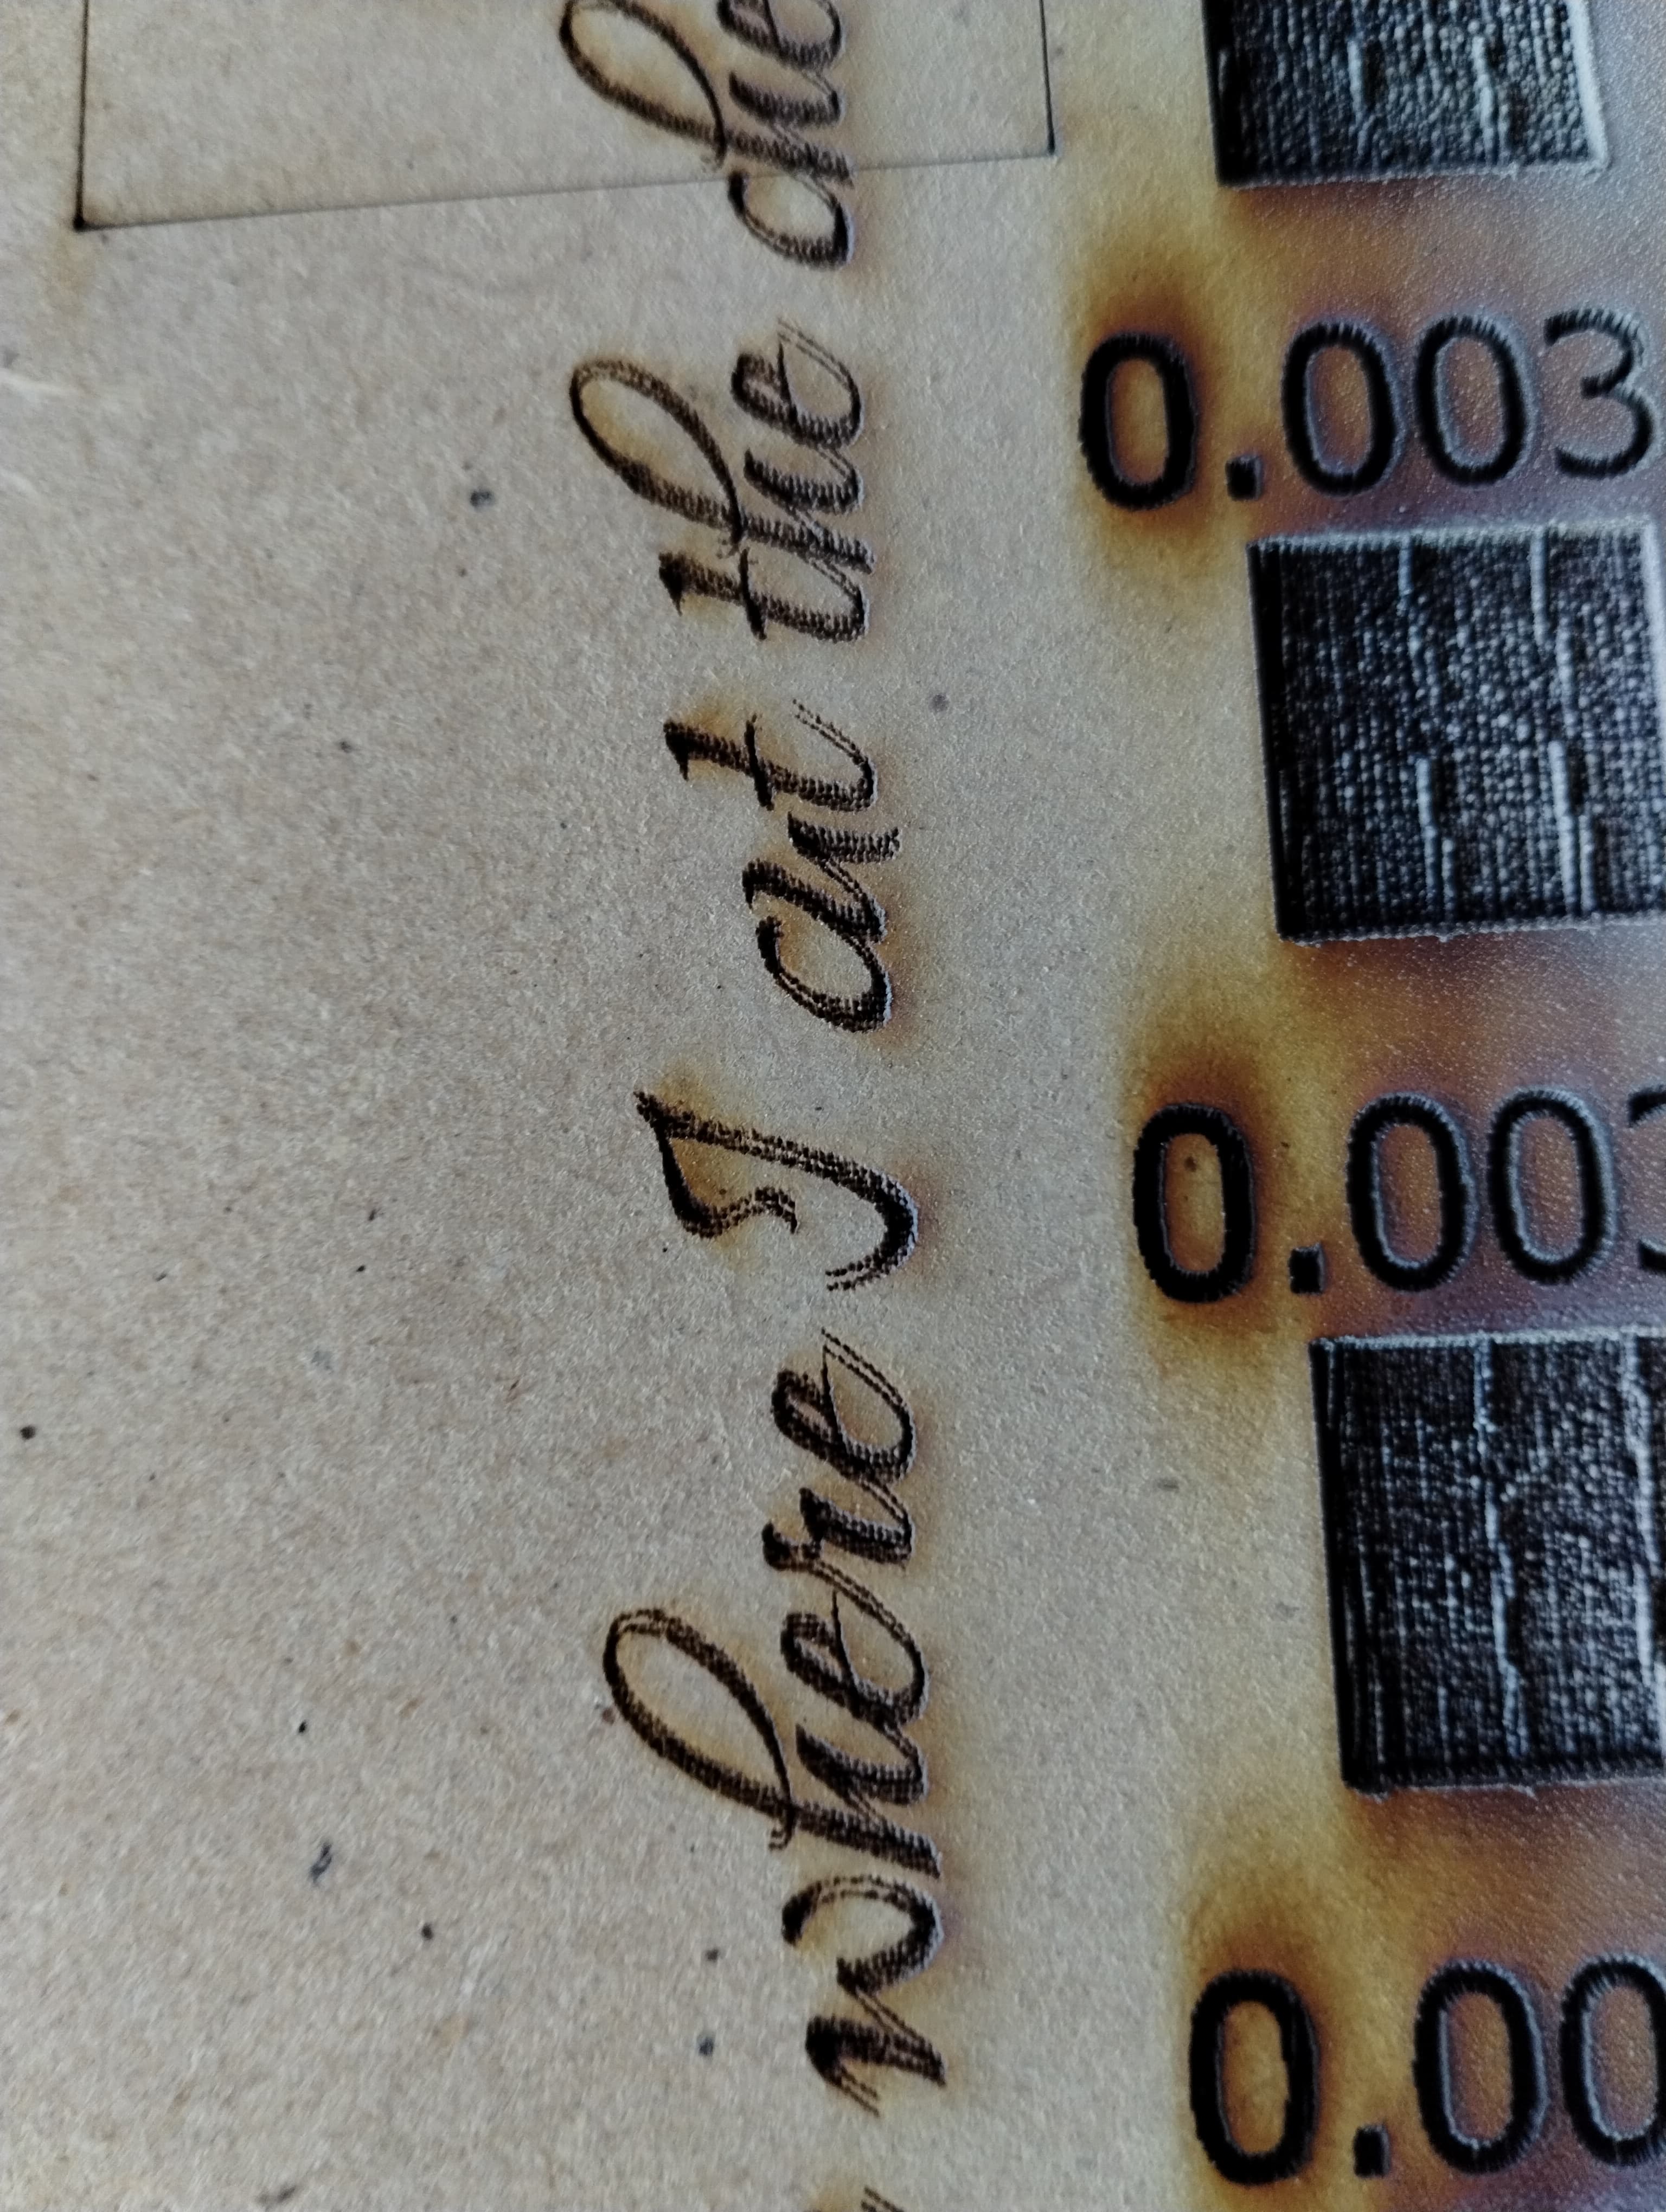
It might be worth noting that the double image is the same ratio no matter the size of the print. It’s very consistent.
I haven’t checked the nozzle… I’m on with trying, but not familiar with how to do that
You can unscrew the part of the nozzle that holds the lens, or the large ring, and remove the entire nozzle.
You can also test whether your nozzle is pointing straight down by making 2 shots with the entire machine bed height difference. Of course, you must not move your test subject between shots 1 and 2 ;-). The idea is that point 2 should cover point 1. It could be that your laser beam hits the inner wall of the nozzle a little, because it is not 100% vertical in the center.
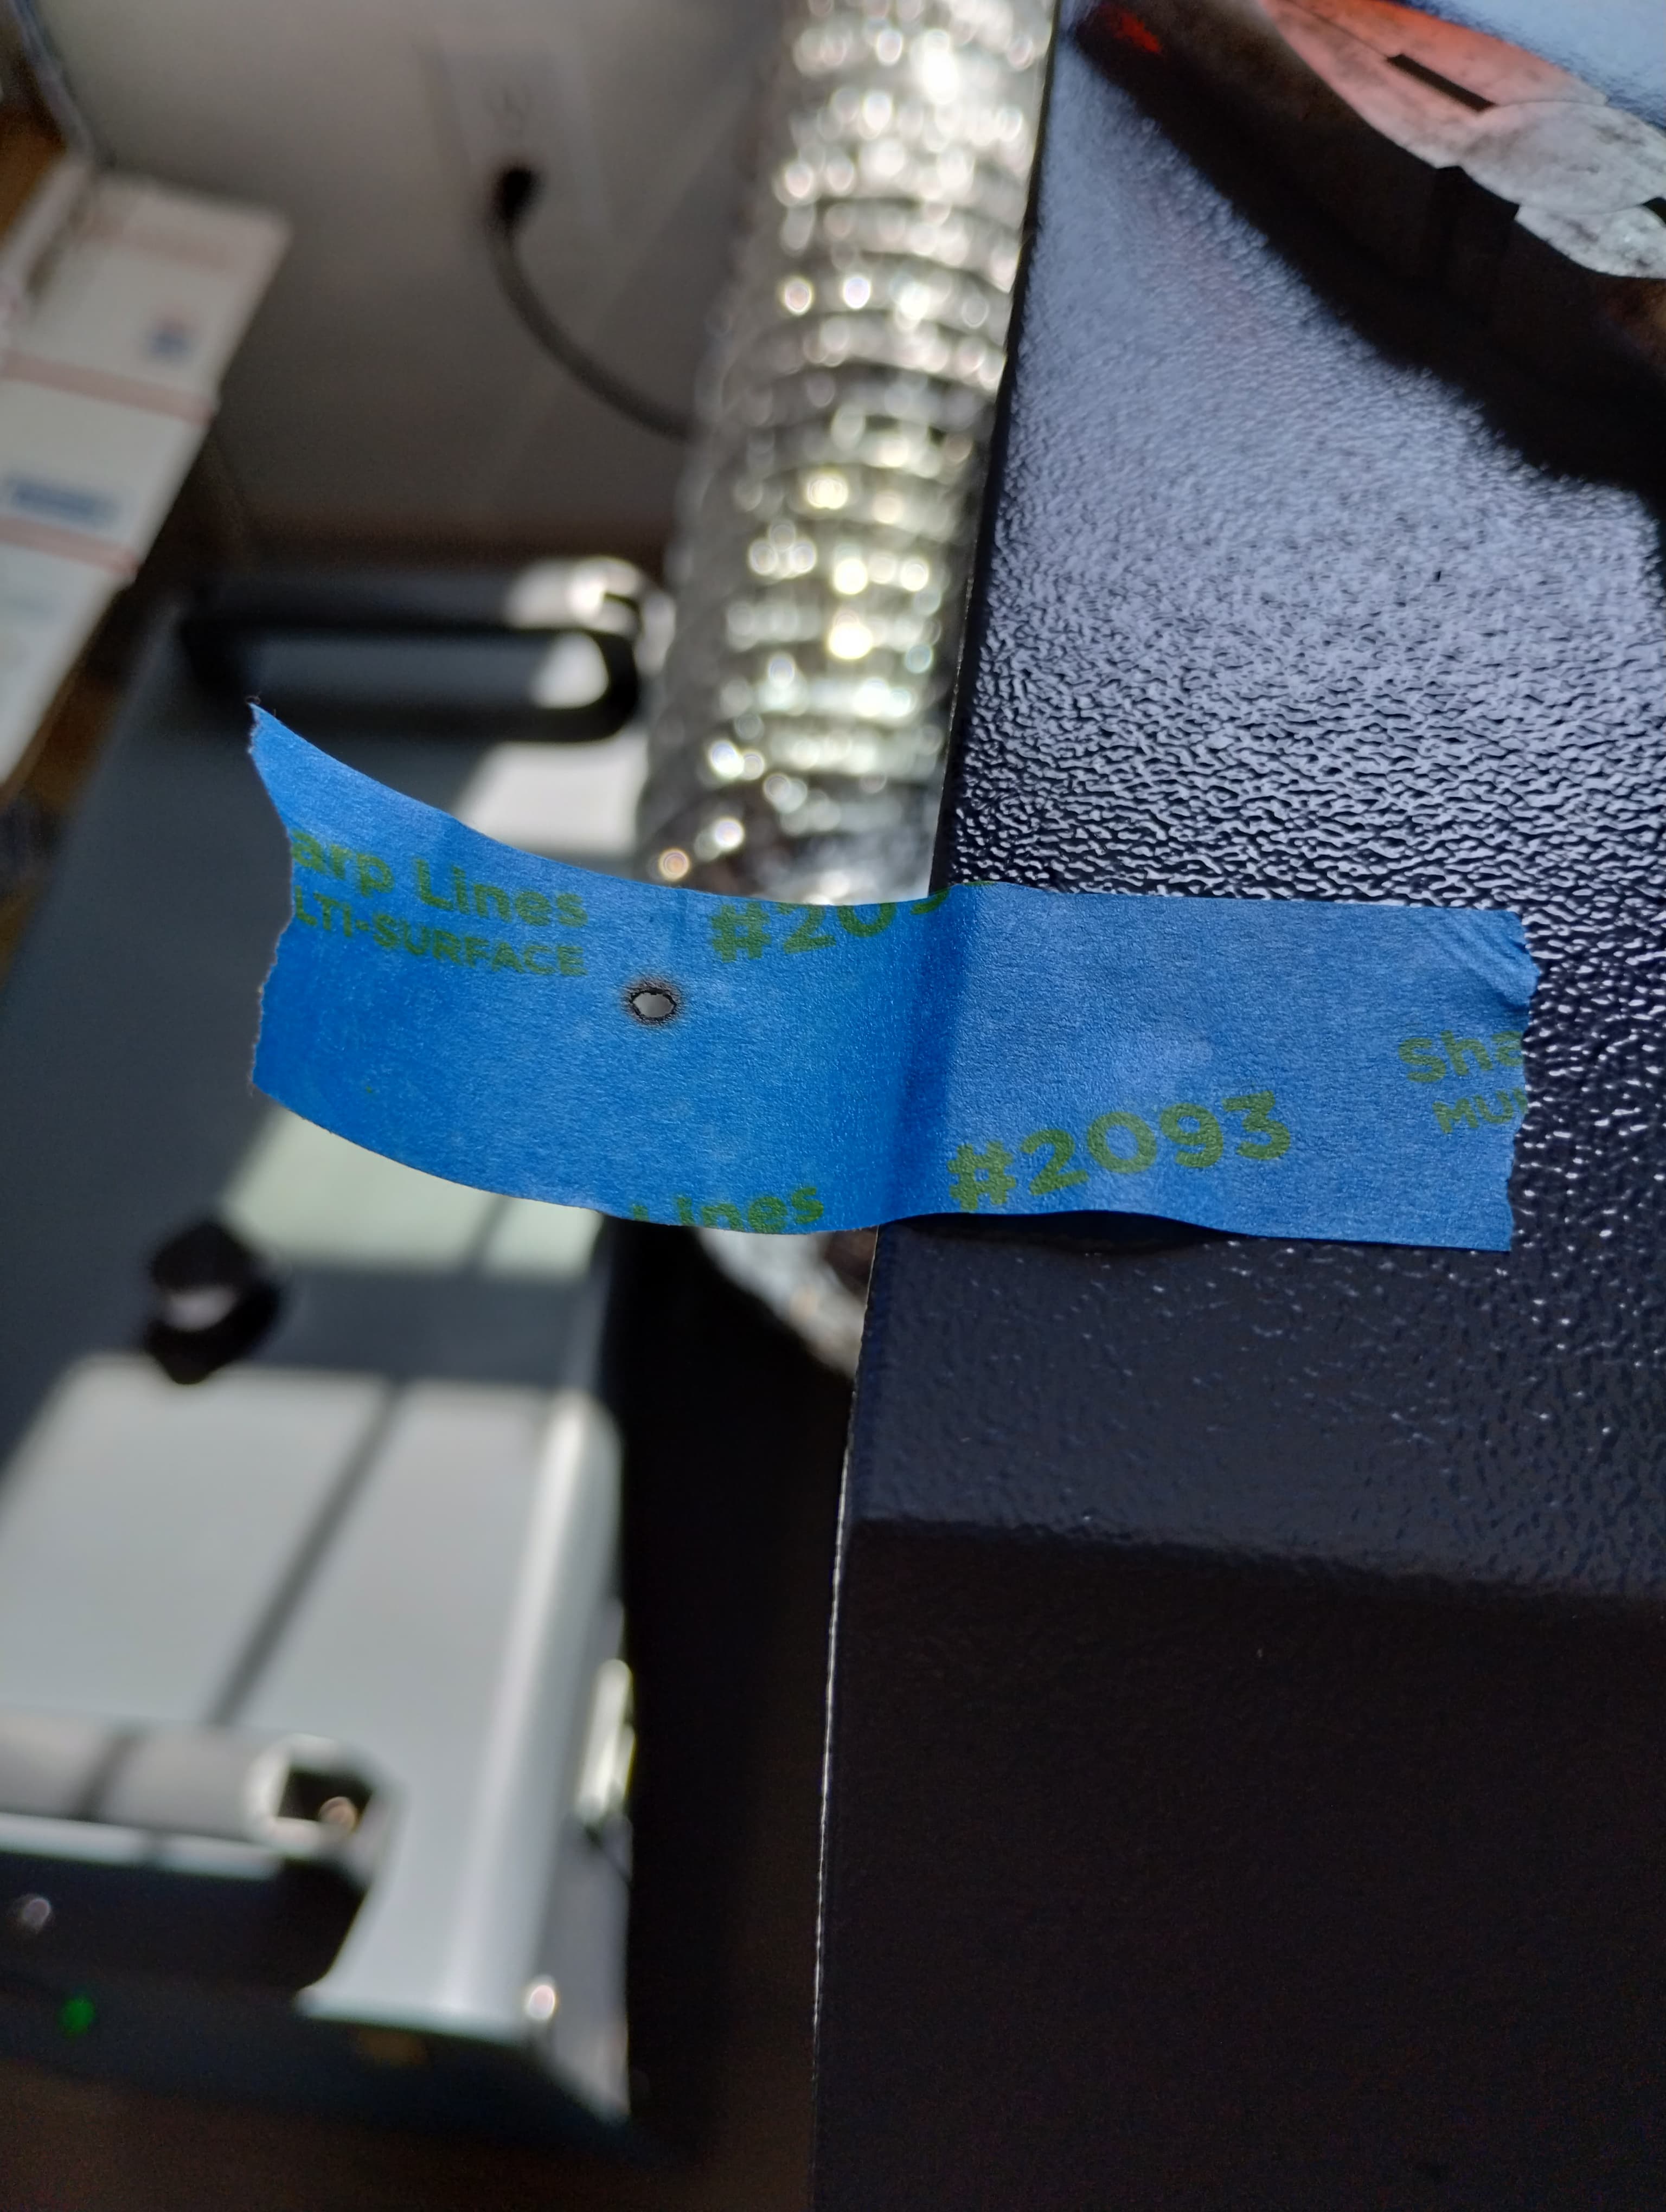
On the other hand, your shot on the blue tape looks fine…
That makes sure the laser hits the same spot in both directions, which will clean up the ragged edges of the letters as well as overlay the very thin vertical lines in the tails of those letters.
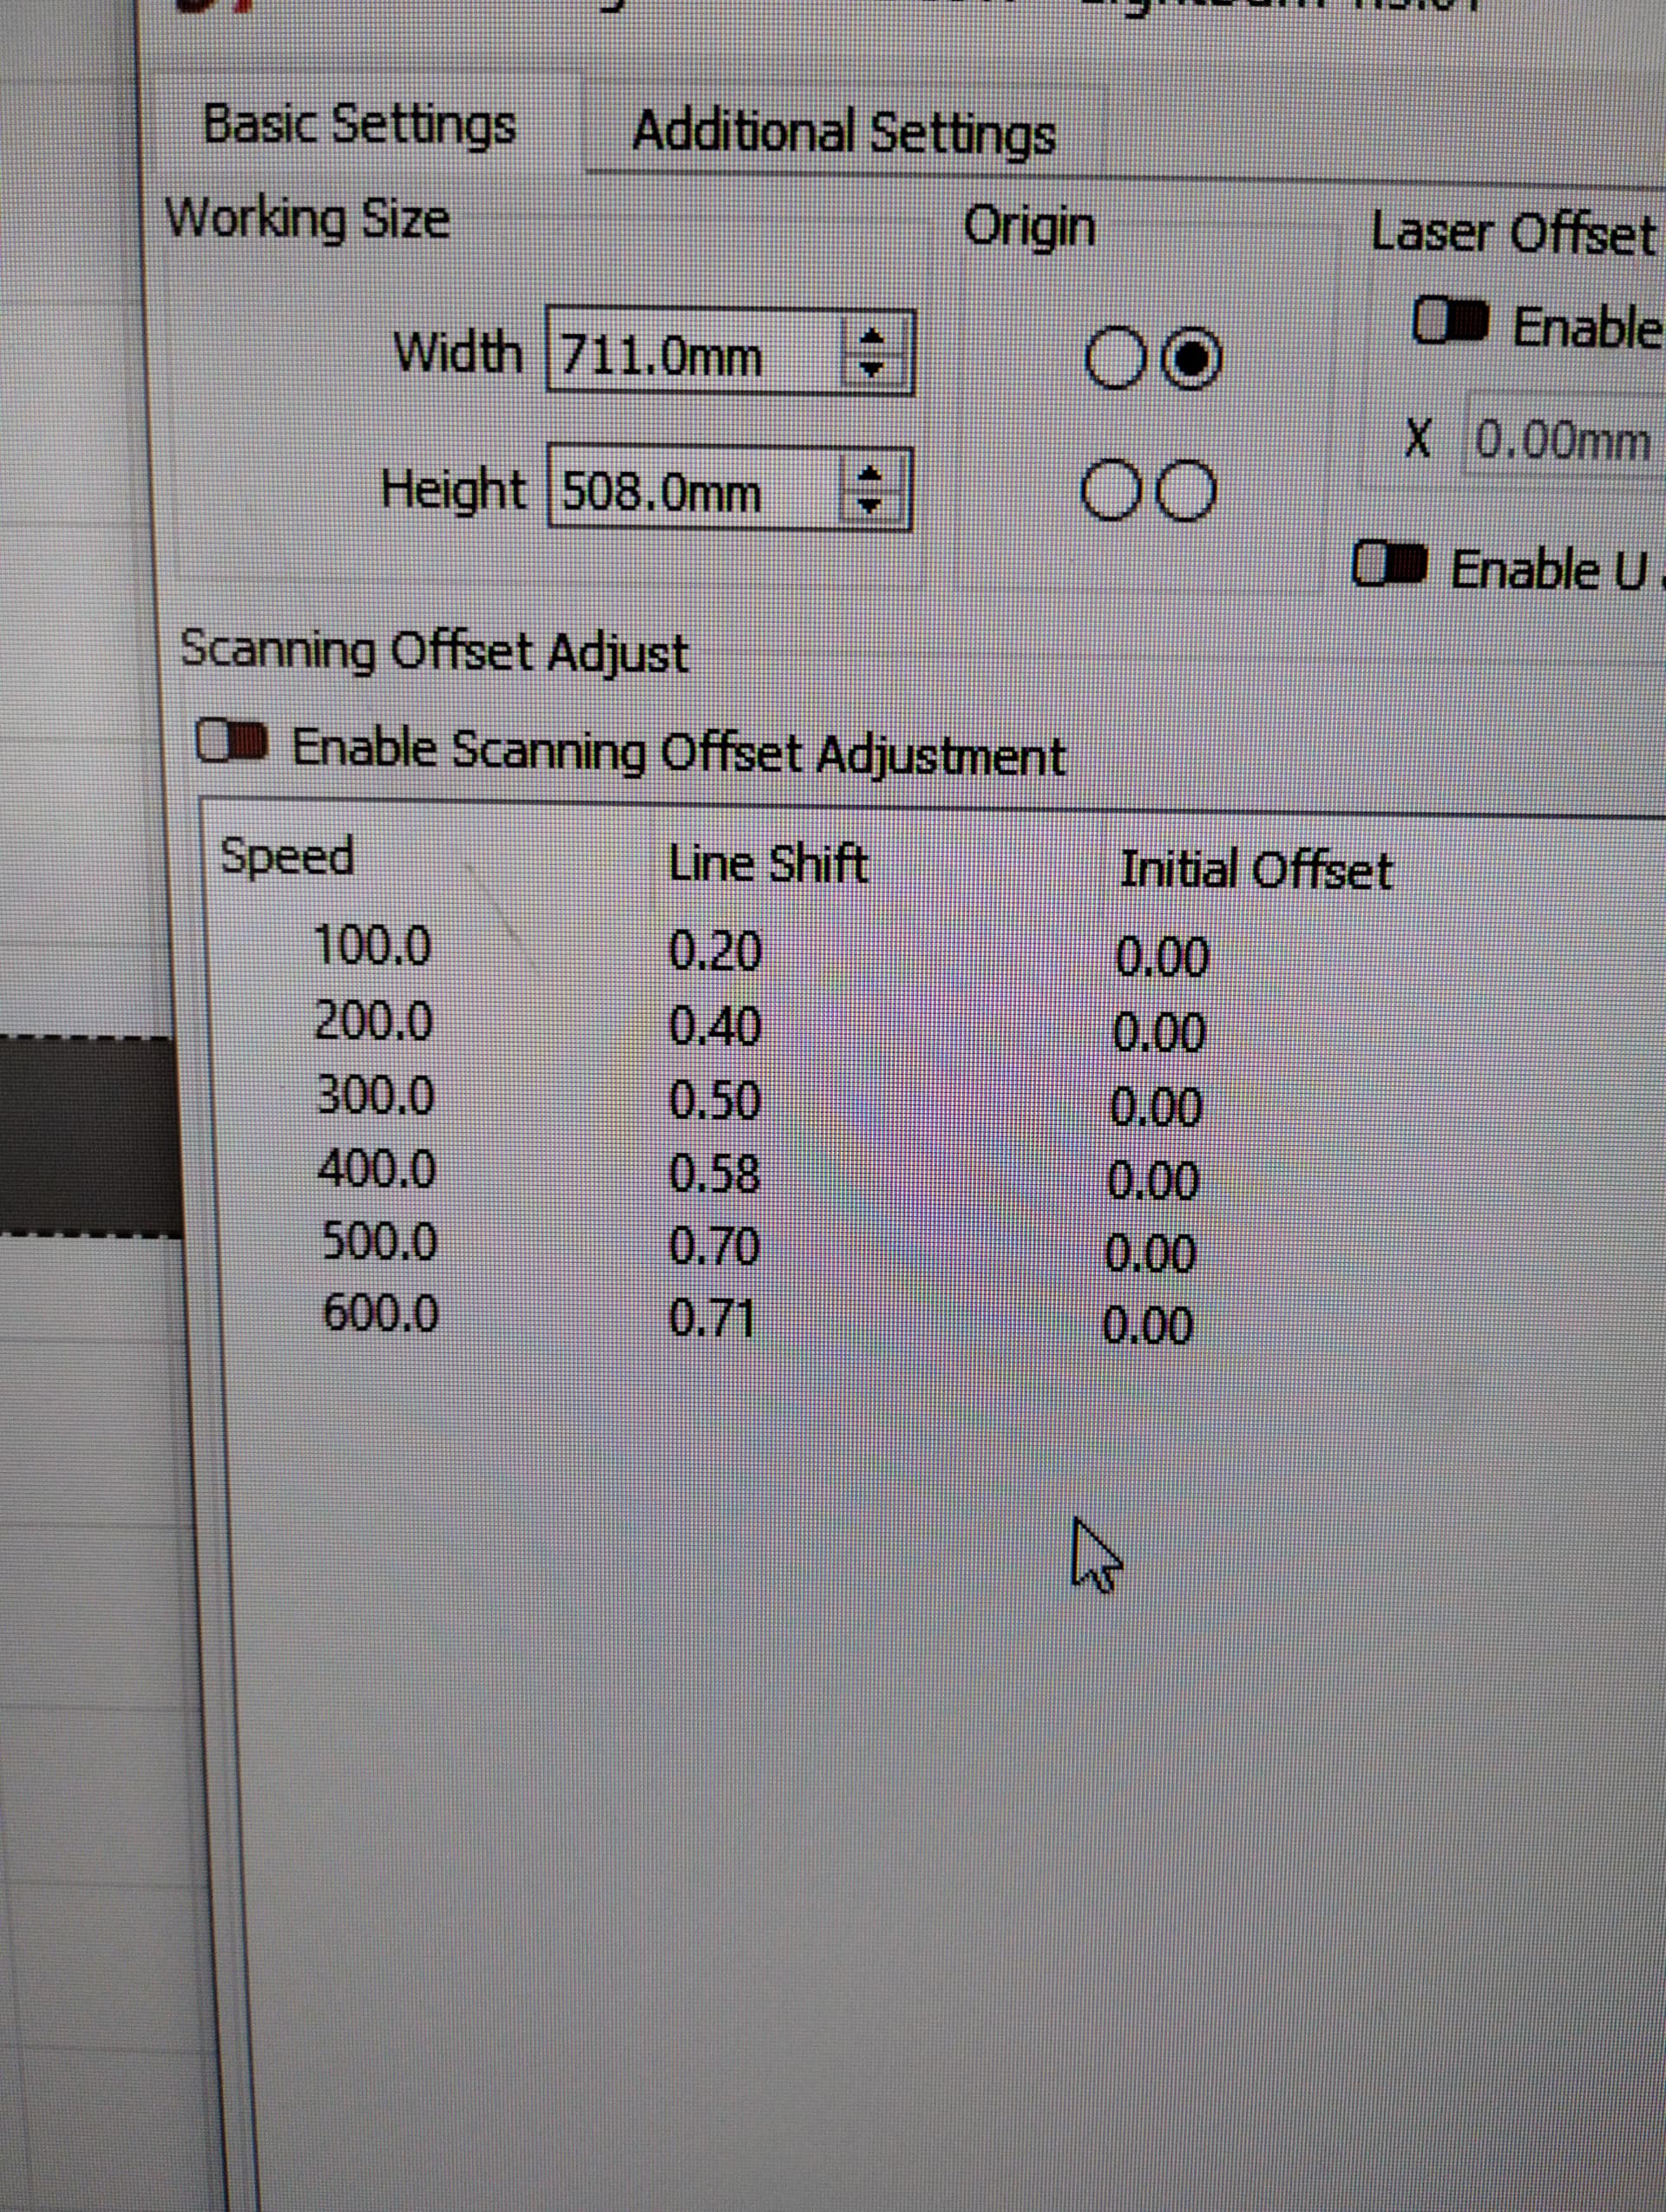
You must run the tests at several speeds, perhaps from 100 to 500 mm/s, and measure the results. The table gets half the measured offset between successive lines, which tripped me the first time through.