My Omtech 60W/50W laser is et at 20khz as default.
For engraving is there any advantage to increasing frequency setting?
In K40 circles I’ve seen discussions where the opinion is that low frequencies can be used to provide a wider range of shades for engraving. And that higher frequencies are better for cutting.
In my limited testing I haven’t seen this to make a significant difference on my 80W tube using Ruida.
I’d love to see something more definitive in this area, though, so look forward to seeing what you come up with.
There is some type of band pass filter in the lps input circuitry… this limits what can be done by only frequency…
The only difference I found was at a low 1mS period running at 1000mm/s@50% power, I could see the on/off burnt spots on the material…
@ednisley advised as it goes up, the filter on the input becomes more effective…
Either DC or PWM, it’s filtered and smoothed out, ends up a dc current control voltage…
I spent quite a while trying different things, but I don’t think it was well spent time…
Don’t let that stop you…
![]()
None whatsoever, because the HV power supply has a low-pass filter with a cutoff around 200 Hz to convert PWM to a DC-ish control voltage. Any PWM “carrier” above about 10 kHz produces pretty much the same output signal.
I wrote up probably more than you (or anyone) should know about PWM vs. laser tube current:
The reason @jkwilborn got dots at 1 kHz is because that’s close enough to the filter cutoff to let some of the PWM carrier through: the dots come from the high points of the waveform, where the PWM signal is ON, but the average intensity depends on the average value of the signal.
1 Like
I will dig until I find something lol
A question on another…
I am having fair results with obtaining 3D effect from photographs with one caveat. Photoshop seems to be my best friend except, If I save my result as a PNG I lose a considerable amount of the 3D effect. I have the last version of PS on my shop computer that has Adobe 3D that works. I can save in 3DS and of course LB doesn’t accept that file.
Sorry if I am crossing the line on the last part of my post. If I need to post it elsewhere just let me know.
Would SVG retain much of the 3D effect?
Well, I read the entire thing, interesting.
I will fuss with the PWM tomorrow.
I had to do some reading to remind me of differences in PSD, PNG, etc. Fact is, My daughter put a post-it-note on my computer reminding me of same some time ago.
Unfortunately retention of all of the changes I make to a flat file to get the 3D effect has to be saved in PSD, as far I as know.
LB doesn’t accept PSD. Back to the drawing board.
What are you doing on the LightBurn side to get the 3D effect? Are you using grayscale image for this or something else?
That will determine what file formats are effective.
LightBurn has nothing to do with creating the 3D effect. I accomplish that with an older version of PhotoShop. I do touch up in LB as far as Brightness, Speed, Power, etc. and use either Pass through or Jarvis. I don’t really care for the Jarvis setting since it creates a lot of artifacts I don’t always want.
Grayscale is not a good alternative to any of what I am doing.
If you’re doing a pseudo 3D look using shading then SVG will not work for this in terms of bringing into LightBurn or at least not easily.
PNG should actually work fine for this so not sure why you had an issue there. I’d avoid a lossy image format like JPG. BMP, TIF, and TGA should also work fine.
If you’re pre-dithering externally then you definitely want to avoid reprocesisng with jarvis or anything else in LightBurn.
I have fiddled with using Pass through or LB.
I found a possible way of saving the 3D illusion file in PhotoShop without losing the 3D effect.
Will see what happens tomorrow. Going to watch Cincinnati Reds ball game.
Thanks
The fiber has an option called 3dslice… it creates 256 layers, each a bitmap of specific gray value…
To get the data, I use an stl file (for a 3d printer), pass it though online software that creates a grayscale from the stl file… I feed the grayscale file into Lightburn…
3dslice is only available to fiber machines as far as I know… I haven’t seen the option with anything else.
This leaf was one I found on the Internet that is in public domain… It was only a grayscale but Lightburn did a good job with it…
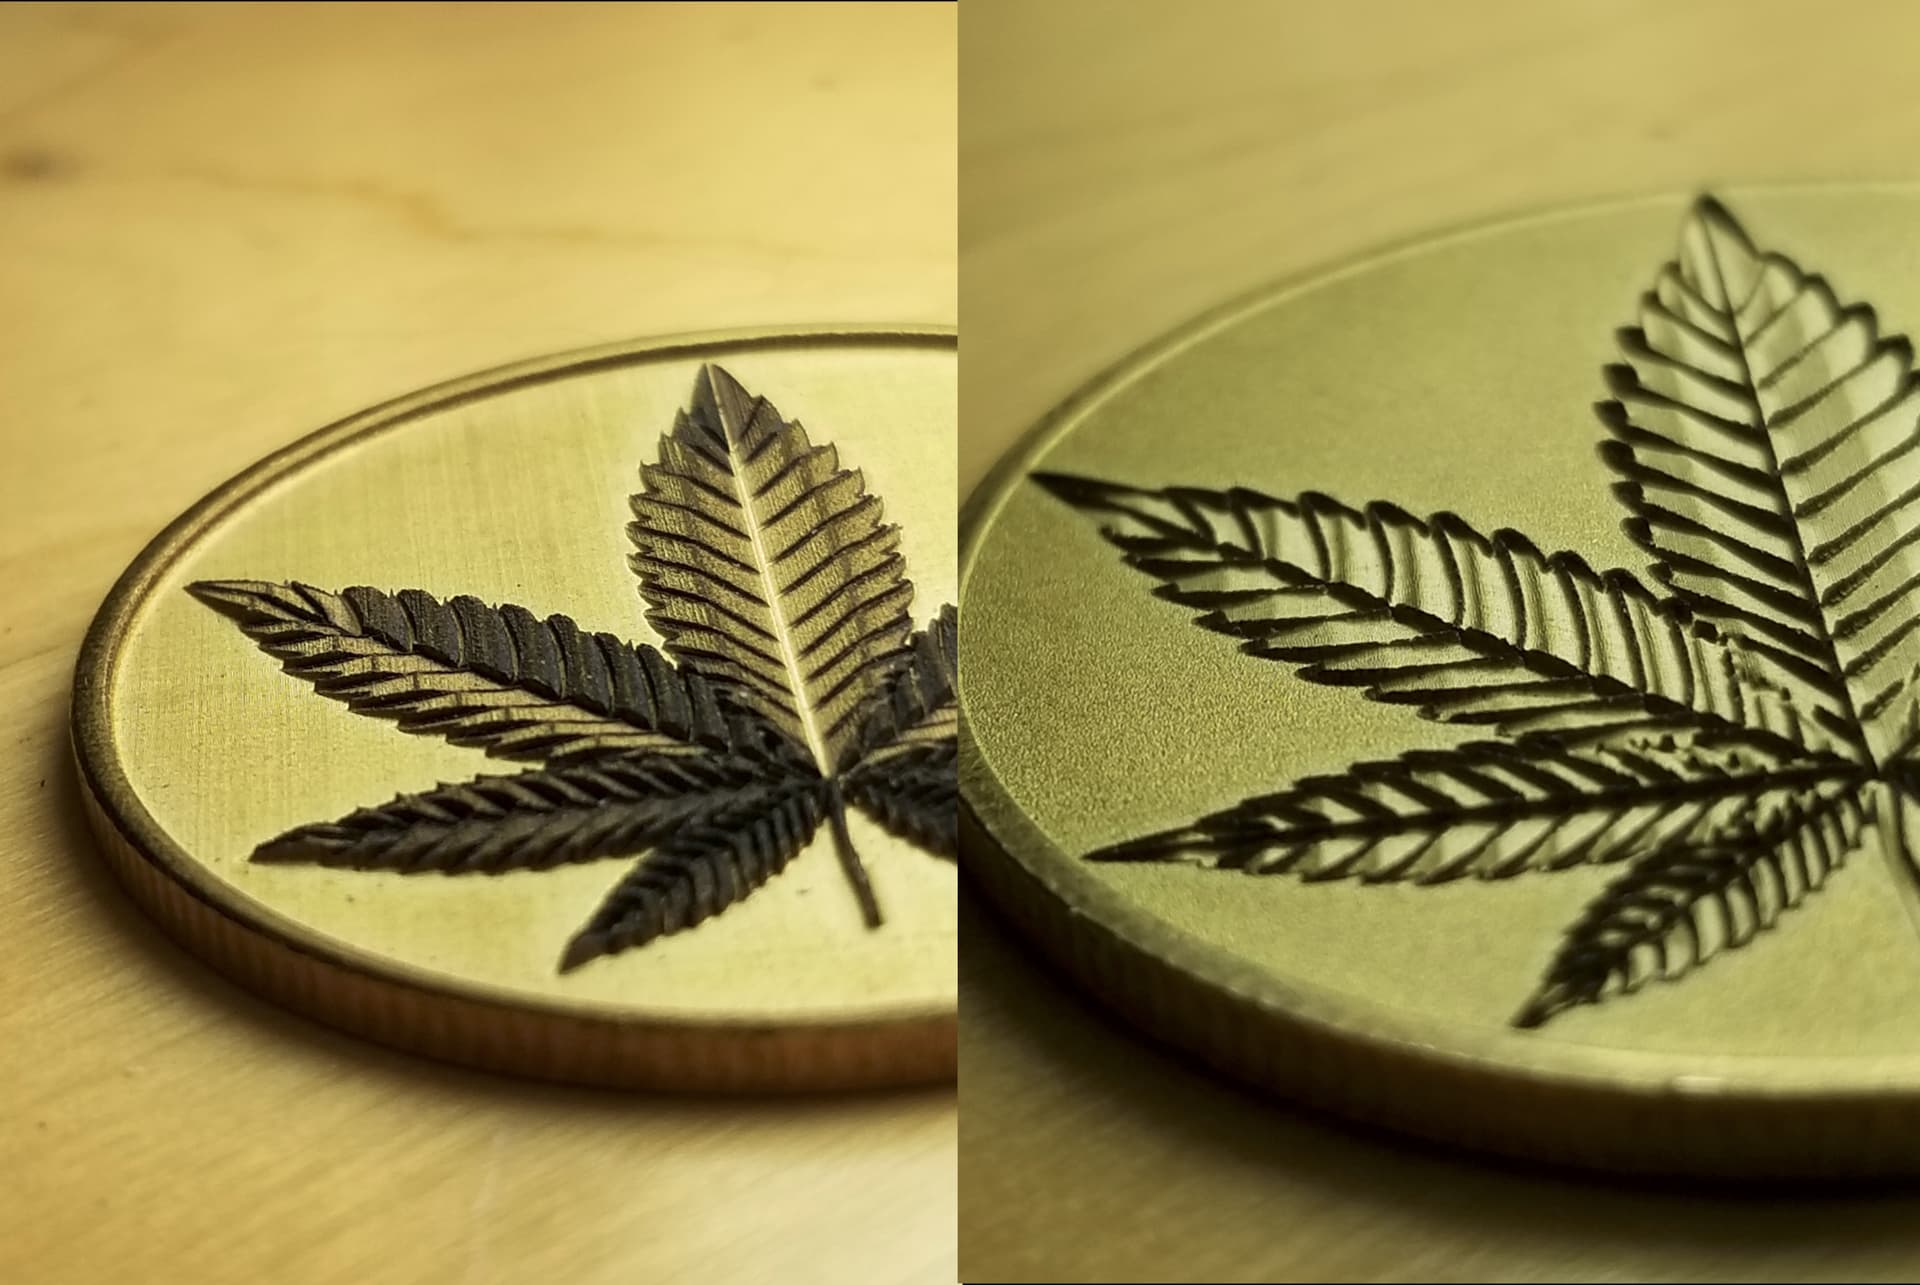
There are lots of plain grayscale graphics around that you can pick up… I try to deal with only public domain stuff.
![]()
I have used the STL2PNG Converter with less than stellar performance. Could be my lack of knowing how to use it. lol
I have literally thousands of images on my computer, most of them I have taken over the years. Doesn’t mean all of them can be used for this purpose.
I keep thinking I am getting close to what I want to do every time I try something else. Always something I don’t like.
Photoshop has some buried possibilities that I had never even heard about. My Graphic Designer daughter has infinitely more knowledge of Adobe products than I do. She is often my savior when I come up with some of these ideas.
This is intended for an actual 3D effect as is the 3D Slice that Jack has listed. This is where you would use grayscale. The resulting burn will have contours created by varying power based on the gray value in the image.
This is fundamentally different than the pseudo 3D look that you described that’s based entirely on shading effects using dithering techniques which gives the illusion of depth but is not in fact textured.
This is the like the difference between an intaglio vs a painting.
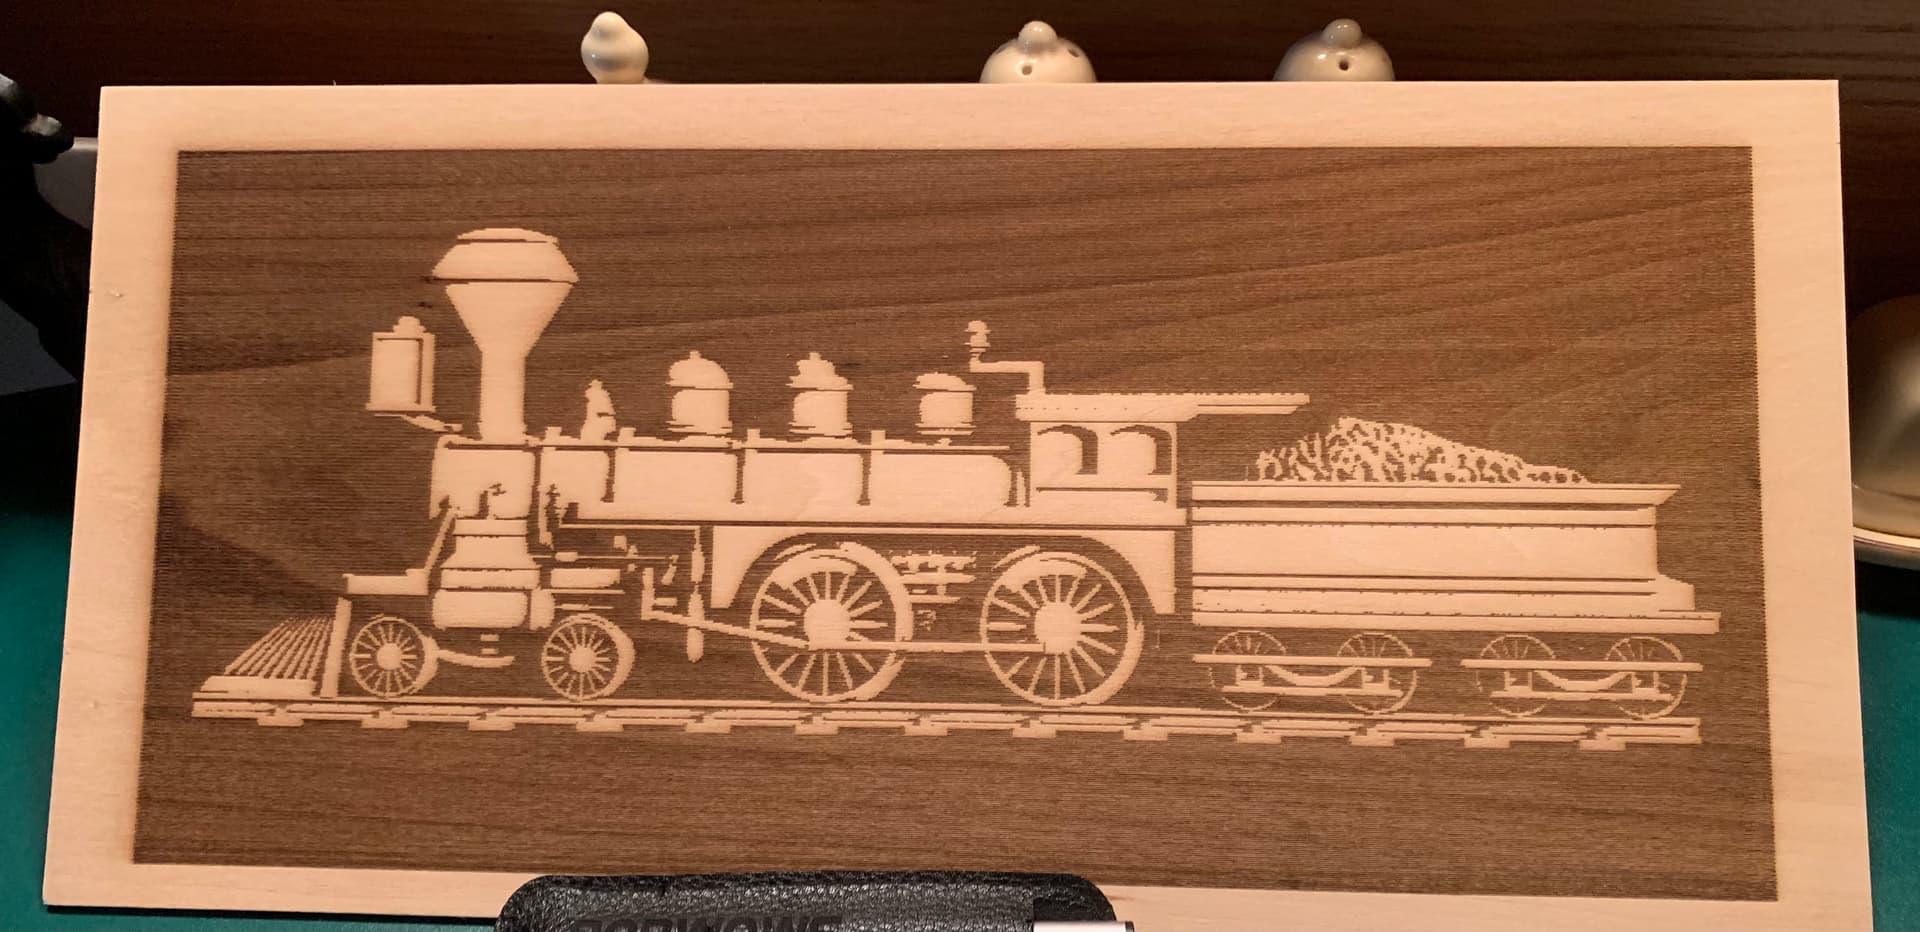
Hard to tell from the photo but it’s possible you may have an issue with backlash or offset scanning based on the frayed look at the edges of each burn area. Might also be from resolution of the image or line interval size so hard to say.
This is a file I bought. Had problems with the file to begin with.
I need to check the tension on belt again. May have an aging.
I can’t really drive it confidently… I use it a lot and have the source on my machine… I still don’t know what it’s doing and there are no instructions I’ve been able to locate. Such as depth offset… easy to speculate… I haven’t spent hours trying to find out… ![]()
![]()
You can also pick the view… from the top, front or side… it has to be a 3d object for this to make sense.
I believe, the leaf in post 12 was actually picked up on-line as a grayscale 2d image… no external software was used with it, but that’s not the norm.
A grayscale file isn’t usually a 3d representation… That’s why I start with an stl file, it has all the objects information from any angle.
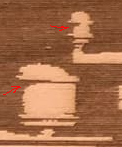
These areas, in red, are probably shadow areas. The grayscale needs to represent a 3d image, not shaded as @berainlb advised and that most are.
Good luck
![]()