Getting acquainted with our new OMTech 60w (AF2028-60) and wanted to see if someone could check my expectations on settings:
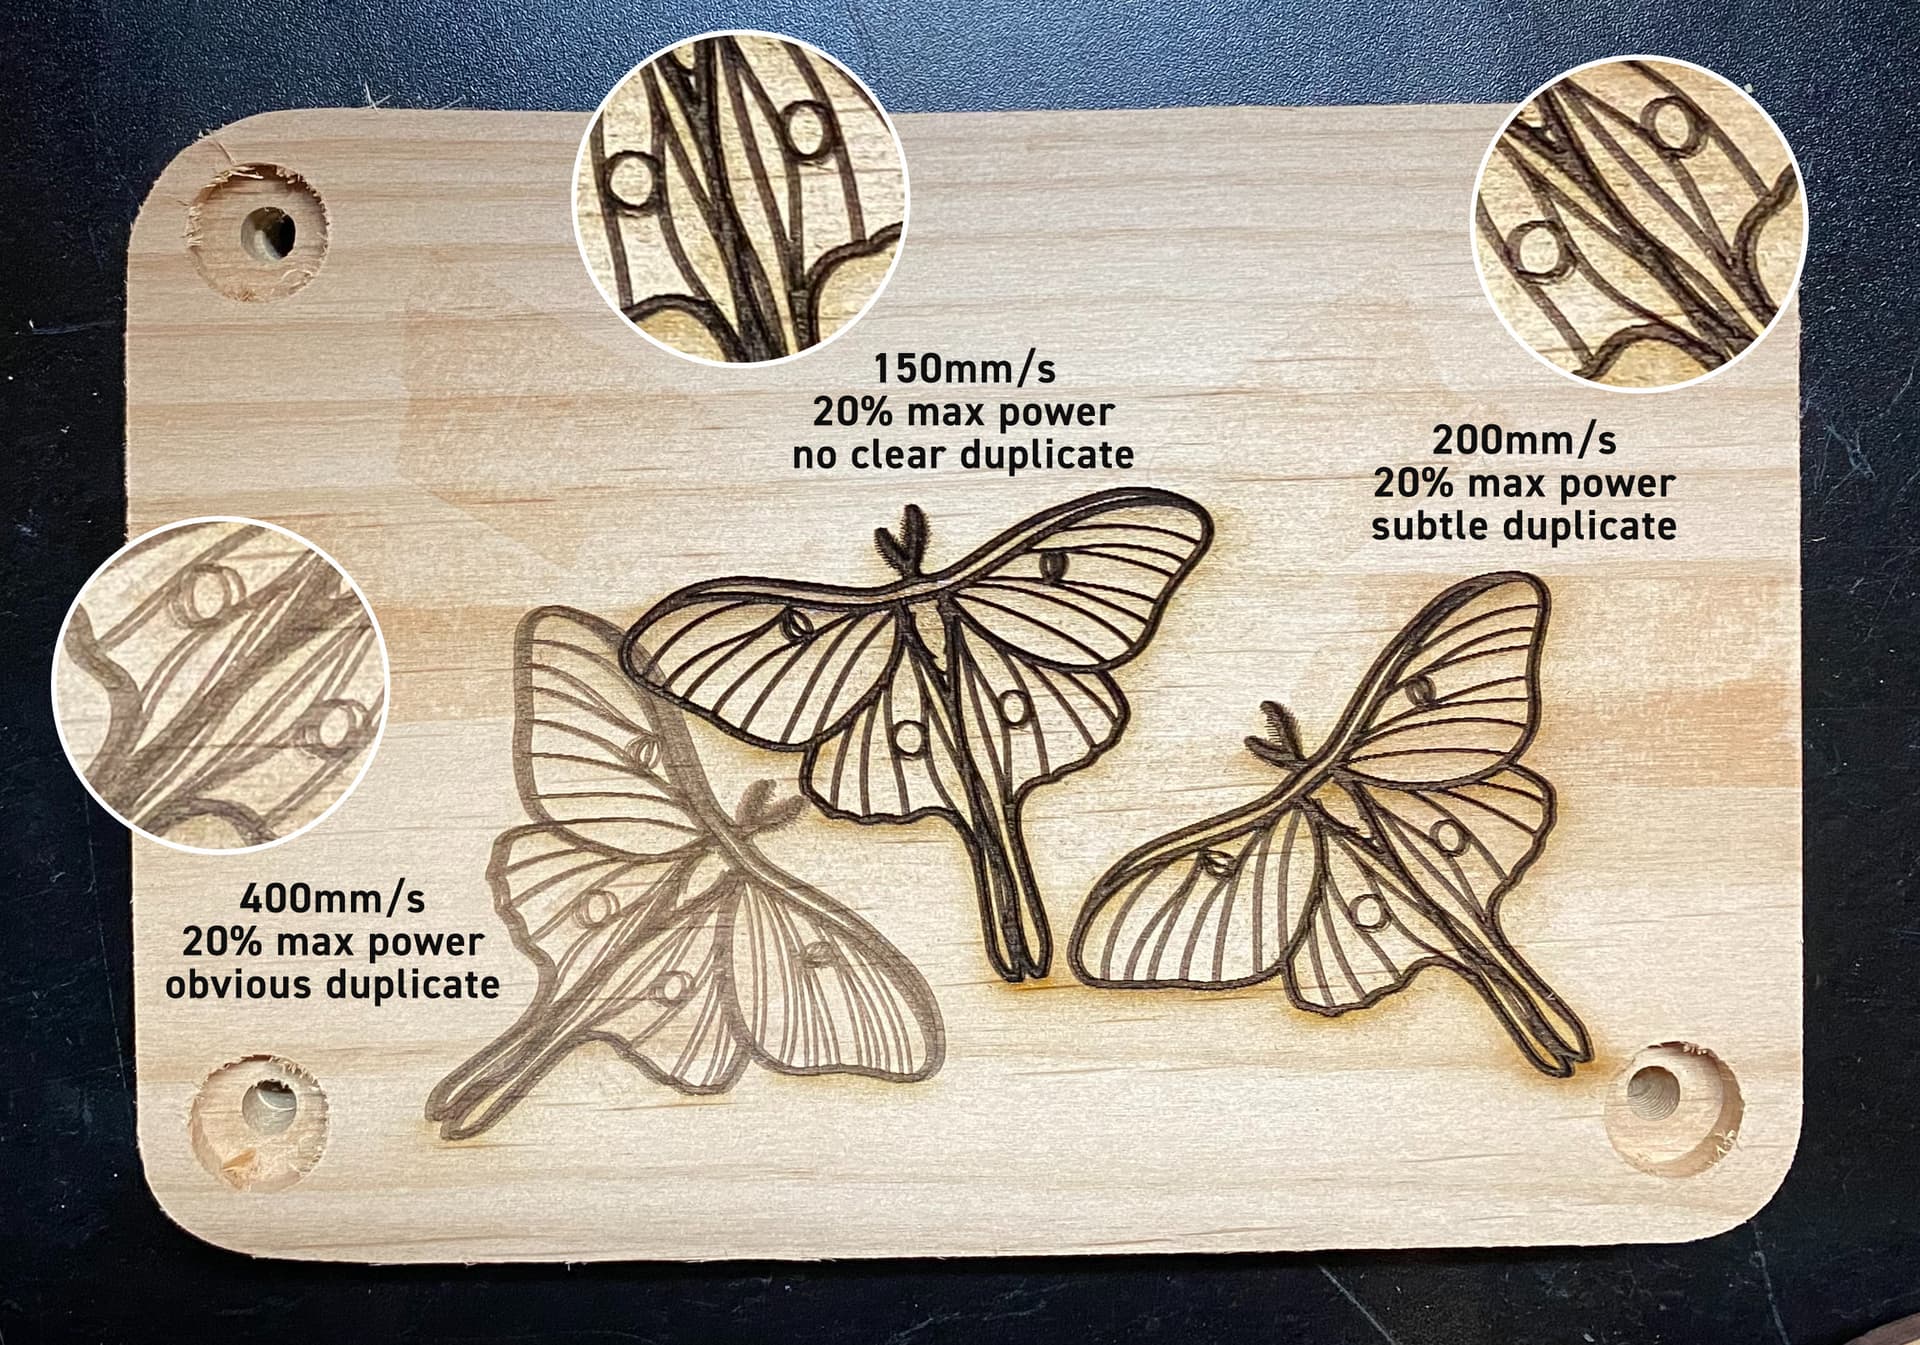
Tested out a design on some scrap alder, at 150mm/s and 20% max power (bidirectional) with a .085 line interval I believe. At this initial setting (middle design) it was too dark, so I thought I’d try higher speeds at the same power to compare. At 200mm/s you get a subtle but visible duplication of the line work. At 400mm/s it’s clearly burning a duplicate. Looking around this forum I’m thinking maybe it’s the speed causing the issue shown here:
Is 400mm/s unreasonable to run at for this type of burn?
Not sure what range to expect for wood engraving with the CO2 laser. At 150 mm/s and 20% that doesn’t leave me a ton of room to power down for a lighter engraving, looking to increase that window with a wider range of speed/power settings.
Note: This is not the only design where I ran into this issue. Can provide additional images if necessary, just wanted to note it’s not unique to this test.
Experience Level: Hobby/Novice (Formerly used a CNC + JTech 7w diode laser + Lightburn) Laser: OMTech 60w (AF2028-60) with Ruida Controller Laptop: MacBook Pro running Catalina I believe (Due for an upgrade, I know) Software: Lightburn, 1.3.01 Material: Alder Hardwood, Unfinished Artwork: SVG File set to Fill
I’m hoping to be able to have a wide variety of settings to produce different shades of engraving, so if I’m limited to 20% power that only leaves me 0-20%. Was hoping I could find a faster speed that let me max out that same darkness at a higher % like 40-50% then I would have a wider range of settings to create a wider range of shades. Let me know if that’s not making sense, lol.
…not quite, your starting % is probably also at 10% +/- .
I think when you experiment with power and speed a bit, you find quite a few shades of grey. You can modify some of the tests available (also in LightBurn) to find the working range of your machine.
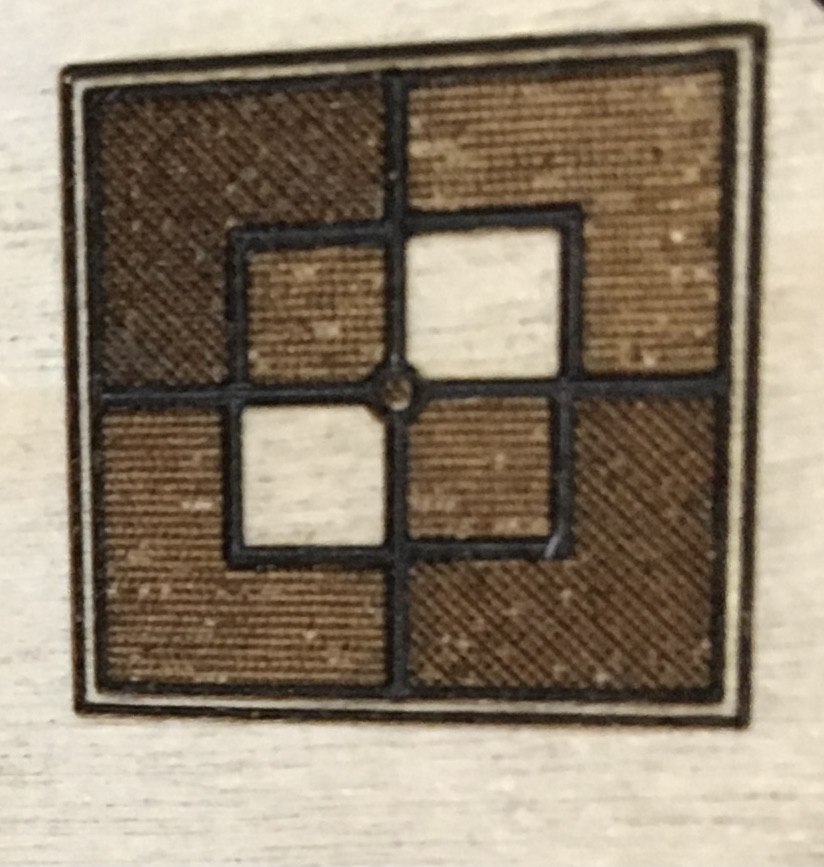
Another way you can get more shades is to change the direction and line spacing, e.g. cross-hatch.
This is so helpful, didn’t consider the direction/crosshatch for darker shades. THANK YOU so much for the feedback. Going to do some further testing to see if I can develop a settings test for each material that goes beyond cutting and general dark to light like the OMTech one.
Cross-hatch takes a bit longer, but the effects you can achieve are worth it. For example, 45 degree cross-hatch with line spacing 0.3-0.5mm gives a beautiful pattern. I quite like it.