Running a 2.5w diode bachin
Calibrated x and y
Was about inch to big(25.4mm)
Got that squared away.
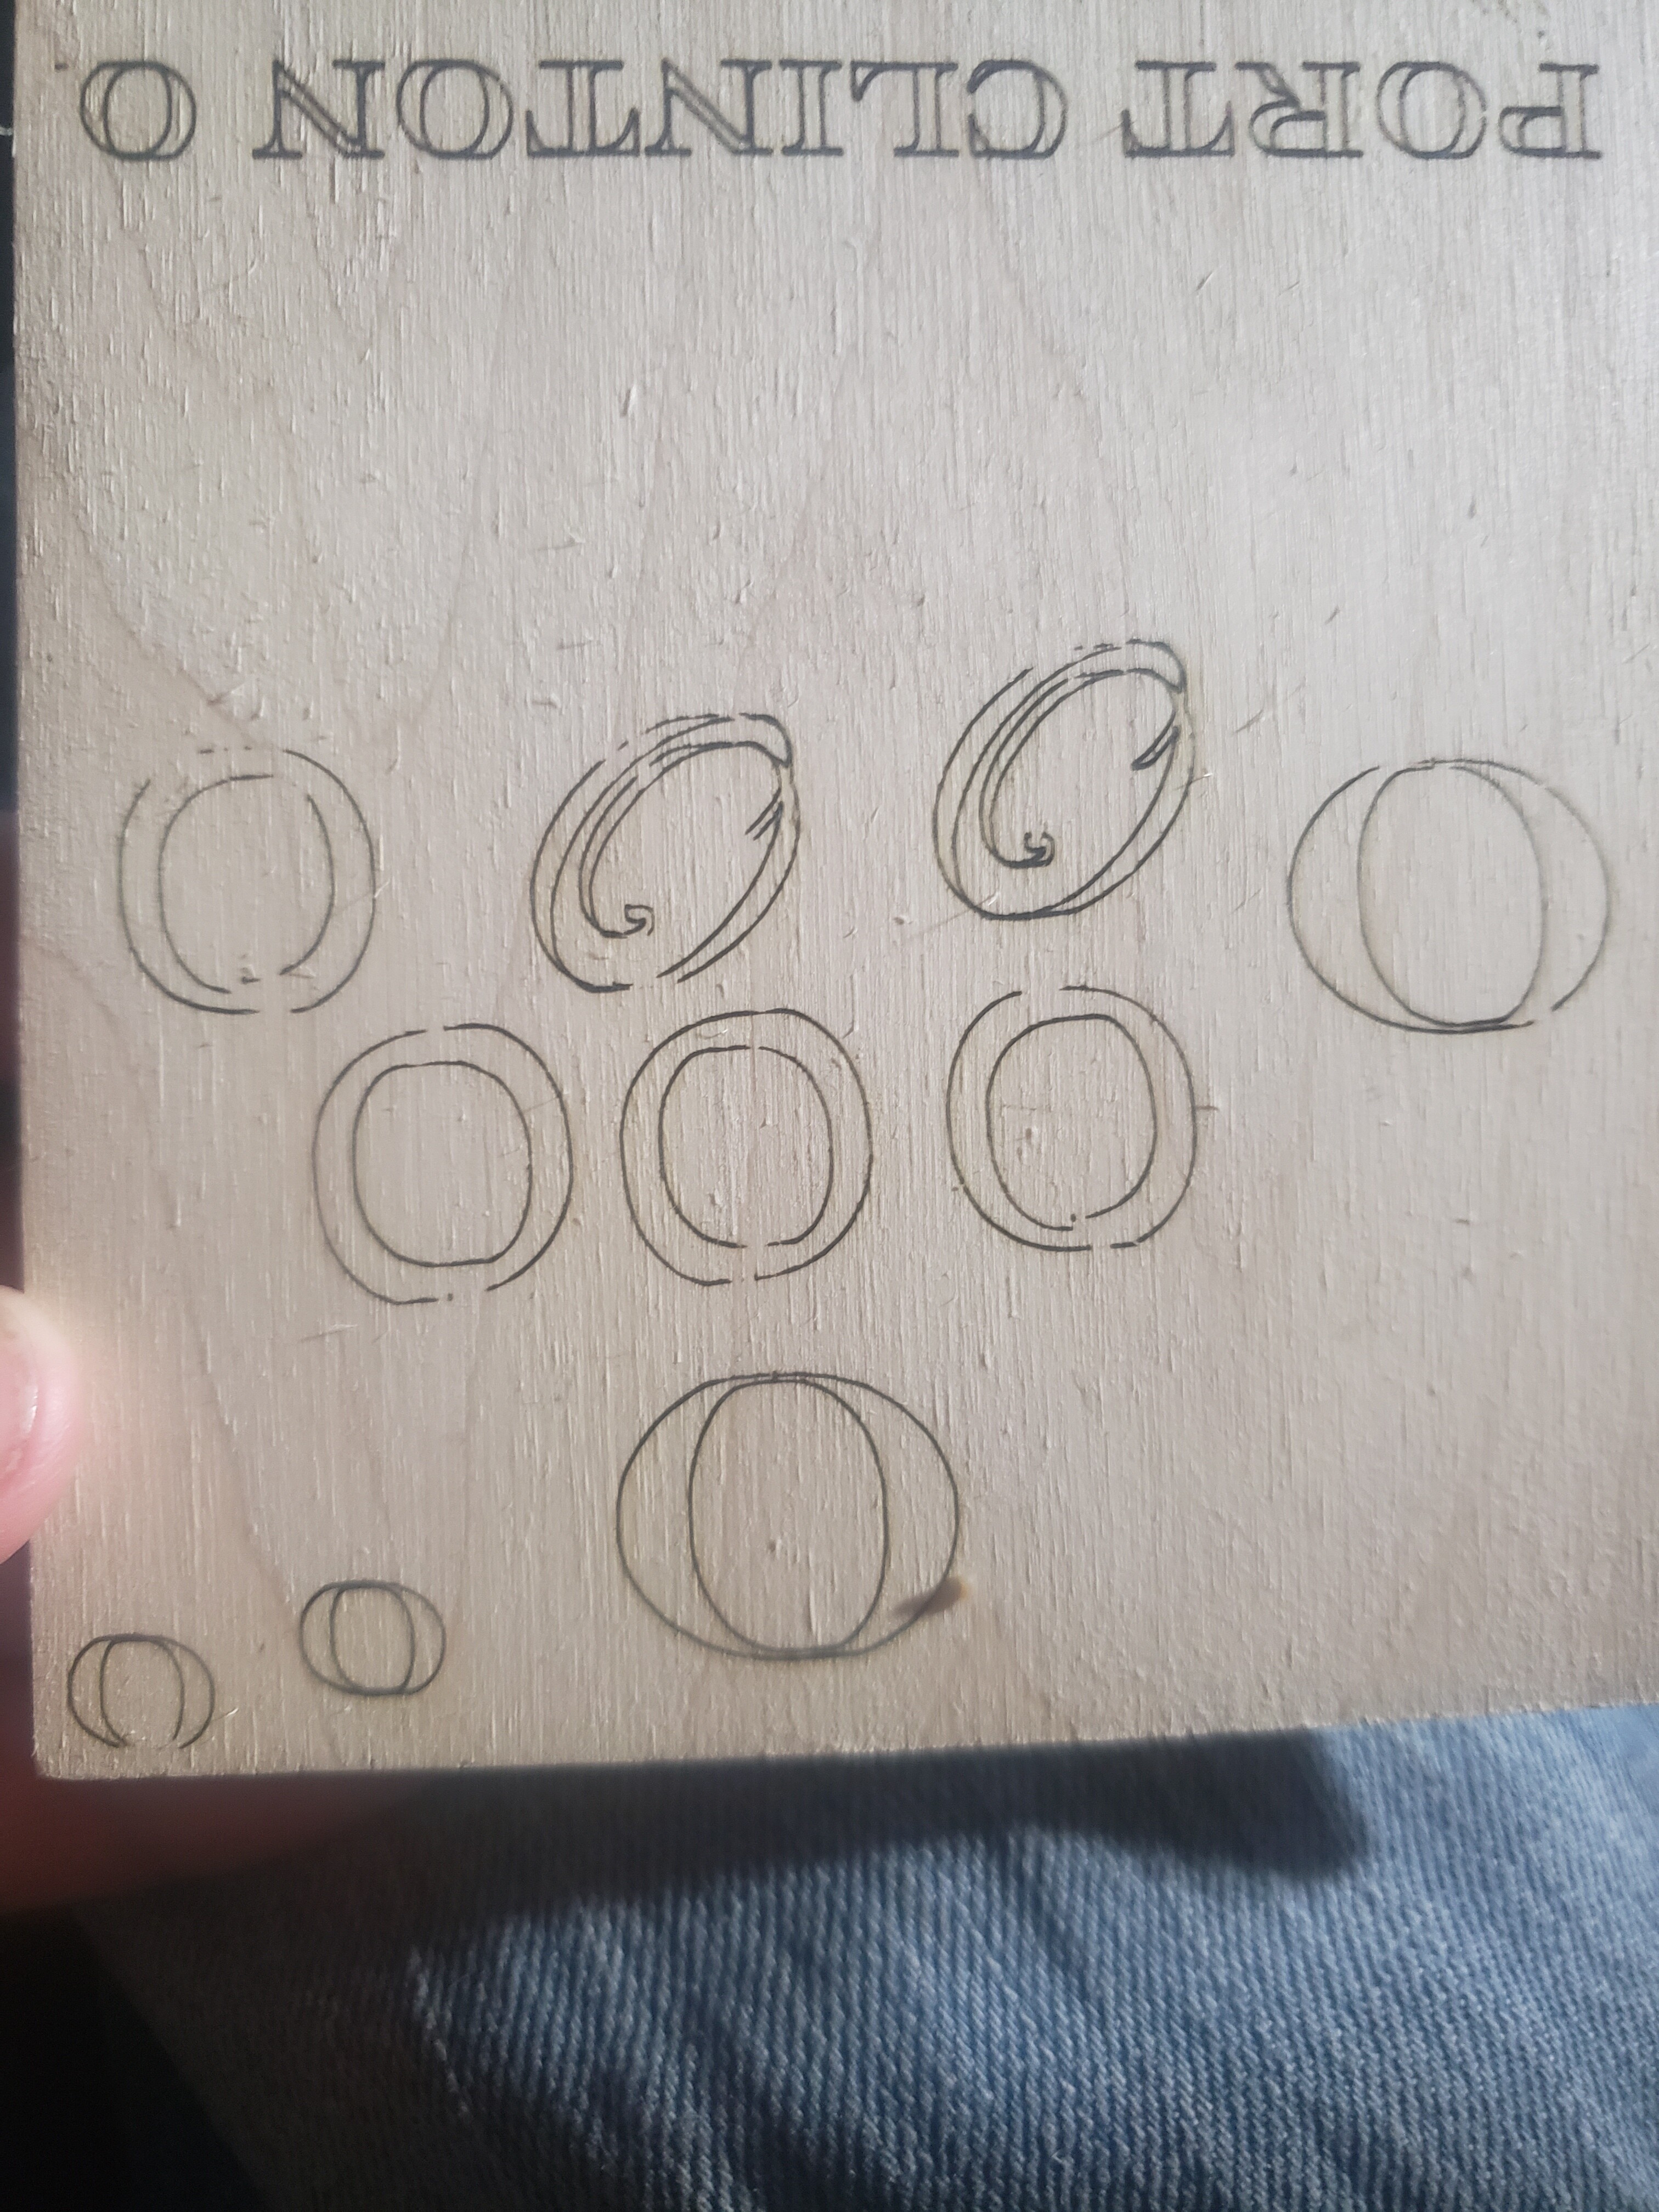
Trying to do letters and lines aren’t perfectly straight. “O” isn’t closing. Neither are circles.
Is there more settings to check?
Got a pic?
It sounds like your machine steps/mm is out.
I would also move over to mm vs imperial. You suffer rounding losses on 8-bit machines, which can have visible effects on the motion.
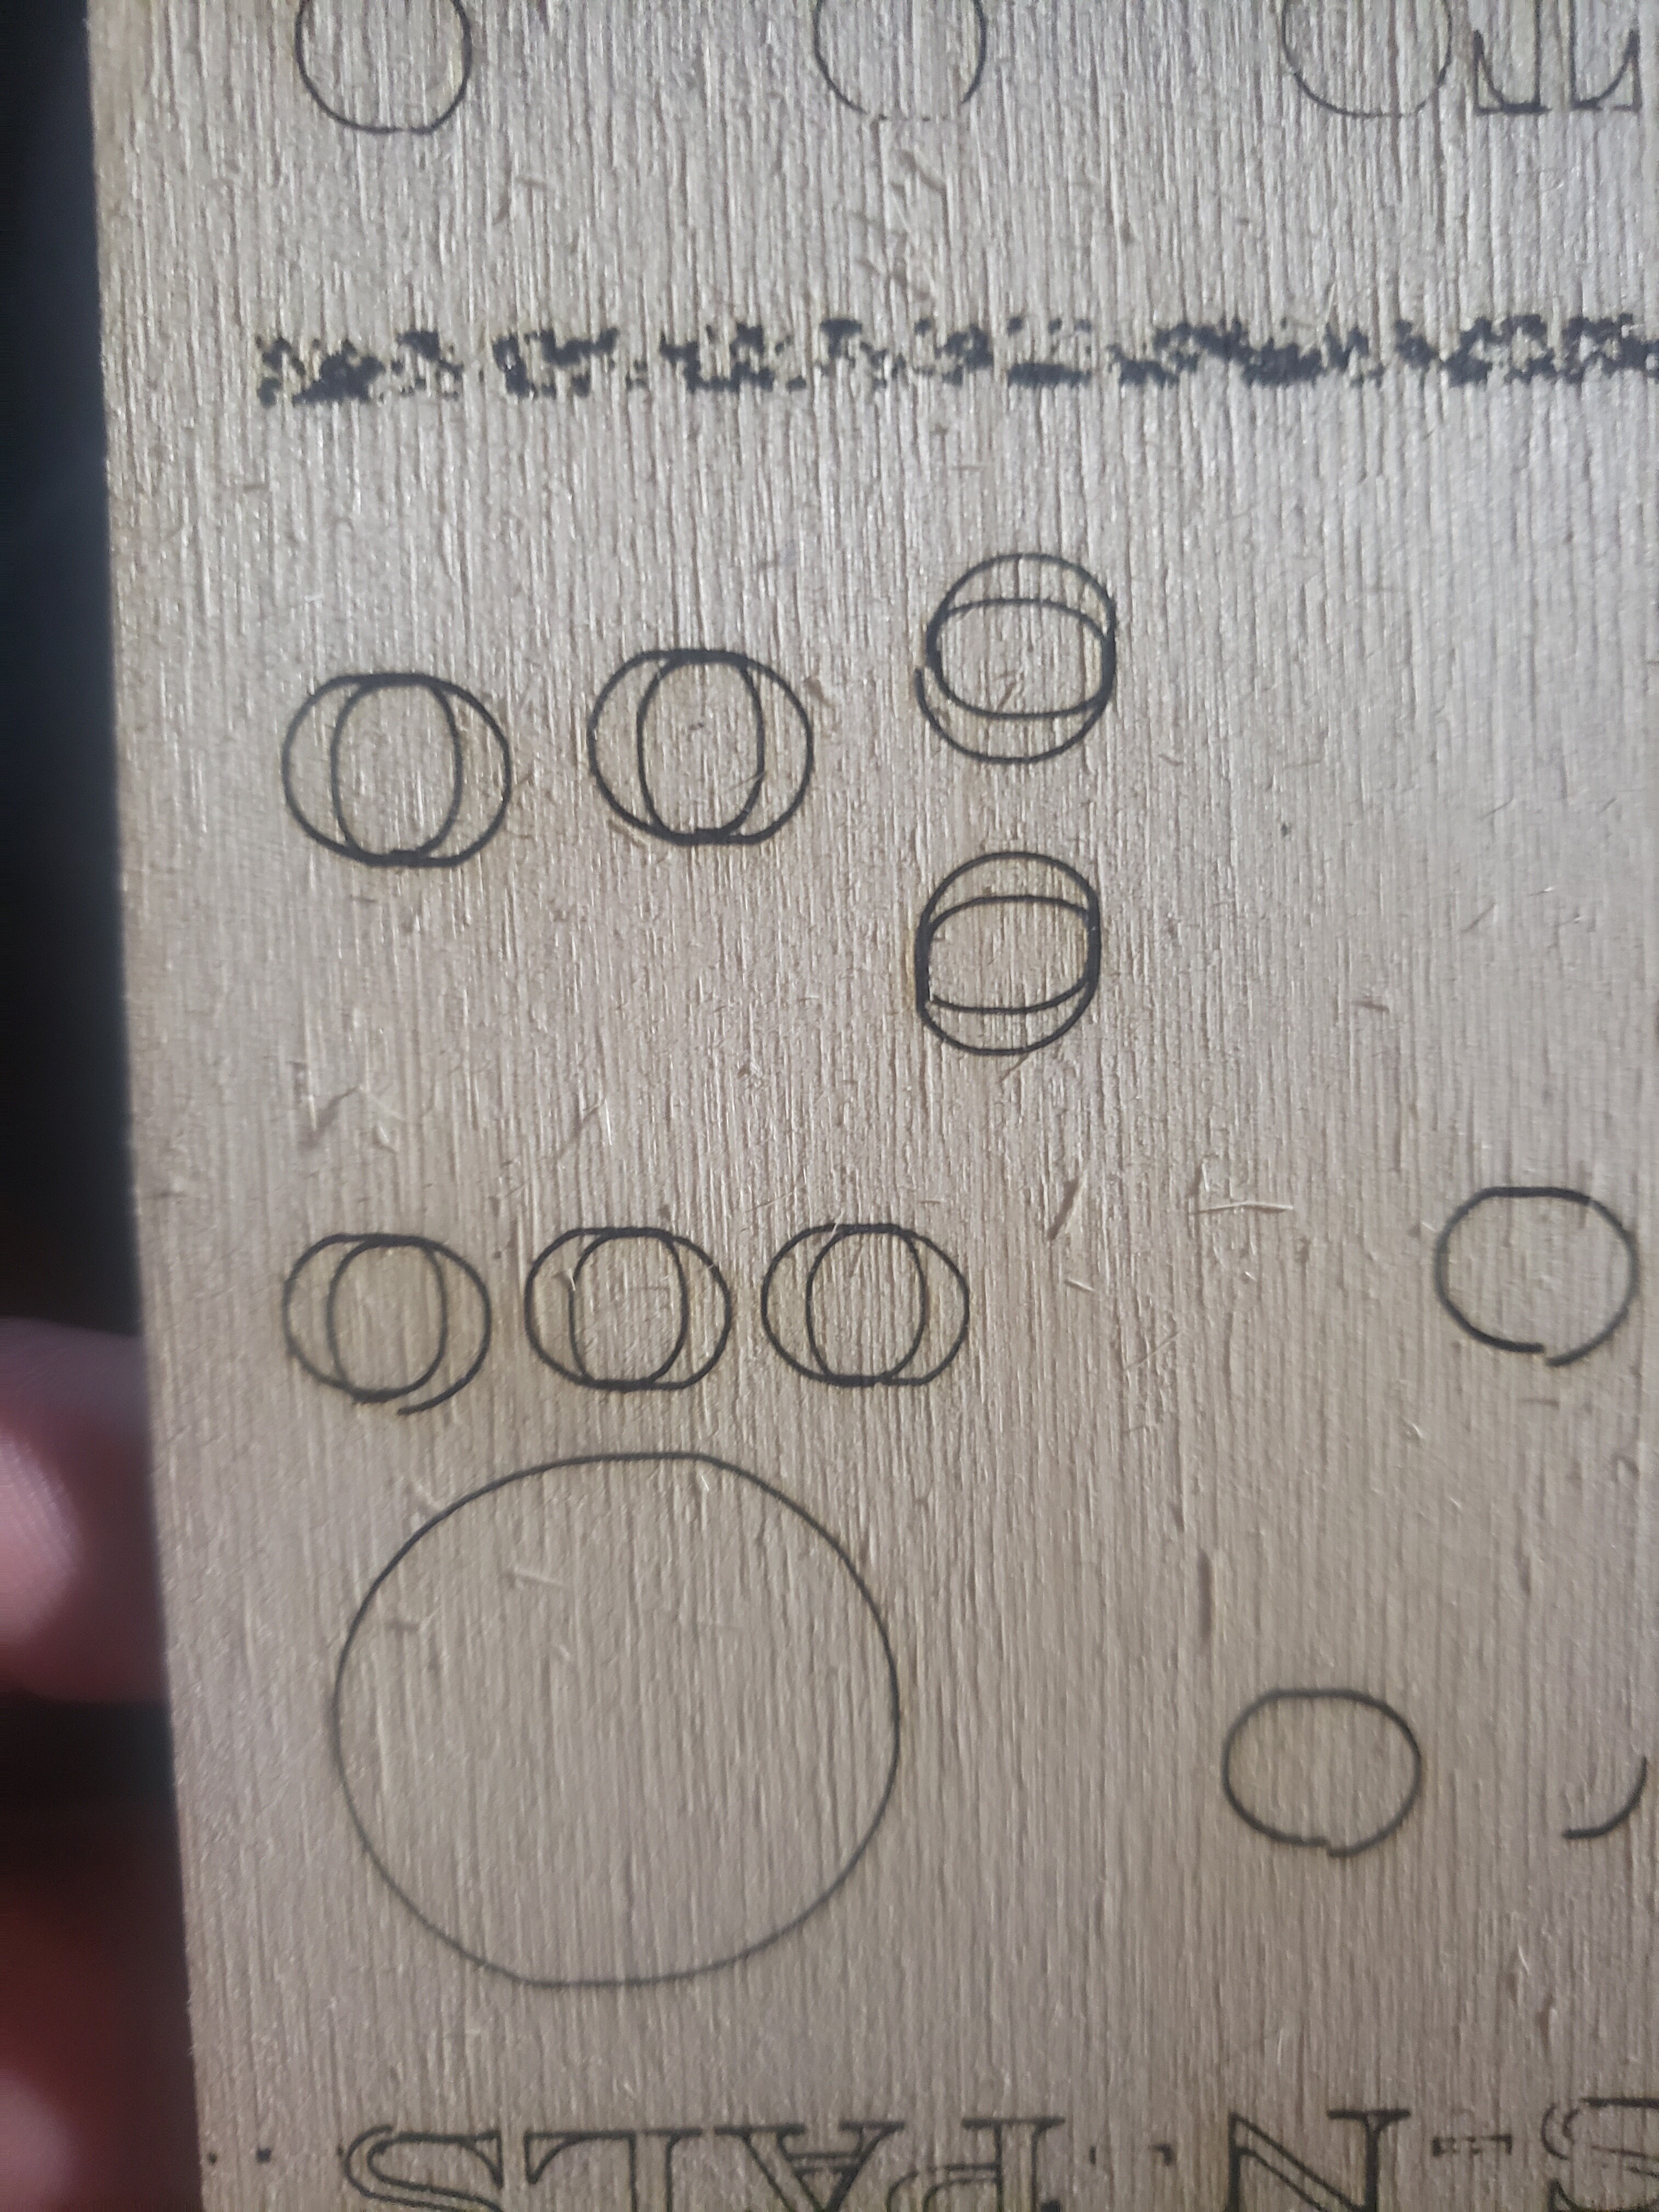
The radius of the two ends of that shape are very different. If they’re meant to be the same, you have mechanical issues and/or x/y step disparity issues.
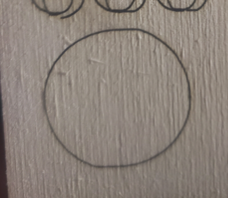
That object is showing evidence of mechanical slop.
New at this. Trying to tune it in. Basically going off everyone’s advice. Till I found lightburn and found more useful information. So I dont know where exactly to start checking. I Calibrated x and y. Jogged it 1 inch. It went 2. (Did it all in mm though on the machine). Changed 100-101 values. Jogged it again, then 4 inch. And it came out pretty darn close. OCD so I took my time. Probably a bad hobby to be ocd with im sure. Lol
But yes I was just making “O” and circles. Thats it. The O was all same but for the two fancy ugly ones. I started changing x and got it to close but their still not complete stright. Still looks oblong to me. Flat spots on the top and bottom. Like Y meant the end of the path before X made it to its own spot. Like Y is traveling faster is what I’m trying to ask?
Yes, that’s exactly it - to make a circle it has to be spot-on mechanically and in step settings.
You can’t measure steps/mm by eye. You need a digital micrometer. Being out a few steps will be cumulative over the job.
I use a $10 set of digital callipers - hold them onto the X-gantry somehow (cable ties, in my case), extend them as far as you can, move the head up against them, zero them, then move a predetermined amount (usually 50mm, in my case) - rinse and repeat until you are hitting 50mm ± 0.01mm
I used a fine line ruler. Not that good with my eye. Lol
…which is why you need to invest in a set of digital callipers.
and you need to calibrate both axes in both directions - to find/account for slop in the mechanicals.
That very much looks like the symptoms of backlash. Probably a loose belt or toothed pulley.
Turned backlash on, fixed it a little. Tighten the belts, came out better. But still not what I want it to look like. I did find out I forgot to turn $32=1. Forget the name of the setting. But has something to deal with the laser and speed or something. Images come out fine. Just the radius of the circles and O so far.
Did you check the setscrew on the toothed pulley, and maybe check the mounting bolts for the stepper motor?
The more recent versions of Grbl (1.1f and up) support two things that are incredibly useful for lasers. The first is Laser Mode, enabled by setting $32=1 in the firmware settings. Laser mode eliminates the pauses that happen when changing power output, because Grbl knows it’s controlling a laser which reacts instantly, instead of waiting for a spindle to change RPM.
When I get home, im gonna take it apart, clean the belts and bearings and check for damaged teeth. But I did tighten belts and set screws last night.
I had it on once, but seems everytime i close the program and reopen it. I have to reset 32 to 1
We have seen versions of GRBL that ships with some lasers resets itself to “factory settings” instead of retaining the state like other versions of GRBL. If this is the case, you’d need to re-run the “set for laser” macro when you reset it or flash your control board with a non-proprietary version of GRBL, if possible.
This topic was automatically closed 30 days after the last reply. New replies are no longer allowed.