I am trying to cut out complex shapes on a sign board and want to keep the profile and inner details. For example, a cactus and not have everything fall out and only leave the outline.
If I understood correctly and without a concrete example to evaluate, I suggest using “tabs”.
Thank you for your response. I have tried tabs and did not achieve the result I wanted.
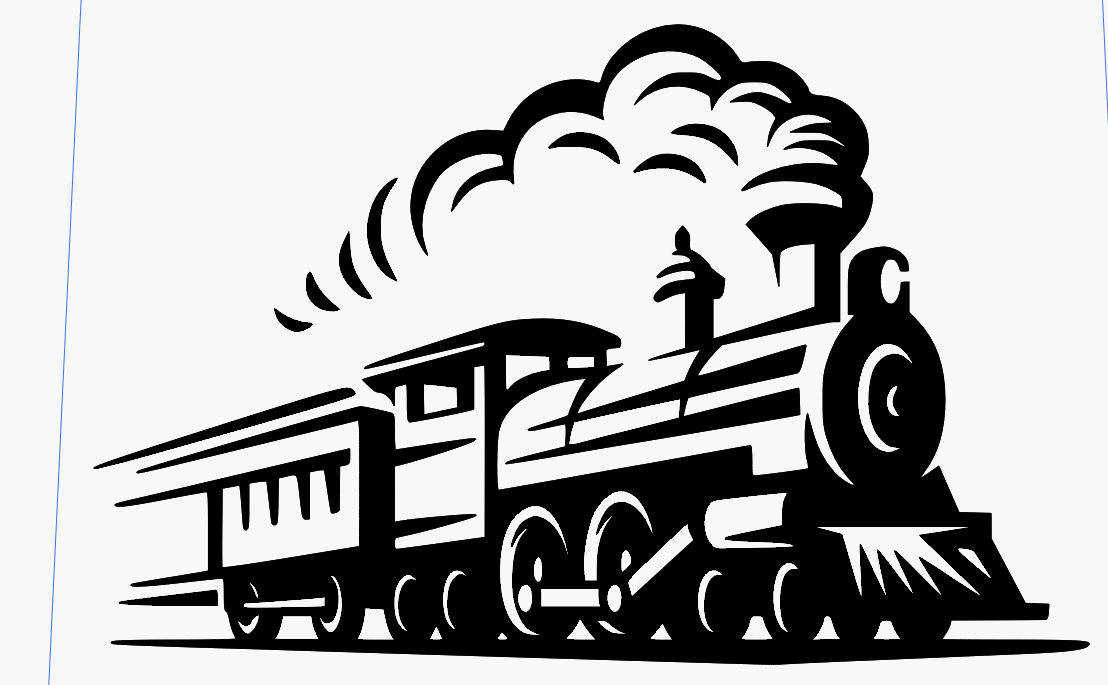
Below is what I am working on at the moment. A train silhouette as shown in the in the “ai” tab. What I am getting is shown in the other 3 photos.
I have tried putting a wedge through the train at several points and then welded it but that did not work either.
Your thoughts would be GREATLY appreciated.
Clifford


RAILROAD PYLON.lbrn2 (125.6 KB)
You will need to manually create bridges of some sort. Something like this.

At a minimum, all the parts I have marked will need to be joined to the surrounding area in order to not fall out.

The way I tell what will fall out and what will stay is to put it in fill mode, then I can see that anything black will fall out, anything white that is totally surrounded by black will also fall out and needs to have some kind of bridge to nearby white area.
I think this image will lose much of it’s integrity if you create all the necessary bridges. It’s probably better suited for engraving rather than cutout.
If you’ve already tried the “tabs” and it doesn’t work the way you want, the matter becomes more personal. More to each person’s taste. I have two suggestions but I’ve never tried them so I don’t know exactly what the result will be.
1st suggestion is more laborious and involves editing nodes manually.
2nd suggestion is more of an idea than a suggestion per se, which would be to select “remove overlaping lines” in “Optimization Settings” in the “Laser” window and set a value that would eventually eliminate lines to be cut at the defined distance. But I have never tested this hypothesis.
Could you engrave the pattern onto the backboard then apply glue to the areas where pieces are to remain.
Fix the front board to the backboard and cut…having already calibrated the power and speed to just the right depth.
Thank you for you insight.
That is something I will consider. Thank you!!
Never thought of that. Thank you!!
2 Likes
I did a project that necessarily had a boatload of loose, unconnected pieces:

There was no way for me to connect all the leaves without completely destroying the art, so I didn’t even try. Instead, I took the design, inset the lines by a millimeter, and lightly engraved that onto a background board (which I also cut out to a circle). Then I cut the loose pieces out of thin walnut plywood and wood glued them individually to the engraved pattern before adding a lacquer top coat.
It was a bit tedious and certainly not the right approach for every project, but by engraving the pattern and then gluing the loose pieces to it, I got precisely the result I wanted. Also, since the walnut pieces didn’t have to be in any particular layout, I managed to cut them all out of one 300mm square (much smaller than the finished piece).
4 Likes
Thank you. That is a beautiful composition. I should have added more detail to my project. Ultimately my profile is to be cut out of steel and go on a 18 foot pylon. I can use your idea on some of my wood projects.
Hmm… that adds some constraints. Best I can think of off the top of my head would be to use the legendary “third dimension” I don’t often resort to. If you had the design, complete with falling-out bits, you could also cut some… comb strips?.. that would make all the connections behind the plane of the sign. In extremely low-quality illustration, something like this:

The “points” would reach forward to touch the separate pieces, which would be welded to the “combs” at those pokey-outy bits. That would keep the plane of the design clear, but with structure behind it to hold everything together (and be used to mount it to its mounting location). The “bites” out of the comb would keep visual separation between the structurally-required background framing and the visually-intended foreground plane. For that train design, if you need to use multiple combs to tie it together, you can also align them with the motion/perspective lines to add to the visual appeal.
Painting or powder-coating the combs/structural mounting while using a different surface finish/treatment on the foreground plane could help it pop. If it needed to be a double-sided design, the same general concept could be used, but it works especially well for single-sided designs that are mounted to a backing surface, with the foreground plane “floating” in front of the substrate by your chosen comb “depth”.
Anyway, not sure whether these concepts would be useful for you and your design, but I’ve used them on some of my wood signs with box-joint-style tabs or just glue and pin nails standing in for welding to attach the combs.
2 Likes
Your input is greatly appreciated. THANK YOU!!
Assuming you are using a CO2 laser with a blade bed, I use a honeycomb insert. I have two 4x6 panels of the stuff that came with a laser that did not pan out- local pickup only ![]()
They are available in different sizes and in alum and steel [magnets can be helpful]