Hi all! So my y axis scan offset is about 0.25% off. When I adjust for this in light burn, then Y is corrected, but the offset then becomes a problem on the x axis that was fine before. Is there a way to adjust scan offset for y axis only.
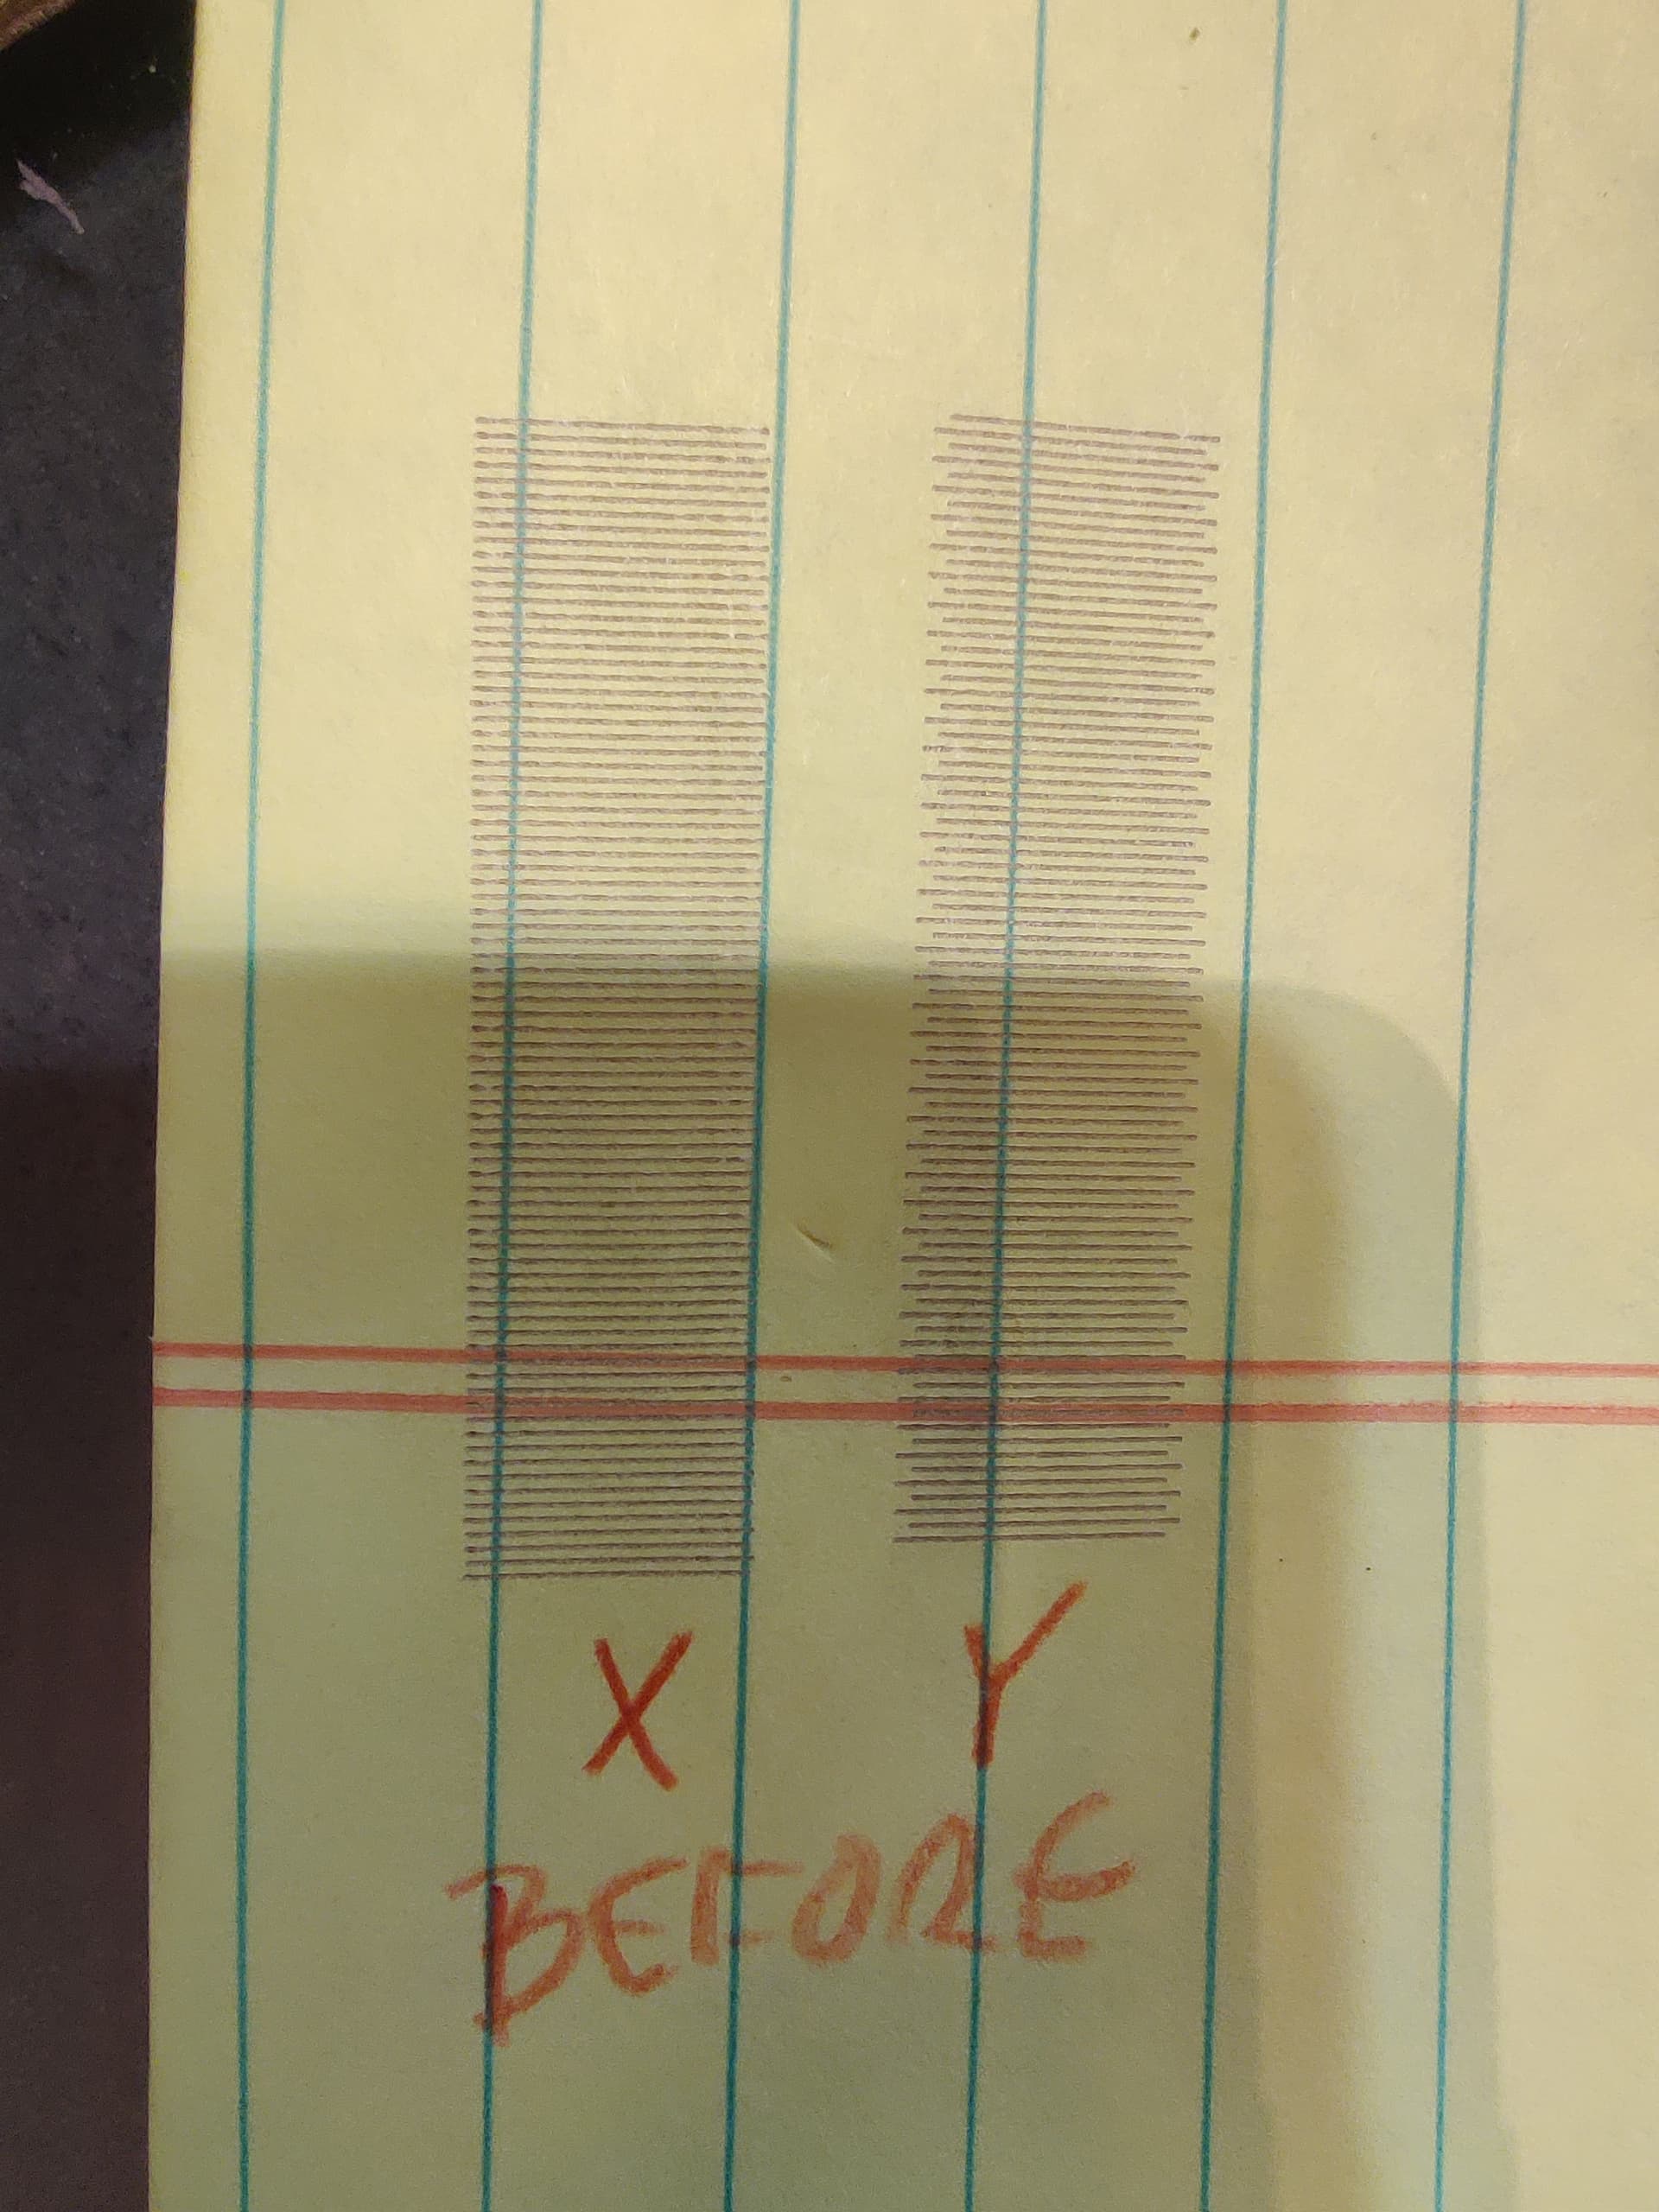
I noticed this when I tried to use the cross hatch feature as it is now, x and y did not align at all, as the Y burn is 0.25 percent lower and out of alignment. Almost looks like a drop shadow.
I don’t believe there’s any way to adjust X and Y scanning offset adjustment independently.
Is this for your Aufero laser? I’ve never known that laser to require an offset at all. I would suspect that you have actual mechanical backlash in your system rather than a system delay.
I’d suggest doing a thorough mechanical review particularly along the Y axis looking for any source of backlash and eliminating what you can. Then disable any scanning offset adjustment.
Thanks for the input. Yeah that is the first thing I checked…the Y axis is rock solid. Also, when printing out the fill to test the offset, there is not variation in the offset at all. Offset is normal on x and off by .25 on Y, and then after I do the adjustment, offset is normal on Y and off by .25 on X.
No mechanical slop on either axis. The problem only shows itself when using crosshatch, or after printing and then adjusting the print direction by 90 degrees to print over the first pass.
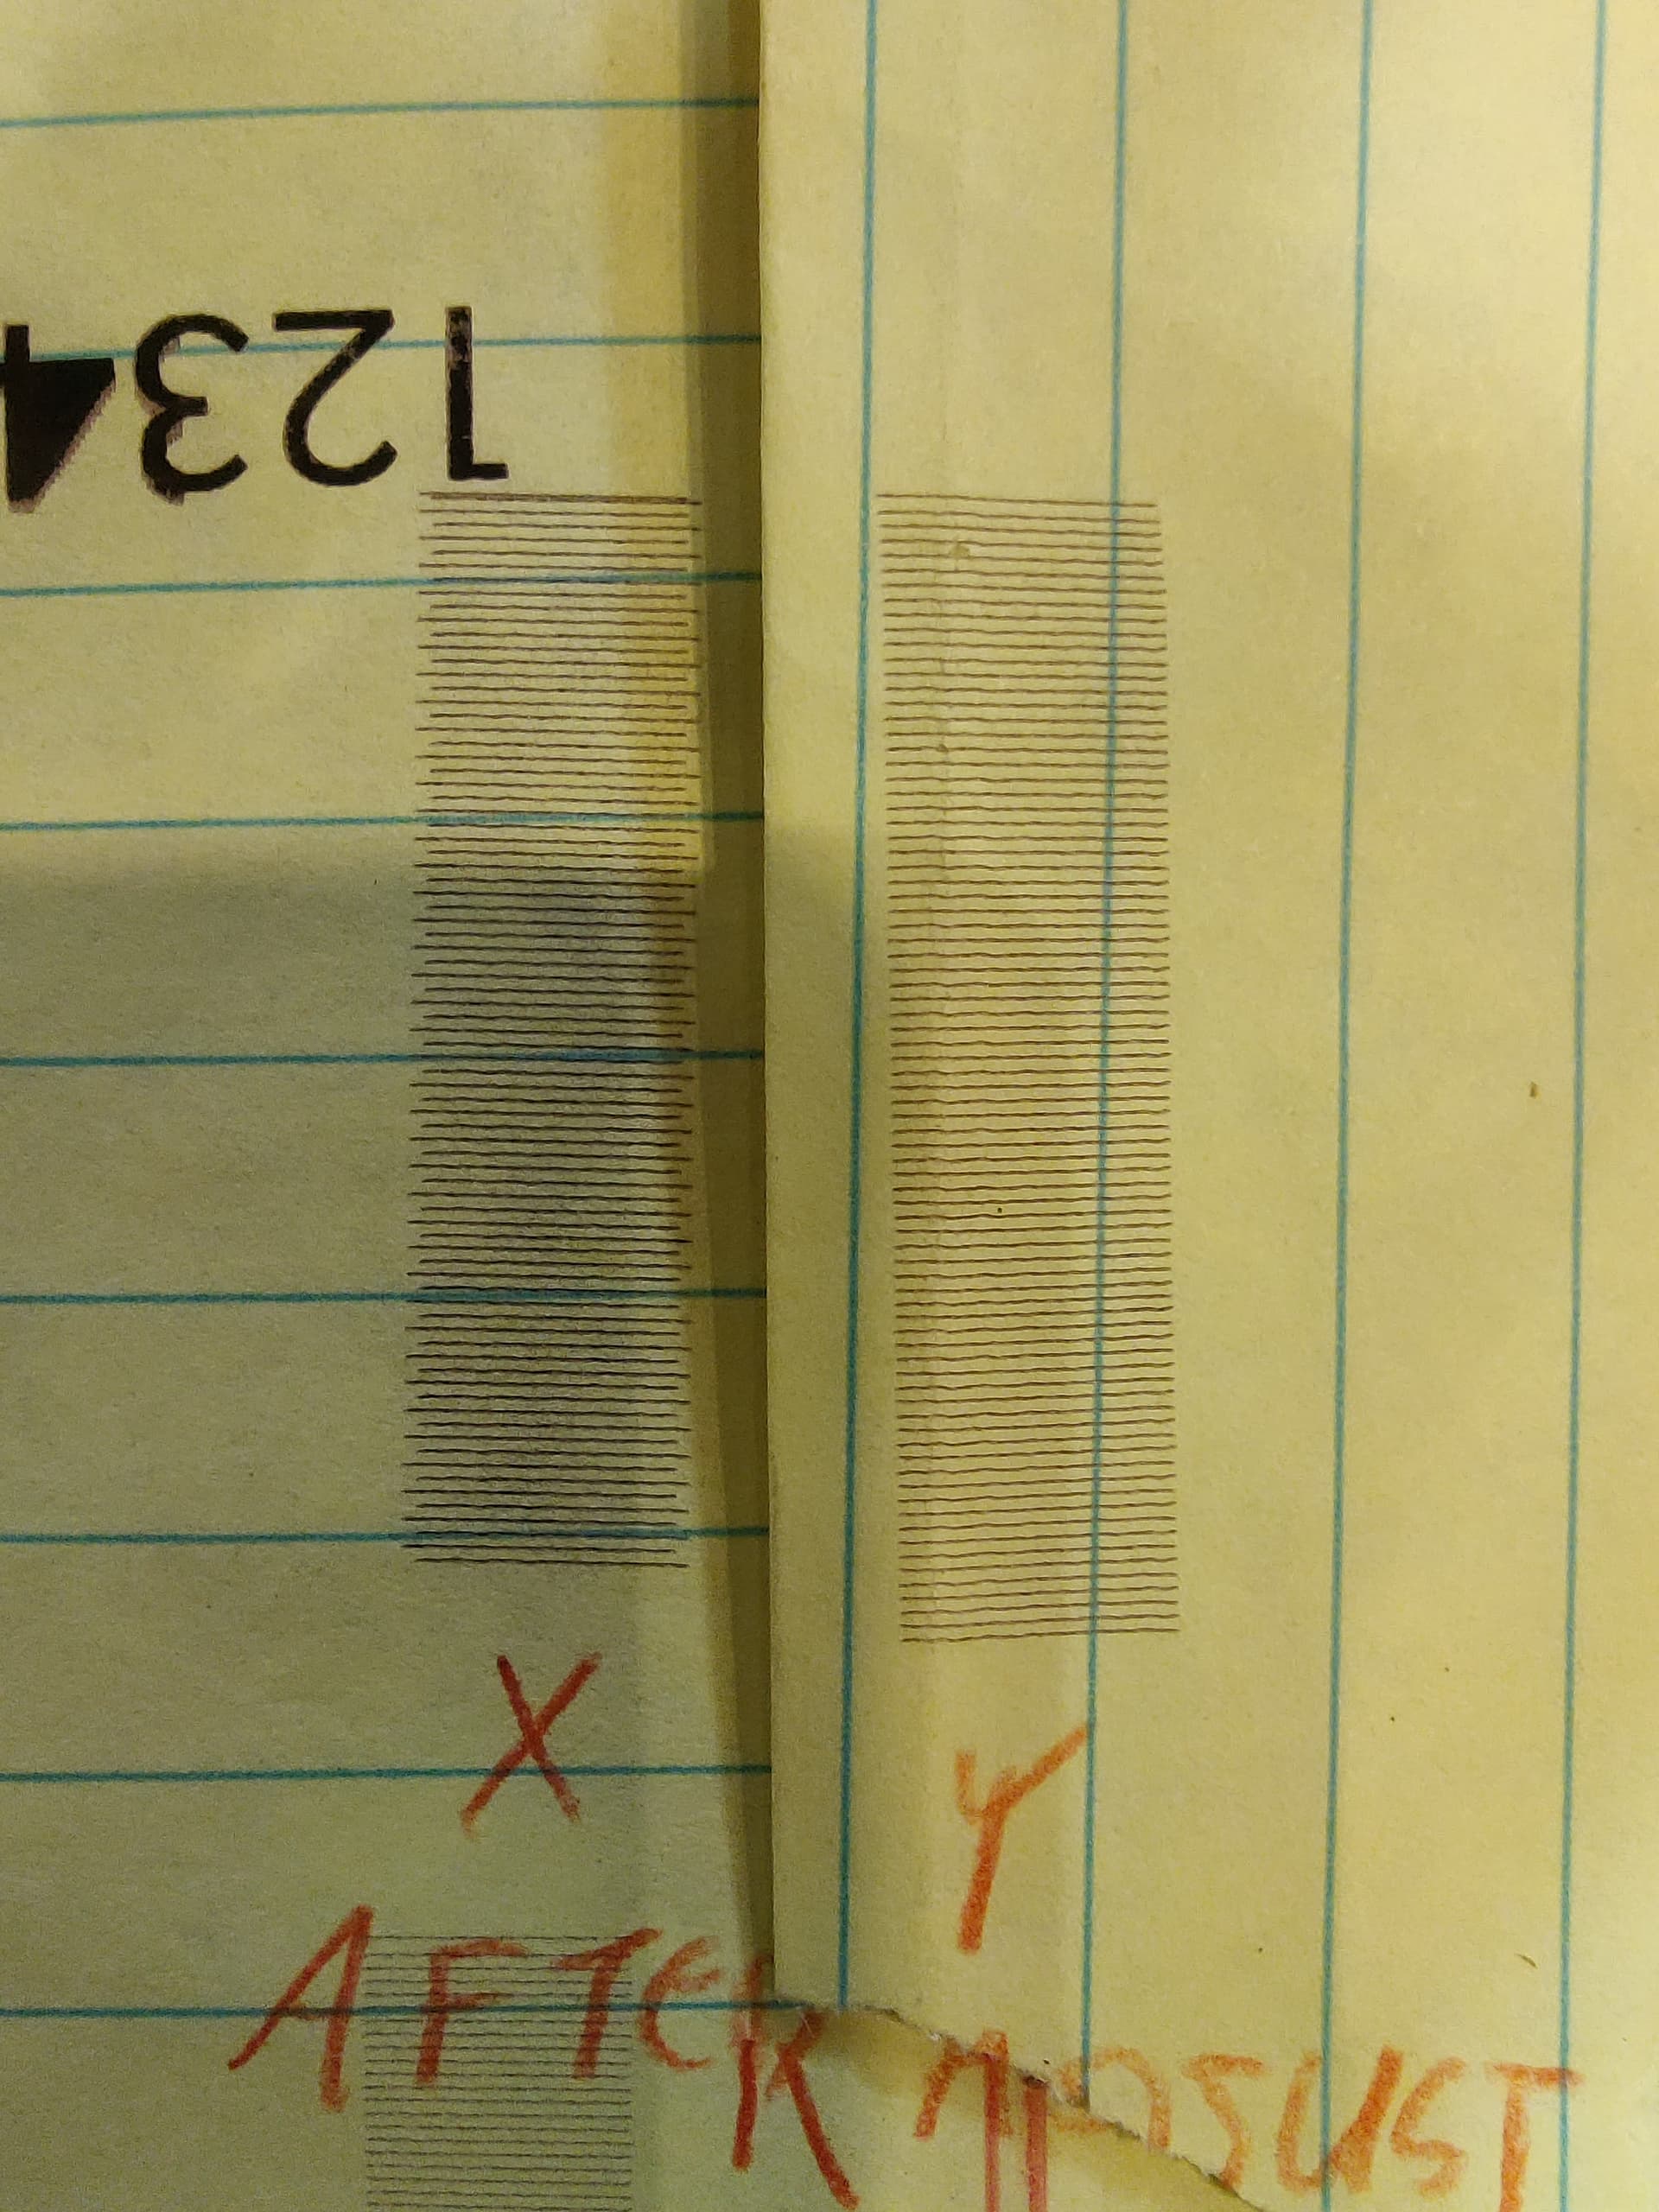
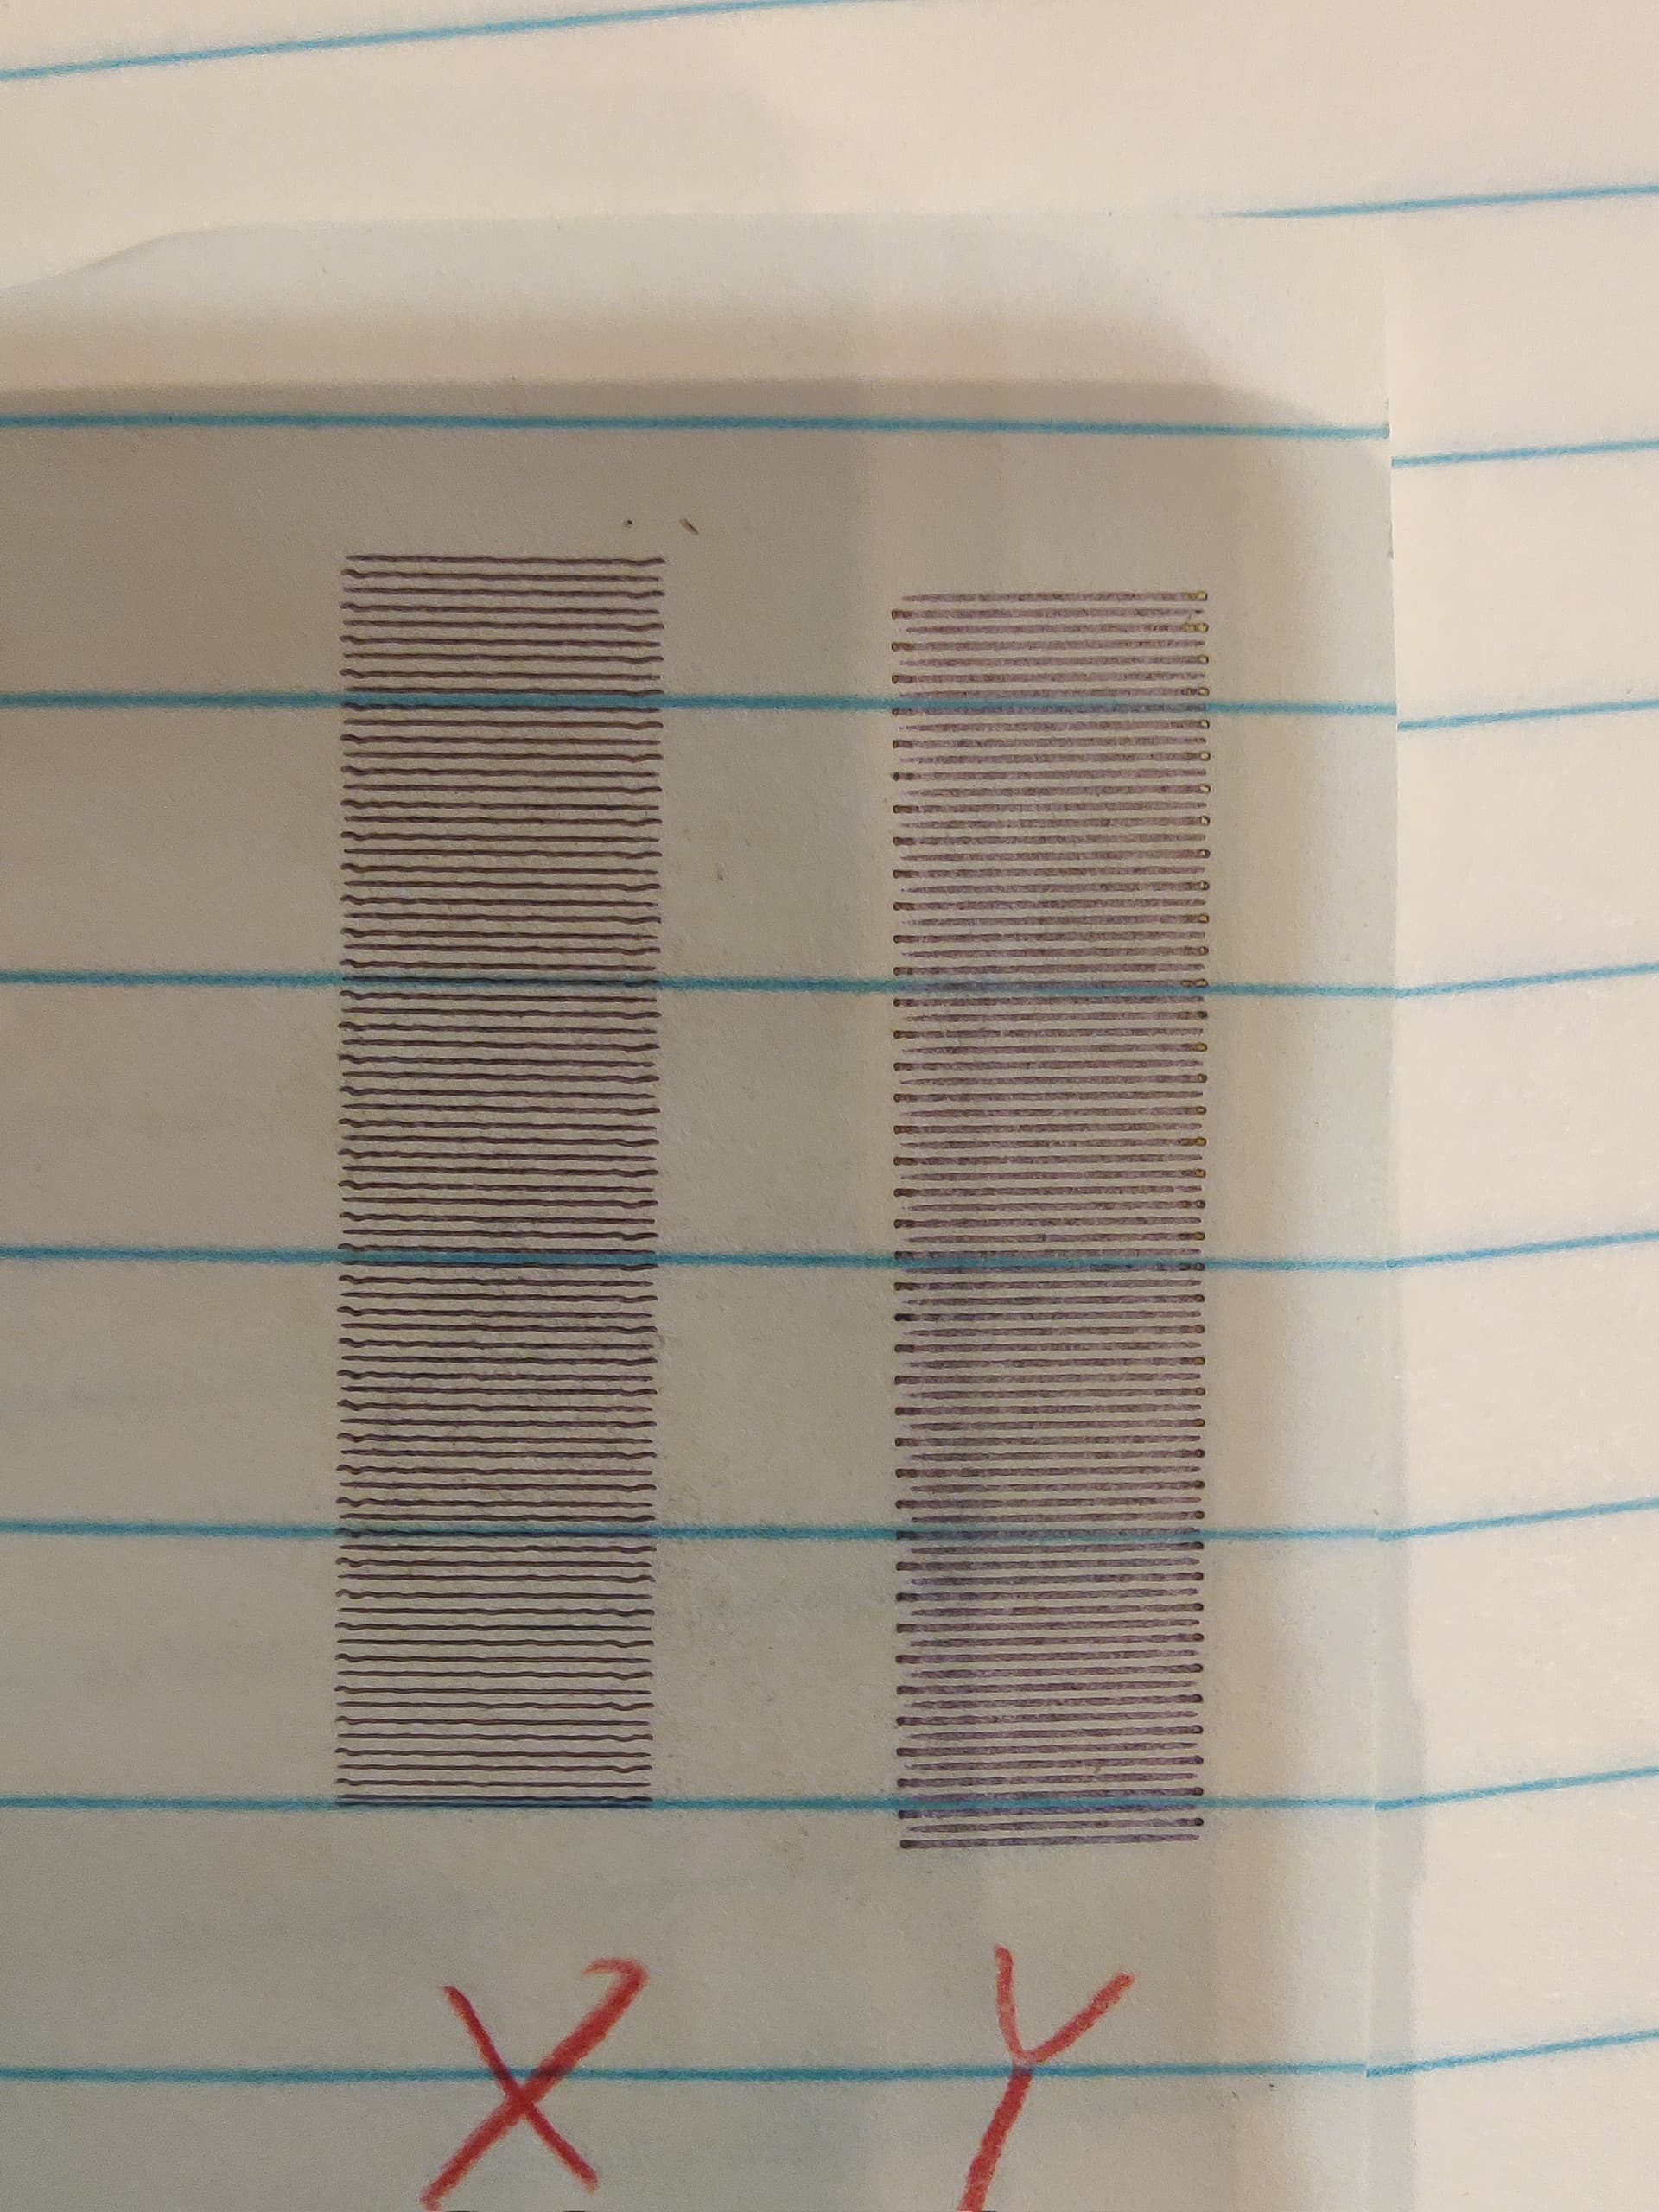
Here are shots of my tests for x and y. I turned the paper of course between testing each axis. When I put the .25 adjustment in light burn the results are the same, but reversed.
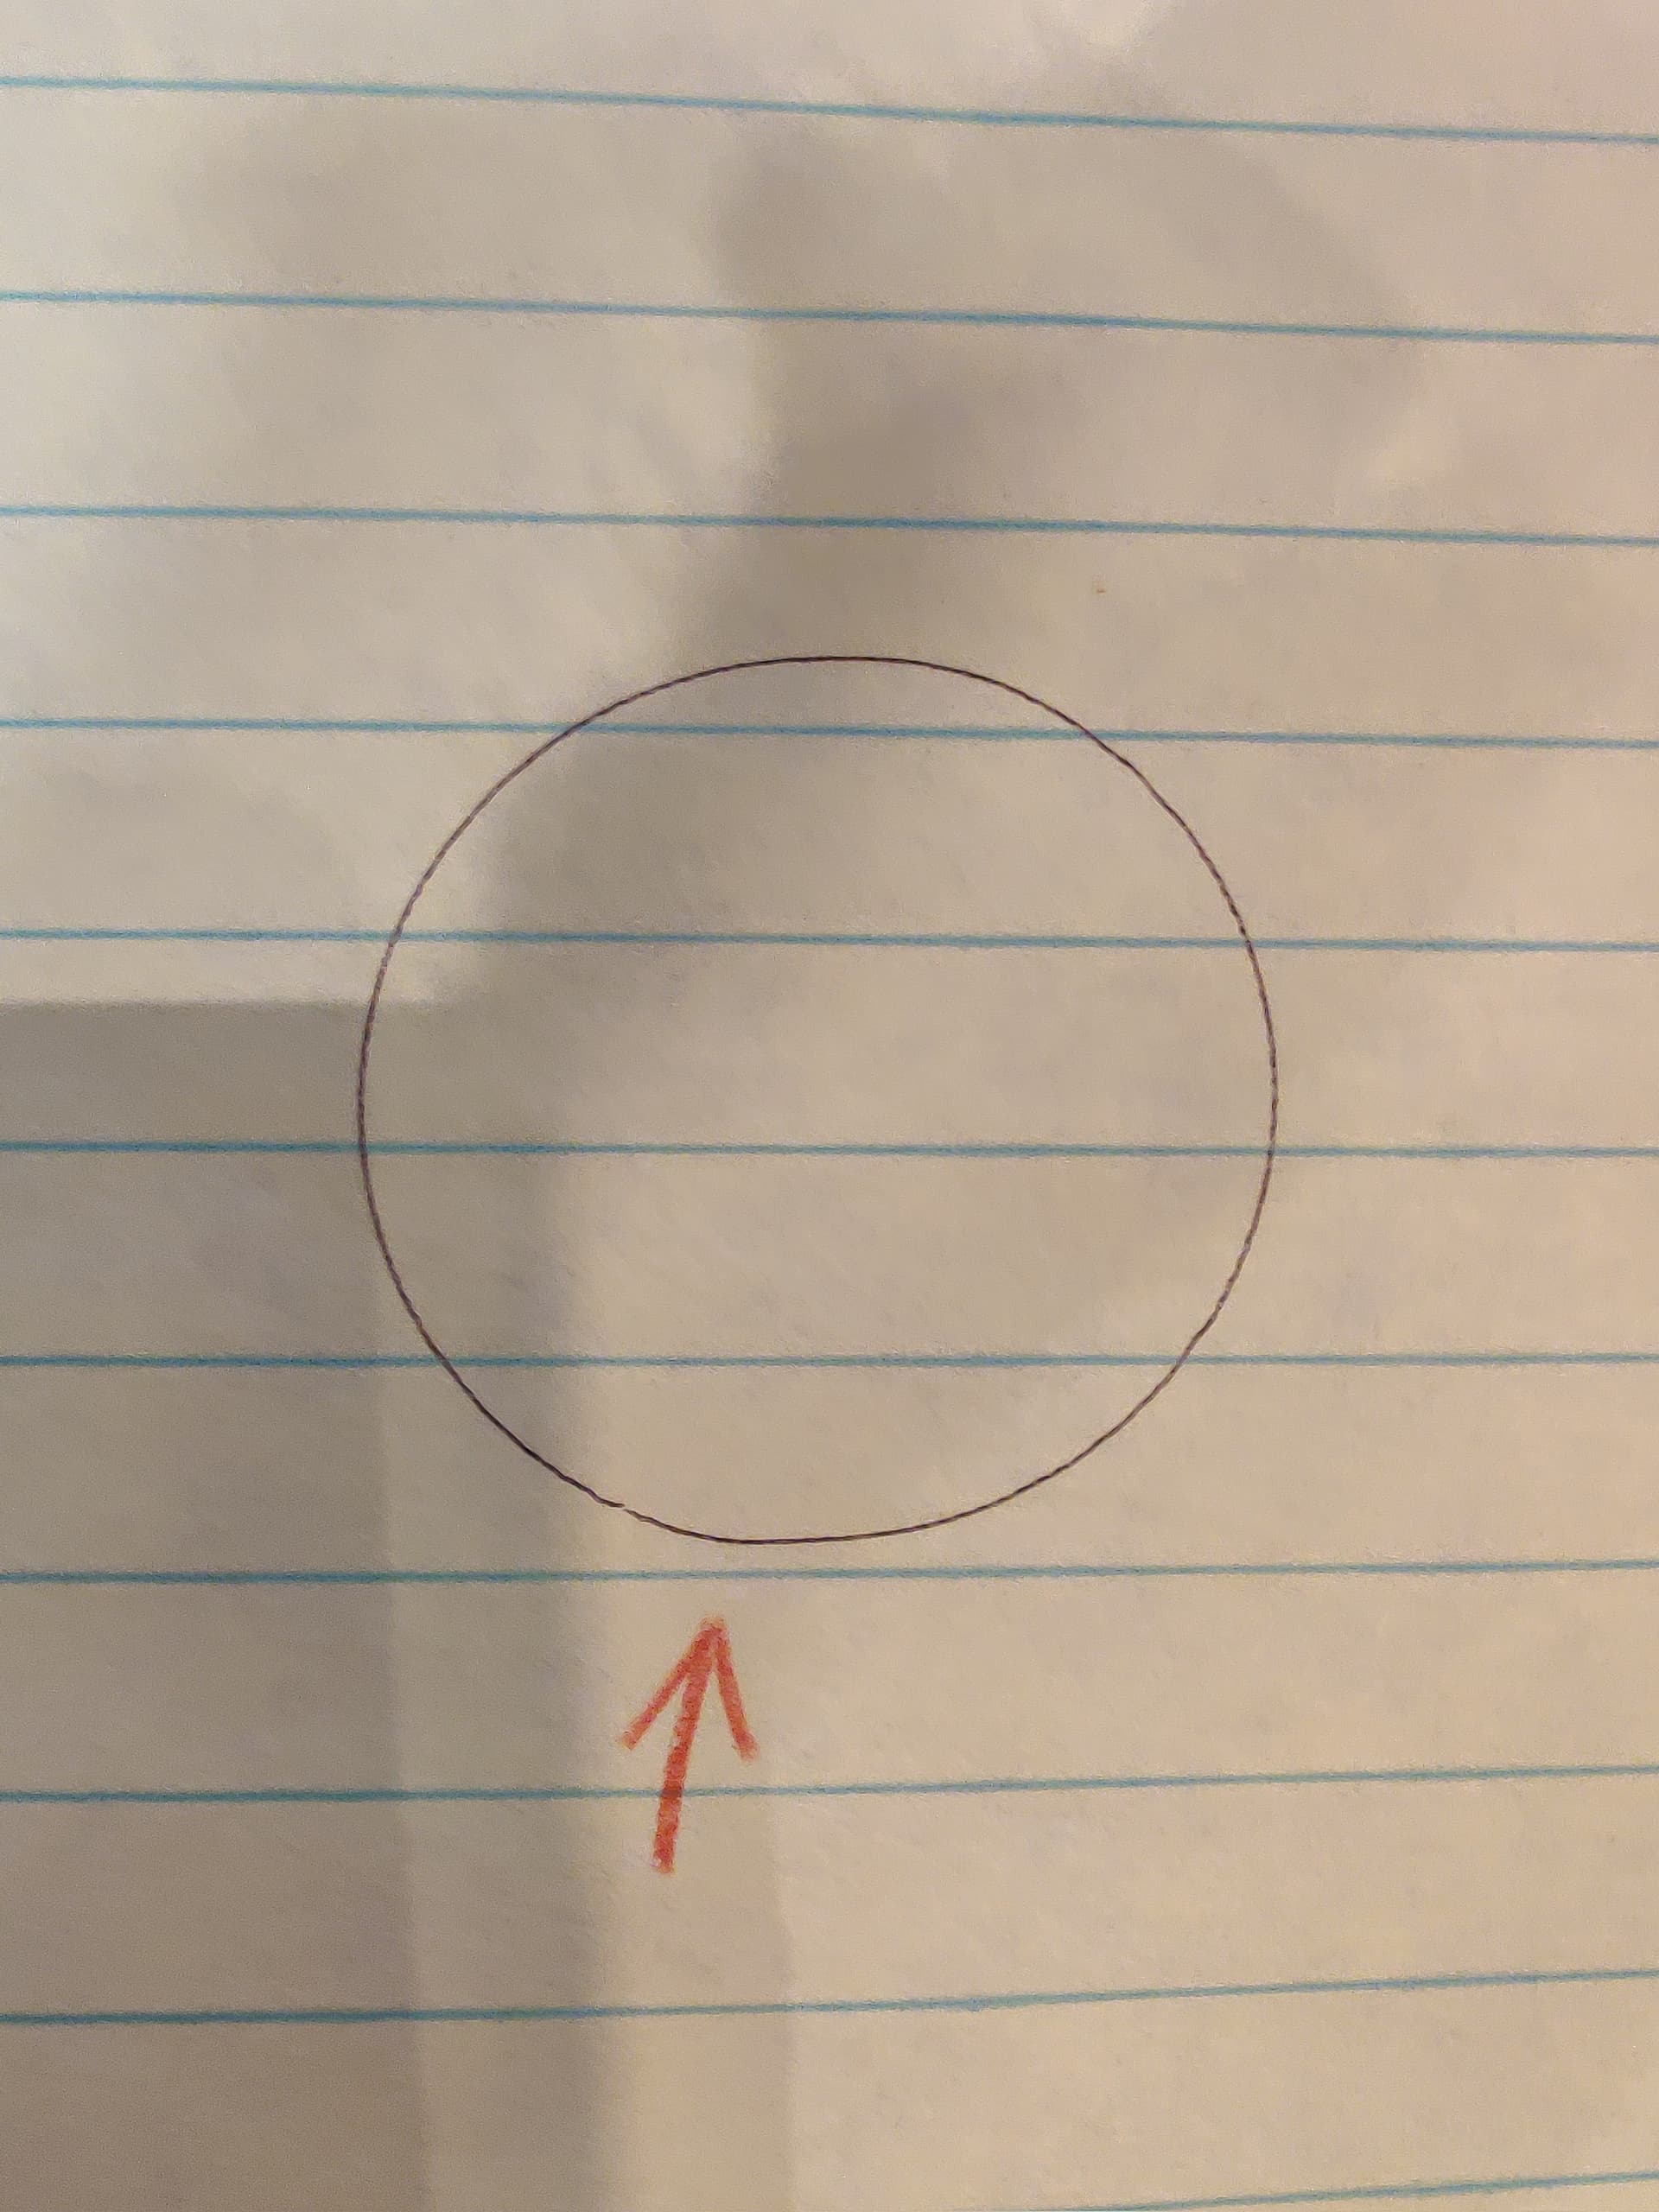
If you burn a circle do the ends of the circle meet? Make sure you don’t have “Hide backlash” enabled in Optimization Settings.
Can you check the model of the stepper motors and drivers? The drivers may be hard to check. I assume they’re the same but can never be sure. If the drivers and motors are the same I’d expect them to behave the same way.
Also, can you confirm that you’re on the latest firmware?
Thanks for your help on this, berainlb!
The printer is a week old and the steppers/drivers are factory. Aufero Laser 1 with the 5.5mw LF laser.
I just updated the firmware to the latest after your suggestion, and still getting the issue.
Printed the circle, and it almost touches, but looks a little flat at the bottom? Pic below.
The offset test is still doing the same thing as well…but maybe a tad less than before? Pic below.
The firmware also looks like it introduced some line wobble on X.
Based on the circle test it seems like there’s still likely some backlash in the system. I suggest reviewing again starting at the Y stepper motor. Check that the pinion gear is secured properly to the stepper shaft. There is likely one or two grub screws that are used to hold the gear in place. Make sure one is solidly tightened to the flat of the shaft. Then tighten the other.
Then follow the mechanical chain from gear to belt to any other linkage all the way to the X gantry and test and eliminate every last bit of backlash.
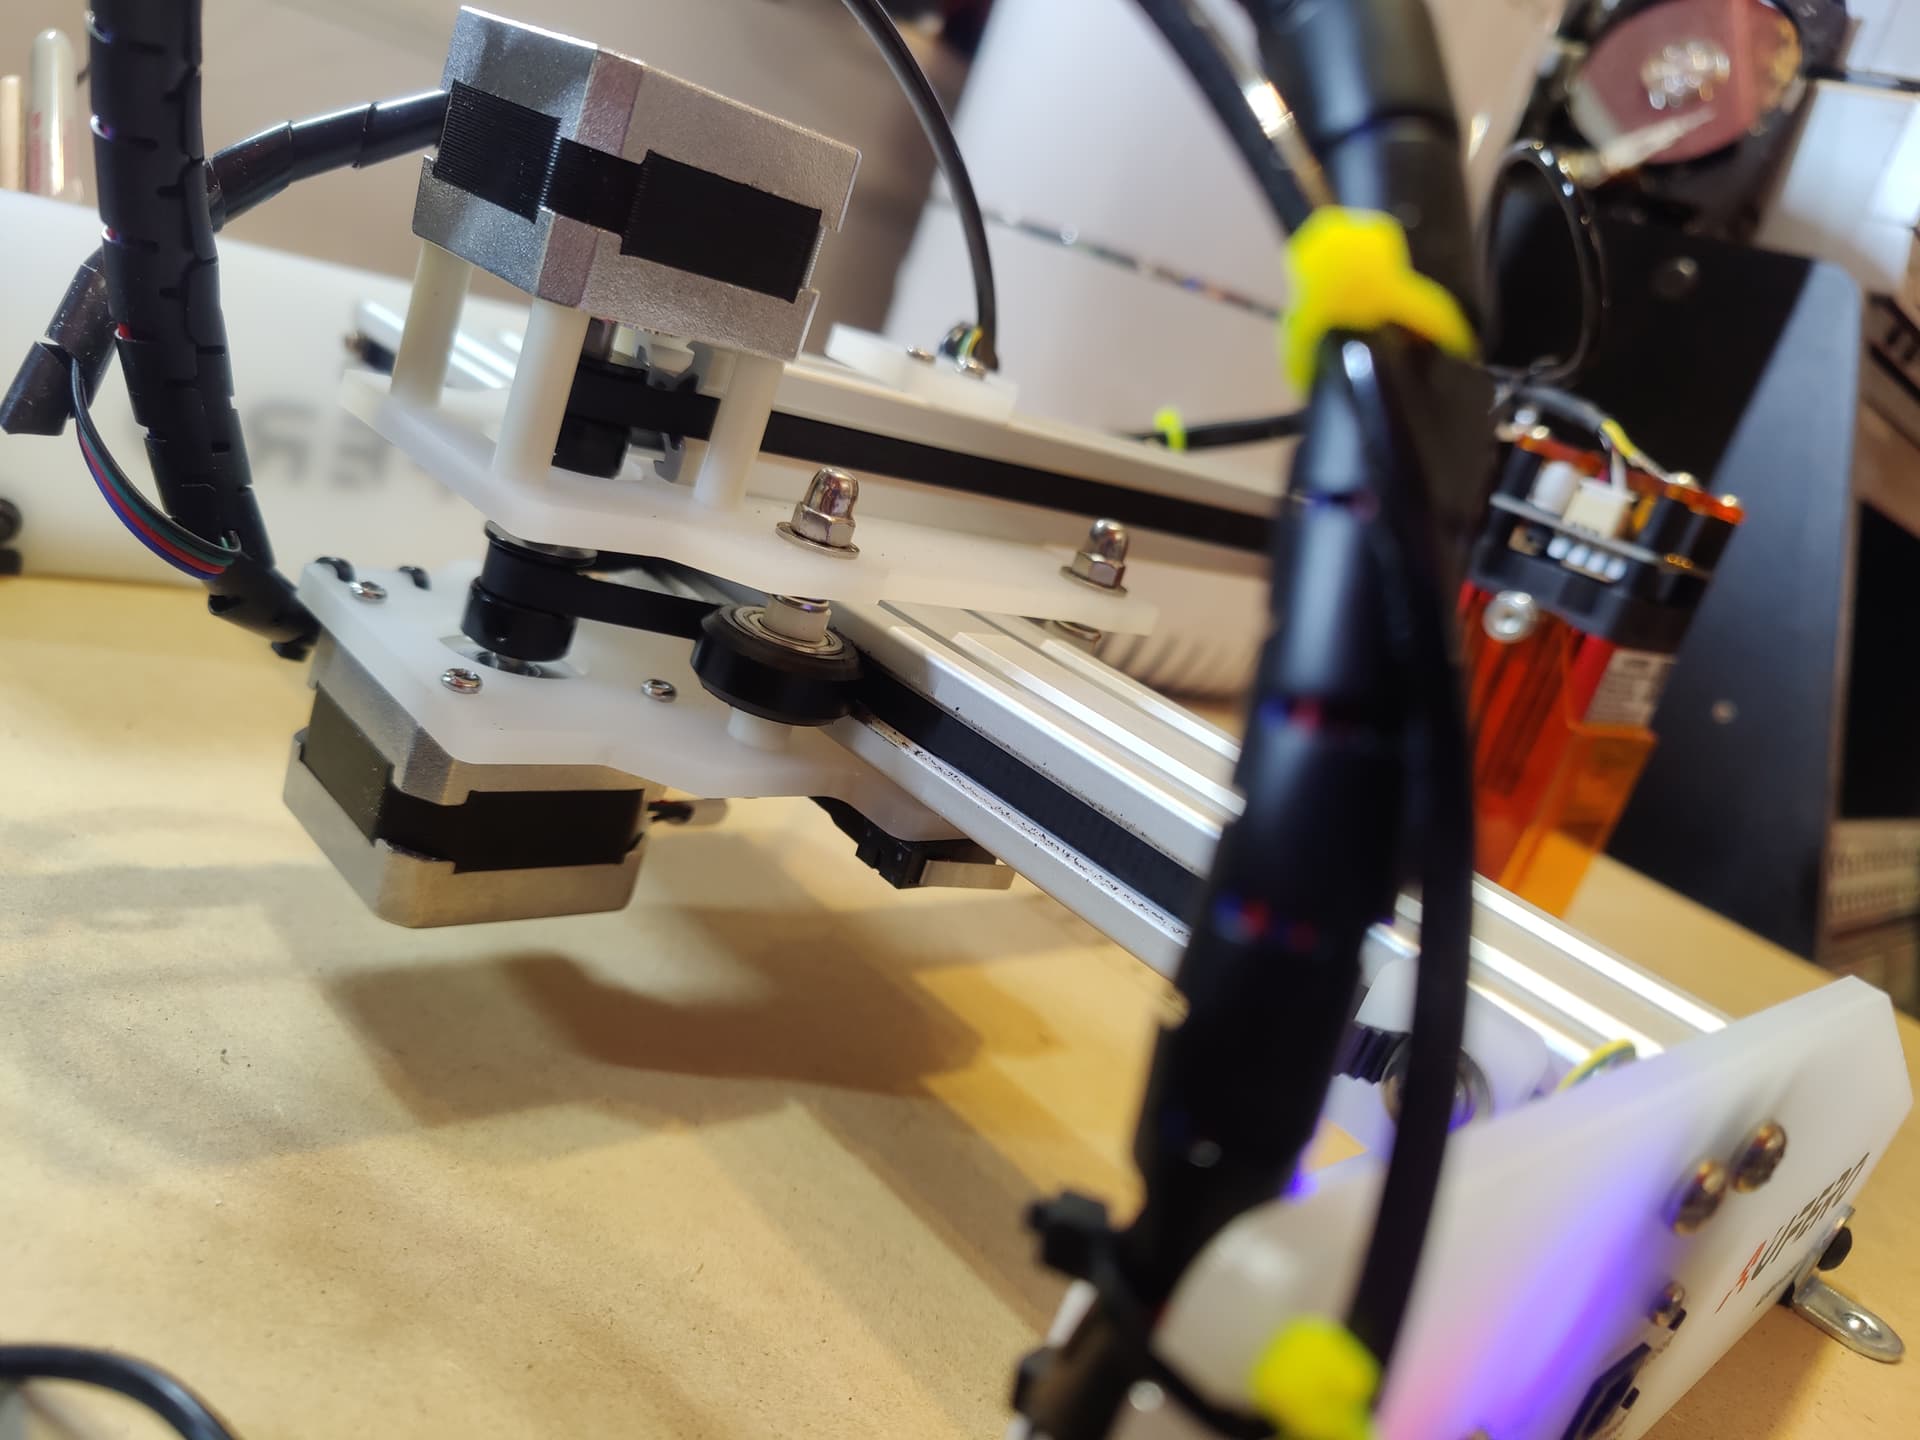
For the X-axis make sure that the laser module assembly is properly secured to the gantry railing. I can’t recall if the Aufero uses a wheel and rail system but if it does, make sure that there isn’t excess space between wheel and rail. Use the eccentric nuts on the shaft of the wheels to close any gap. Take care not to overtighten.
Also make sure that the lens is properly secured. If it’s wobbly this could also occur.
Both retainers on each pinion are as tight as can be. I don’t feel any slop anywhere either.
Y feels like it has more resistance to move than X. Could it be that Y is too tight, either on the belt for the pinion, or maybe the eccentric nuts on the rollers?
Definitely a possibility. Check if belt is overtightened or other sources of friction. Eccentric nuts are often overtensioned and a possible culprit. In fact, based on your photo it looks like there’s some debris from the wheel likely from being too tight. I’d suggest checking wheel distance and make sure it’s just enough to remove any distance and slop but not any more. I’d suggest also cleaning off the rails so that it’s not interfering with movement.
Thank you again for helping out a noob! Y has greatly improved (prob close enough for my use) and the circle is looking good now! I guess it came over tightened from the factory!
Nice! Still a little off but hopefully something you can work with especially as you get more familiar with your laser.