Ok - so I thought I had everything worked out, but I was wrong. Now this is happening…

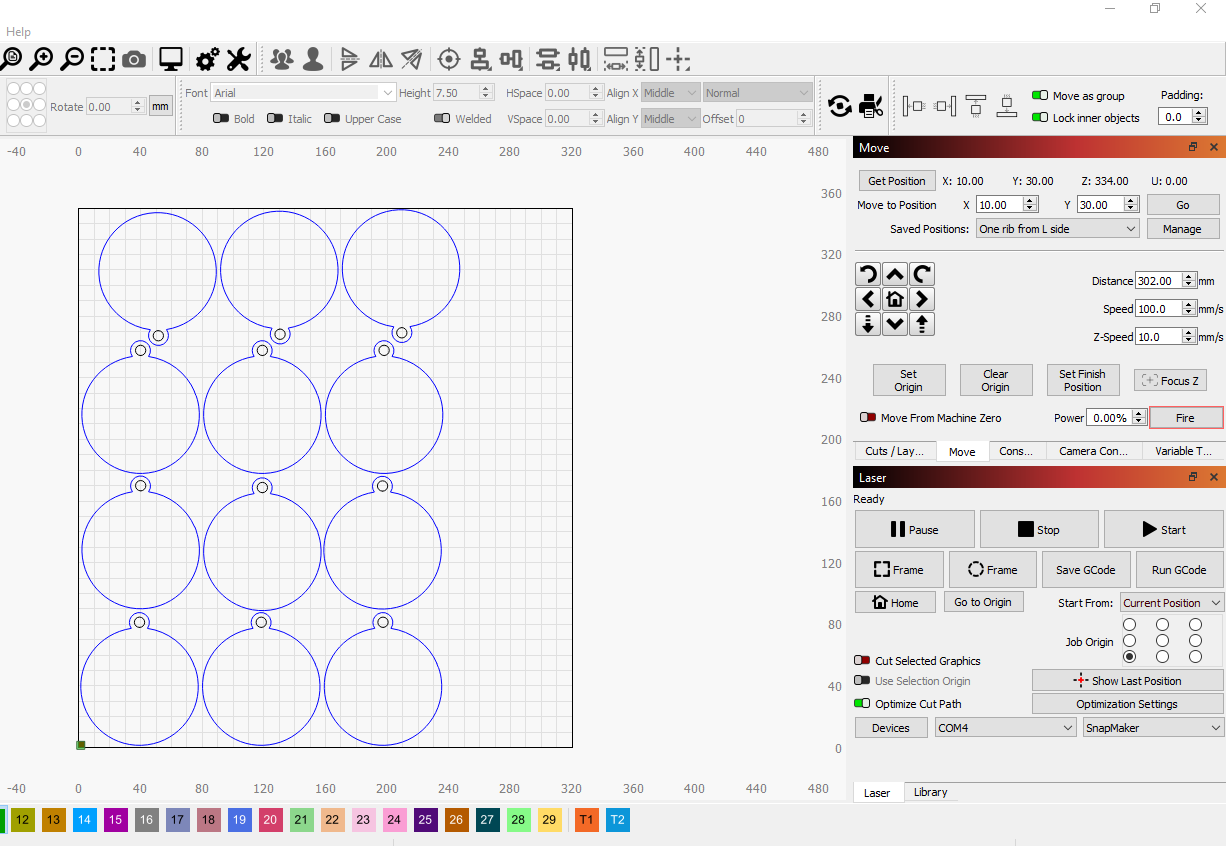
When my program is set to this…
Ok - so I thought I had everything worked out, but I was wrong. Now this is happening…
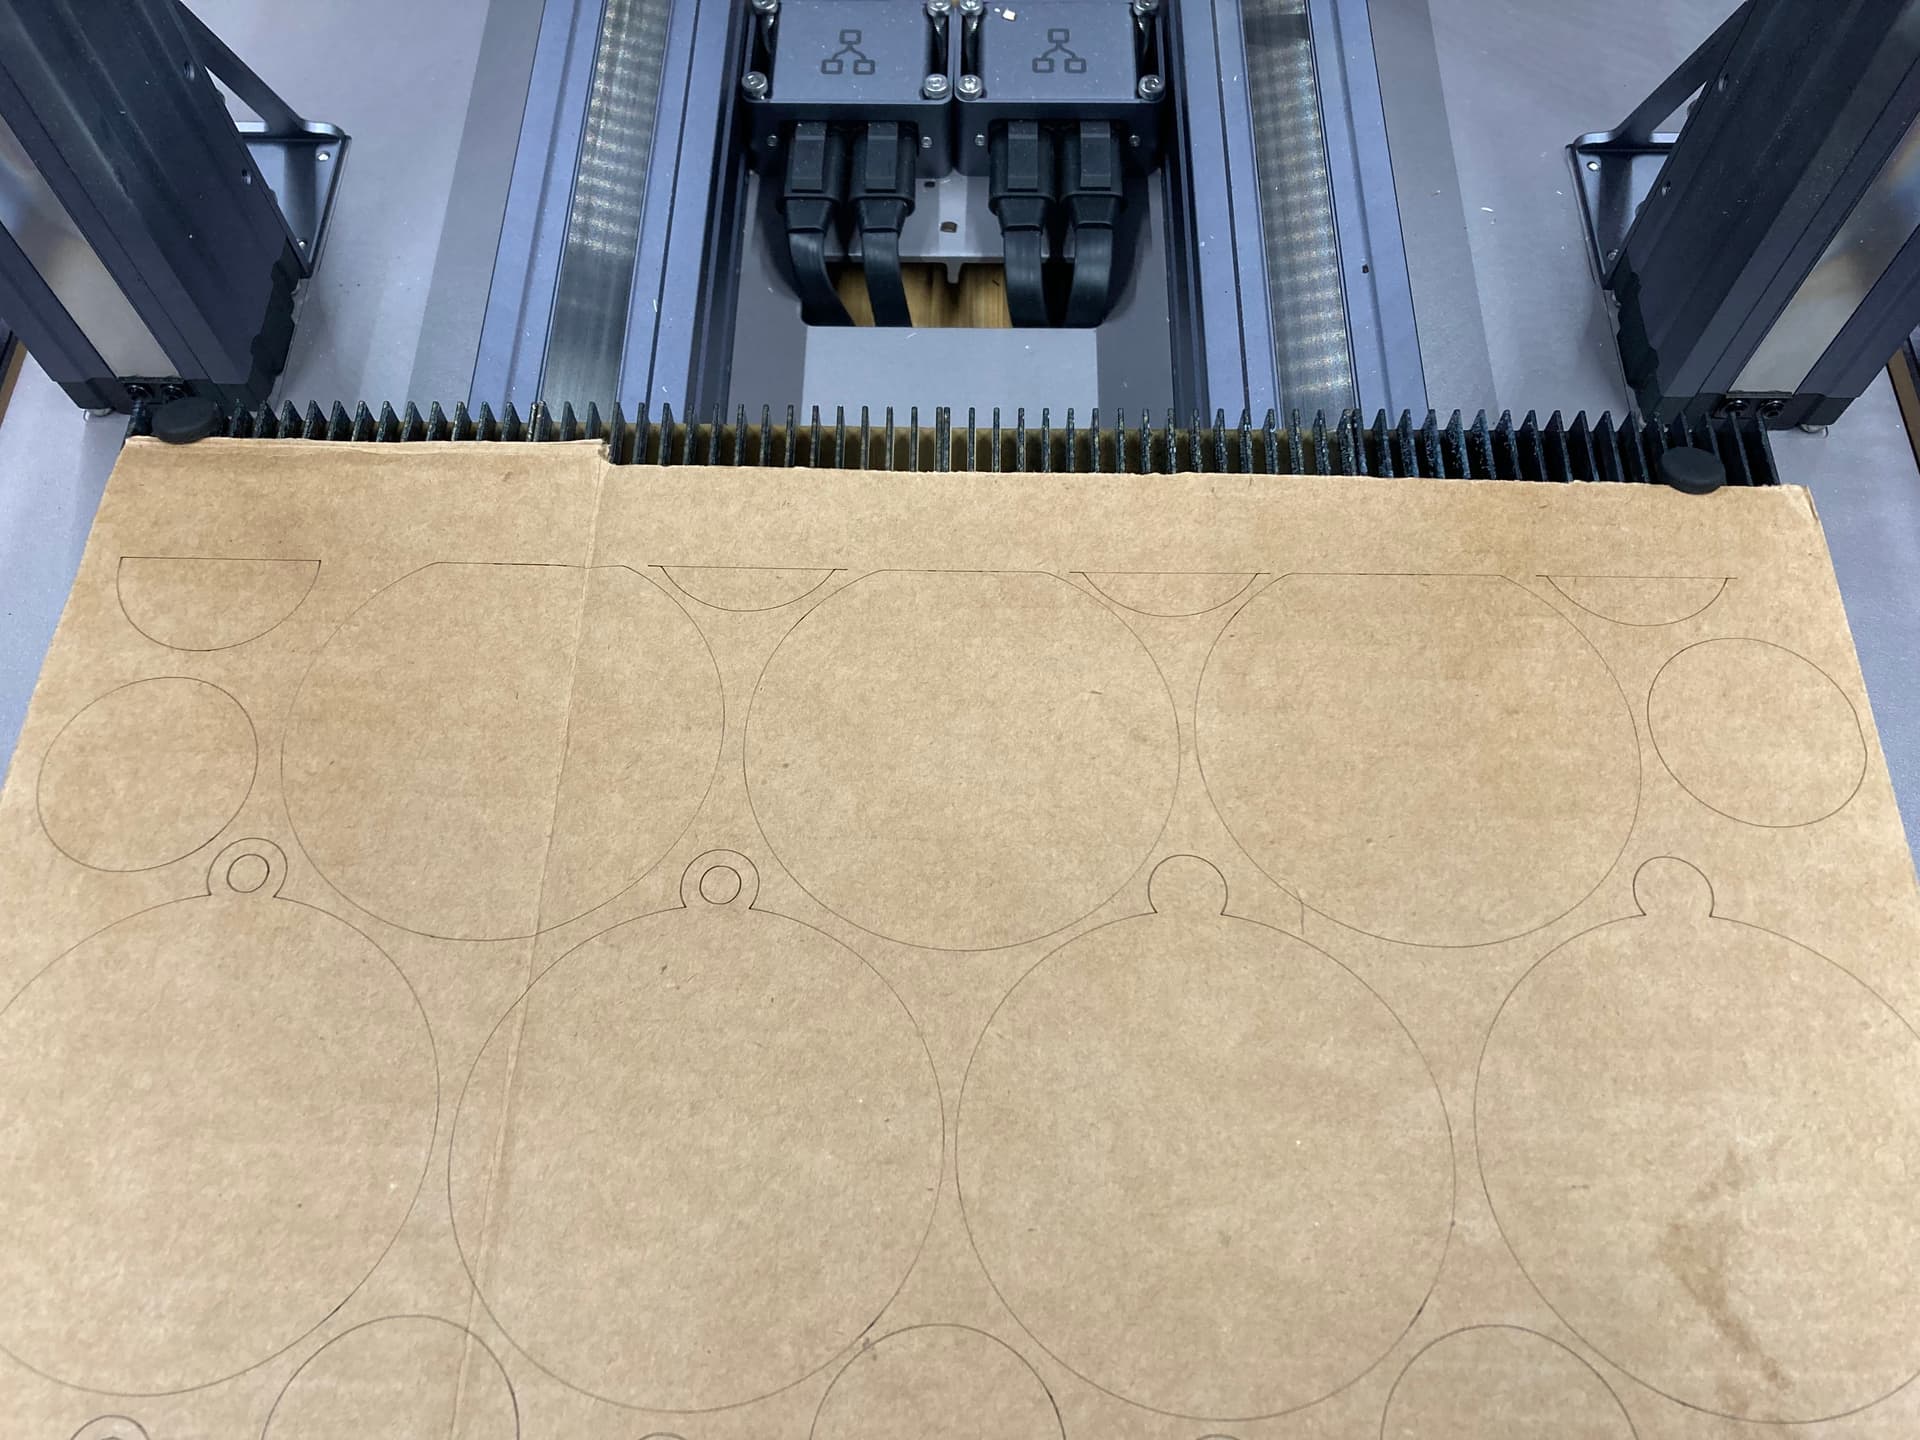
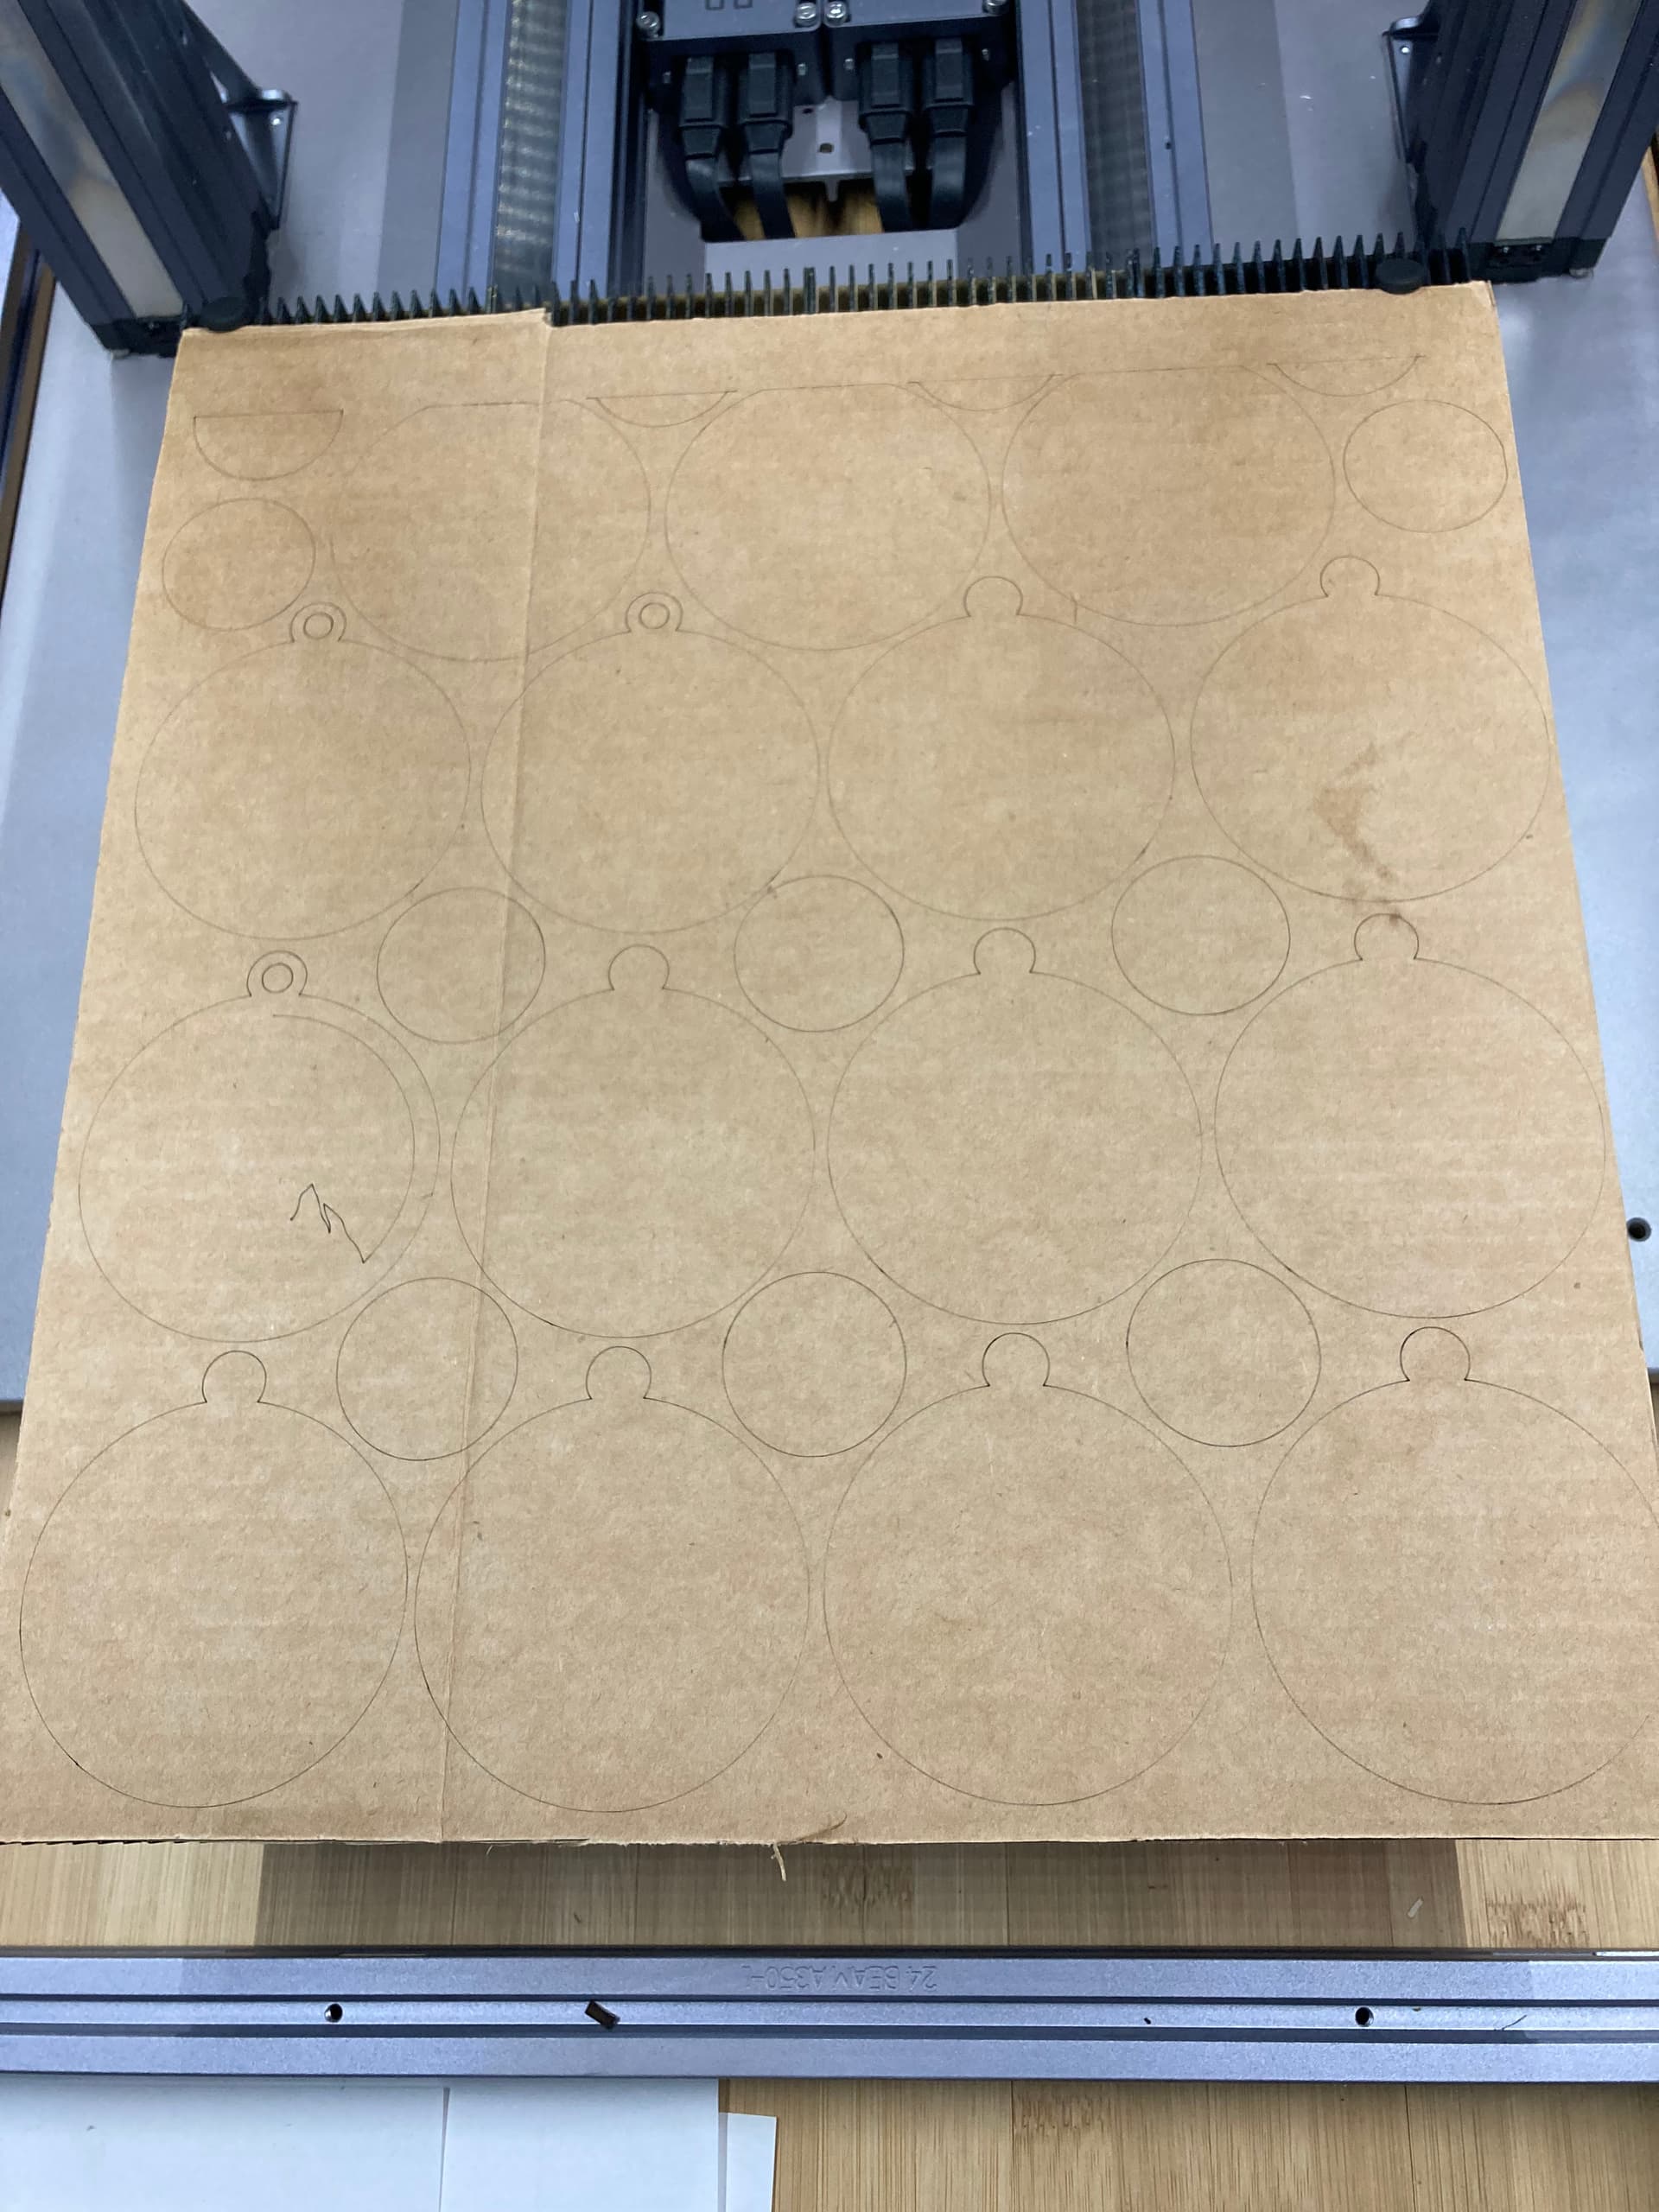
So I just put some scrap material on the bed - removed the top 3 ornament backers (upside down ones) and tested it - it cut properly. So it appears that as soon as I place anything above the third layer of ornaments then it throws the machine right off for some reason.
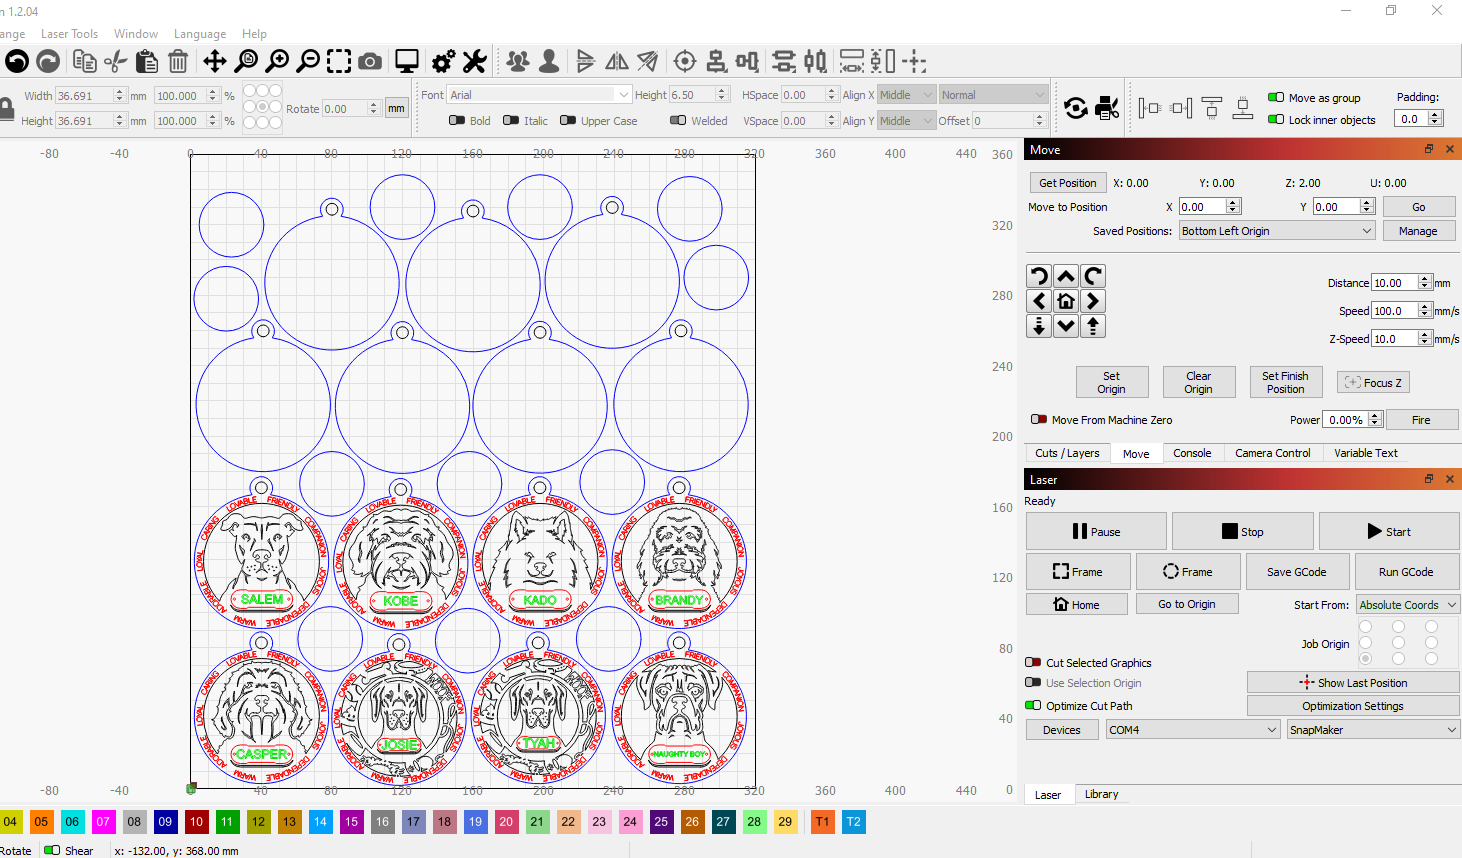
It looks like you’re using Current Position for Start from. Is it possible you’re crashing the head and then losing steps at some point?
Does using Absolute Coords change the behavior?
If I put absolute coordinates for the start from - it wants to start off the front left corner of the bed. So I have to move it to x 10 y 30 for it to be on the front left corner of the bed (which should be my absolute coordinates)
Does 10,30 correlate to the front-left corner of the usable bed?
If so, can you try this?
Move the laser head to 10, 30 so that the laser head is exactly position above the front-left corner.
Then issue in Console:
G92 X0 Y0
Check position. Does the position report as 0,0? If so, see if you can address the rest of the bed. It’s possible that Marlin will still refuse to allow you to go beyond the understood boundaries of the bed so the top may still be unaddressable.
If so, I don’t think you’ll have choice to but try to recompile the firmware with the proper dimensions and offsets.
I have done that - then i placed a piece of cardboard on the bed and told it to run. You can see in the pictures that the top part of the bed is still not useable. ![]()
I have no idea how to do this…
Welcome to Marlin land, where many many configurations are done at compile-time. It’s possible there’s a runtime way to do this but I’m not familiar.
Alternatively, just make the workspace smaller and live with a smaller area.
I would love to be able to use my whole bed, as the snapmaker bed isn’t huge in the first place. Right now with not being able access the whole bed - I can’t even complete customer orders in the sizes they are wanting. Which leaves me at looking for a larger machine, which I didn’t want to do until my sales “paid off” this machine.
Is there anyway I can get ahold of the people who made Lightburn directly?
They monitor this site. You could also email support@lightburnsoftware.com.
However, there’s nothing in LightBurn that can be done if the firmware is not allowing it.
Are you able to jog higher than the current limit in Move window? Or otherwise go past the limit with perhaps a command:
G0 X10Y350
Where does that leave you? What is the reported position after that?
If I enter that command from the home position - it still has about 35mm of the bed behind the laser. The “get position” is showing X10 Y347
If I try to jog it any farther back - it doesn’t do anything.
Then again, likely firmware limited. Have you had any luck getting support from Snapmaker on this?
Hopefully there’s a method to redefine bed area through configuration rather than recompilation of Marlin.
Thinking through a different path… how much lower than the end of the bed are you able to position the laser head? Can you get 35 mm lower than the bottom end? If so, could you simply reposition the bed in some way?
Hi @Chelsea,
I´m new here but i think i know your Problem.
When you start the snapmaker you have to touch Home on the Maschine display.
then move manually to the coordinates X=0 Y=0 Z=(Laser height from SM start Screen)
and press “Set Work Origin”
Now are your work coordinates set to this start value you are able to use the
whole bed.