Some questions about cutting with S9

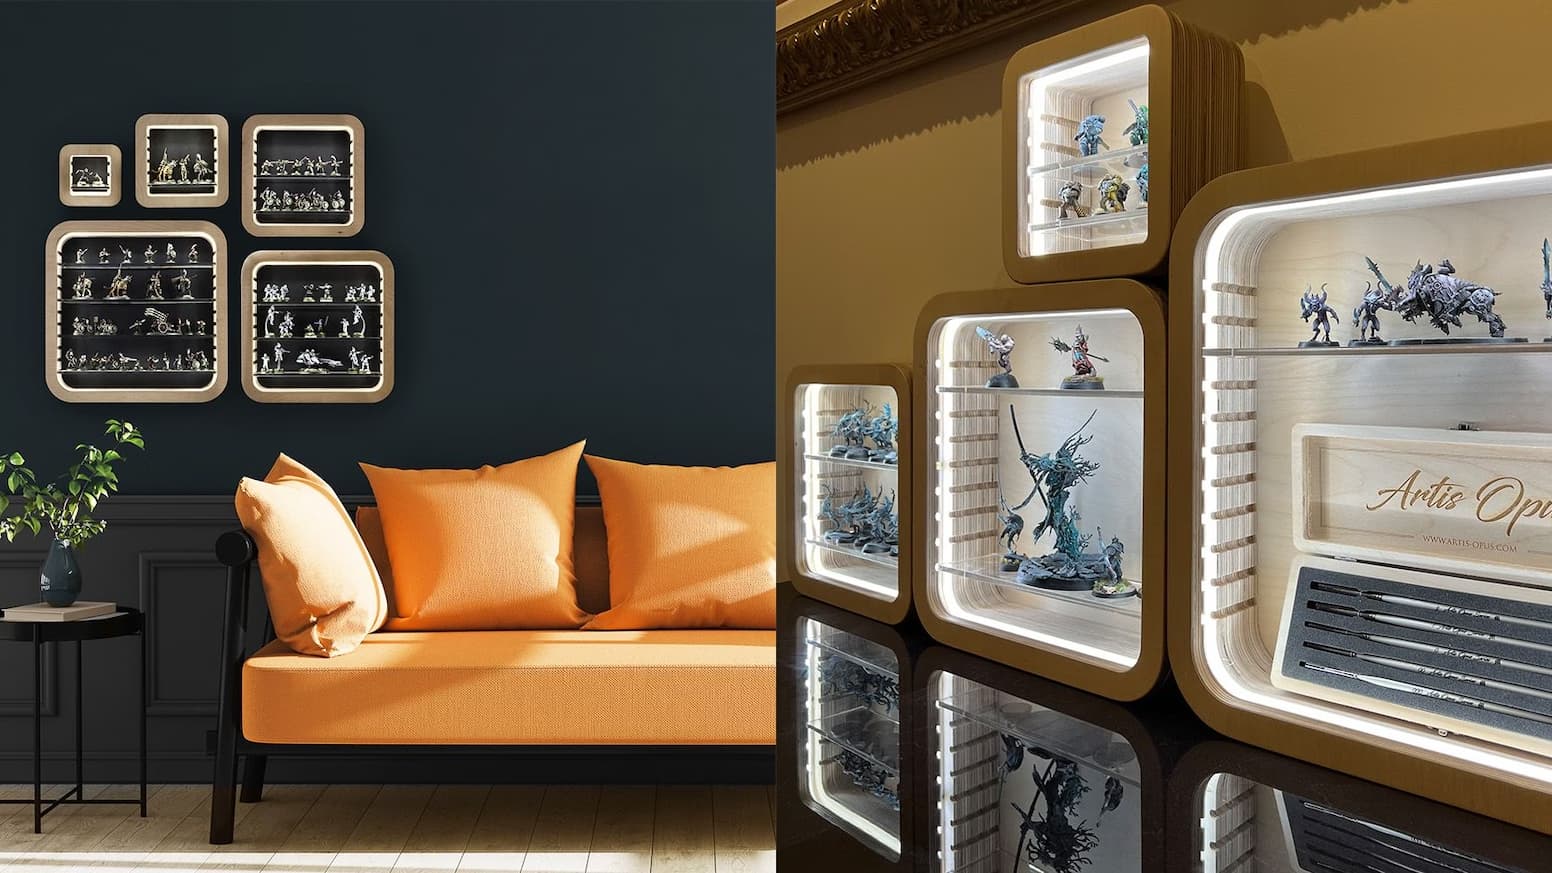
Since last week I own a Sculpfun S9 with Air Assist and a 500mmx500mm Honeycomb (Sculpfuns official one is only 400x400 but including the frame, work area is only 350x350) because I want to build something like this for my Warhammer miniatures:

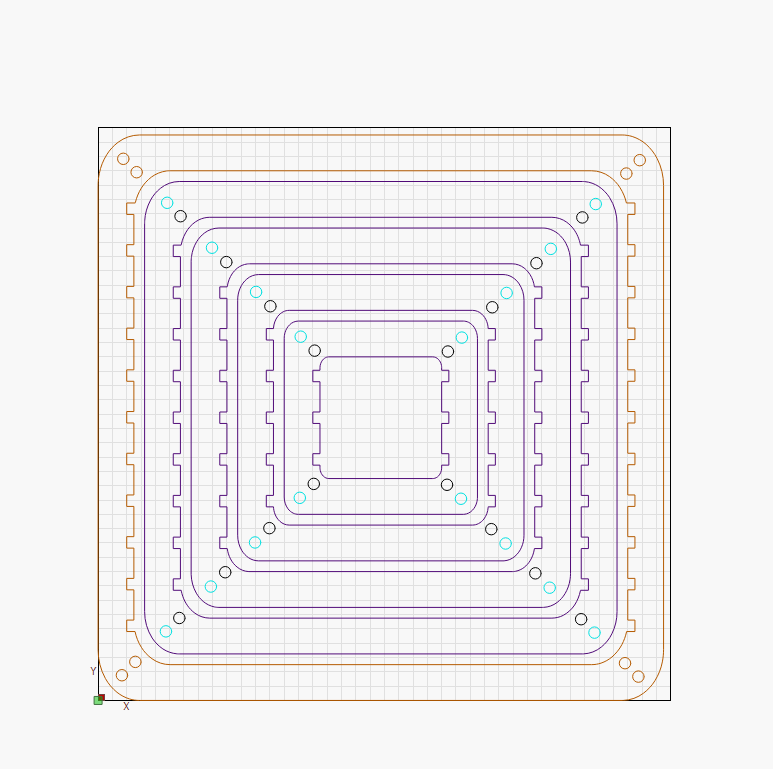
I built the design in LightBurn. It is 395mm x 395mm, so it uses almost the whole area.

I ran several tests. Managed to cut small 10mm Poplar Plywood at the beginning but had trouble with cutting through the bigger pieces. I went down to 8mm Poplar Plywood but I ruined about 5 sheets of plywood already by now.
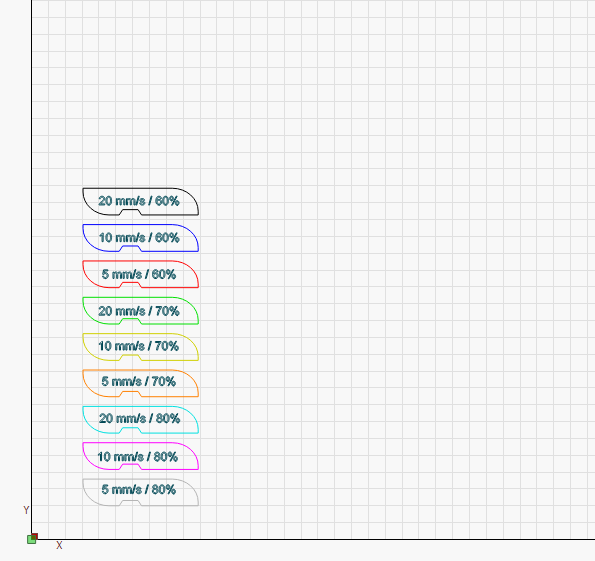
Yesterday I ran tests with cutting small pieces at 60 to 80% power at 5mm/s, 10mm/s and 20mm/s with 20 passes where the cleanest results (with least charring) were 80% at 20mm/s and 70% at 10mm/s.


So I put up the whole piece again and it ended up not getting through in most places.
I do not think it is related to a dirty laser so much, but more to the size of the object. Because my smaller pieces are mostly ok, but bigger pieces not so much. Or maybe I was just unlucky 10 times hitting glue pockets. My other theory is, that if I cut a small circle say 20 times in a row the material will still be hot and behave differently than if I cut a big piece where it takes 90 seconds until it reaches the same cutting point again.

I managed to cut the whole thing almost perfectly at 70%, 20ms and 60 (!) passes the day before, but it takes around 12 hours for a complete sheet and I do not want to go to bed with the laser still running in my basement (side note: did anyone ever have a fire issue btw? I usually go down to check on it every hour or so. One time I had the issue that the laser was stuck in one place, that seemed kinda dangerous, I think it was related to a loose cable).

The 80%, 20ms, 20 passes setting that worked for the small piece would have brought it down to 4 hours, but as I said, did not cut through.
So what I tried was just turning it around and tried to adjust the positioning of the piece to cut it from the backside, but I found it impossible to stay exactly on the lines. Is there a good way to achieve exact cutting from the backside? Did anyone do that successfully already? If I have only a few cuts that didnt go through I will carefully cut them with a cutting knife from the back. I tried a dremel but couldnt make a straight line with it.

My last issue is this. The air assist forces me to move the starting point a bit to the right and I just noticed yesterday that one of the outer frames is cut off about 1 or 2 mm on the right side and does not fit snug onto the other outer frame that I was able to cut by now. So it seems to have hit the inner right frame of the laser slightly. Now If I move the wood a bit to the left, chance is that the hose of the air assist is making it bounce at the left inner frame of the laser. So if I stop the laser I cannot risk to go back to the origin because when I start again, the next line is offset by 1 or 2 mm. So I am thinking about either telling LightBurn that my workspace is only 395mm by 395mm and not 400x400 or by moving my cutting starting point to the machine origin point. I did honestly not think I would run into so many issues. It is fun to craft something, but also kinda frustrating with all the small and big issues I run into.

Ok, foremost, you just started and try to get the maximum out of it from the very beginning. This is why I’d say you only could fail, unfortunately. Lasering is all about experience, and you should start with small projects and get experience.
And most important: NEVER EVER LEAVE THE LASER ALONE!!! They catch fire instantly, and it can happen every time. If you leave the room, pause it!!! (I get reports almost daily, it’s more common than you think)
Some things:

  • The workspace advertised is usually not correct, especially if you add air assist etc. You need to measure your specific workspace and set this in LightBurn and the firmware.
  • If you don’t have limit switches, it’s nearly impossible to do a front and backside engraving. And since you already go the max of the workspace, it will be therefore difficult to design some rig to put it in.
    -Maybe check out the print and cut feature for backside engraving
  • An S9 is using a 5W diode. As a rule of thumb, you are good to go up to 5mm plywood, not more. You can cut deeper (lower focus etc.) but as you mentioned at a very high number of passes. So 60 passes is ok in your case, I’d say.
  • in diode laser world, you don’t use mm/s, you use mm/min. Change this setting to make yours comparable to everyone else (you don’t have to but it will make your life much easier)

What kind of air assist do you use? The official kit?

I suggest reading through these articles first: Quick Start & Overview - Diode Laser Wiki They will help you getting through the first steps with the laser.

Thank you for your answer. Yes, I use the official air nozzle kit. As I said, I successfully cut a clean 10mm plywood piece already at the beginning.

Yes I set it to mm/min now, but as you said, it is a mere issue of dividing or multiplying by 60. I am not at home right now but I think it should not matter from which angle the air assist enters, does it? I might just turn it by 90 degrees and have a bit more space already.

Yes, you can, but it’s not made to do it. Like you said, it might take 14 hours for such a project then. Possible, but you have to decide if it’s ok for you :slight_smile: Diode laser are not made for speed anyhow, they are a magnitude slower than CO2 lasers.

No, that shouldn’t matter. You can change as you like. You can also easily increase the Y axis size by changing the aluminum profiles, the x axis is a little more complicated due to the long rod. But still doable. And not very expensive (you can also buy the official kits, but they are quite expensive, I think).

Ok, I did a superlong cut yesterday and it was almost perfect. The big frame almost fell out by itself which is a first to me. The small drill holes fall out by themselves a lot but the bigger pieces usually did not.

Before I started I cleaned the lense with isopropanol again which was the first time since I have the air assist and suprisingly it was not dirty at all. I have cut with it for probably 40 hours and there was no dirt coming off.

Before when I used it without air assist for maybe 2 hours total it was very dirty twice.

That is pretty cool because now I will probably only needto clean it every 100 hours or so.

1 Like

You may still be going too fast.
Working in mm/minute for diode lasers is key. The units really matter.

When you change to mm/minute you will see much larger numerical values (60x) for speed in the Cuts/Layers window - this is normal.

With maximum acceleration and speed values in the Machine Settings, completing a small circle at a higher than allowed speed, will cause the Sculpfun to reduce power and reduce speed to compensate. It’s part of the ā€˜cornering algorithm’ in the engraver.

If you reduce both speed and power, I’m confident you will develop the consistency that you’re looking for.

All of these things played the same tricks on me when I started out.

So you say it makes a difference if I use 17mm/s instead of 1020mm/min?

No, but it might make a difference if you cut with 1000 or 1050 mm/min. And it’s hard to adjust this using the ā€œwrongā€ units. It’s just as you would measure the size of your objects in km. You can do it, but mm is the better unit in terms of resolution. And for the small processors, it matters to have as few floating point units as possible.

Ok, fair enough. I will work with mm/min from now on.

I have one more question: I put four pieces of wood under my honeycomb so I can see where the laser is getting through nicely and where it is not. I know I can use the ā€œstart from hereā€ function. Is it also possible to say ā€œstart here and stop hereā€ so that I can focus on problem areas without manually having to go to my desired starpoint over and over?

This topic was automatically closed 30 days after the last reply. New replies are no longer allowed.