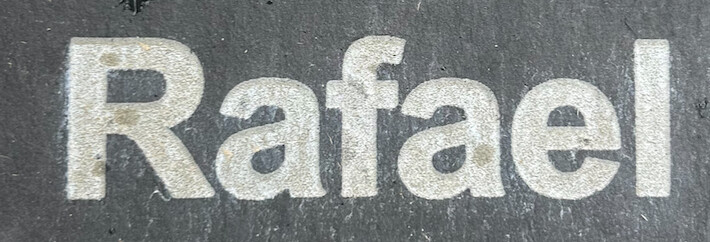
I could use some advice about engraving slate. I have a Boss LS2440 155W CO2 machine. I’m making outdoor memorial markers on black slate with a natural cleft face. I rub mineral oil over the face, then after a few hours, I wipe off the excess with a cloth and engrave. Here are my settings:
300 - 350 mm/sec25-35% power
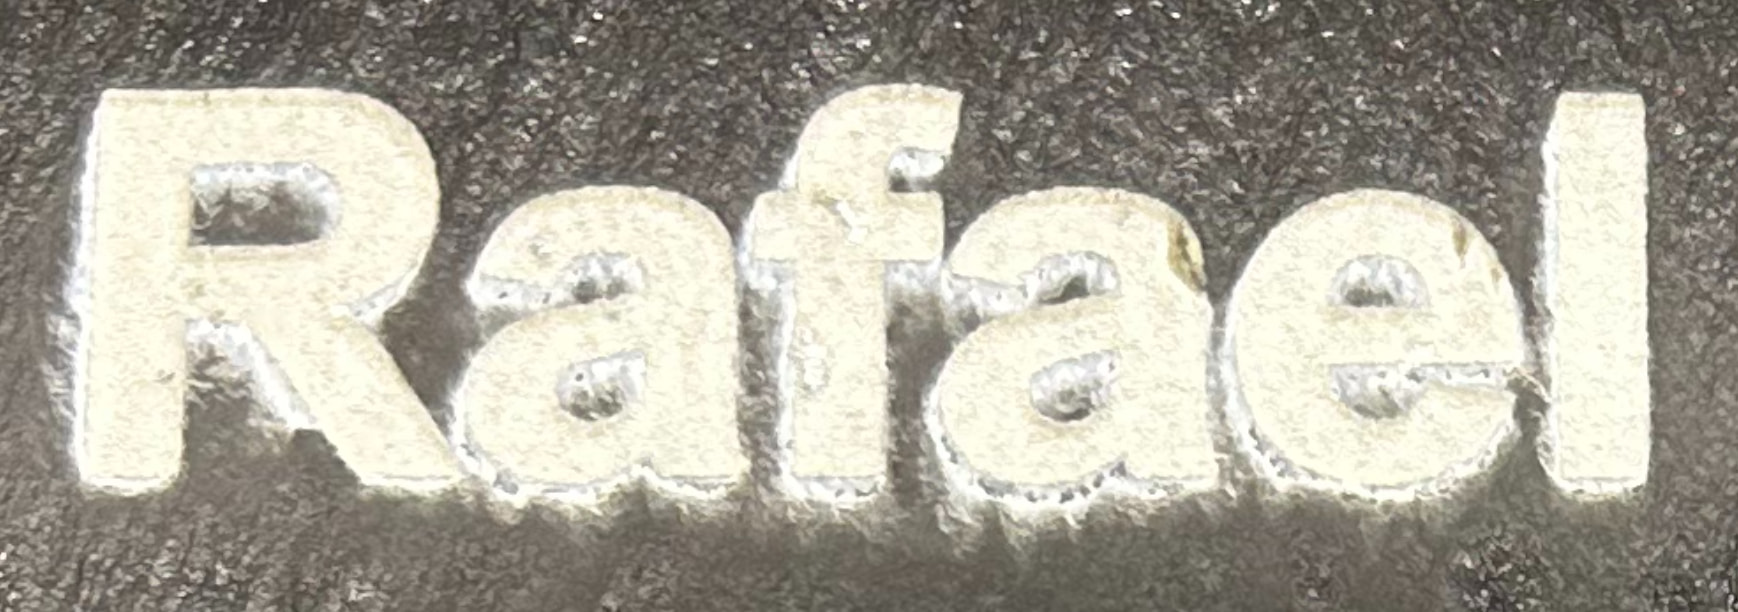
produce white engraving that contrasts well with the background. However, when I use these settings, I’m getting specks around most of the lettering that make it look messy. Here’s a picture right after engraving is done:
Oops, I hit send prematurely. I’m using a the shortest focal distance (2” lens) and air assist. When I use lower power or higher speed settings, I don’t get the same speckling, but the engraving is more gray than white resulting in poor contrast. Aside from rinsing with water, I’m not treating the slate with anything else after engraving because I’ve found that other oils just gray the lettering and reduce contrast.
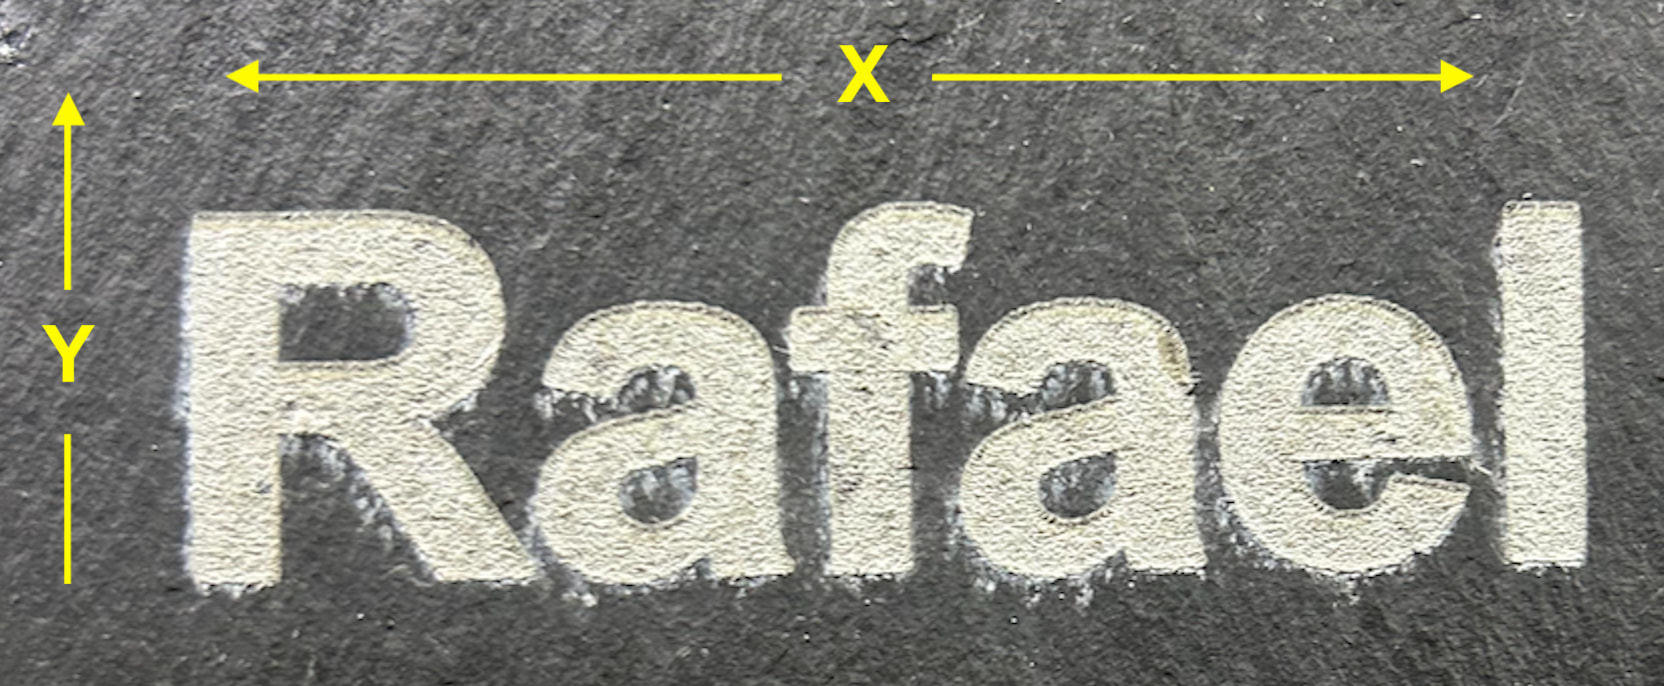
It’s always helpful to designate the head direction. Some people post photos with the X and Y direction different from how it was orientated in the machine.
You are treating the slate with oil, correct?
A couple things come to mind. One is don’t use oil. Another is to use higher power and de-focus a bit.. That would be a couple three mm with a 2" lens.
Have you tried a brush on it? Sometimes the debris really sticks to the material. If you melt a piece of slate, then the air assist moves it, then it solidifies back to the object.
How much air are you using on your air assist?
It would be nice to know the orientation. It should work better at a lower speed. I do this a bit on my co2 and don’t exceed about 150mm/s, rarely over 200mm/s. That’s my preference.
Thanks, Jack. I appreciate these tips. In response to your questions, X and Y axes are shown below, with the Y arrow pointing in the direction of job progression:
Regarding air assist, the compressor gauge typically points somewhere in the 60-90 psi range, though I’m not sure if there’s a better way to know the actual pressure coming out of the nozzle?
I’ll try reducing the speed down to your range. What is your power setting?
I don’t have ready access to the settings I used. I lost both my main disk and backup together. Haven scratched the disk, hoping to recover much of what was lost.
I did this on my 43W machine, about 1/3 the power you have, so it might be you can’t lower the power enough to do delicate work like this.
Seems like I used somewhere between 10 and 15% power, that’s only about 5W, it may be difficult getting your 150W tube to lase low enough. 10% on yours would be about 15W at least three times what I’m using.
Unless you have an RF machine, the response time with most of these isn’t that great, most are placard at 1ms to reach 90% voltage, so this limits the speed. This is the maximum time to lase.
At what point, percentage wise, does your tube lase?
I run my minimum, which is just enough to keep debris off the lens. This is my main operating with low pressure.
With some materials, such as slate and acrylic, enabling air assist (higher pressure) seems to drive some of the debris into the material and condenses there or somehow sticks to the material.
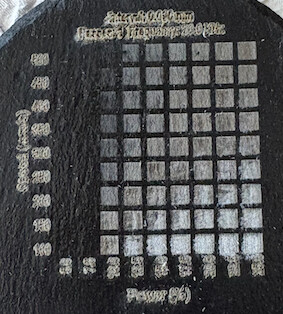
The lowest power that makes a mark is 10%. A material test matrix is below. The power settings go from 5% to 25% by 2.5% increments, and the speed goes from 100 to 500 mm/sec in 50 mm/sec increments.
Given the power you can apply, I would chance using standard masking tape with high-tack, pressed firmly into the slate progressively in one direction to avoid wrinkles and air pockets.
The debris looks like it’s being blown in a downward direction.
Is it not lasing below 10% or lasing but not producing power? My original tube would only go below 10% when the tube was below 20C.
I really doubt you’re ever making 500mm/s that’s pretty fast, but possible. They have a pretty large overscan area at that speed.
How big are each of the squares?
Using a common value for acceleration, I use one of the on-line calculators, with an acceleration of 6000mm/s, it takes over 20mm to reach that speed, along with another 20mm to slow down.
Way too much power for a 155w…i have 100w and run 325spd 32pwr .085 lpi… grind the slate down smooth, apply a matte clear coat then engrave…i would say on a 155w, 400spd 23pwr and .085 lpi
I assume you mean 0.085mm interval, that’s about 298.824 dpi. I believe that’s too small as the beam of a co2 with a 2" lens has a spot size of nearly 0.200mm or 200 microns. That means it will pass over the same area 200/85 = 2.35 times. Is that what you want?
I usually run 0.150mm to 0..200mm for an interval.
You know that kid in X-Men that rips a trench across the lawn and cuts an oak tree in half…quite violently, with his laser eyes, That’s how I see high power/high Lpi on slate.
Slate has a lot to offer the laser enthusiast who explores Lpi, angled scanning, crosshatch, depth and some color alterations via power values.
That’s a great way to increase contrast. I tried an ink roller/pad but the roller was a bit stiff to get into the small pores etc so I used a microfiber cloth or any that doesn’t leave fibres behind.
When doing a large image (600x400mm) and having to use some speed to get it done in a reasonable time frame, it helps with sharpness and takes the Flat look out of the image by upping the range of greyscale.