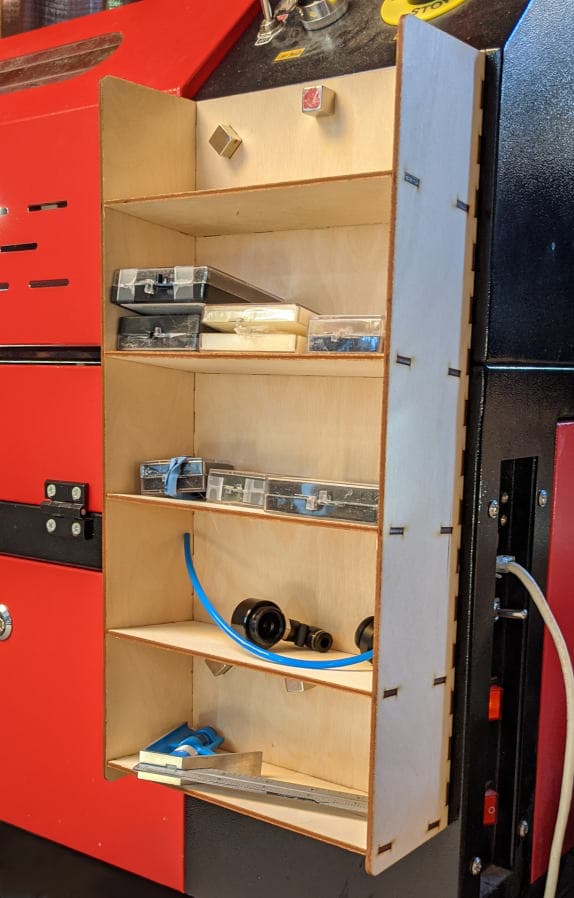
I threw together a quick & dirty “spice rack” to hold some lenses and small crap that goes with the laser. It’s just a back, 2 sides and some shelves. I angled the shelves 6° to help encourage stuff to not fall out. I have some nasty 1/2" cube magnets that I’ll use to stick it to the front of the laser. If that turns out to be insufficient then I’ll drive a couple of screws in to it.
I attached the lbrn2 file for the rack in case someone wants to make one or mess around and use it a starting point for something else.
It’s not glamorous or fancy, it’s simply functional.
I think it’s fun drawing boxes and finger jointed stuff from scratch instead of using boxes.py or similar. Now that I’ve got the hang of it it goes quite quickly and I can build whatever I want and not constrained by whatever some website has to offer.
I start by drawing all my sides/parts to correct size for the INSIDE dimensions of the box and the fingers get added later. Finger length will almost always be the thickness of the material. (3mm for this)
Outside dimensions will be inside dimensions plus twice the thickness of your material for a standard “box”.
In the posted file, the black layer is “ready to burn” and settings are appropriate for my 80w machine and the 3mm (0.122") plywood I used. They are not nested nicely, I used “Cut Selected” Graphics and just cut one item at a time and put them where I wanted manually. (using up some partial sheets of wood)
The blue layer is essentially finished except the fingers aren’t welded on yet. I always keep a copy of my designs in this “unwelded” state because if I ever want to modify the box size or use a different thickness material (which means different finger length and hole size) then it’s MUCH easier than trying to modify the finished one that has the fingers already welded on.
The purple layer is my starting drawing, just the basic parts with no fingers or holes. The red layer has some guides and junk to help me align things and figure out how tall the holes in the back piece needed to be to accommodate the fingers from the shelves. Since the shelf fingers enter the back at a 6° angle, those holes need to be a little taller than the 0.122" thickness of the material. (they ended up at 0.135")
“Snap To Object” and the ability to move things by exact amounts using the XPos & YPos boxes makes it pretty easy to get stuff lined up and in the right place.
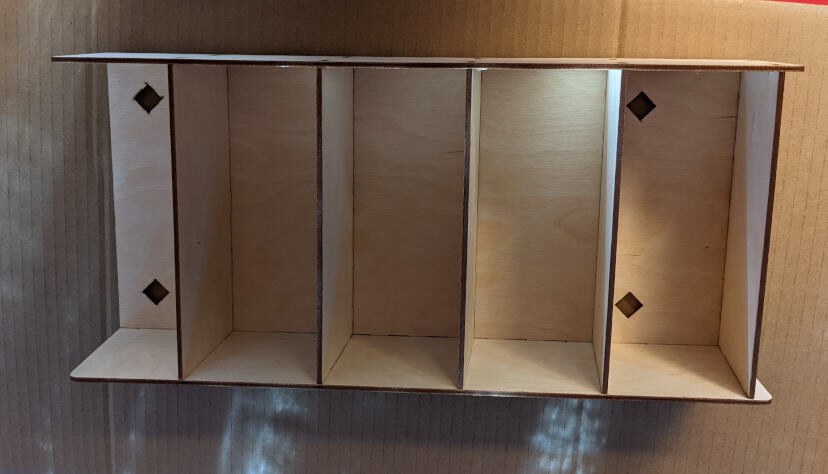
Here’s a couple of photos. It still needs glue & paint, it’s just stuck together for a quick photo op…
laser_spice_rack-01.lbrn2 (118.7 KB)


 always good to learn
