This was going to just be about the UI, but had a bigger issue to document first.
When going through the probe wizard for the first time, my spindle unexpectedly started spinning. Ripped my probe wiring to shreds (algator clip was attached). Thankfully not wrose.
Info: Genmitsu 4040 Pro with VFD driven Spindle connected via laser/PWM signal. CNC connected via USB.
MillMage: MillMage 0.8.00-RC-5 @ 6fc111d Qt6.5.7 (MacOS 15.6)
Steps to reproduce.
Use GRBL code (M3 S10000) or whatever to get the spindle spinning. I believe the same happens if you start the spindle using the SPINDLE button.
Use the STOP button to stop everything.
Open the Probing Wizard. XYZ Probe Block > -Z only > Use the Job controls to move the spindle.
The spindle starts spinning at the end of the move.
At first I couldn’t reproduce this, but I think that was because I’d started and stoped the spindle using M3 and M5 in the console, NOT the stop button. I think having used the stop button is key to reproducing this.
If there is logging by default in the RCs I’m to provide that (I couldn’t find it), if not, I’m happy to turn on debug logging and reproduce it with logging on. Also can shoot a video of it all happening. I tried twice but then failed to reproduce it before discovering the STOP button being critical to it all and wasn’t videoing that reproduction attempt.
PS. Originally was going to post the the UI for the probe is super confusing as a newbie. I had assumed since I have a “Z only Probe” that it’d be the Tool Length Probe, took a long time to figure out I could use the XYZ Probe Block with a Z-Only probe and just leave all the X and Y stuff zeroed.
PPS. Just discovered this same thing happens without involving probing.
Out of curiosity though, did you manually edit the tool length probe routine in the gcode blocks?
If not, after the new RC is out, I suggest you completely blank out its contents so it gets regenerated with the proper defaults to turn off the spindle as part of the probe routine.
I definitely did not manually edit any gcode (GRBL?), or add any code anywhere in MillMage.
I had installed a prior RC but I never used it. I’d started it up, just never even created a device. This is the first version I’ve actually connected to my machine.
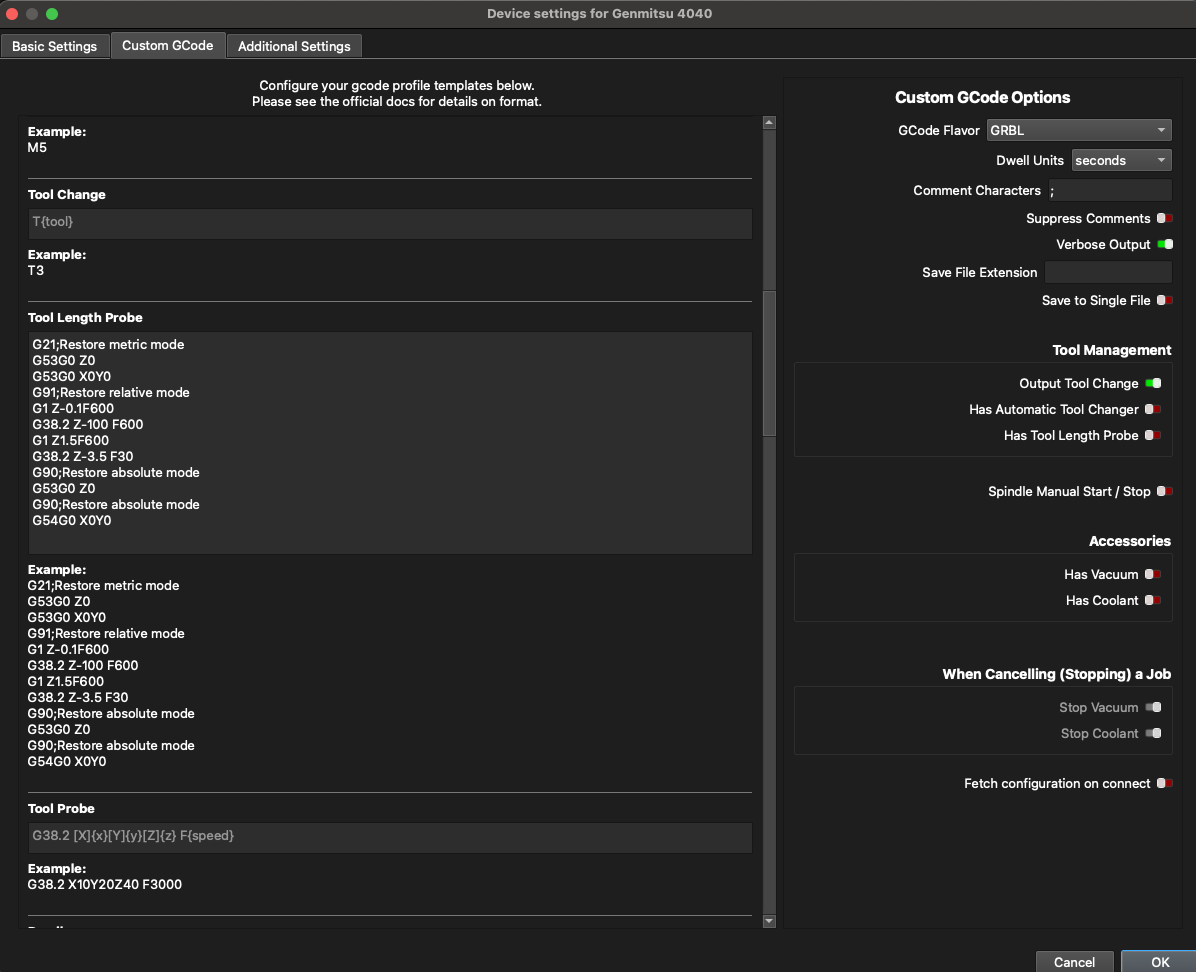
Then as suggested, if you rang the tool length probe wizard, you’ll want to remove the gcode block for tool length in the custom gcode tab of the device settings when the fixed RC is out: we auto generate the code for you, but give the user the option to edit it. This means it will prioritize using the existing routine instead of generating it again on the fly.
TY. I had no idea where to find that, but I did manage to find it aftrer some looking. I’ve definitely never seen this dialog before (screenshot). Again, I’m a novice CNC user, MM gave me hope I’d be able to use my CNC after a year of barely using it and trying to generate g-code with FreeCAD/F360 and sending via gSender or UGS.
When I look at that dialog I do see a gcode block, which looks identical to the “example” code below it. Is this the block you’re saying I should delete entirely?
Again, I am 100% certain I didn’t manually put that in there myself.
Thoughts… a couple of things I did change or toggle in the device wizard I could imagine changing this:
I have toggled in device setup from mm/sec to mm/min in the device wizard.
I have changed from GRBL flavor to GRBL M3 or some other option and then changed it back to GRBL. I’m honestly not sure I ever saved that change; I was just poking around.
I did install MillMage weeks ago, not sure which beta/RC, but never used it back then. This round all this happend in the first 30 minutes of trying to get it working with my machine, so not a lot else I can think of that could have input that gcode for me.
I did try to setup the z probe using the tool length option by clicking that icon in the wizard.
That’s when MillMage would have filled out that block.
And yes, after you get the next update (MillMage will prompt you when it’s released), delete it completely, not even a space should be left in place.
We have a number of fixes that will make it into the next RC, and fixing the spindle behavior is definitely one of the big ones.
If you need help learning to use the machine, I highly recommend finding a series on YouTube explaining machining concepts to better understand cam and control of a CNC machine. They’re definitely more complex and involved than lasers.
Thanks. I’ve spent more time working on the machine (adding VFD spindle, spoil boards, etc). It’s been a fun project, just have used it far less than I expected.
I think MillMage is going to catalyze me using it a lot more. It’s a much easier workflow than anything I’ve tried before. Thanks!
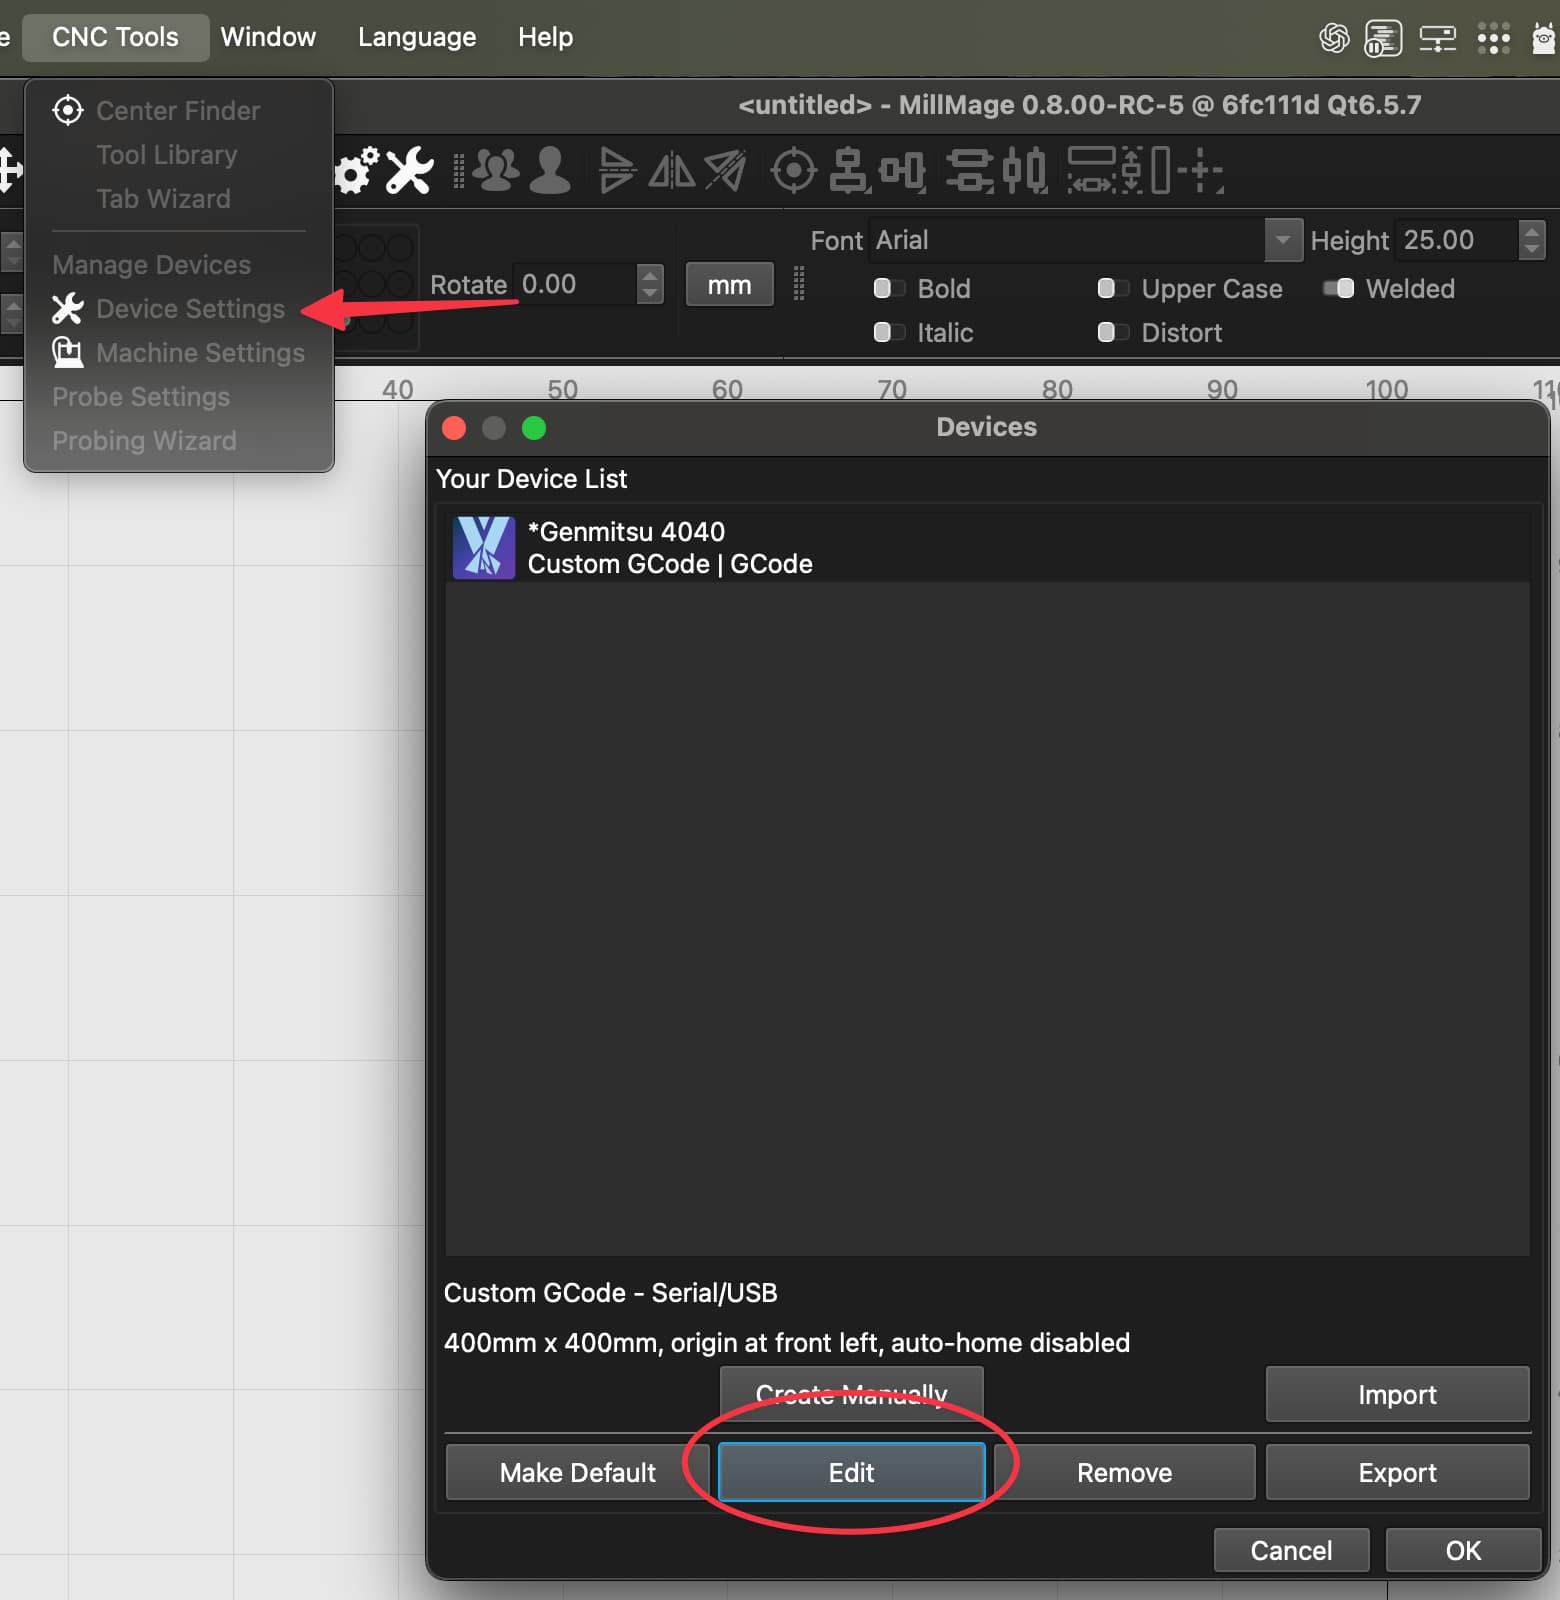
One last UI note. It’s weird to me that going through the “Devices” button or the menu item “Manage Devices” and then clicking the “edit” button for an existing device doesn’t get you the same place that “Device Settings” goes to with the “Custom GCode” and “Additional Settings” tabs. It’s weird to me the first user flow drops one back into the basic wizard instead of the full device dialog.
That’s because they serve different aims - the first devices list that you see is to allow you to manage multiple devices - this is similar to LightBurn. It’s dealing with the very basic information about the device profile, and how you want it to appear in your device list.
The Device Settings is to fine-tune the way the software interacts with it beyond that point, and assumes that you’re already sure which machine you want to use.
Think of the first one as the “Device Manager” and the latter as “Device Settings”.