Ari, thanks for sharing this project. I needed a refresher course in Variable Text anyhow. ![]()
I just like to know I’m using software as well as I can, there’s always going to be things I think should be different. Your conclusion is very similar to that of @fins , so no harm there.
Just to make sure I understand about wrapping, I added 300, 310, and 320 to my CSV and did a preview, this is what I got:
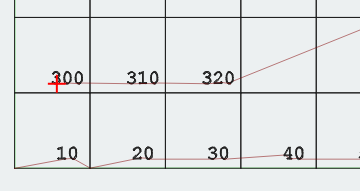
That’s not the wrapping you meant, yes?
Sorry about the files, I keep bouncing back and forth between my office computer and my workshop computer so I’m tossing the files back and forth and posting from both.
Going back to the original idea; you don’t need a csv;
make a serial number text item ddd, with the variable text set to serial number
create an array of this text item with 29 x columns, 1 y row. set auto increment variable text to 10 in the create grid array popup. now set the current value to 10 in the variable text settings.
now create an array of this array, with 1 x column, 29 y rows. disable auto increment variable text.
That will likely work but I’m stubborn, so I made this. It uses a macro to set up a spreadsheet with the value spread needed for a single array. Barely debugged, but it does create a spreadsheet that works in Lightburn.
Array Value Maker.xlsm.txt (23.7 KB)
Yes, that is what is happening. When LB runs out of cells (squares), the next number in line (mine=10, yours=300) in the CSV goes into row2 cell1.
The beauty of getting “similar” solutions with @fins is that we get a variety of options. That is always good.
On the tablet now, but I will see on my PC what you came up with there.
If you get an issue with font size, add the ISO9 SHX font to your toolbox. I printed legible 1mm tall text on Baltic plywood using my 10w machine.
If I understand correctly, you want the X-coordinate displayed in the lower-right corner of the cell, and the Y coordinate displayed in the upper-left corner, correct?
By trying to do it all in a single pass you’re making it much harder than you need to.
First, set up your “cell” - I’ve create two text objects, the blue one for the X grid labels, and the red one for the Y grid labels. Set both to “serial number” with the initial offset set to 1. I used ddd0, but the text could’ve be dd0. I stuck a zero on the end because I’m only incrementing the variable text by 1. If you wanted to just use ddd with no zero, change the variable increment to 10.
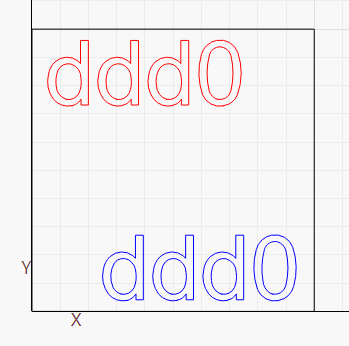
Set the blue one to “right aligned” and the red one to “left aligned”, so they’ll align correctly as the numbers change.
Then grid-array them in 4 passes:
-
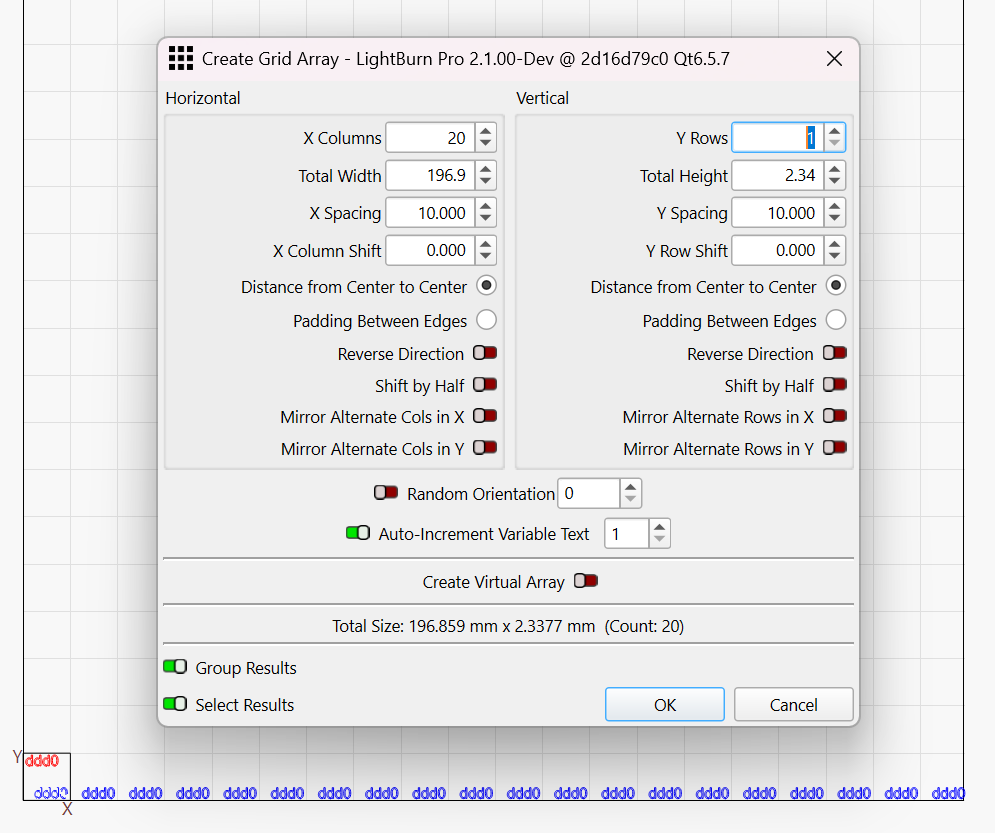
Duplicate the single blue X label horizontally, with “auto increment” enabled, and 10mm center-to-center spacing in X:
-
Duplicate the entire row of X labels vertically, with “auto increment” disabled, and 10mm center-to-center spacing in Y
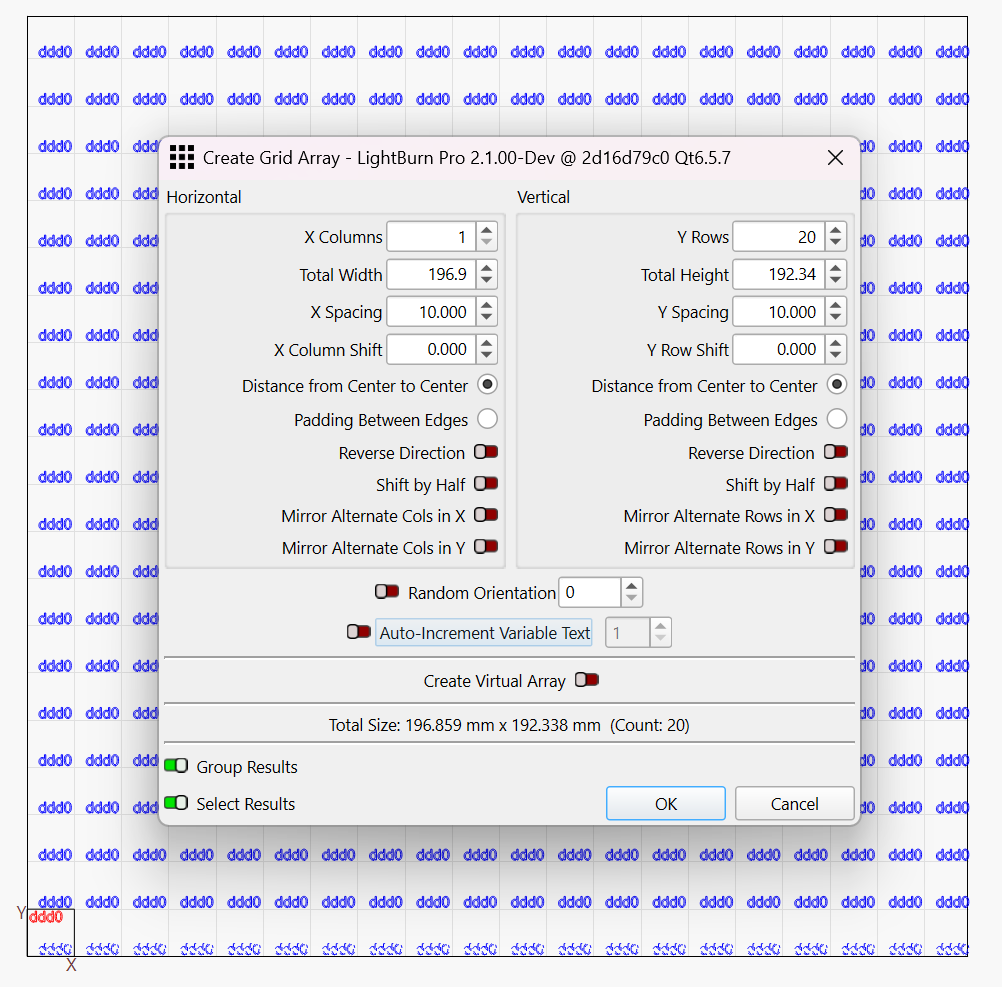
At this point, previewing shows the X labels are done:

Now do the same for the Y axis, but flip the directions - Array them vertically with auto-increment on, and horizontally with auto-increment off, and you get this:

Is that what you were trying to produce?
Yes, but with a single array. I did do it with a carefully made CSV file.