I make sure to line up the top of the stepper motor tip so that the flat edge of the shaft lines up with one of the 2 screws that connect it to the coupling. It works fine at first but after a while the rail uncouples from the shaft.
What can I do?
I make sure to line up the top of the stepper motor tip so that the flat edge of the shaft lines up with one of the 2 screws that connect it to the coupling. It works fine at first but after a while the rail uncouples from the shaft.
What can I do?
Screws must be working lose… Might try something like lock tight…
![]()
Thank you. I’ll try some loctite 242. Should I apply it on the threads of the little screws that hold the rail and the coupler or should I throw some onto the coupler and shaft as well?
Anywhere it’s working it’s way lose…
Pick up a version of Lock Tite that isn’t permanent, might have to unscrew it some day.
![]()
You may want to consider using Purple Low-Strength Permatex 24024 or Henkel Loctite 222 for small fasteners.
Thanks for the suggestion on loctite. It did work a bit longer than without it but eventually the rod came lose from the stepper coupling again. It’s always that same rod.
It almost seems like it’s shorter than it should be as when I try to push it back into the coupling it barely reaches and the screws do manage to grab it but just a little bit. Is there anything to do in that case?
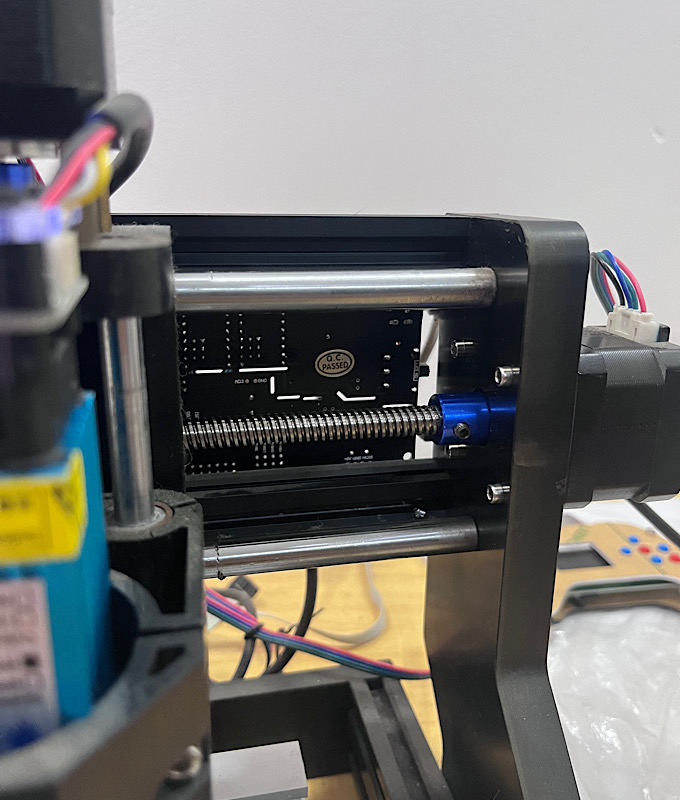
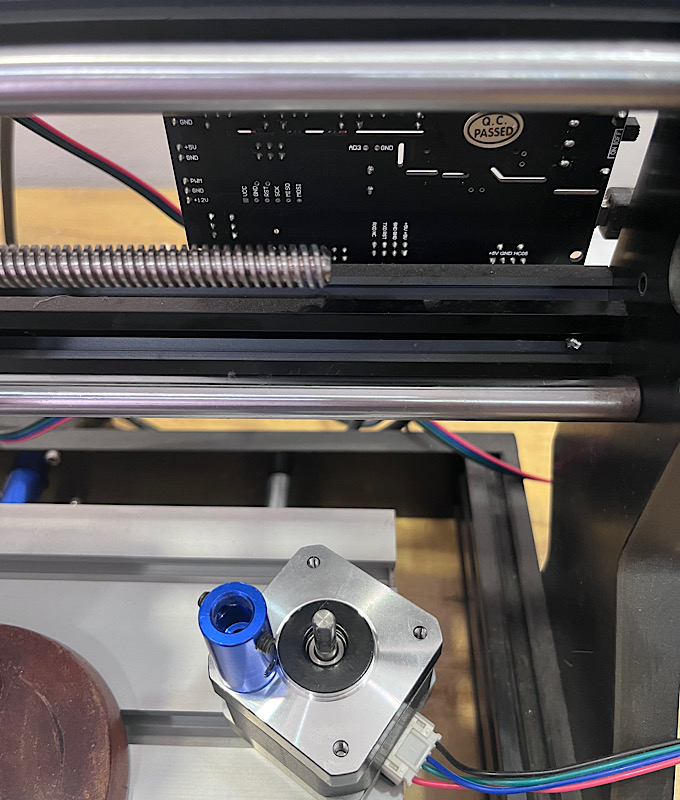
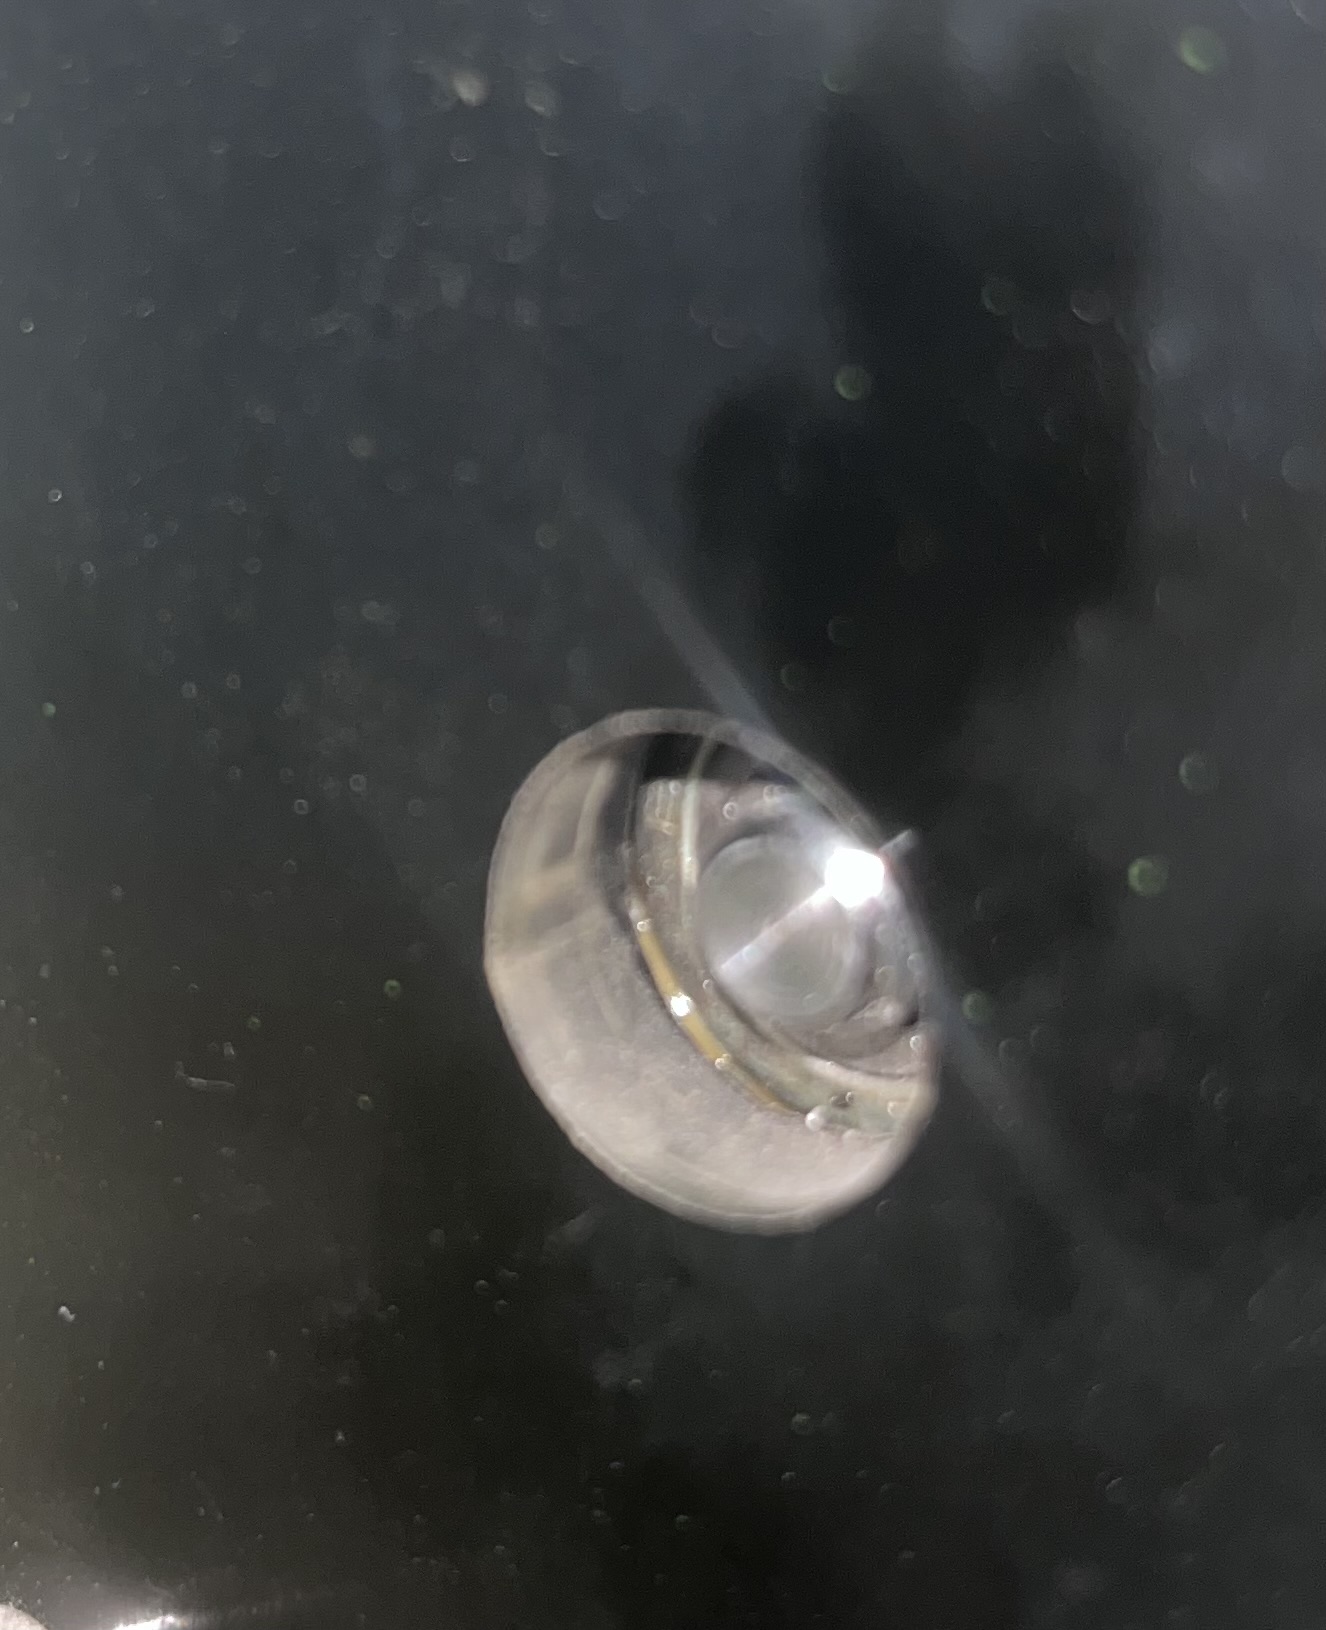
I’ve attached 3 images:
How much of the threaded rod can
be seen now (thru the small hole on the coupler) which shows how much the rod is inside the coupler now after it came loose.
How little more I can push the threaded rod into the coupler which must be affecting how quickly it comes loose. Before it would come loose mid job. After using loctite I was able to make it thru 3 jobs before it came loose.
How little extra threaded rod is actually left to push the threaded rod further towards the coupler.
Any suggestions would be greatly appreciated.
Perhaps there is a burr around the inside of the threaded hole in the blue adapter preventing the leadscrew from seating properly. If you have a drill of the same diameter, you can gently clean out the hole. Worst case, you can use a small file.
You should be able to slide the leadscrew into the adapter until it bottoms out. You can measure the hole’s depth and mark it on the leadscrew to show how far it should go.
The leadscrew should slide more-or-less freely through the bearing at the other end to let it seat in the adapter. Your picture shows the leadscrew can be moved away from the motor; if you pushed the bearing out of position, figure out how to loosen the leadscrew from the inner race to let it slide properly.
Stepper-to-leadscrew adapters are cheap and readily available. If the threaded hole has been wrecked and does not hold the setscrew, buy another one; measure the diameters to make sure you’re getting the right adapter.
I have one of those 3018 machines, although not with a laser, and they’re nice gadgets!
OK, it is currently running a burn after cleaning out the small threaded screws and reapplying fresh Loctite. After the burn is done, I will take it apart and check the condition of the coupler and rod.
I have noticed by manually running the laserhead left to right on that guide rail that it meets a lot of resistance towards the middle of that threaded rod. It makes me believe that it might not be perfectly straight, so I will take a look at that.
So both the alignment of the threaded rod and its length might both be an issue. The threaded rod does not reach all the way into the coupler, because as you saw the coupler still has about 5 to 6 mm, at least of space for the threaded rod to run into whereas the end of that threaded rod barely makes it out the farther side of the bearing.
That seems like the source of your problem!
You can test the leadscrew by rolling it on a flat surface (a mirror works well) and observing whether the middle rises above the ends while it rolls.
The follower nut should have a bit of play allowing side-to-side motion, but being too loose will introduce backlash on the axis.
This topic was automatically closed 30 days after the last reply. New replies are no longer allowed.