Hi, I’m new to laser engraving and to LB. I got a Vigotec L3 laser and for some reason when I engrave either text or image everything is stretched out. the Image i have on the screen is not the same with the actual image printed. I tried looking for answers here in the forums but so far all i read pertains to the rotary function which i am not doing. I tried disabling the rotary button but the results are still the same.
Thanks for posting, we can offer some suggestions. But we are needing a bit more information to help steer you in the right direction.
What motion controller and firmware is used to drive this laser? Share images of what you are wanting to produce, how it looks in LightBurn, including the ‘Preview’ window, how you have that job set, and the results you got.
Hi Thanks for the quick response! Bare with me, not sure if this is the right answer motion controller i think is GRBL, not sure of the firmware though… This is the sample image i tried to do
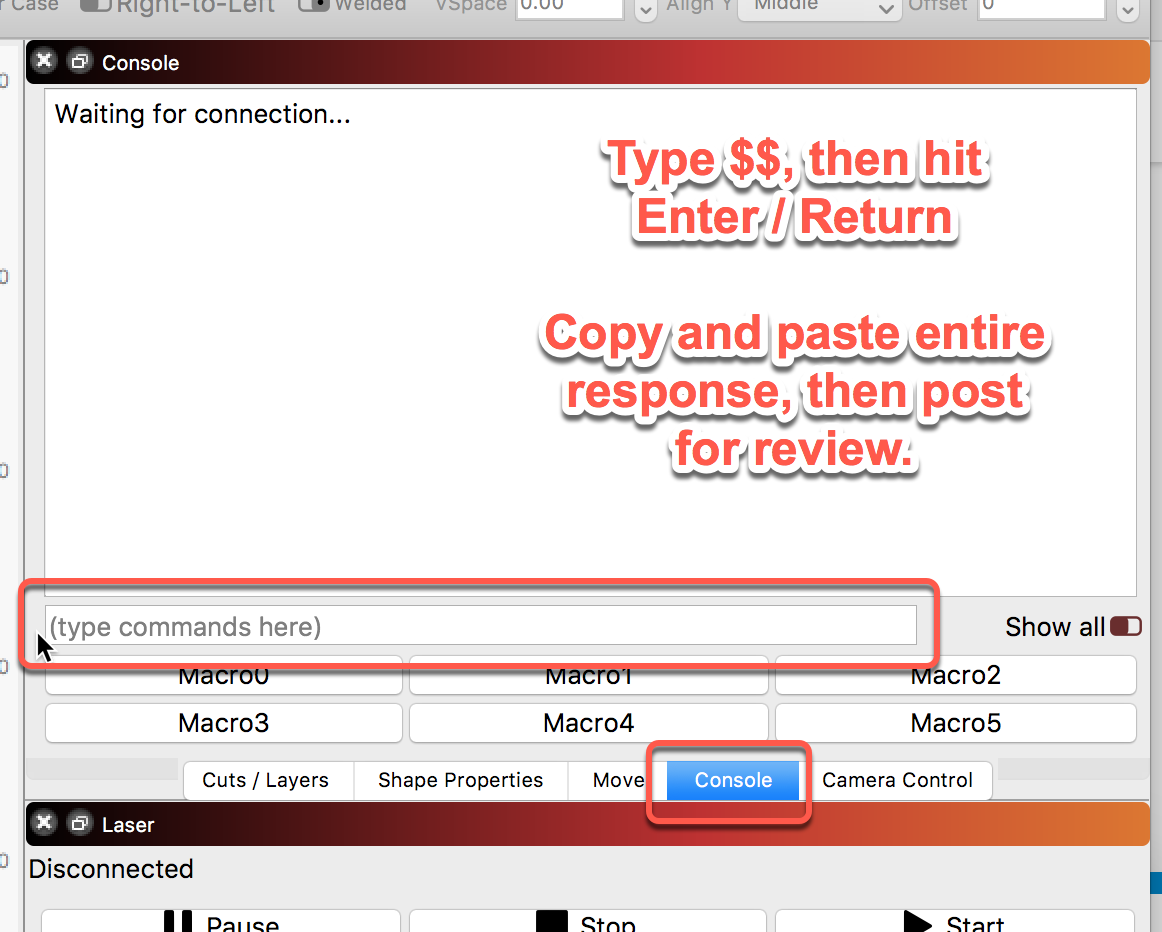
Click on the ‘Console’ tab, then type $$ and hit Enter / Return. You will see that window spit back a bunch of information. Please copy and paste the results here for review. That window scrolls so make sure you copy it all before pasting here.
When enabled, Grbl will move continuously through consecutive G1 , G2 , or G3 motion commands when programmed with a S spindle speed (laser power). The spindle PWM pin will be updated instantaneously through each motion without stopping. Please read the GRBL laser documentation and your laser device documentation prior to using this mode. Lasers are very dangerous. They can instantly damage your vision permanently and cause fires. Grbl does not assume any responsibility for any issues the firmware may cause, as defined by its GPL license.
When disabled, Grbl will operate as it always has, stopping motion with every S spindle speed command. This is the default operation of a milling machine to allow a pause to let the spindle change speeds.
Grbl needs to know how far each step will take the tool in reality. To calculate steps/mm for an axis of your machine you need to know:
The mm traveled per revolution of your stepper motor. This is dependent on your belt drive gears or lead screw pitch.
The full steps per revolution of your steppers (typically 200)
The microsteps per step of your controller (typically 1, 2, 4, 8, or 16). Tip: Using high microstep values (e.g., 16) can reduce your stepper motor torque, so use the lowest that gives you the desired axis resolution and comfortable running properties.
The steps/mm can then be calculated like this: steps_per_mm = (steps_per_revolution*microsteps)/mm_per_rev
Compute this value for every axis and write these settings to Grbl.
 motion controller i think is GRBL, not sure of the firmware though… This is the sample image i tried to do