Hi Miguel,
That’s a good start. I recommend doing some more tests in between these values to determine the perfect setting.
You should not see an “overshoot” because the laser is supposed to only move until the end of the line. The fact that you still see it on the text might be related to the font you are using.
Instead, if you look closely at the rectangle, you should see a stronger burn mark at the end because the laser stays on for longer. (The effect of this might be more visible if you engrave with a higher power.)
The Laser Off TC can’t be negative by design. It does not make much sense to turn off the laser before it reached the end of a line and I don’t know why EzCad3 even offers negative values there.
You are looking for a value, where the lines are juust touching and meet at a nice right angle.
In the video, this is at a Laser Off TC of 50us, clearly too early:
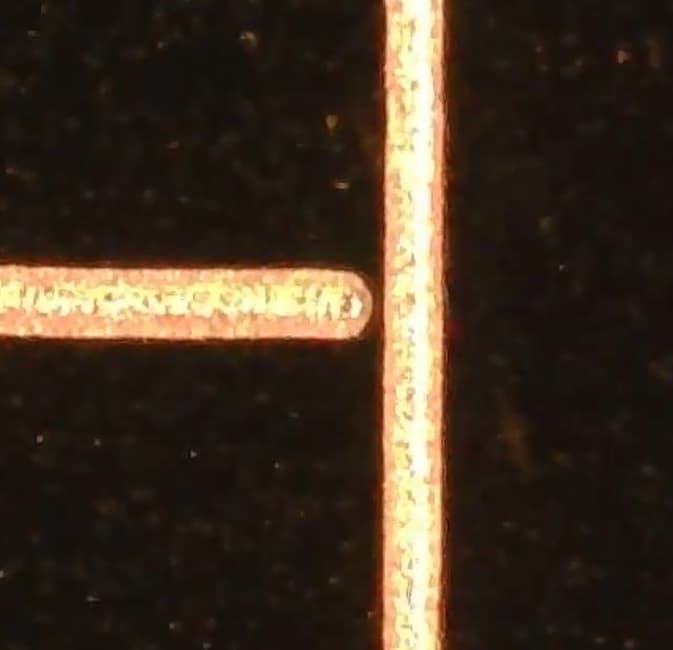
At a value over 500us, the delay in turning off is far too long and you start to see a burn-in at the end:

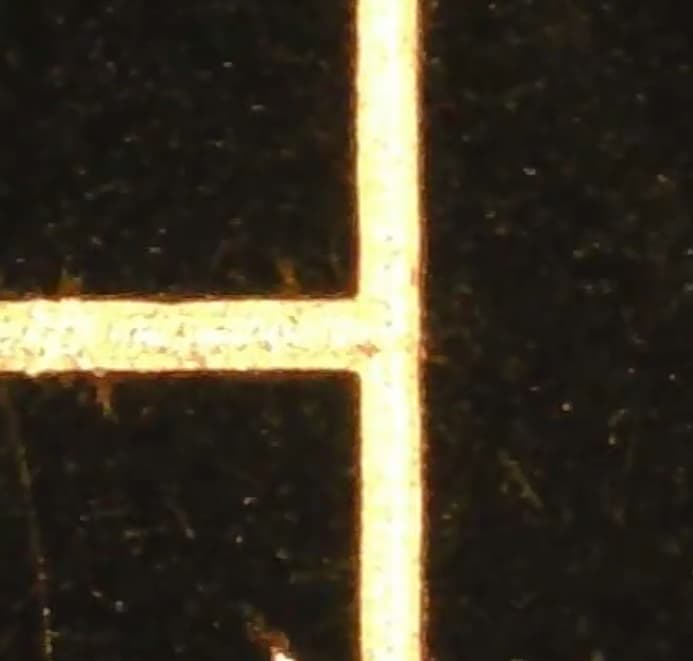
At 250, you can see the nice right-angle:
Thank you for your test file! I have edited it for the following changes:
- Set the speed to 1000mm/s with power at 50% to hopefully make the effects more visible.
- Changed the Laser Off TC values to cover a range between 0 and 1000us.
- Changed the Jump Speeds to 500mm/s and Jump Delays to 500us to work with the same settings as in the video.
laser off TC calibration-Aa.lbrn2 (64.9 KB)
Please check if these values work for your laser, run it and send us detailed pictures.
Full disclosure: I am also learning as we go along!
Looking forward to see your results!