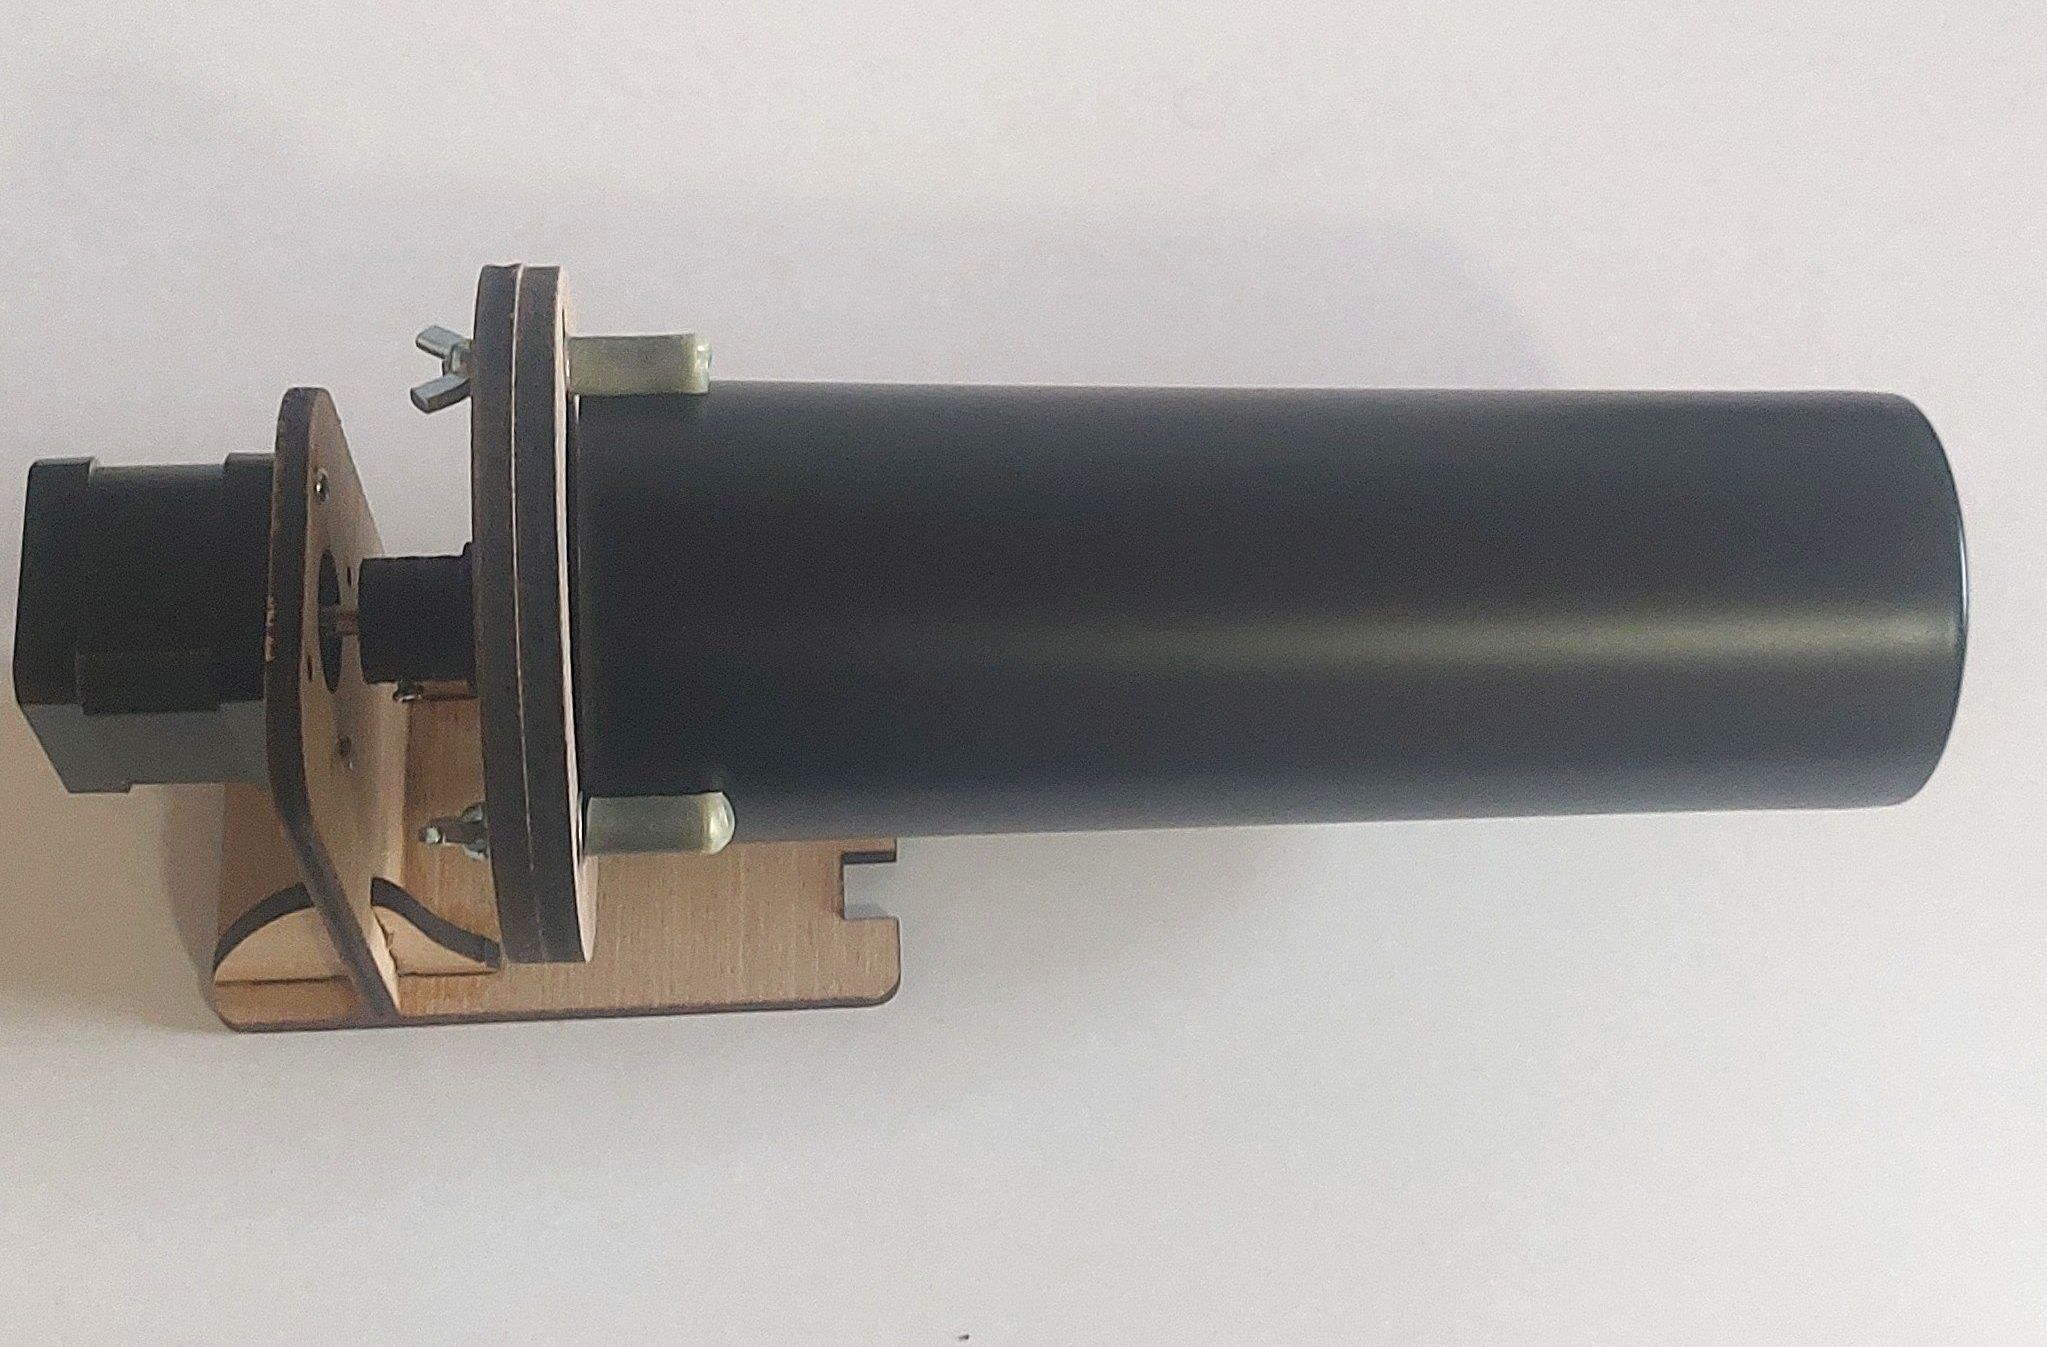
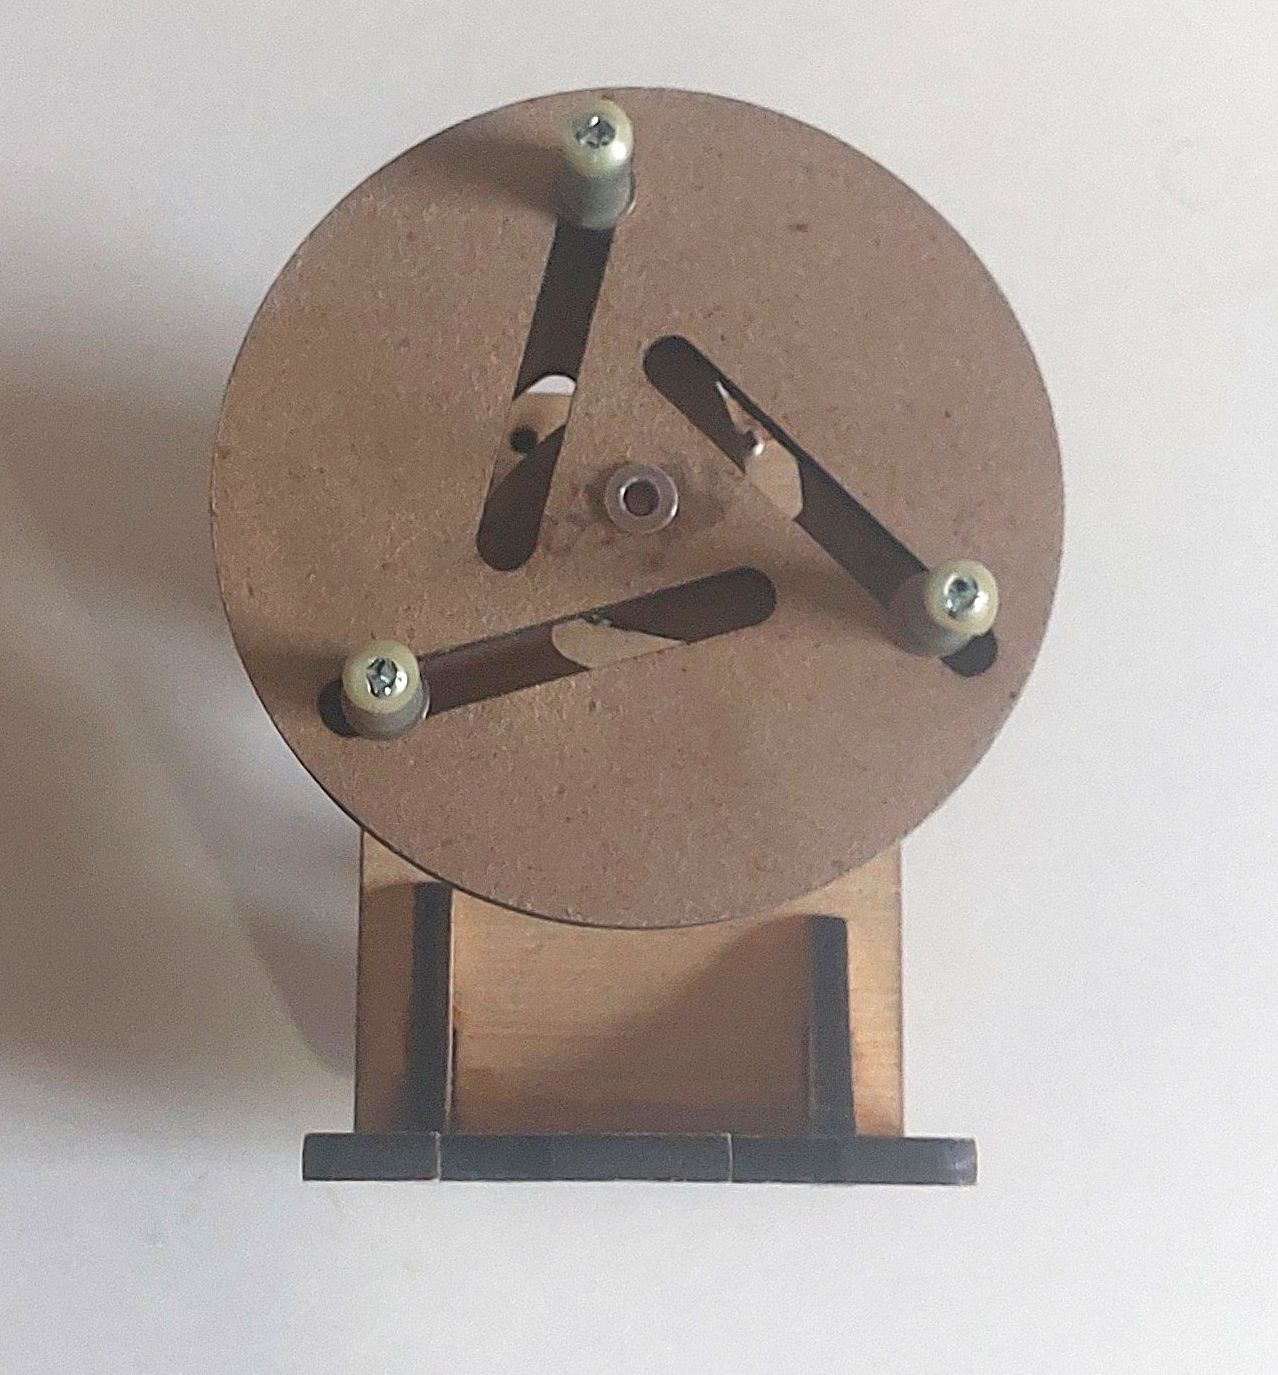
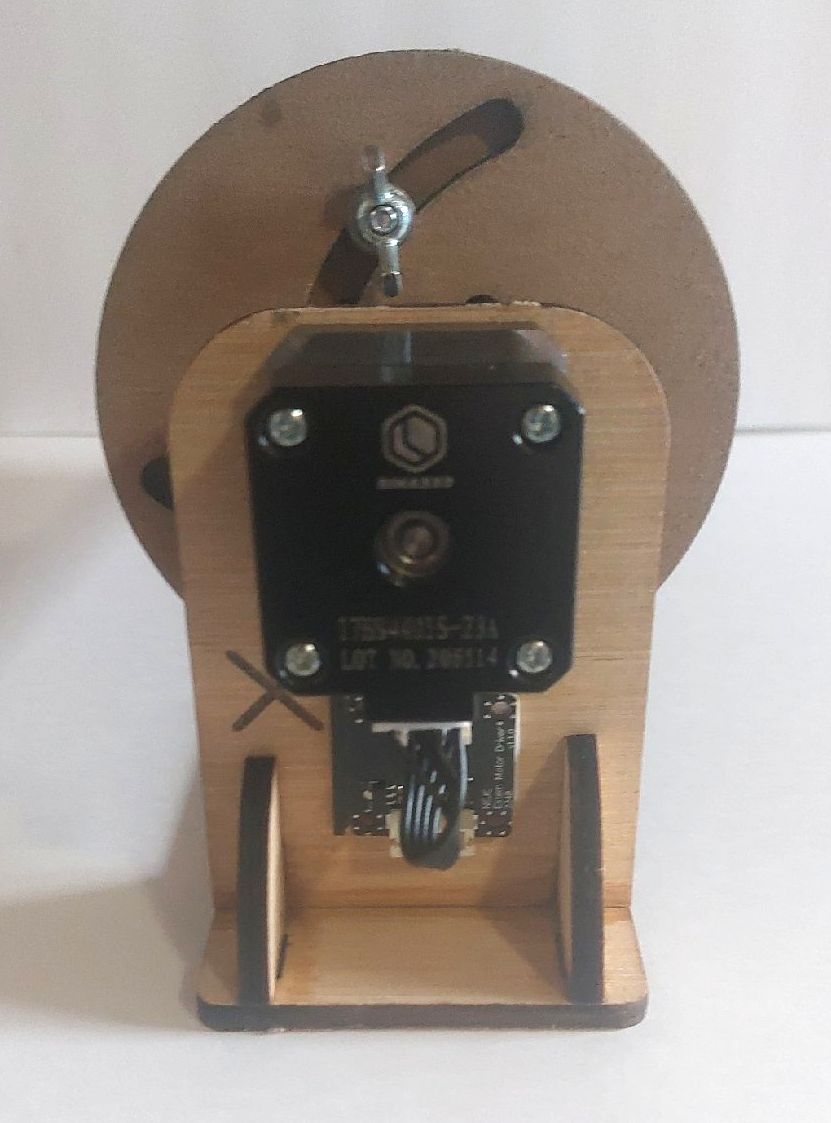
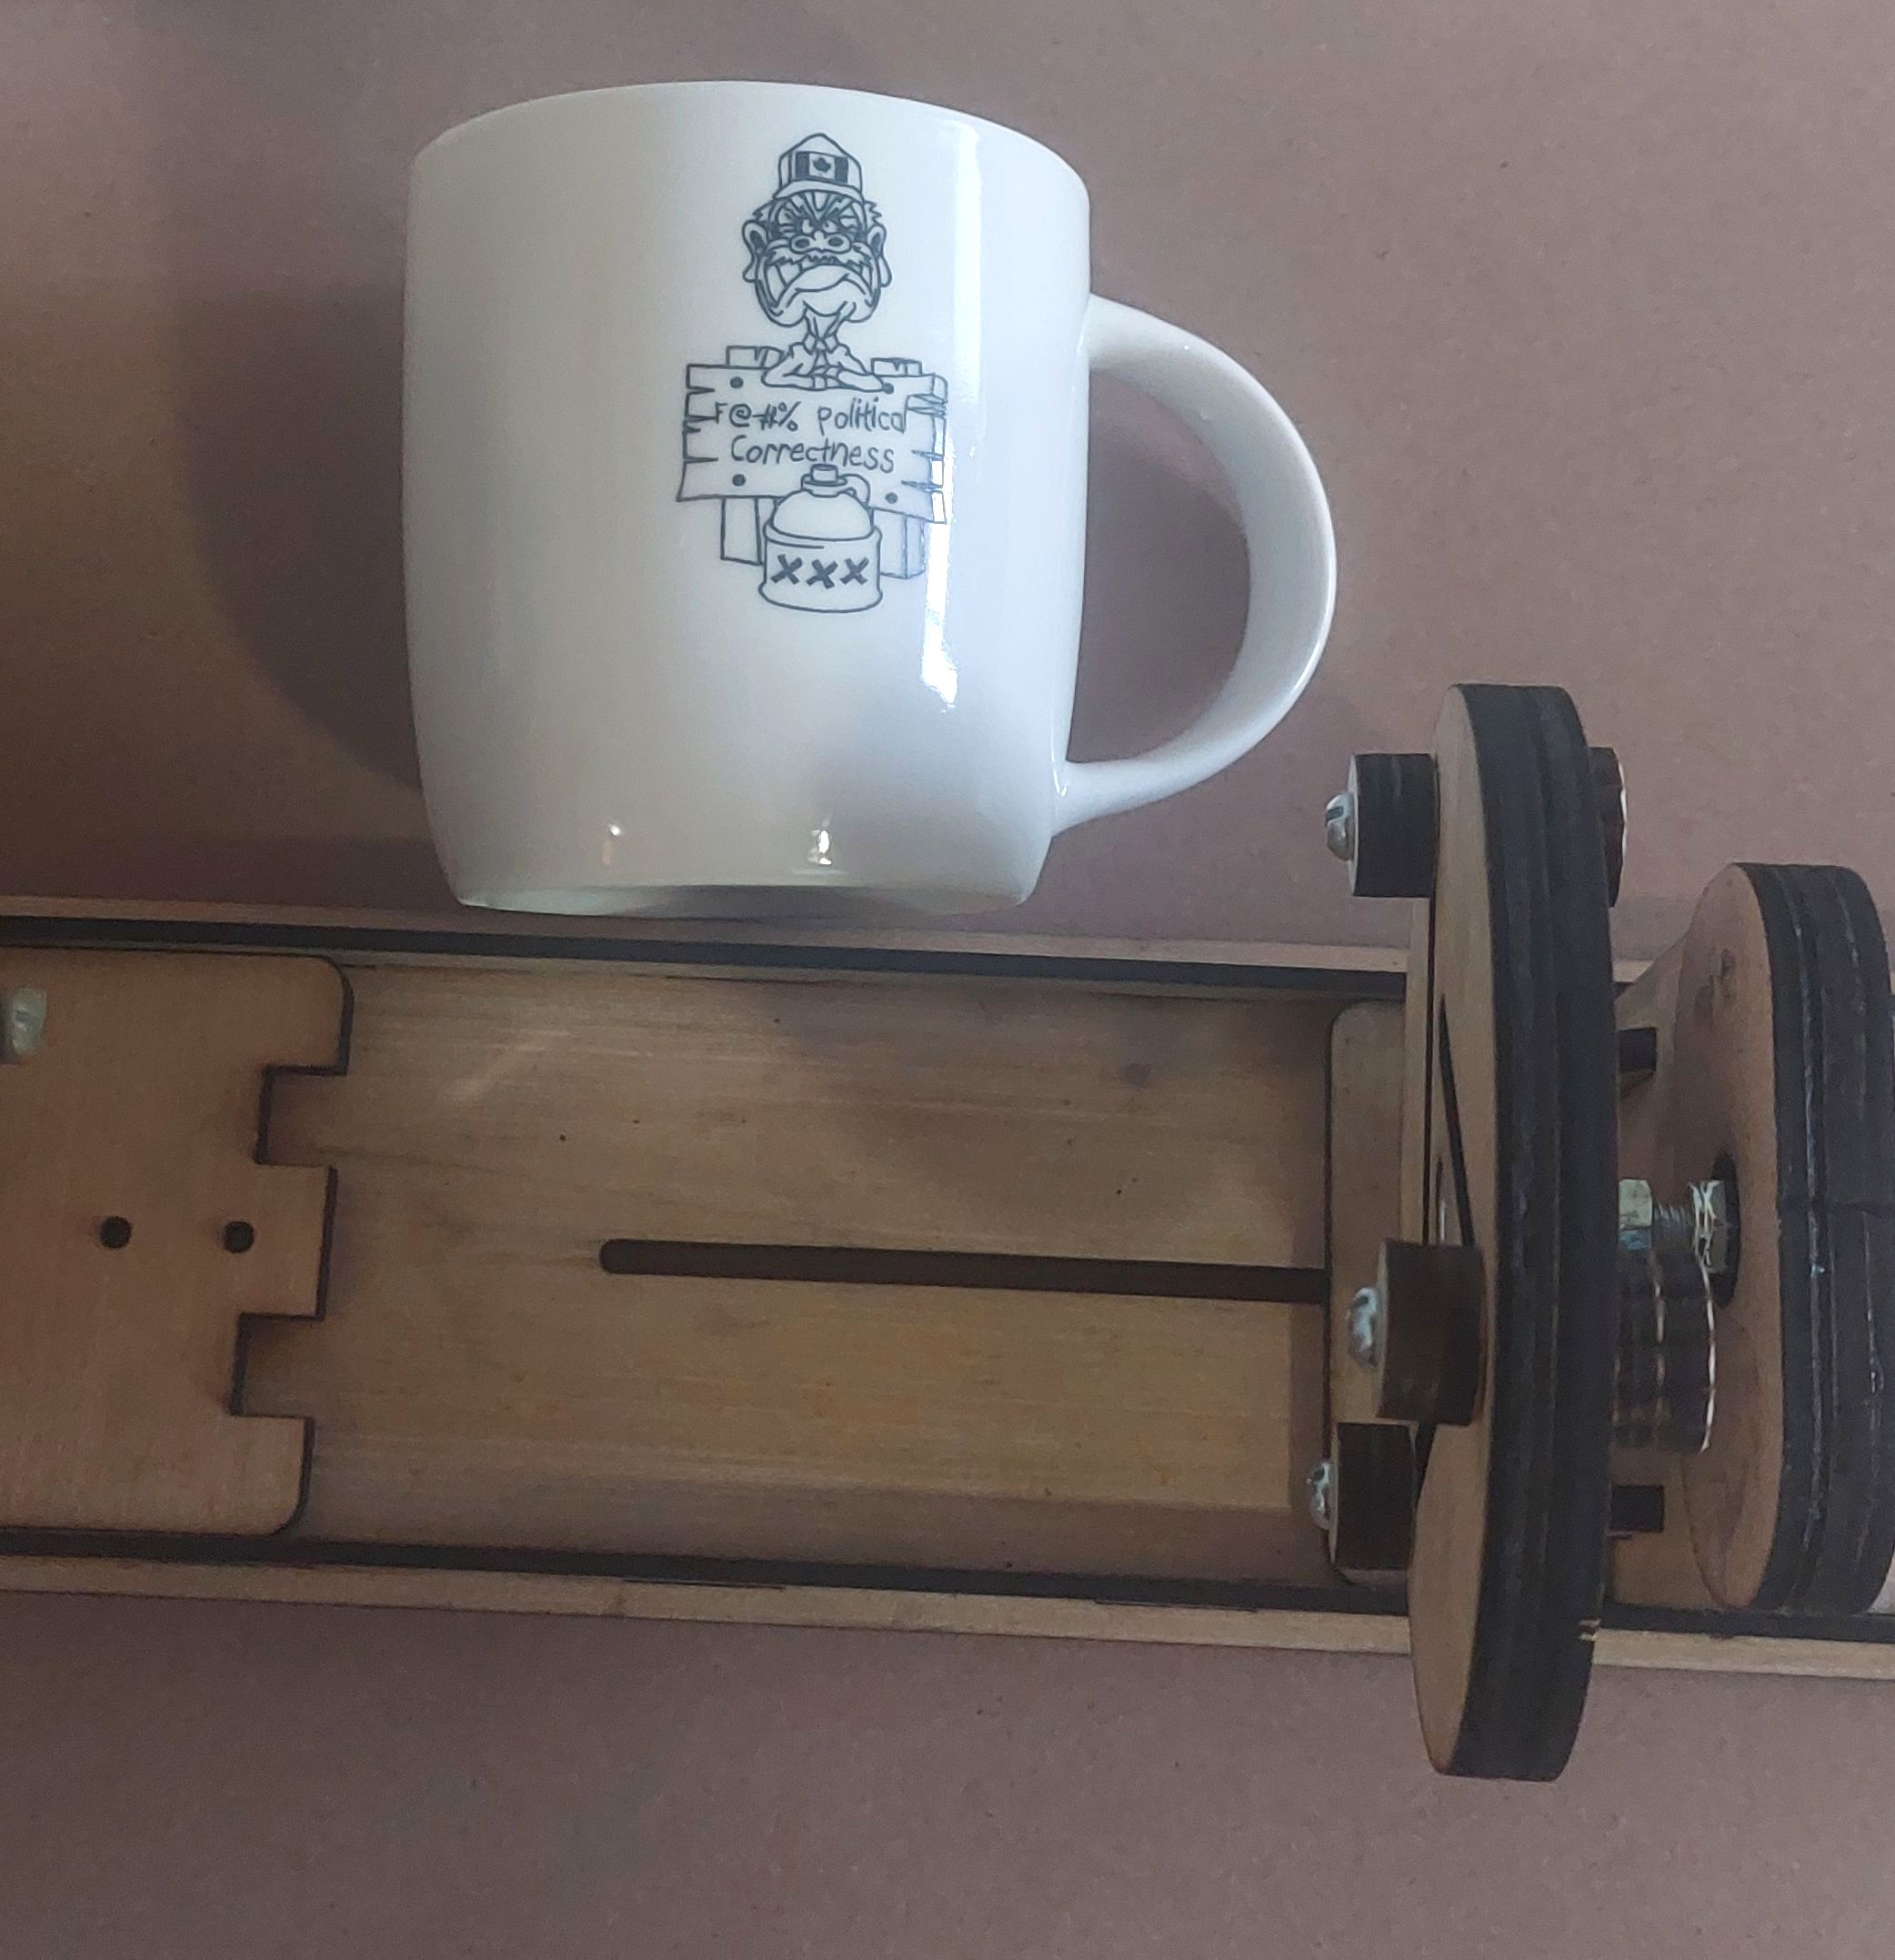
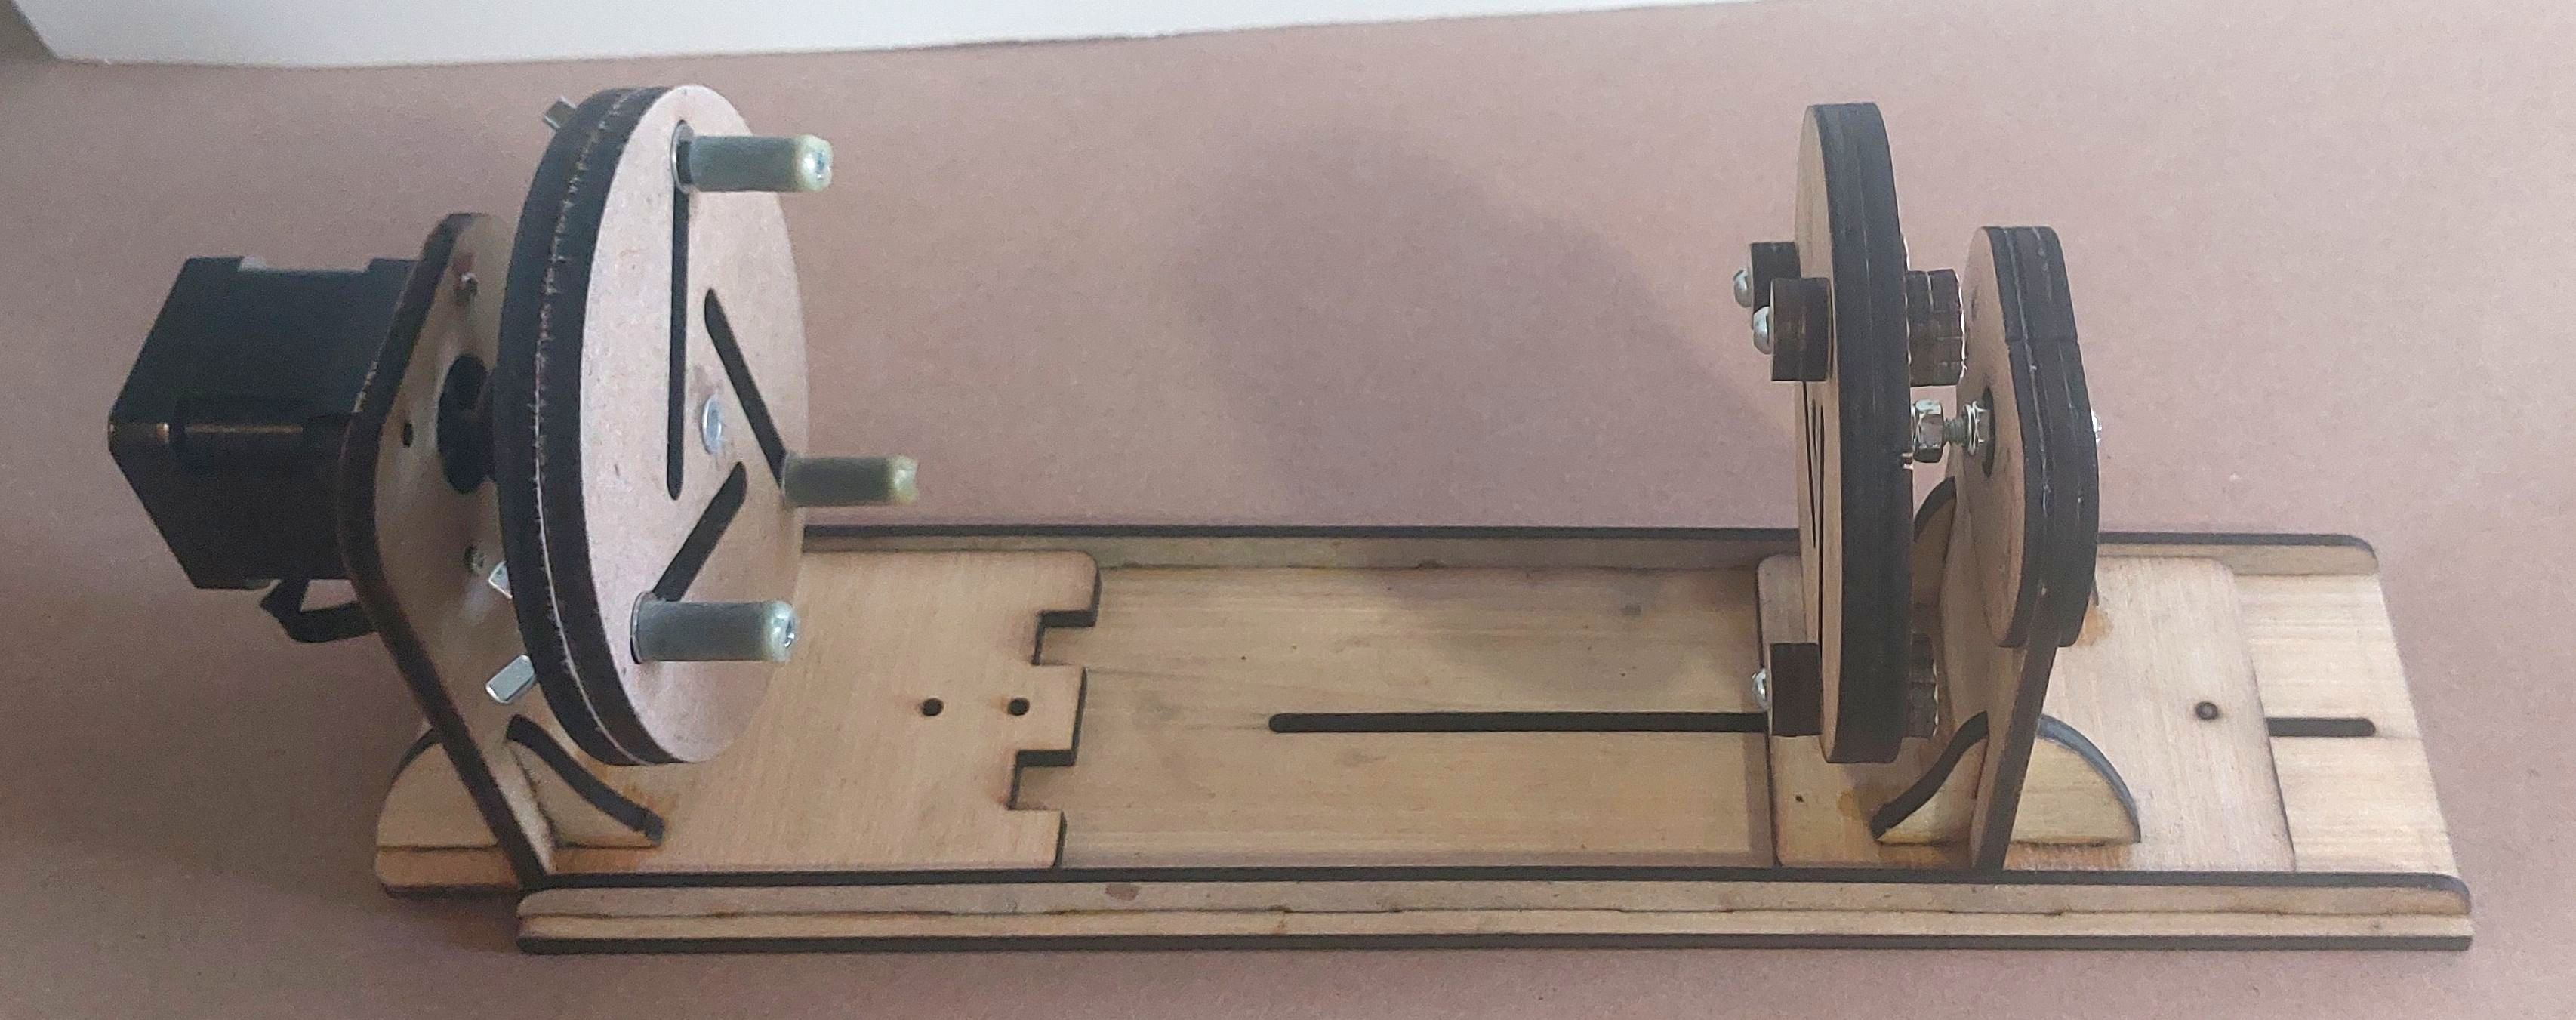
Here are a few pictures for you Rob. I changed how the chuck attaches to the stepper because I wanted to show it could do mugs as well. Usually, when doing mugs, I put the jaws on the inside of the mug so it gets better support but in this case I put the jaws on the outside to show it will hold. The stepper is now attached to the chuck using four pieces of 5.2mm plywood I cut and glued together so it would slide on the stepper’s shaft. I use 4 to make it easier to get to the wingnuts. The view of the back shows a adapter board that Neje needs to convert the stepper motor cable to the proper pinout for the Neje. It was included when I bought it. Another shows
two holes I added to the base. That is so I can screw it to a piece of wood, and add another chuck to the baxk end to supply better support for heavy items. I have no clue why I put tabs on the front but I’m sure it was a good idea at the time.
That was originally my thought but then I decided it would be easier to screw the head unit to a wider piece of plywood that was long enough to add the rear assembly to. Then I would cut a slot down the centre, add rails to the sides for the rear assembly to slide forward or backward while keeping the alignment. The centre slot would be so the rear chuck assembly could be tightened down easily. It would also be easy to add a second baseplate on a hinge setup so the entire chuck assembly could be angled up for mugs that were tapered. I’ll probably do that soon as this unit works great. So far the total cost is about $12.00 Canadian because of my Tim Hortons coffee addiction. I have everything else so, other than the coffee, the chuck hasn’t cost more than a bit of time.
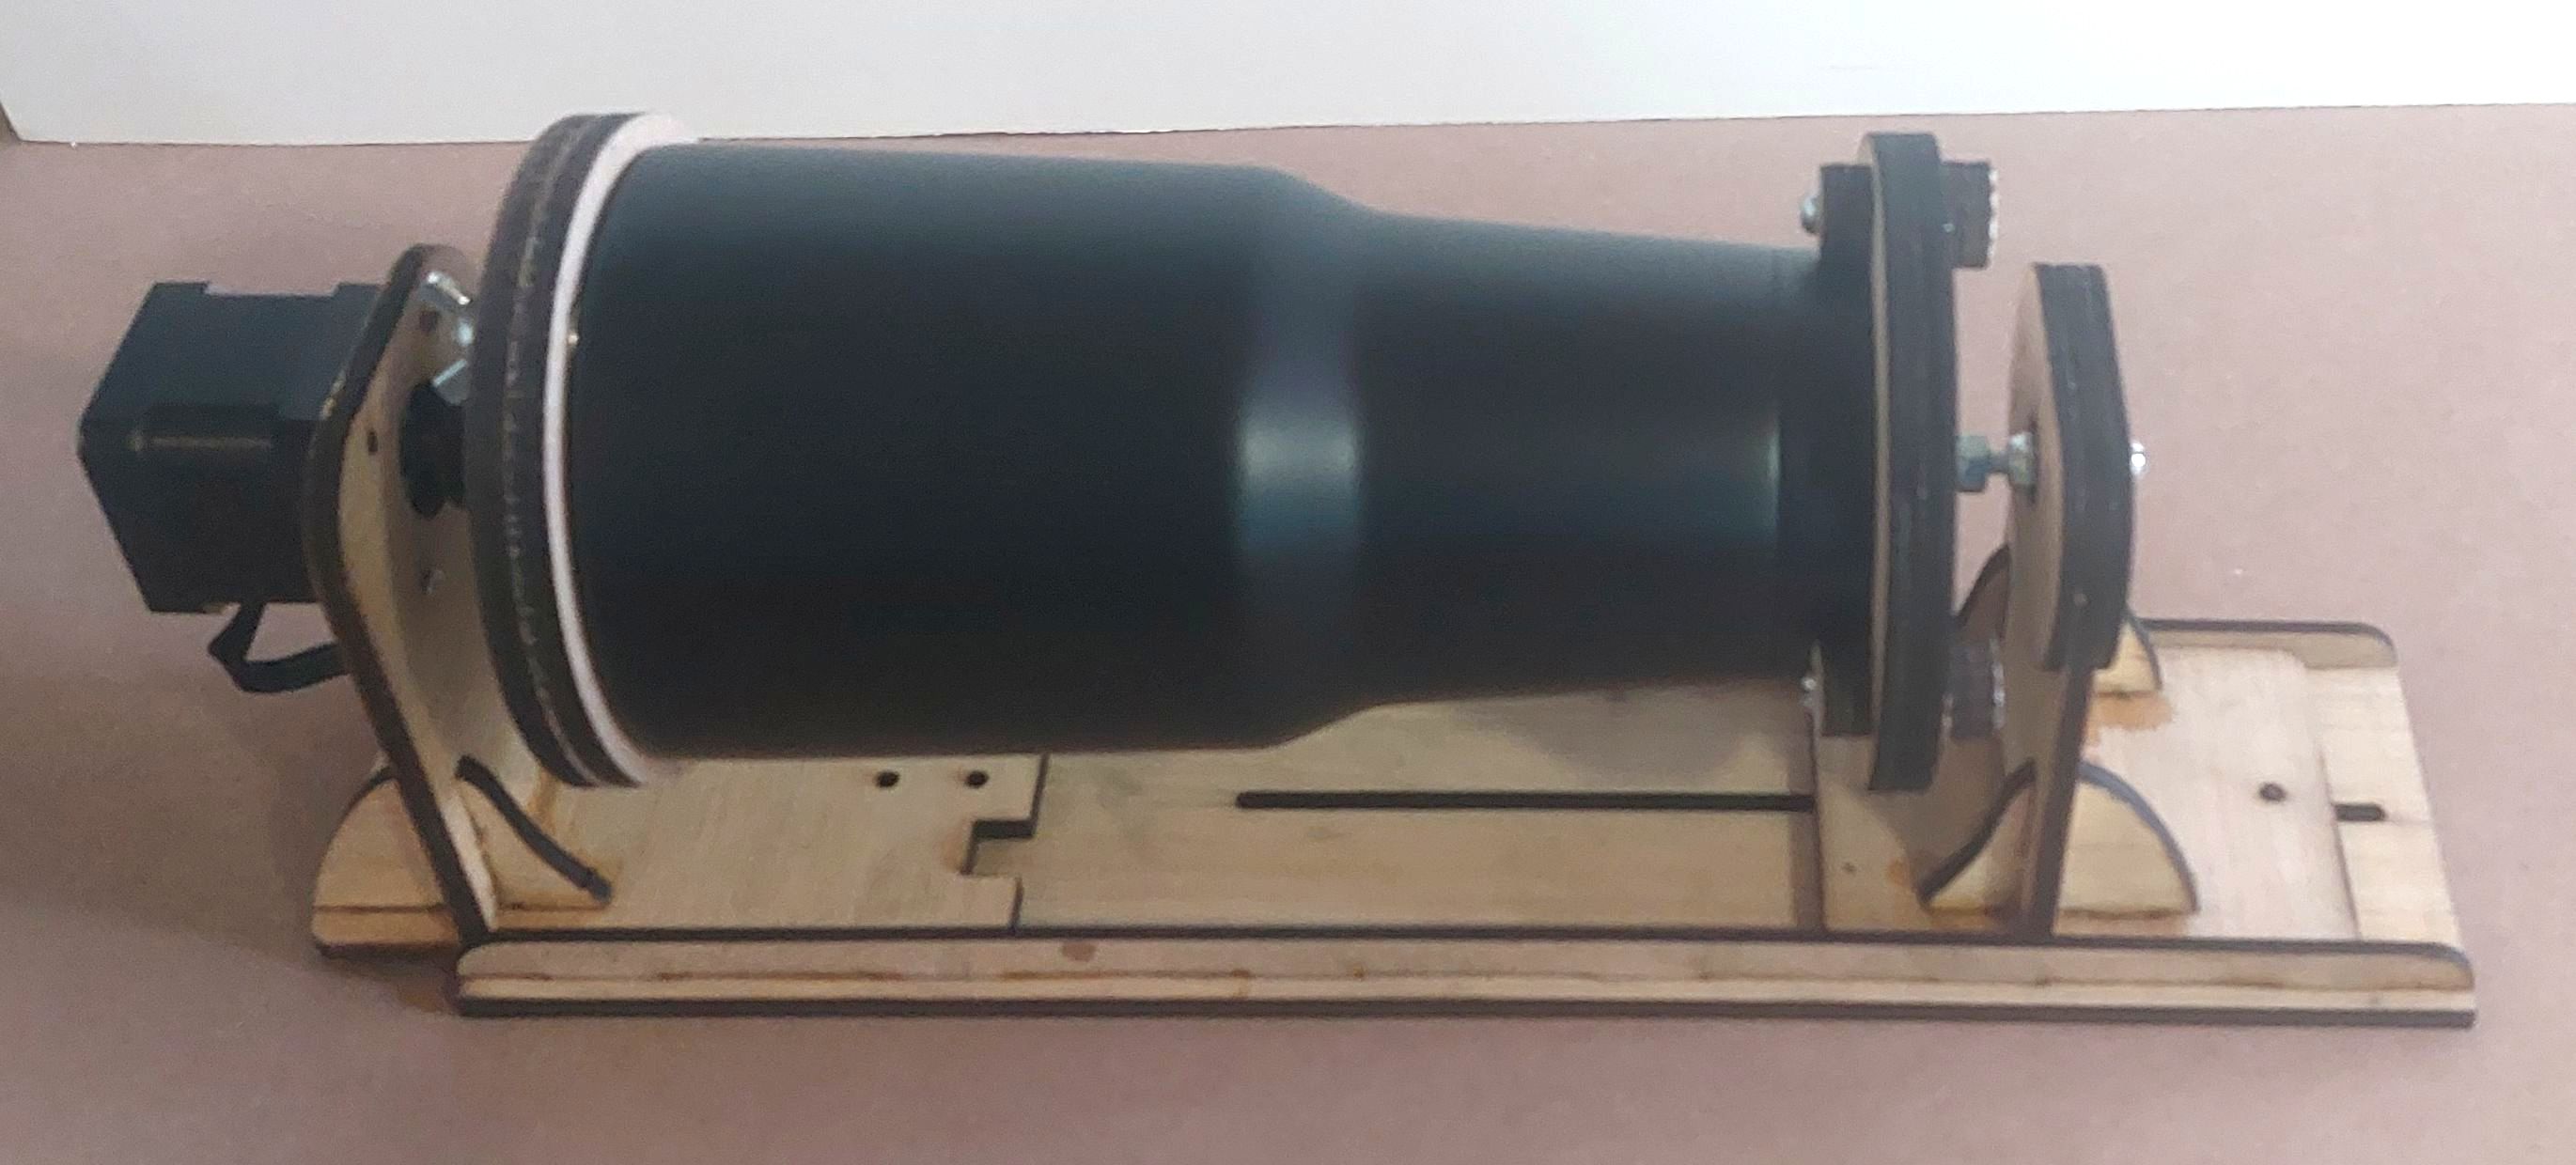
I finally got back to the project. My aim was to make a rotary as cheap as possible using what I had on hand. This project cost zero dollars. Even if a person had to buy the stepper motor and a few bolts, it should still cost less than $30 Canadian. I made the rear attachment and put everything on a base for easy rear chuck movement. I made the rear chuck gripping arms slightly different because they are just for holding the mugs, etc. aligned and steady. For all the diode users, everything was cut using a 20W. I was using my CO2s in the beginning and for the recently done items. I decided to keep using the Neje. Next I’ll make an attachment to angle it up rather than sticking a shim under the back. Here is the final product (except for maybe a coat of bright purple paint) with a cup I did.
That’s always a great result to aim at, and You succeeded very well indeed.
For someone wanting a case specific rotary, or even as the very first rotary for someone just starting to get into rotary lasering, that creation of Yours fits the bill exactly.
Fashioning that rotary of Yours for angled jobs is also very simple with a sine- or a see-saw style base modification/addition.
If you like to share the complete source for the parts, I could add the images and the files to the rotary page of the wiki: Rotary roller - Diode Laser Wiki
Hi Harold,
I made a new topic on how to make it and the parts needed here:
This gives you the LightBurn files for both the metric and standard versions. The manual will need to have the “.txt” removed so it can be read as a PDF.
If you are interested, there is also a roller version that is similar in design. You can even use the base assembly from the 3 jaw chuck version for the roller version.
It is located here: Cheap & Easy Roller Rotary
I originally tried to edit this topic but I wasn’t able to. I was also unable to delete the topic in favour of the new one, and as my wife took away my favorite computer repair too, Percy the Sledge (old music lovers will know the reference) I decided it was easiest to make a new thread.