Hi folks,
I hope there is someone who can explain me how the calculation of text filling works or what I am doing wrong.
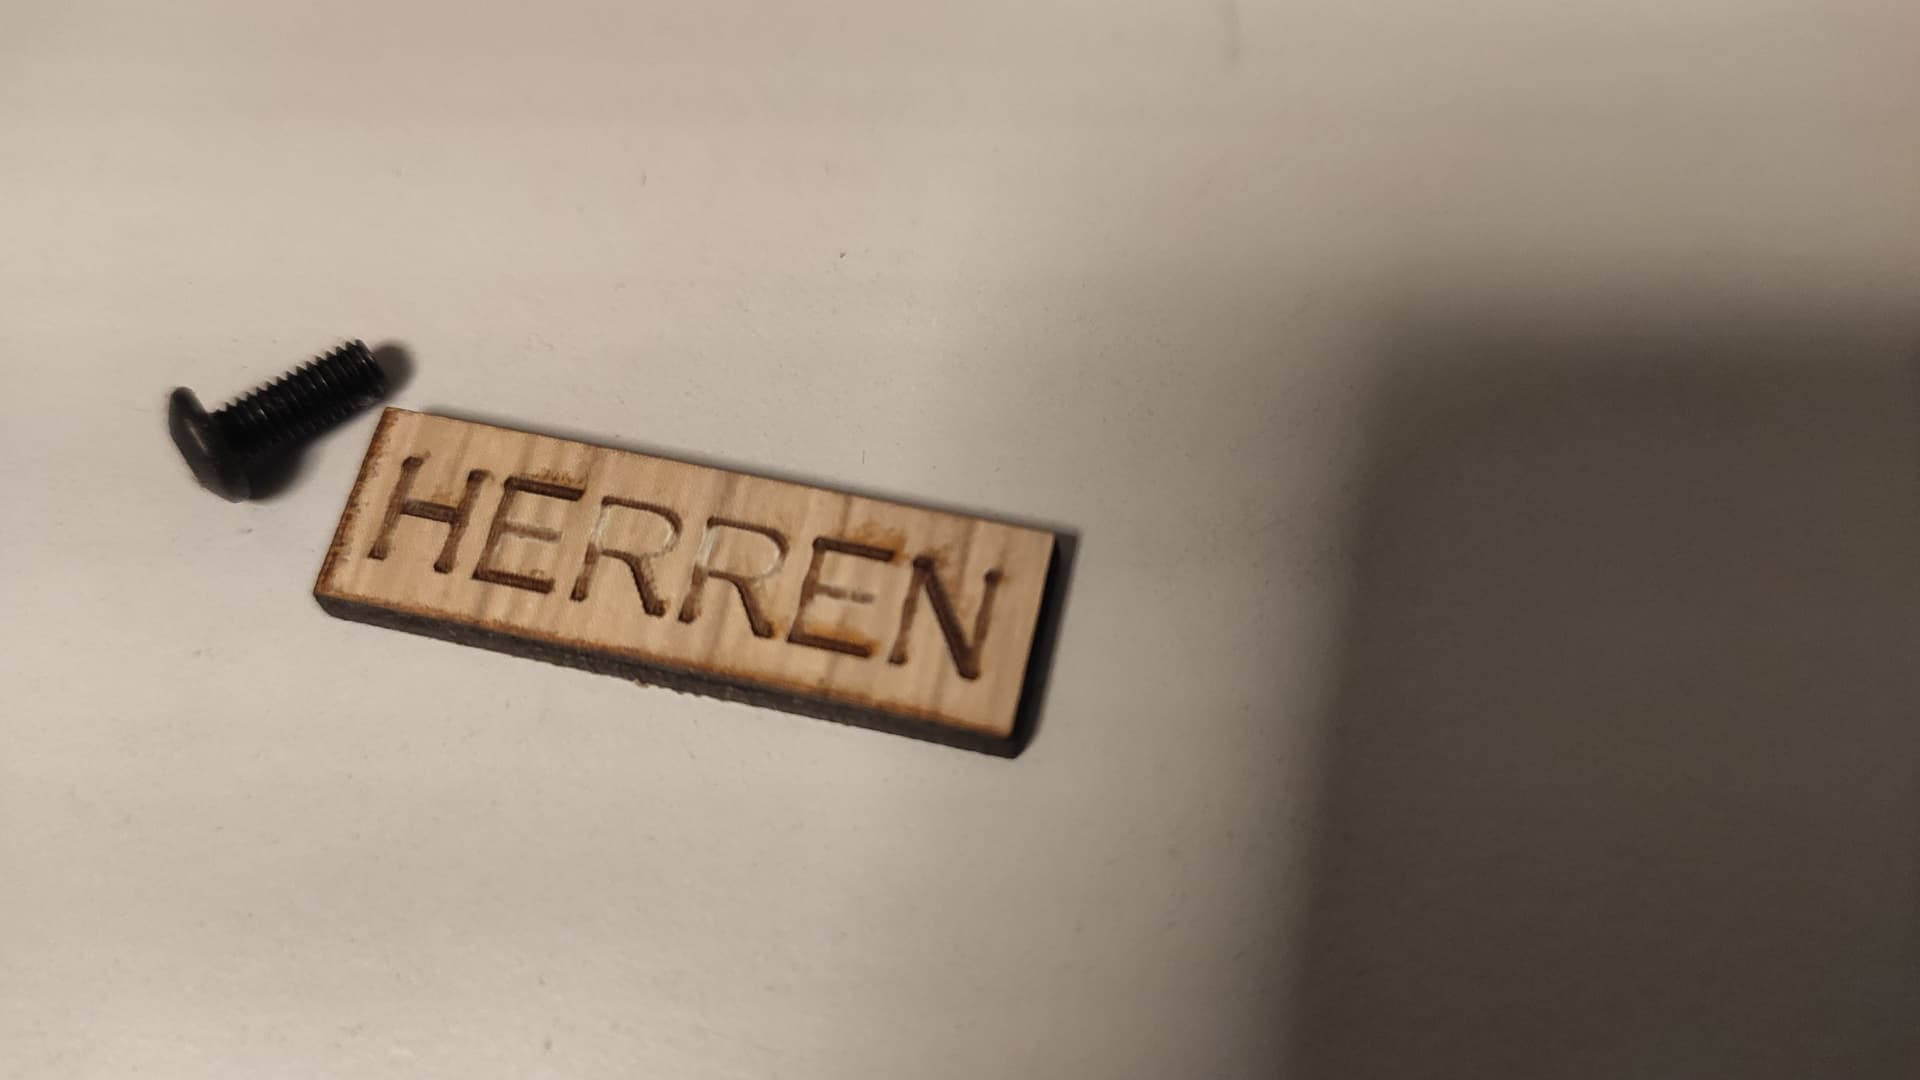
I have a small diode laser and wanted to engrave text on small wood pieces. Works quite well except that the machine reduces for some letters the power of the laser that it is not engraved Till the edges.
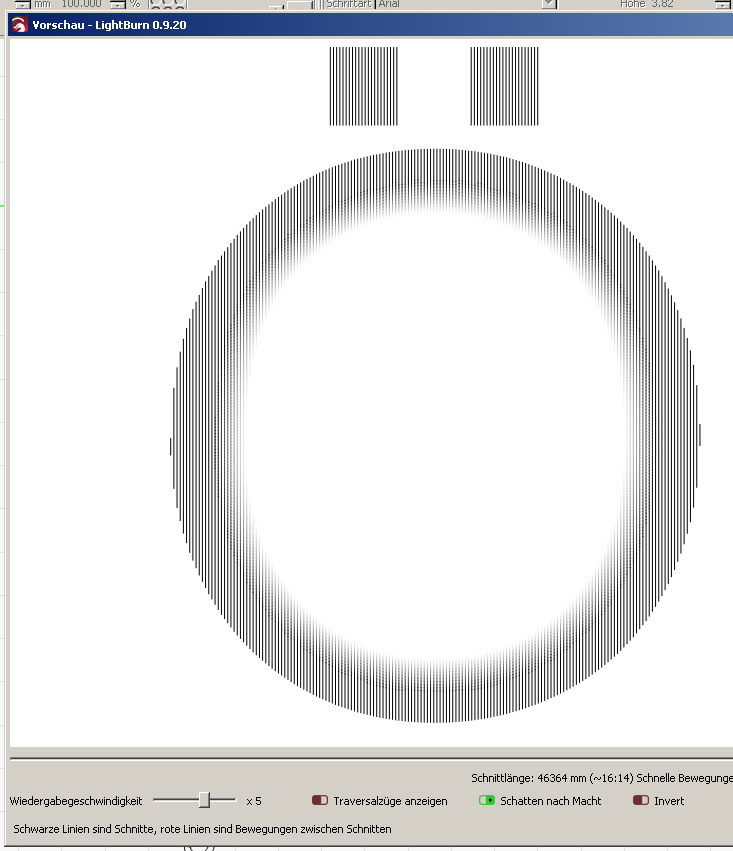
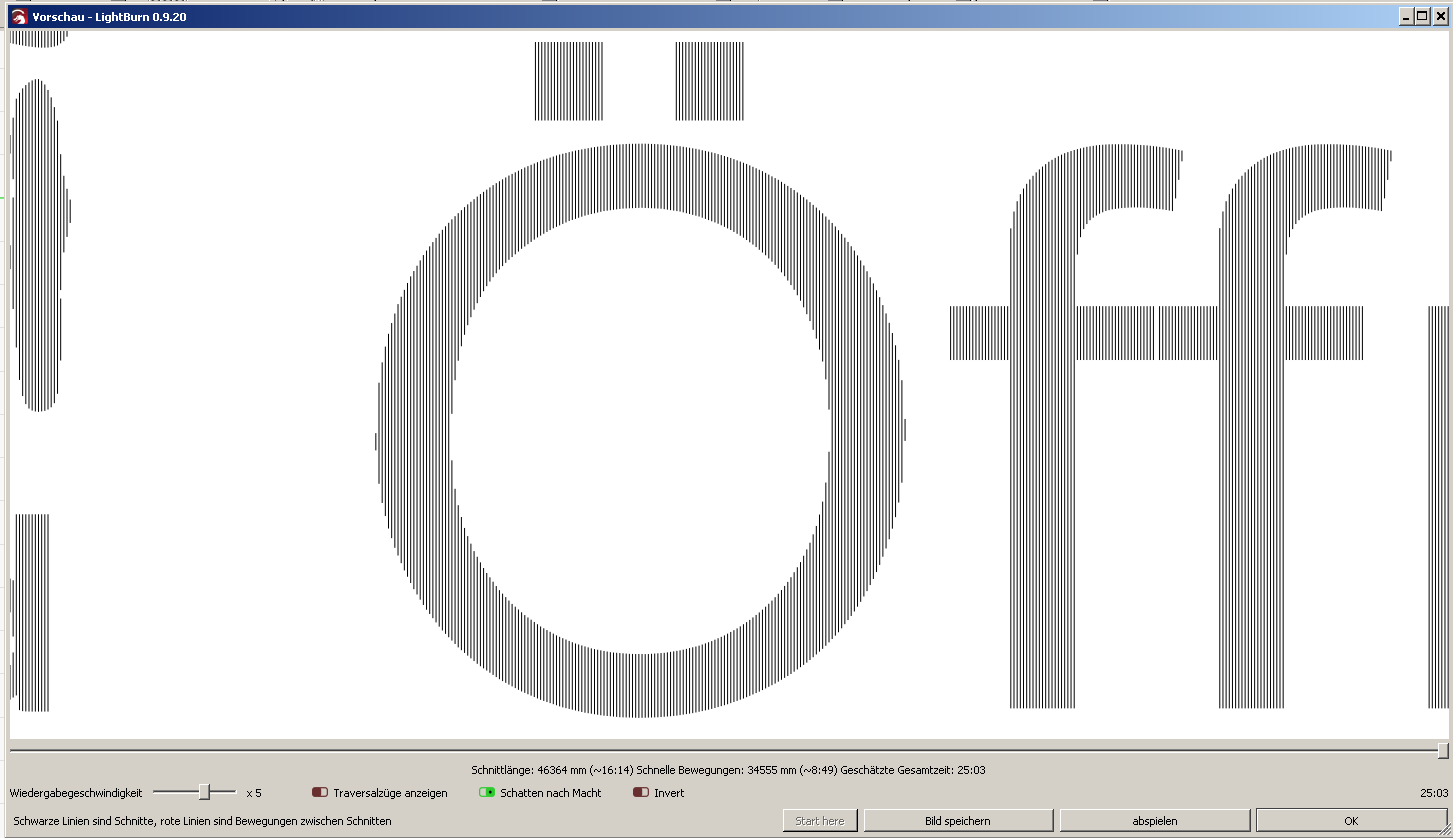
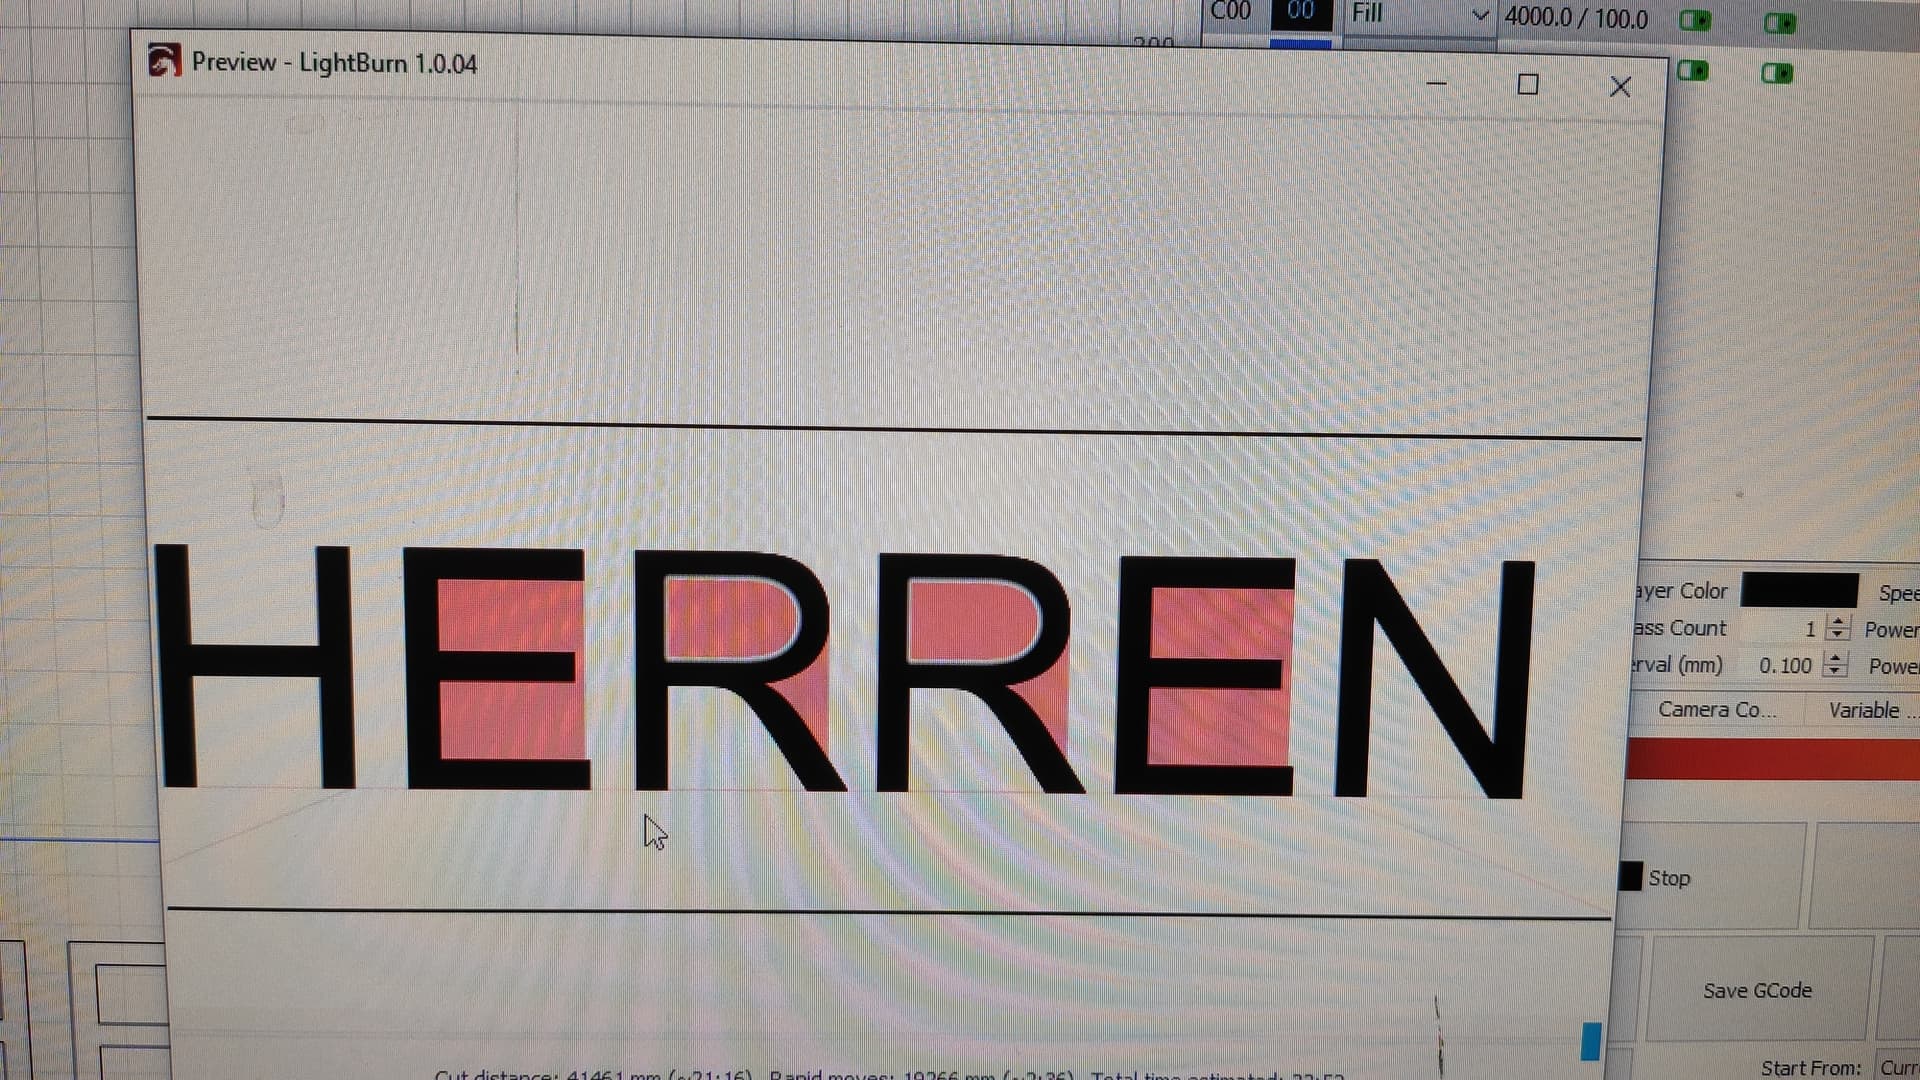
In the preview you can see where it gets weak and on the result piece it’s also visible. When the text is bigger it’s no problem only if it’s just a few mm.
Maybe someone of you knows if there exist a setting to disable this.
You are going a bit too fast in my opinion, try a bit slower. Perhaps add some more DPI since it’s such a small piece.
Your axis moves opposite of mine. mine moves side to side yours move up and down since you have it at 90 degrees. Try not using the 90 degree’s. Try “cross hatching” and also give “overscan” a try. You can sharpen the edges with “fill+line” to help define the edge on small pieces. “constant power mode” will keep the same power across the whole engrave.
With my CO2 (so far) I don’t have the same issue I have with my diode.
Tough to tell, but it looks like a bit of wobble also. Slower speeds might help that.
Just offering my own opinion which might not help, but hey, it’s free-ninety nine.
Defocusing would unfortunately not work for my issue, because you can really see that it reduces the laser power when it comes to the letter R and there the laser is not powerful enough to burn the wood surface anymore.
For other letters like the E it is totally Sharp on the edges and also the preview shows no reduction.
The preview screen doesn’t know what’s happening on your machine. It executes the generated code as a ‘simulator’ that gives you all the movements and where the laser should mark the material.
I think we talk past one another.
Actually my problem is not the quality or details of the engraved text to use a defocused beam for blur effect.
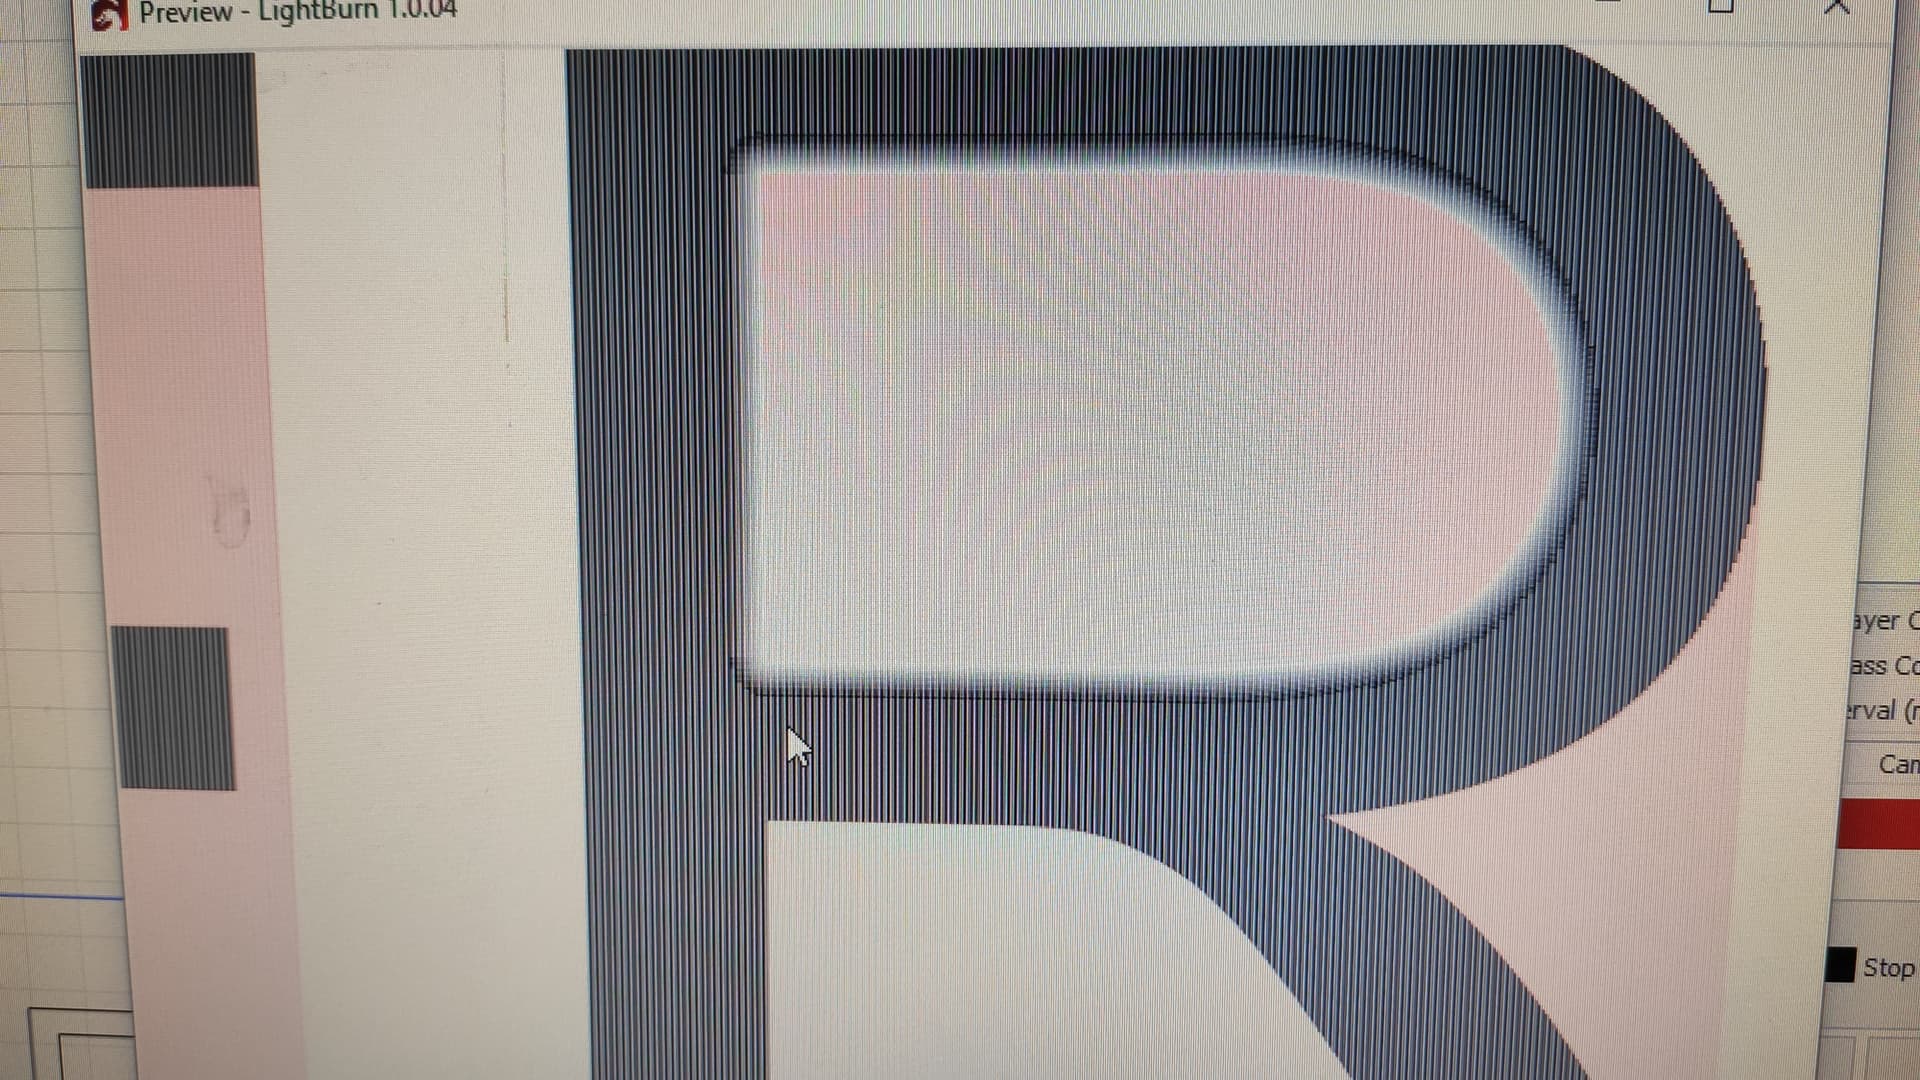
My problem is that for some reason the filling algorithm of LightBurn reduces the power when it comes to the edges of some letters like R (only the closed middle part of the R).
Other letters like E show no power reduction.
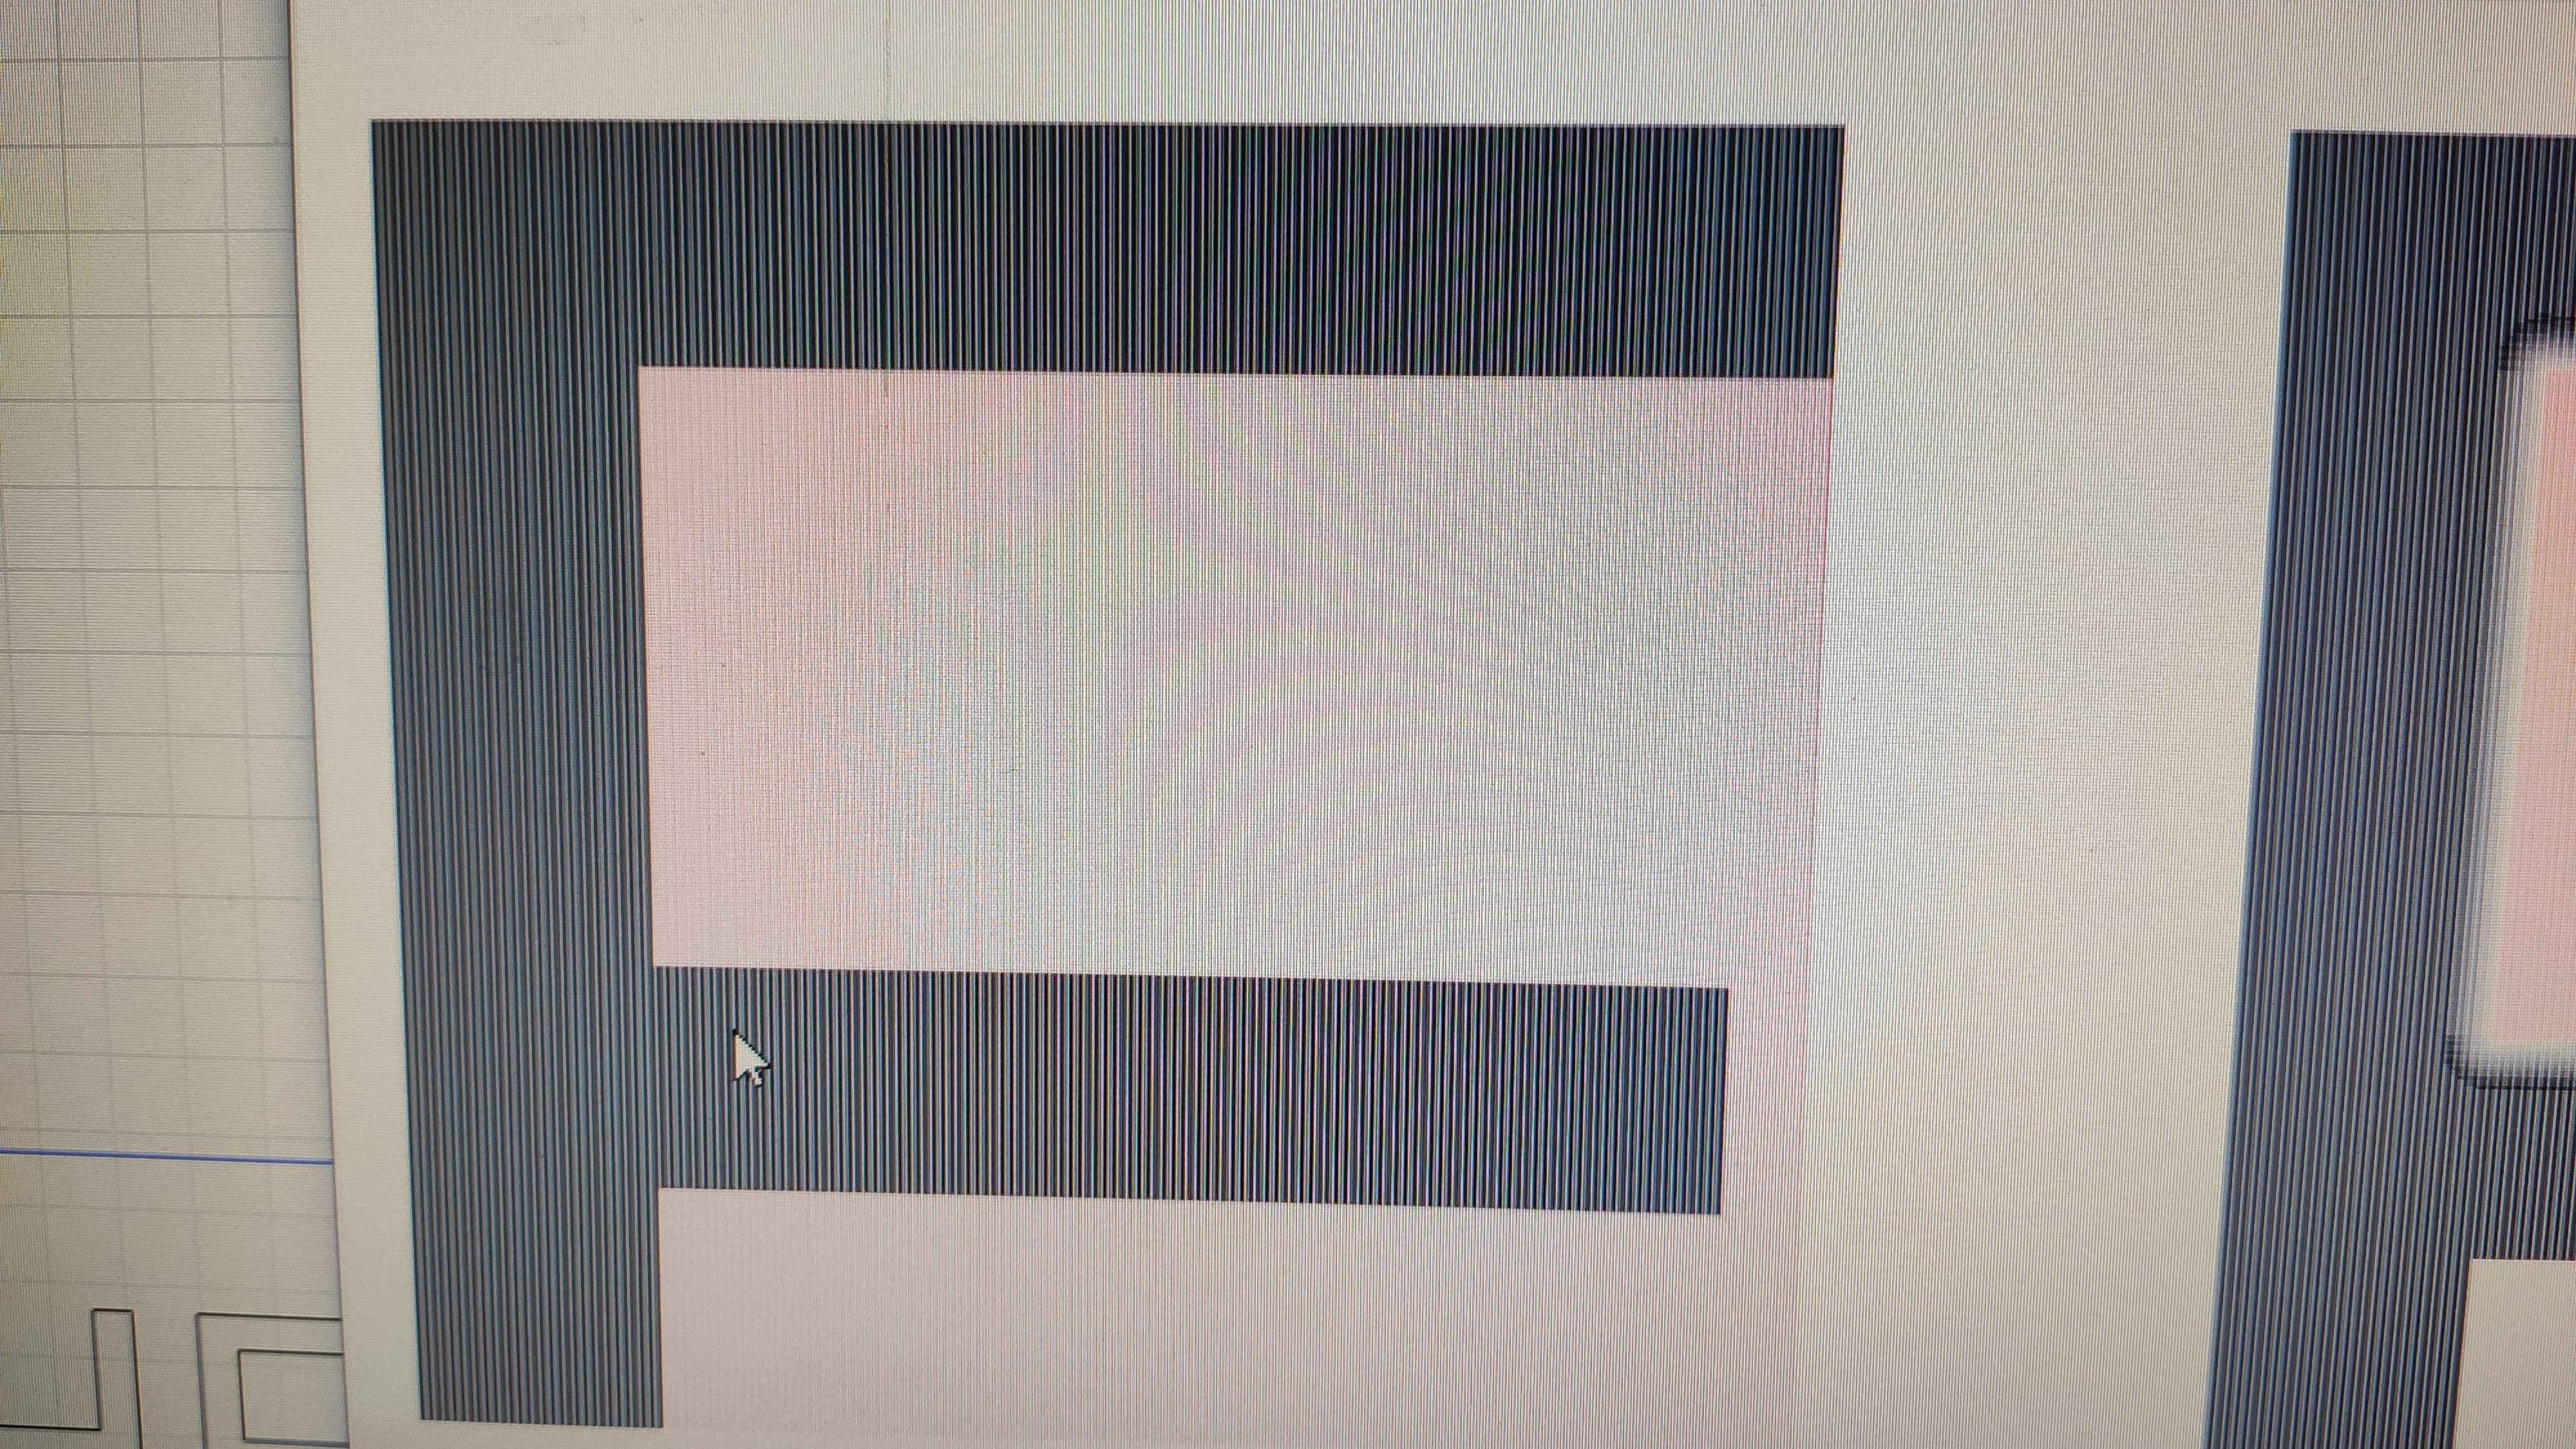
This is what can also be proofed with the simulator…where it shows black lines with full power and gray for reduced power.
Maybe this is to smooth the letters. This is only annoying for small size letters.
I just thought that this feature can maybe deactivated somehow.
Aaaah… I’m so stupid.
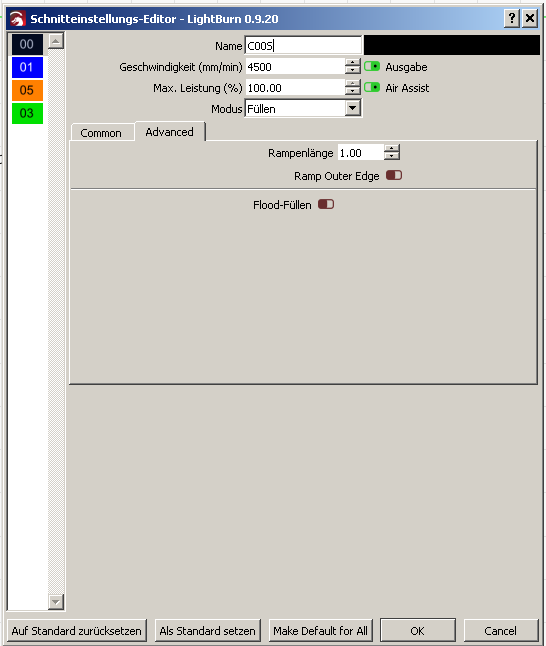
I have now finally found the solution for the above described issues.
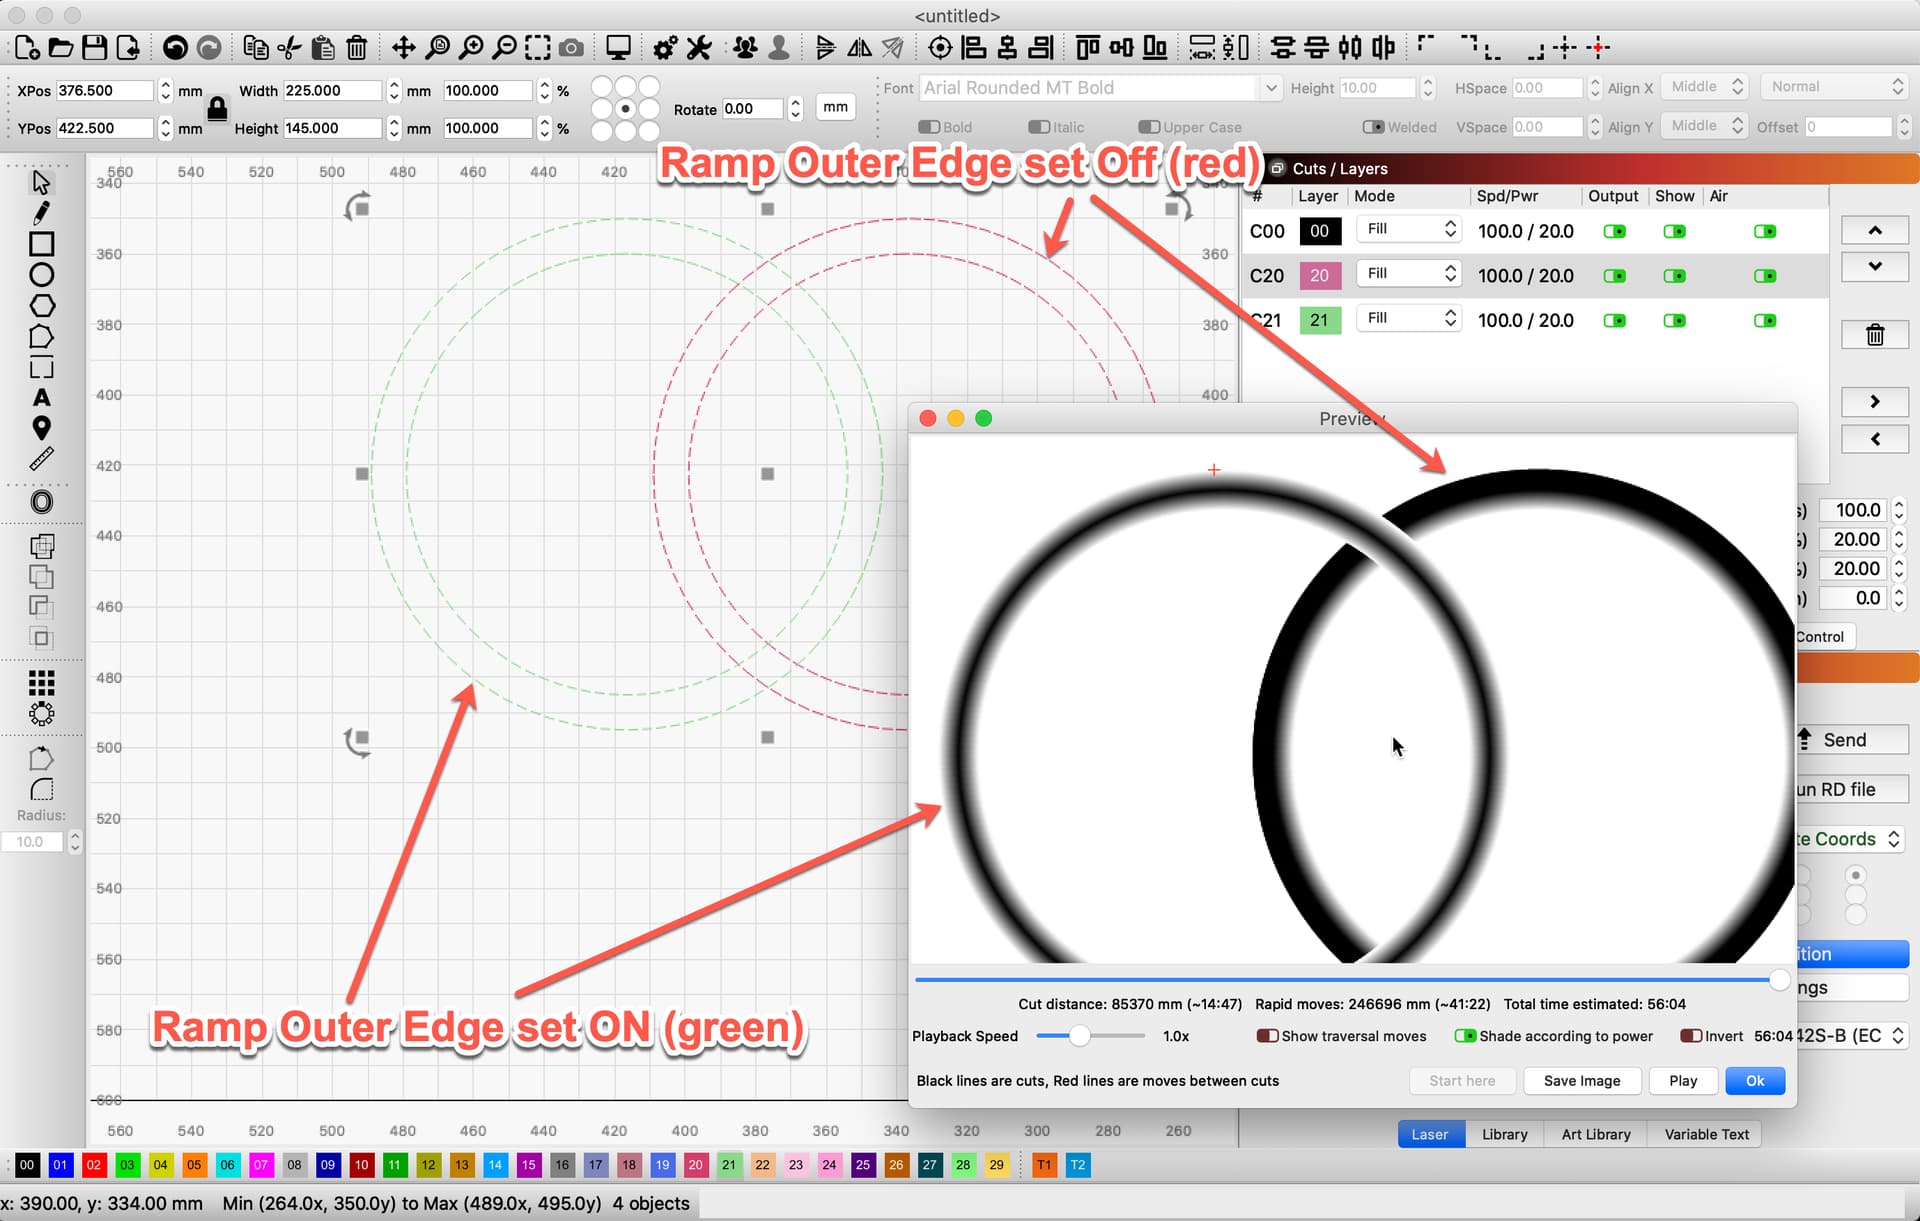
It seems that I played around with several settings and did not change them back. The issue was on the second page of the Layer settings. There was a ramp length of 1mm configured

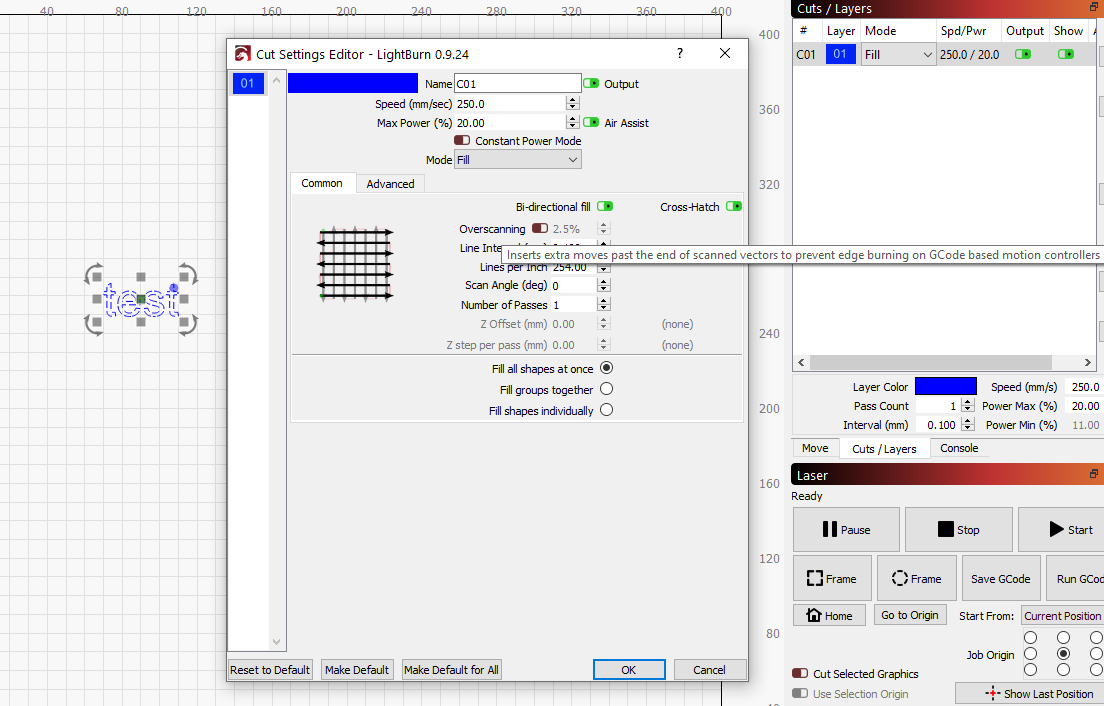
 on your settings is the constant power option… somehow this is missing on my version. Do you have any idea how to get this switch?
 thanks for the info… I’ll try