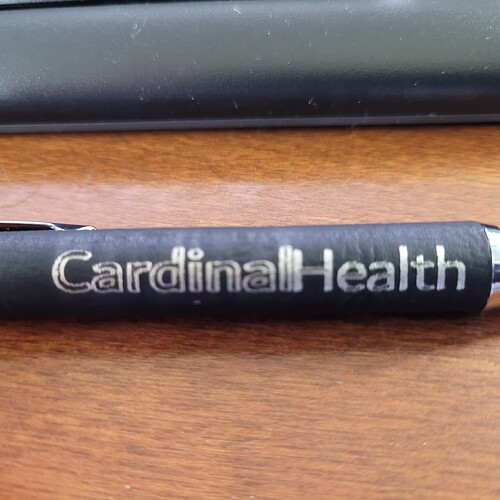
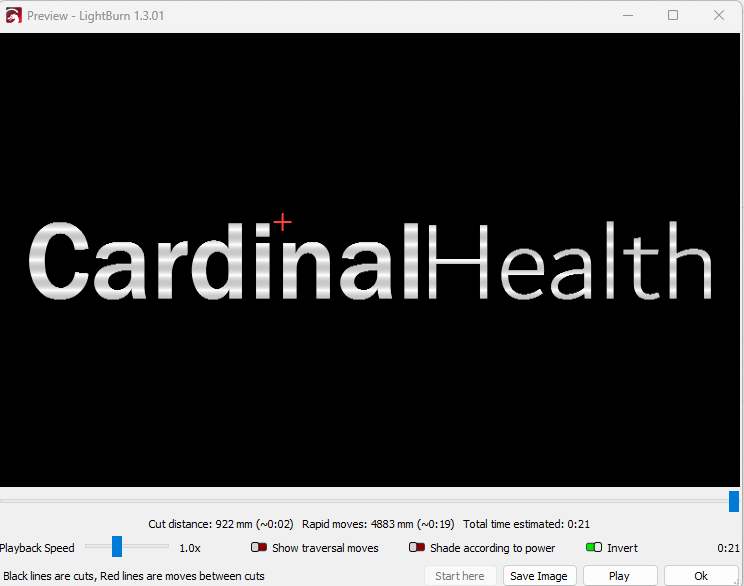
Using and Omtech laser and LightBurn. I have typed two words to etch on a pen. One word engraves as a line and the other as fill. Both set to fill. Preview shows fill, yet the end result … one line one fill! Help!
Can you share the .lbrn file here? If not, then please provide the following:
- full screenshot of LightBurn with design loaded
- screenshot of Preview
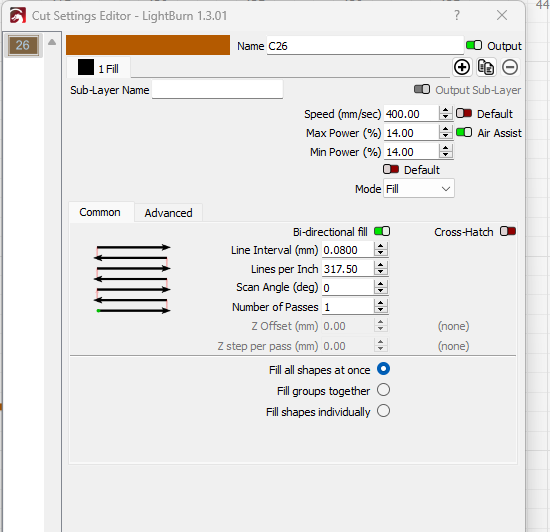
- screenshot of all cut settings involved
Additionally, can you provide a photo of the result?
A few more followup questions:
- Can you double click on the Cut settings to show the full settings?
- How was this design created? Was it done within LightBurn or imported?
- Was this done on a rotary or standard XY?
- When this was run, could you actually see the laser light skipping the middle portions?
It seems like to me this may not be about the fill working. I suspect fill is working fine. If you look at the “Health” you can actually see some gaps in the “fill” as well. I suspect because the lettering is thinner that it’s just not as obvious.
My hunch is that this is either a scanning offset or something else mechanical.
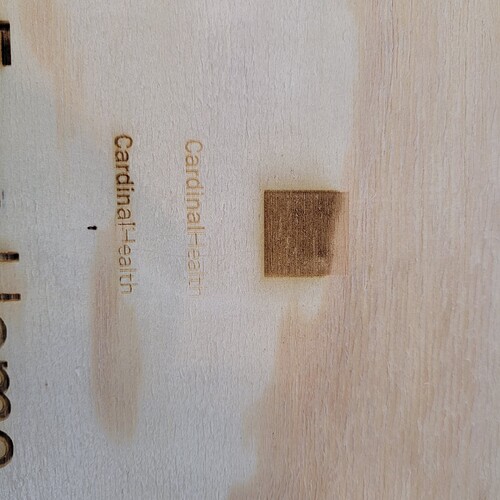
Can you try burning this to some cardboard or something else that’s very uniform? That should reveal some more about what’s going on.
One other test, can you create a 20x20 mm square, then set your line interval to something like 1 mm and burn that also? This will reveal any potential scanning offset.
Here is what Johnson Plastics says about this pen: We have a 60 watt laser
Offering the feel and appearance of genuine leather the Saddle Collection is a water resistant, textured, synthetic material that lasers cleanly for exquisite detail. Fabrication Process • Place Saddle Collection product onto the laser bed aligning to the zero point (upper left) corner of the bed • Ensure that the surface is flat and even by using a small level. The edges can also be taped down to help flatten the surface, if needed. • Focus laser to the product surface and send the job to the laser. • Setting Recommendations o 35 watt | 60 power | 90 speed | 600 DPI o 60 watt | 20 power | 80 speed | 600 DPI o 75 watt | 15 power | 80 speed | 600 DPI o Note: May need minor adjustments to achieve optimal results. • Remove product from laser and gently wipe engraved area with soft cloth dampened with water.
Wood is not the ideal material for this test but you can see the issue.
For the lettering note the ghosted edge of the letters.
For the square test, did you increase line interval to 1mm or more? They lines look unusually close. If not, can you rerun the test with a higher line interval?
Based on these results, this is likely one of two things:
- backlash in your system. I assume this is on the X axis. Try manually moving the laser head back and forth along the X with the controller turned on. If you feel any lateral movement not associated with stepper movement then that could be causing this. You can test for backlash by creating an outline circle. If the ends of the circle do not close then that’s likely backlash
- If you have no backlash then you may need to create some scanning offset adjustments in Edit->Device Settings. You can read up on how this is done here:
Scanning Offset Adjustment - LightBurn Software Documentation
This topic was automatically closed 30 days after the last reply. New replies are no longer allowed.


