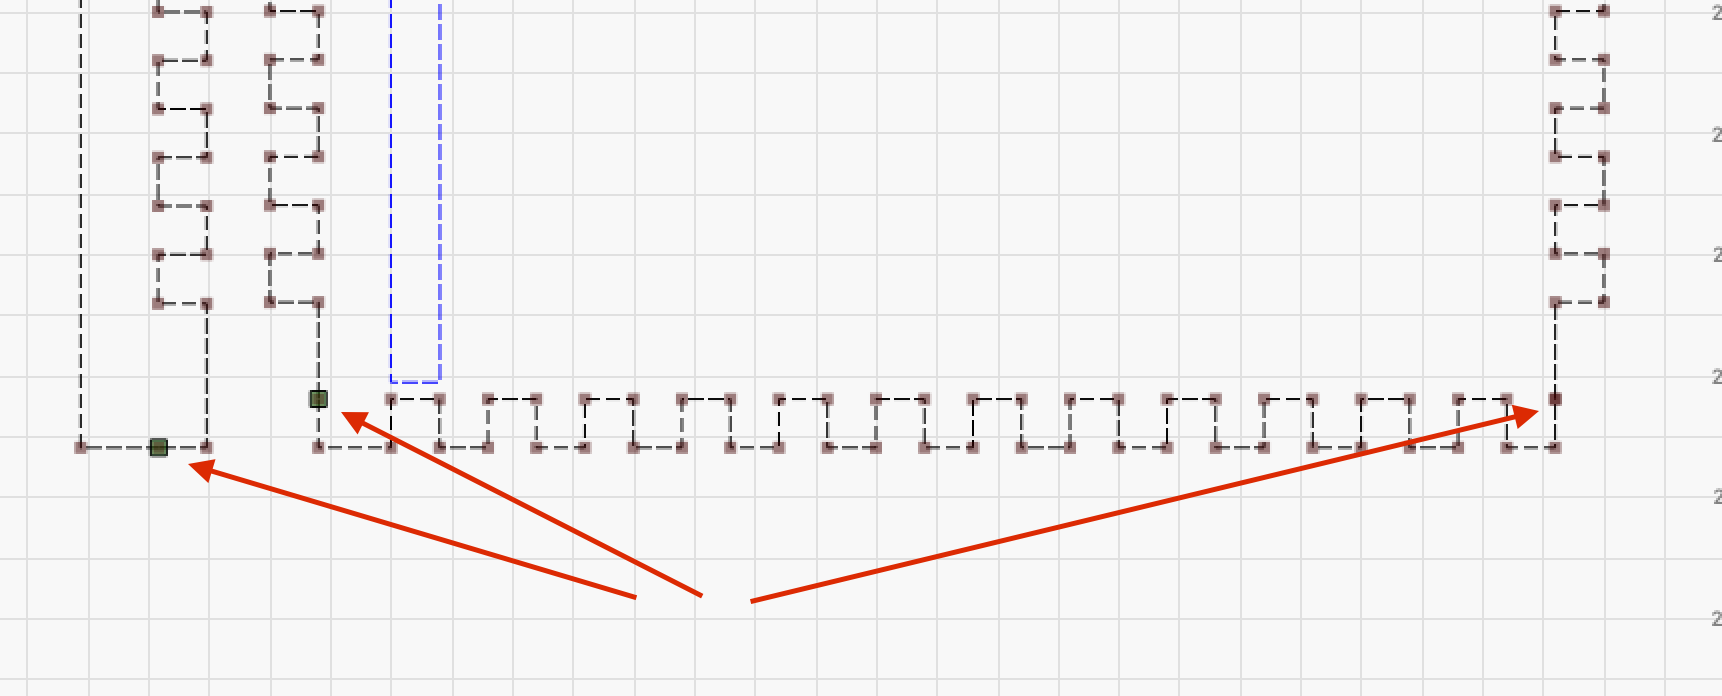
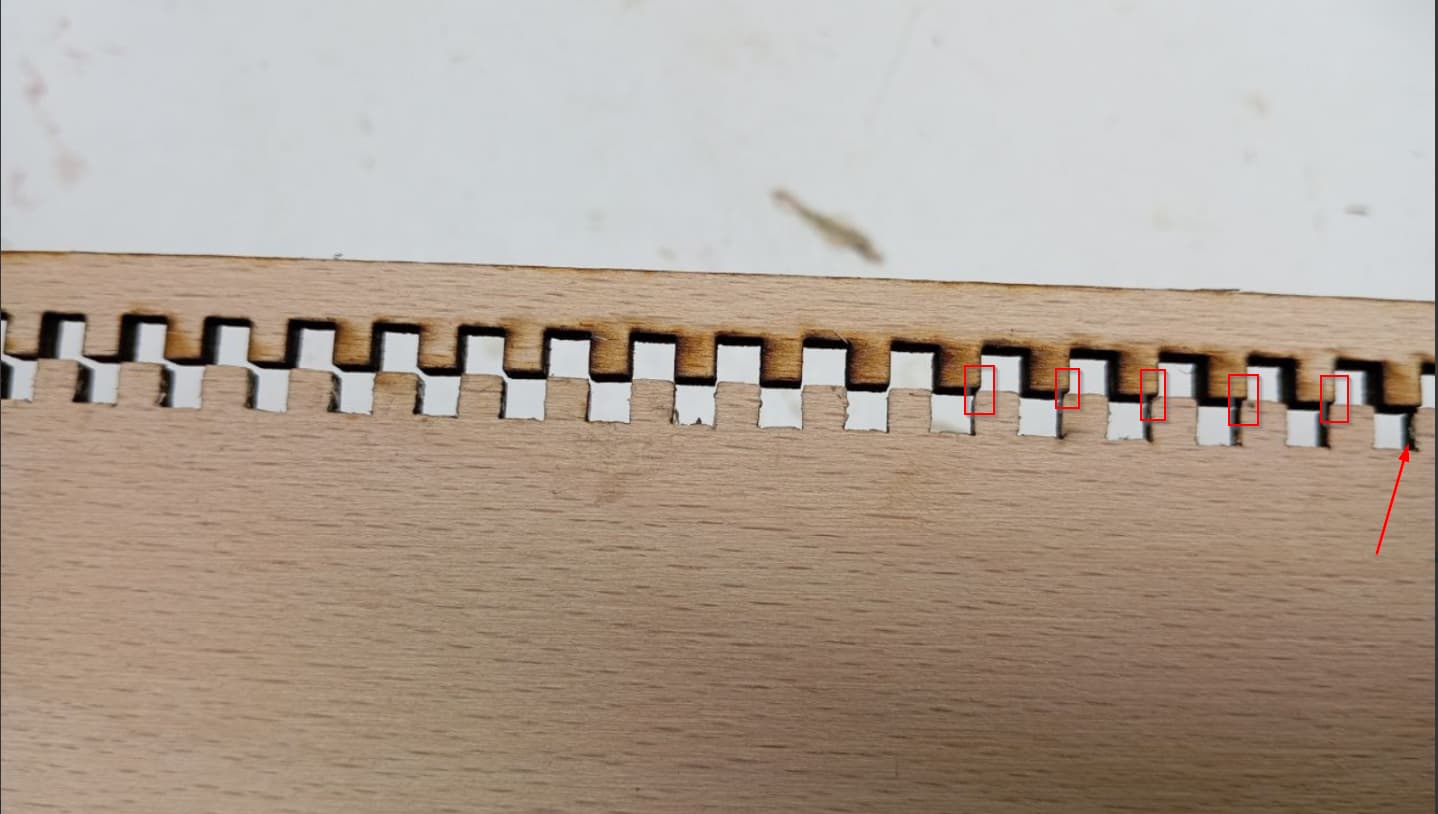
Hello, I purchased a plan to make a wine holder, but after checking it in Lightburn, the dimensions don’t seem to work. The side wall has wider teeth than the back wall and if I cut it like this it won’t come together. I have contacted the manufacturer of the plan but have not heard back yet. Has anyone had a similar experience? Attached is a photo, including the settings for importing in Lightburn. I am using the Illustrator 72 DPI settings.
Thank you for your comments.

What format was it supplied?
Just wondering why you are using AI if you have purchased the artwork… Most of the time it will import directly into Lightburn.
![]()
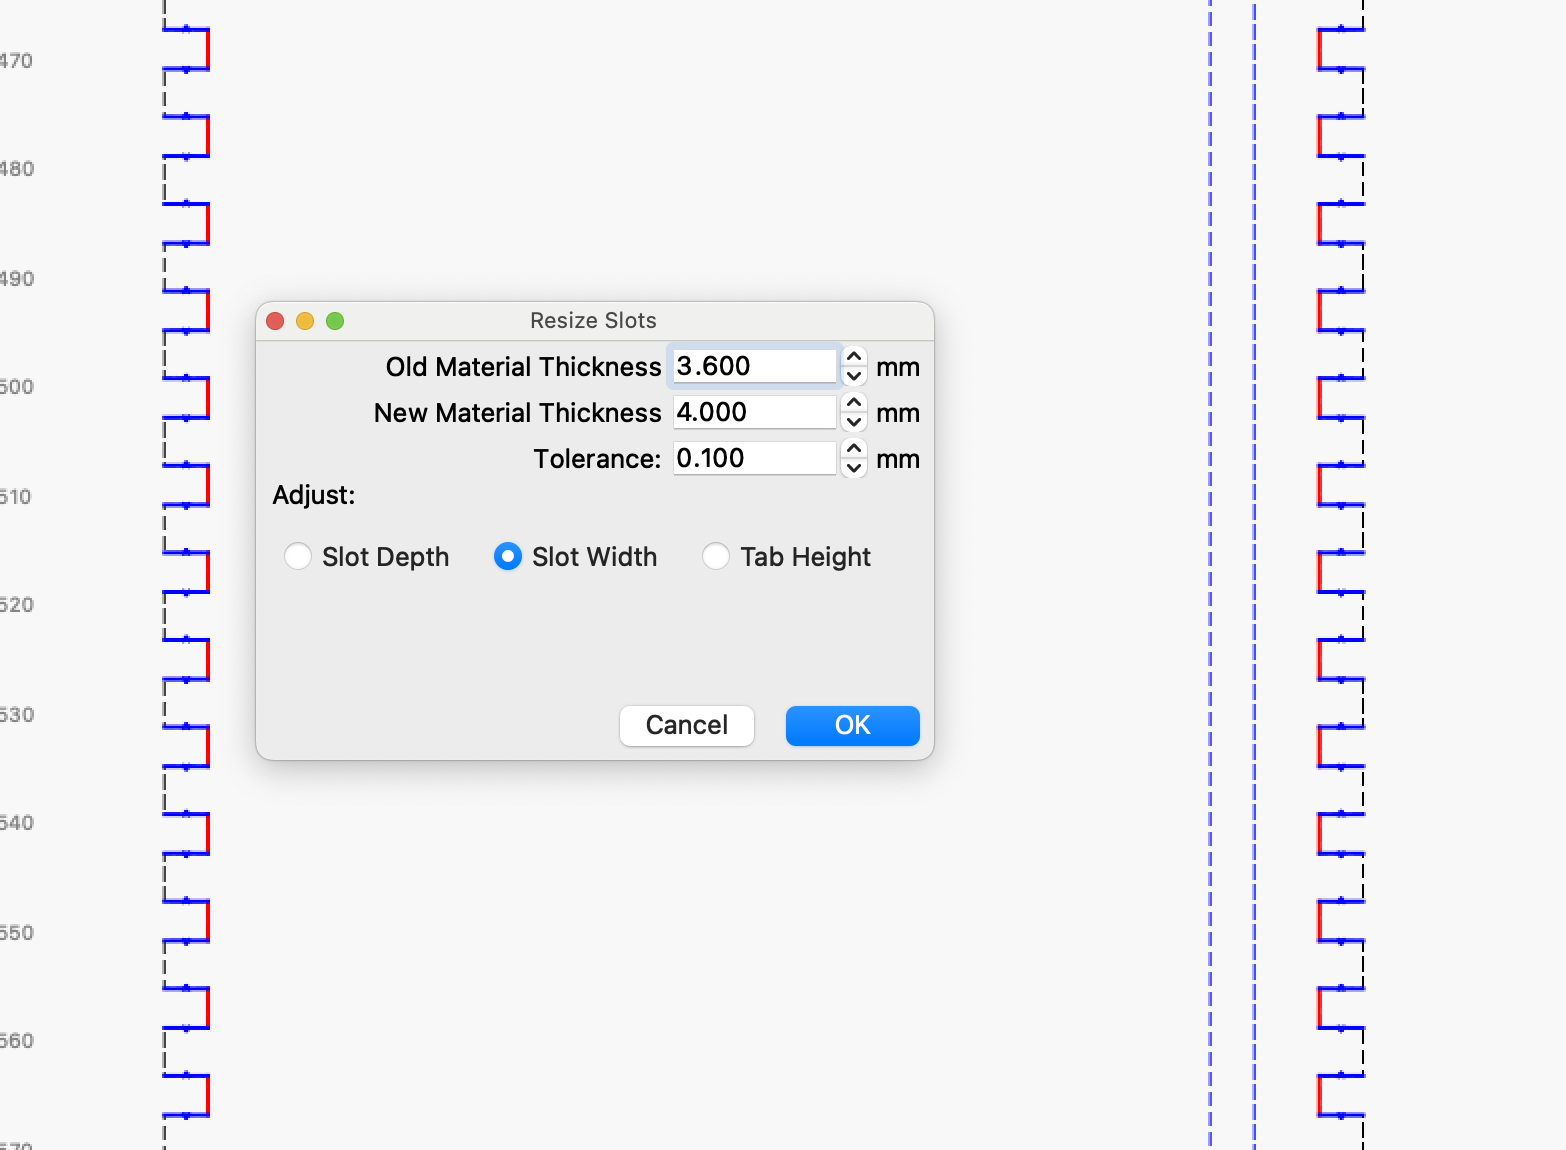
Read up on the Resize Slots function that should fix your problem.
When a purchased file has such a marked error it should be replaced. The error / quality probably continues throughout the project and a lot of extra time has been spent quickly.
Yes I sure have. I also purchased a plan to make a wine bottle holder which looked like a motorcycle engine. After wasting three sheets of ply thinking the errors were down to me, I then realised it was a badly designed plan. I tried to contact the seller but after several attempts to get a response from them, I decided to cut my losses and will never purchase laser plans from the internet again.
It happens once in a while and it’s a pity.
But, I want to look at the file, it could be it can be fixed. You have paid for the file so it is there yours. If you are interested, sent it as a PM or just put it up here.
Does it apply to what you are doing?
If so, it should work…
![]()
Thanks for your very kind offer to help. Unfortunately I have deleted it and have no way of restoring it. Originally it was for a gift to my Son, so had to get him something else. Many thanks Ron.
No problem with the import, I use it straight into Lightburn, the image above is just for illustration. Otherwise after purchase I got it in pdf, ai, eps, dxf, svg and cdr formats. The manufacturer contacted me to check it out, so we’ll see. Otherwise, I tried the feature you guys advised here which is Slot & Tab Resizer, but it doesn’t work for me. I am attaching the problem part if anyone would like to try it out on it. It didn’t work for me. Let me know how to do it. Thanks.
winebox_part.lbrn2 (28.5 KB)
That is why PC’s come with 500GB drives now. You don’t have to delete anything before the PC is obsolete. ![]()
The laser beam has width, so it’s quite possible this size difference is intentional:
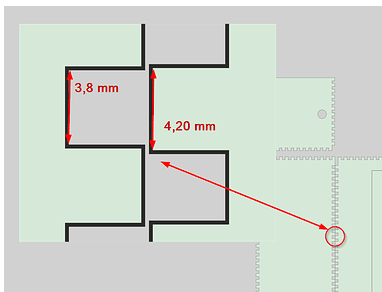
Since the slot is smaller than the tab, I suspect it is. If your laser produces a 0.2mm wide cut, then the 3.8mm slot will be 0.1mm wider on both the top and bottom than the line you run on, and the tab will be 0.1mm narrower on both the top and bottom as well. Those differences will add up to make the parts mate perfectly. (this is called Kerf)
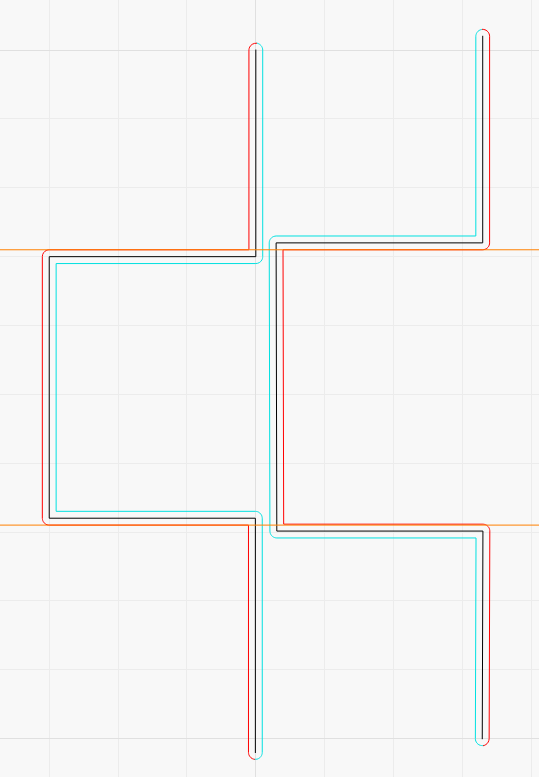
In the illustration below, black are the original shapes you provided, with offset lines around them to illustrate the width of the laser beam. RED lines are the ones that will be the resulting shape of the wood, and the light blue lines will be the part you take away. Notice that the red lines match up:
2 Likes
OZ`s explanation is probably going in the right direction, but I think 0.4 millimeters of kerfsetting is probably a bit violent. ![]()
Beyond that, I have no trouble using Lightburn`s Resizer Tool to change your drawing.
1 Like
Thanks. I have to say that I finally managed to solve it through resize. I couldn’t because I approached the problem with a different logic.
I have one more question about finger storage. In the Lightburn design, everything fits together dimensionally. I cut with a kerf of 0.06 and yet when I cut the side, the fingers get displaced and can’t be stored. Any idea why this is happening? The file is attached.
winebox_part.lbrn2 (38.6 KB)
There is a small “error” in one or both that is further enlarged with your kerfsetting. As a starting point, both party should be equally long, they are not. The Lightburn Internal Kerfsetting provides the correct distance of the teeth - without extending the very outer measures of the parts.
Thank you, but I’m not entirely sure I understand the answer. So the dimensions of what are wrong. If I correct the dimensions and keep the kerf, should that solve it? The whole plan is wrong, but I’ve spent enough time correcting it, so I’d like to close it so it’s usable. Thanks again for the reply
I will change the length of the thin part so that it has the same length and spacing of the teeth as the large part and let Kerfsetting do the rest.
A finger joint connection should be constructed with zero tolerance for LightBurn’s Kerf settings to work correctly.
The screen dumps are from your file and show that the parts do not fit together correctly from the beginning. Image 1 is the top and 2 is the bottom, although it is not very much, it is enough to cause problems.
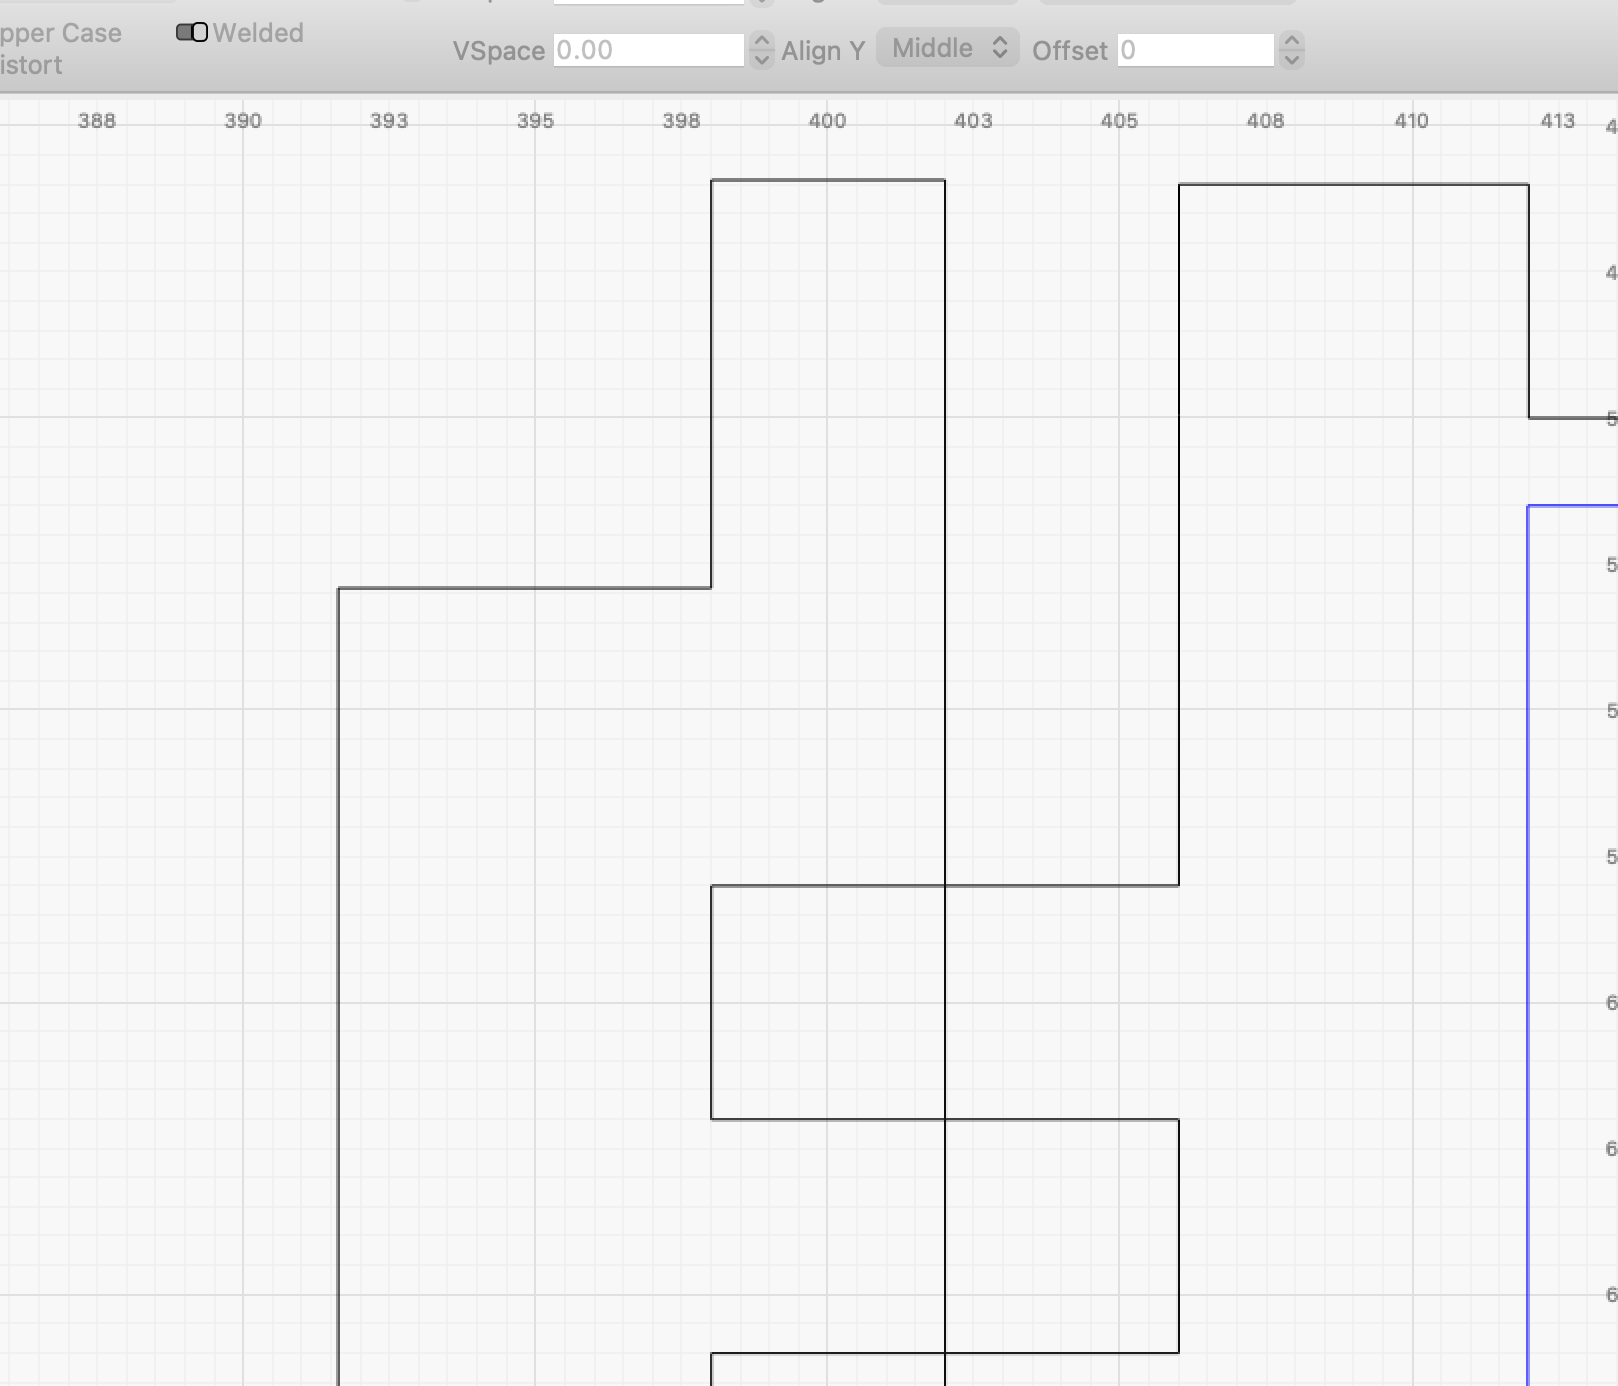
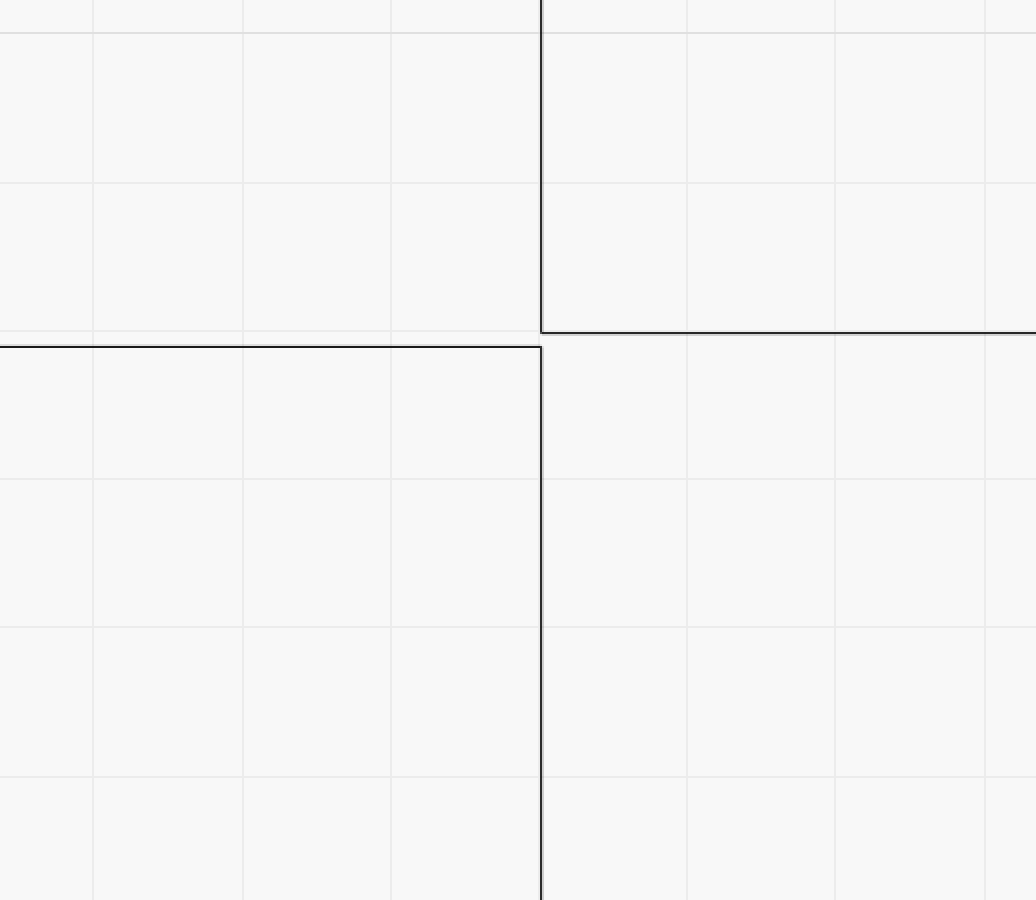

To the right, your file is corrected and set to “0” for finger joints. To the left it is only the mirror and given 0.075 mm in Kerf, which is the value I often use for tight connections. Remember that you can only see Kerf in the Prewiev window.
1 Like
Okay, now I understand. So how can I fix this in the app? According to the dimensions, if I check them, they’re identical. Should I use Resize slot in selection again ?
First I want to clean up and delete the nodes (similar on the opposite) try to zoom in a lot and you will see what I mean.
Now you can choose the middle section as a starting point and then select the narrow segment and use the “Make Select Item Same Hight”. Check the tooth dimensions that they are still 4x4mm and the first 2 parts are ready. Repeat the process of the missing side parts you use the mitter section from the first step as your height reference.
Check all parts for these strange extra nodes and delete them.
Finally, you specify the desired kerf setting in Lightburn.
But it is relatively important that your starting drawing fits together, then it is reasonably easy and quick to scale up or downscale or use the Resitze Tool.