I’m experiencing an issue with my laser setup where the frequency (Hz) keeps resetting to 14 Hz when I send a file from LightBurn to my Ruida CO2 laser. Here’s a summary of the problem:
The issue:
When I adjust Speed, Max Power, or Min Power settings in LightBurn, the frequency is automatically set to 14 Hz, even though my ‘Vendor Settings’ in the Ruida controller specify a ‘Laser Frequency’ of 20,000 Hz (20 kHz).
If I enable ‘Default’ in the layer settings for Max Power and Min Power, the frequency behaves as expected (20 kHz). However, disabling “Default” causes the frequency to revert to 14 Hz.
Things I’ve tried:
Reinstalled LightBurn and ensured the latest version is in use.
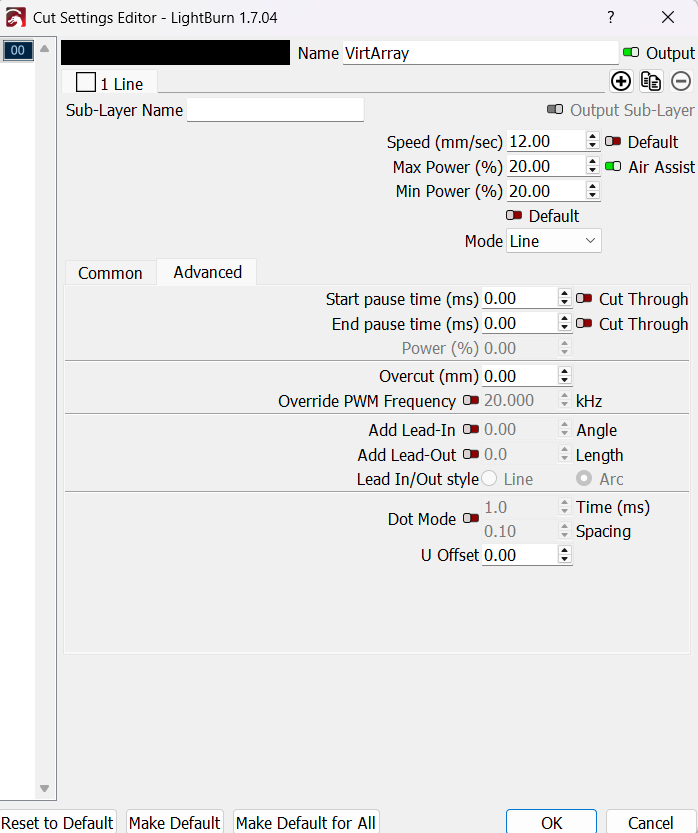
Verified that ‘Override PWM Frequency’ is disabled in the ‘Cuts / Layers’ advanced settings.
Deleted all old jobs from the Ruida controller’s memory.
Loaded older versions of the settings. (This has kind of worked, but as soon as I tried to bring up saved files it is back to the wrong frequency. Even if I try to open f.ex. an .ai file, and not a lightburn file.)
Checked Vendor Settings on the Ruida controller:
Laser Frequency: 20,000 Hz (correct value).
Min and Max Power Limits: Appropriate values for my machine.
Created a new test file in LightBurn with basic settings (Speed: 10 mm/s, Max Power: 50%, Min Power: 50%, no advanced options enabled). The issue still persists.
Other Details:
My machine uses a Ruida controller connected via USB.
I’ve verified the communication settings, and the FTDI serial driver is installed.
What I Need Help With:
Understanding why LightBurn resets the frequency to 14 Hz when I modify Speed or Power without using ‘Default’.
Identifying any hidden settings in LightBurn or the Ruida controller that could be causing this behavior.
Any suggestions or guidance would be greatly appreciated. Please let me know if more details are needed!
Is this a new setup? What type of laser are you trying to set up? Those look to be Galvo settings. My Ruida doesn’t have those settings in the layer settings.
EDIT: I see the PWM in advanced. It’s off as default on my side.
Lets see what the response is then maybe we’ll have more information.
I can change the pwm period of the Ruida, but don’t remember if I can do it via a layer setting. Tried it, but don’t see the option.
I tried fiddling with this when I first got my machine… figuring out that it didn’t matter what value the period was set, for the lps turned it into a dc signal as long as it’s over about 250Hz.
I don’t know how you would know it had changed the period…?
Maybe @micrololin is correct, did you install the Ruida laser? Can you provide a link to your machine so we know better what we have here? Even if it’s set for a fiber, it shouldn’t be changing frequencies.
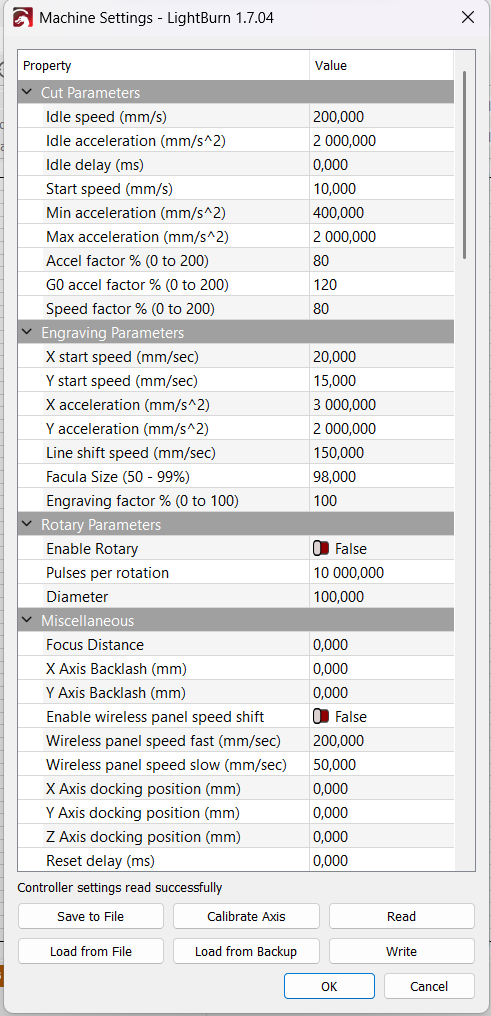
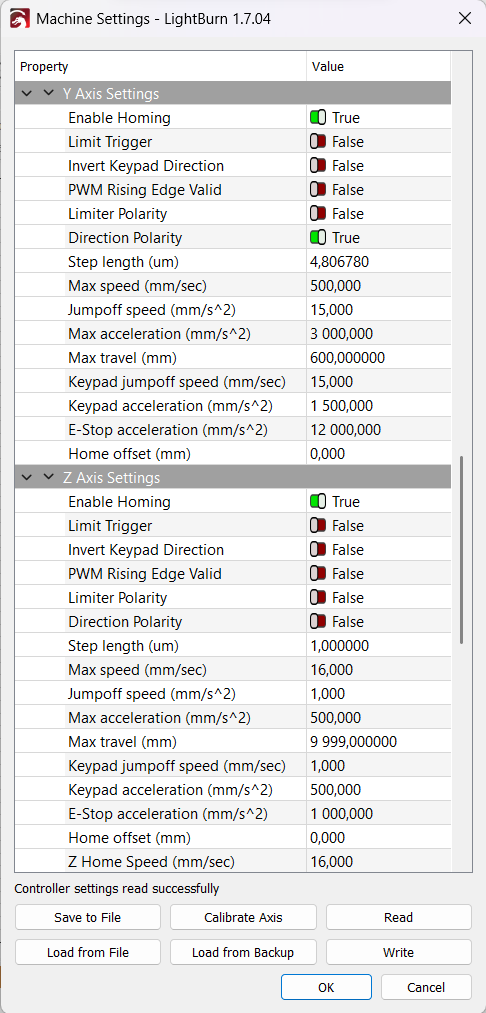
Can you post one of the pages of your machine settings? A fiber doesn’t have them.
Can’t compare a glass tube co2 with a metal tube co2, if that’s the point. The glass tube is an analog device, the metal tube a digital device.
All led and rf excited tubes are digital devices. To get 50% power out of them they are on 100% power for half the time, then totally off for the other half.
This can effect how the material reacts to the laser…
I used the advanced command to override the frequency. The funny thing was that it didn’t work. Not until the next day… But when I try the laser, without being connected to the computer, or until now when I reloaded to a earlier prefs version it would be higher frequency (when I tried it now that wouldn’t work neither)… I may add that I have of course tried to manualy change it, but now it only ranges from max 14. Not 20 - something, as it usually would.
The problem with the saved files could of course be the issue, but I thought it was strange that it happened when I took a file directly from Adobe illustrator, and not a saved lightburn file. If it was just the latter it would make more sence to me.
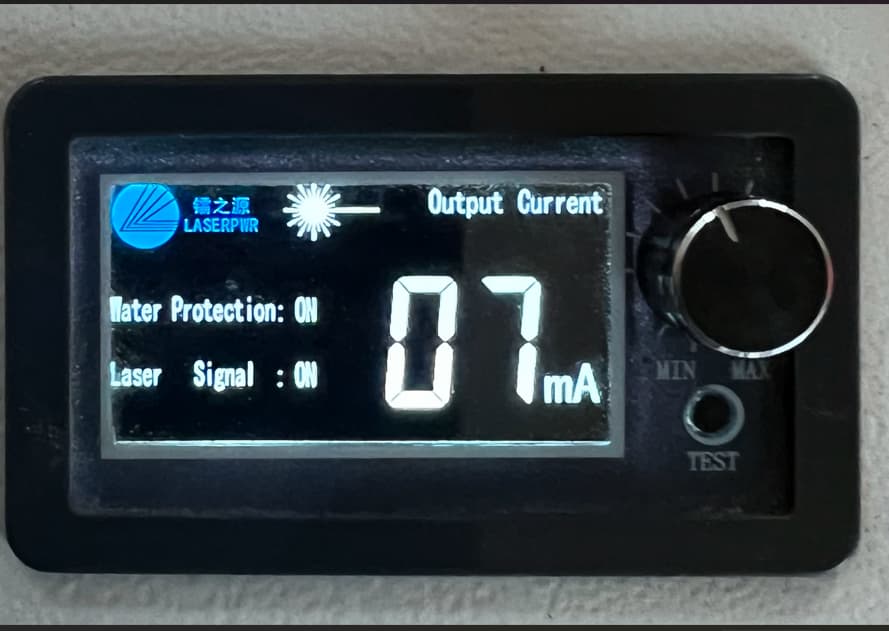
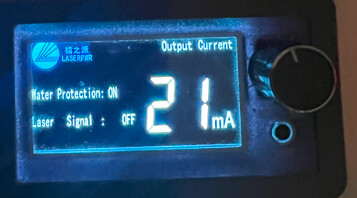
Are you looking at the display with mA? That’s the power the laser tube is using it will change depending on the power settings. I do not have that display with the MIN/MAX knob.
The position of that knob affects the HV power supply’s output current, as shown in the display, with the maximum current at full clockwise being controlled by the LightBurn layer’s power settings.
With the knob fully clockwise, the LightBurn layer set for 100% power, and the laser running, the power supply will deliver the maximum possible current to the tube, probably about 25 to 30 mA. That current may exceed the recommended maximum current for the tube, but without knowing more about the machine we cannot say more.
There is no relation between the tube current displayed on the power supply and the frequency of the controller’s PWM signal going into it.
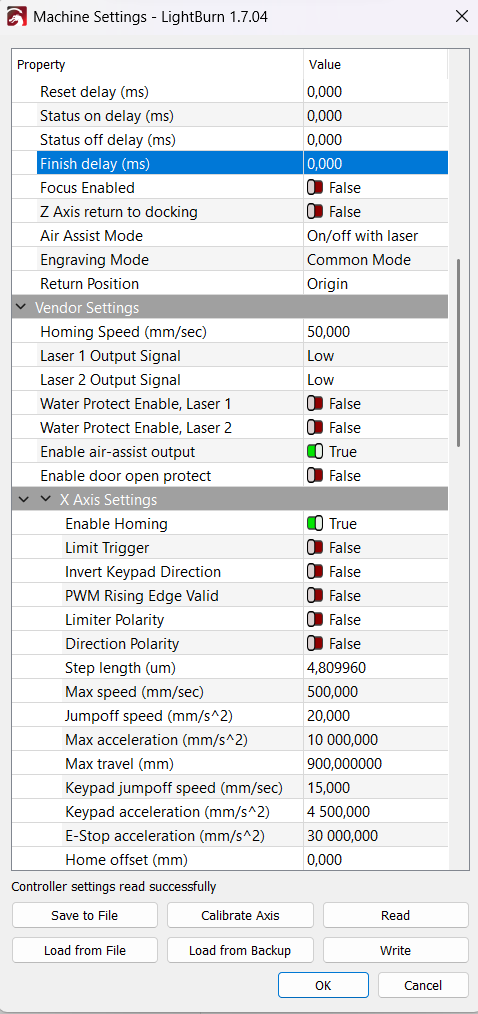
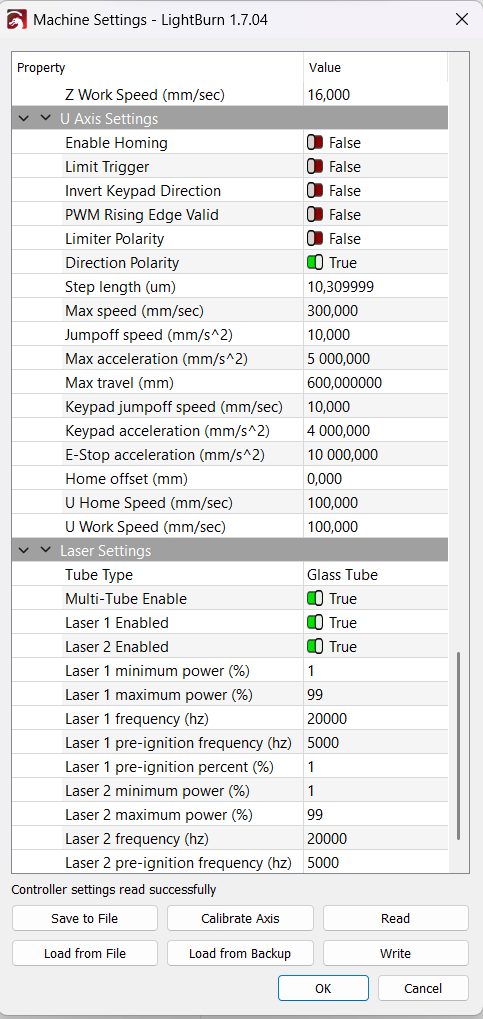
The PWM frequency is 20 kHz in the Machine Settings → Vendor Settings → Laser Settings section. You should not override that value in the Cut layer settings and should not change it in the Laser Settings panel.
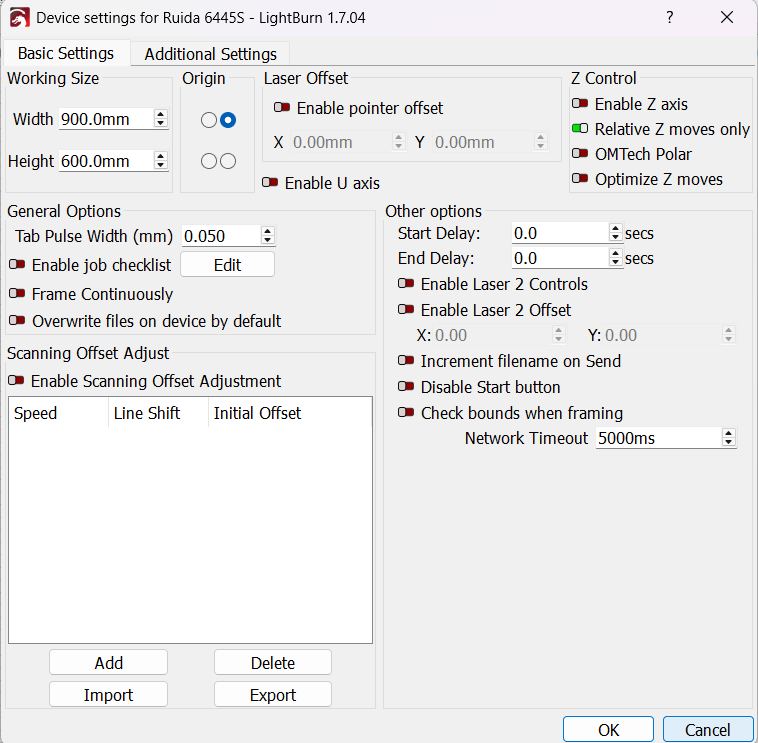
The Laser Settings show Multi-tube Enable and Laser 2 Enable both on, although the Device Settings show Enable Laser 2 set off. Although it may not matter, the Machine Settings should match the actual hardware; if the laser has only one tube, turn those off.
This is why I need to have more eyes looking at it :). I saw it in the context of overriding the frequency (From 20 to 10) in Lightburn. Because as far as I have noticed the Ma has never changed its whole setting range like this.
I have a RDC6445S, in a 9060 body, with one 130 w lasertube.
When I manipulated the hz I adjusted it to 10 I think. And nothing happened right then and there. The next day the Ma was down to 14 max. I see I have misunderstood and haven’t seen that it says Ma and not hz (I guess I became a bit blind to it). But I can not fathom why the MIN/MAX MA Ma is adjusting itself then. And when I loaded prefs backup and made a new design it readjusted to ordinary ma-settings. But then it might be a different angle to my problem then I first thought.
I will go and change, as you pointed out, ‘laser 2’ to off.
What are you “manipulating” to change the frequency?
Where are you reading the frequency?
The knob on the panel display adjusts the laser tube current, which is shown on the dislay.
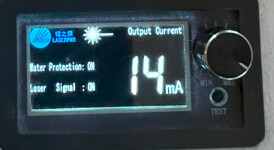
The photos show the knob in three different positions.
The displayed current depends on the power percentages in the LightBurn layer, the speed of the laser head, the knob position, and a couple of other things.
Yes, but the MIN and MAX Ma was different as you can see, that was my point by showing it in different possitions :).
The problem was that the laser gave different Ma for similar project, even though it was the same settings. But I saw it in the context that I had tried to use the override button for the frequency the day prior.
But as far as I’ve understood thats probably what it is supposed to do.
After you pointed out that it was registered with 2 lasers I turned off the dual tube choice, and now it seems to work stable for similar projects and settings. So thats great
That is exactly what the knob is supposed to do: change the laser tube current.
The laser tube current corresponds (very) roughly to the laser power delivered to the material, so we often use the words “power” and “current” interchangeably.
When the knob is turned fully clockwise, the power supply will deliver whatever current corresponds to the LightBurn power settings for that layer.
At all other positions, the knob will reduce the tube current (and, thus, power) from that setting.
The knob labels MIN and MAXdo not correspond to the LightBurn Min Power and Max Power layer settings: the knob reduces the laser current from whatever the LightBurn settings call for.
If it were my laser, I would turn the knob fully clockwise, tape it in place so it could not be moved, and use only the LightBurn layer settings to control the beam power. It seems remarkably easy to accidentally bump / turn / jostle the knob, run a job that “used to work”, and get a complete different result this time.
It’s worth noting that the LightBurn power settings, the tube current, and the laser power all have different numeric values at the same time. For my laser:
Power setting = 50%
Tube current = 14 mA
Optical power = 55 W
Fortunately, the power supply on my laser lacks a knob, so I need not worry about one more variation.